Augmented Reality Photography: How to Create WebAR Photo Experiences (Step-by-Step Guide)
Instead of viewing a static photo, audiences can scan an image and instantly see 3D models, video, animation, or interactive elements layered over it — directly in their browser.No app downloads. No complicated setup.In this guide, you’ll learn:
- What augmented reality photography actually means
- How WebAR works
- Why browser-based AR is now the mainstream choice
- How to create your own AR photo experience using Kivicube (step-by-step tutorial included)
What Is Augmented Reality Photography?
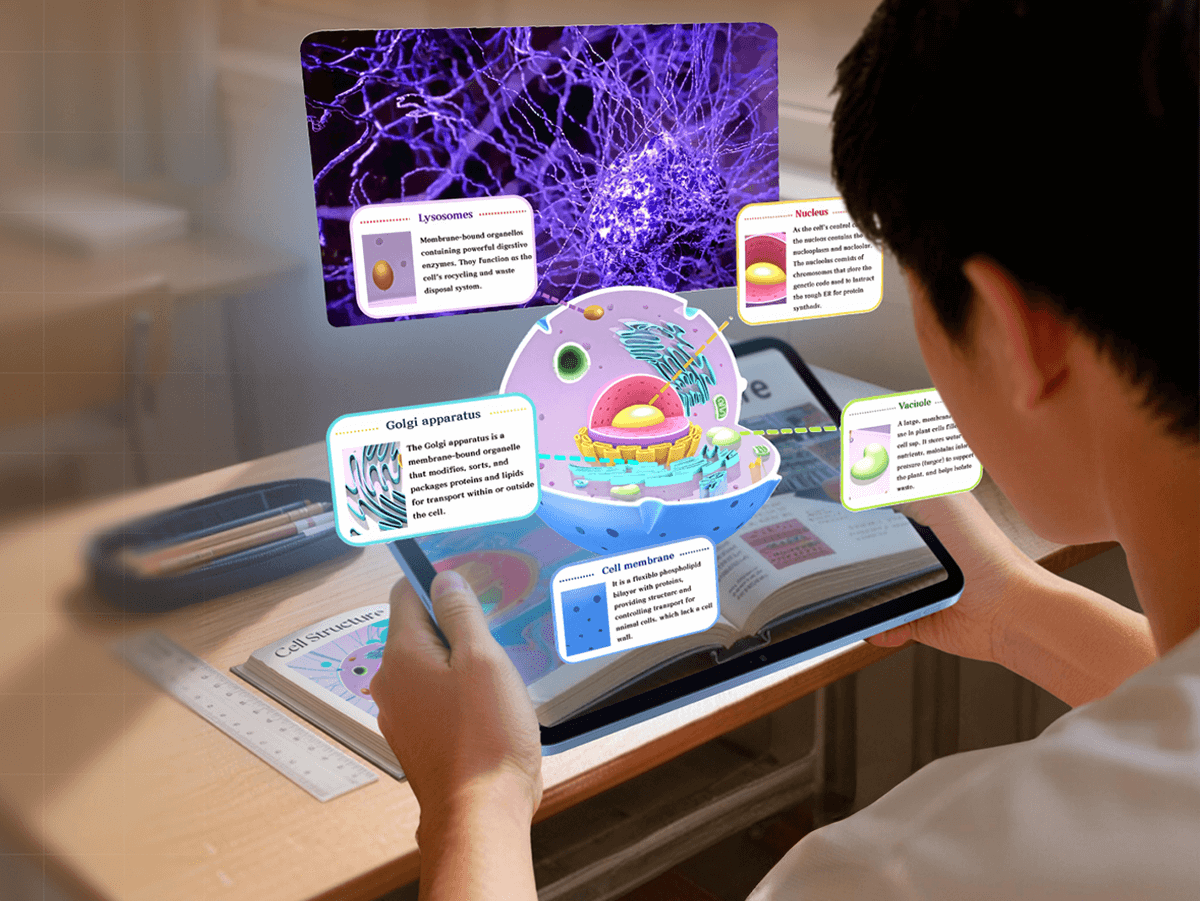
Augmented reality photography is the process of adding interactive digital content — such as 3D models, animations, video, or text to a real world image using augmented reality technology.
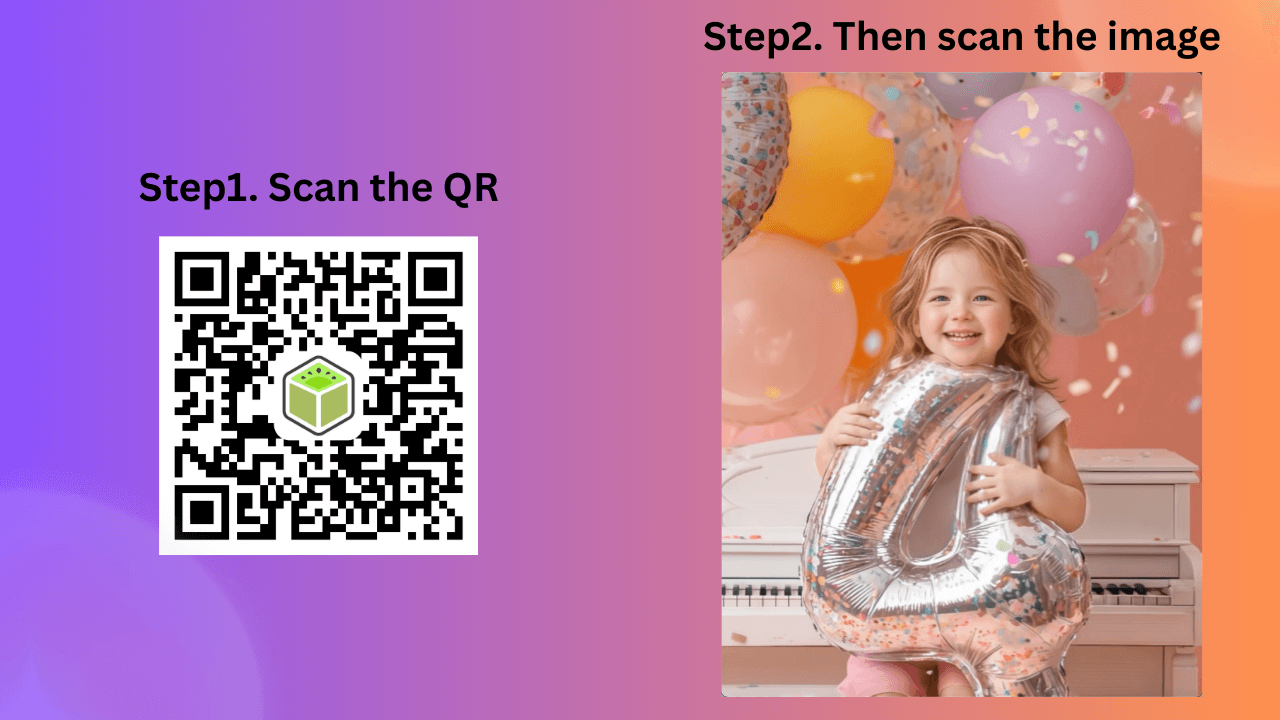
With modern WebAR technology, these interactive photo experiences run directly in a web browser, without requiring users to download an app.Instead of opening a mobile application, users simply:
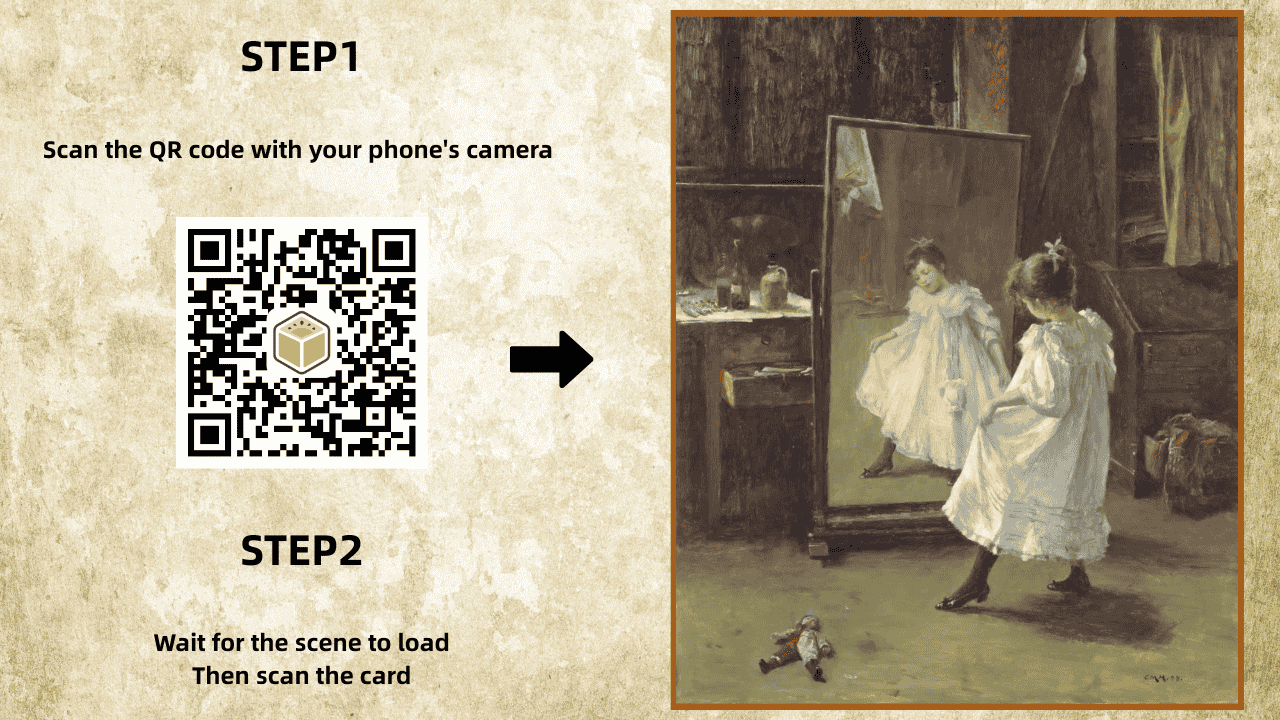
- Scan a QR code
- Or click a link
- Point their camera at the image
The digital layer appears instantly.
Augmented Reality Photography at a Glance
- Runs in a web browser (WebAR)
- No app required
- Uses image tracking technology
- Triggered via QR code or link
- Ideal for marketing, art, education, and e-commerce
- Can be created using no-code platforms like Kivicube
How WebAR Makes AR Photography Accessible
WebAR (web-based augmented reality) allows AR experiences to run directly inside Chrome, Safari, Edge, and other modern mobile browsers.This shift has significantly lowered the barrier to entry for AR photo projects.
Why WebAR Matters
- Instant access – Users only need a link or QR code
- Higher engagement – No app download friction
- Easier sharing – Works in email, social media, and print
- Faster deployment – No app store approval
For creators and brands, browser-based AR is now the most practical way to publish interactive images at scale.
WebAR vs App-Based AR for Photography
Here’s a quick comparison:
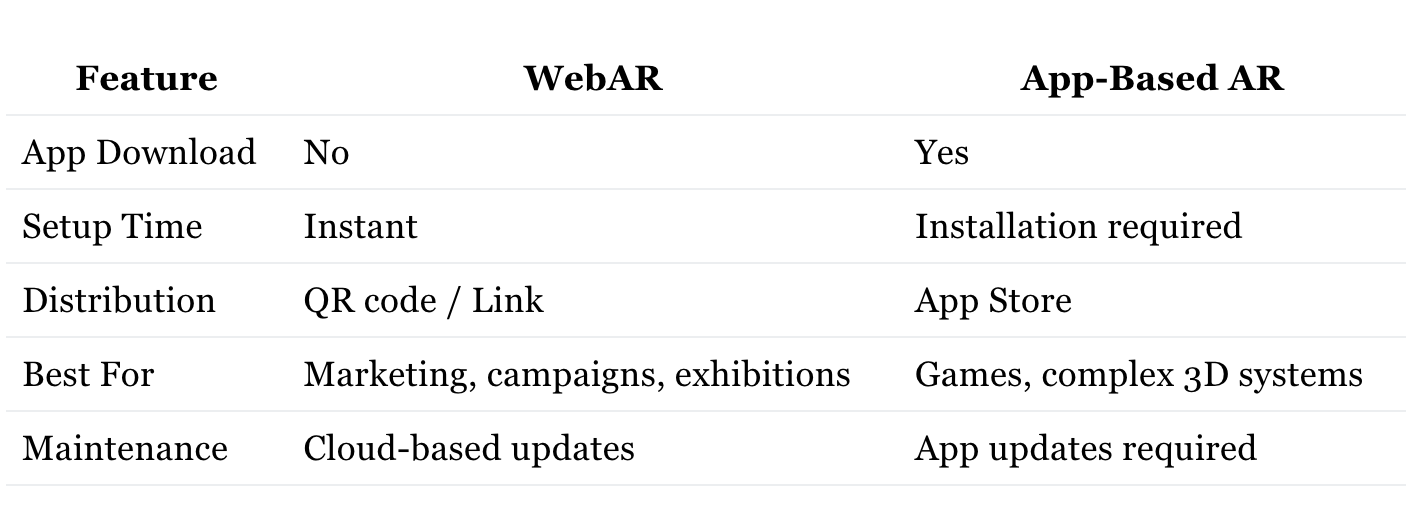
For most photo-based AR projects, WebAR provides faster reach and lower friction.
Browser Compatibility: Chrome, Safari & Mobile
For maximum reach, your AR photography should work across major mobile browsers.Modern WebAR platforms like Kivicube are built for cross-browser performance:
- Chrome & Edge (Android) – Strong 3D rendering and WebXR support
- Safari (iOS) – Fully compatible with WebAR experiences
- Other mobile browsers – Support standard camera-based AR viewing
Pro Tip: Always test your AR scene in both Chrome (Android) and Safari (iOS) before publishing. Together, they cover the vast majority of global mobile users.
Real-World Uses of AR Photography
Interactive photo experiences are already being used in:
- Marketing campaigns (AR posters, packaging)
- E-commerce (product visualization)
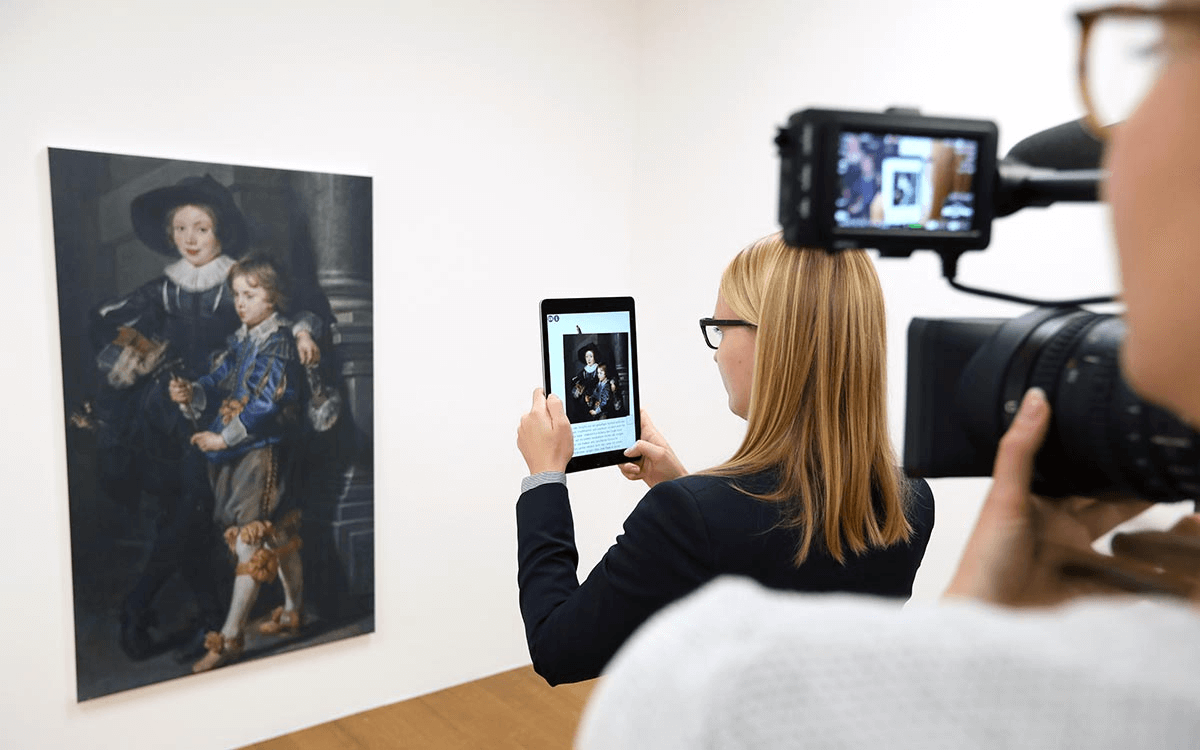
- Art exhibitions (animated prints)
- Education (interactive textbooks)
- Social media activations
What they all have in common is instant interaction without requiring users to install anything.
Why Use Kivicube to Create Augmented Reality Online?
While many AR tools exist, Kivicube focuses specifically on web-first AR creation for creators, marketers, and educators.It removes technical complexity and allows you to publish stable, fast-loading AR experiences directly to the web.
Key Advantages of Kivicube
- No-code WebAR editor
- Stable image tracking for AR photos
- QR-code and link sharing
- Cloud hosting
- Cross-browser compatibility
- Built-in asset library
If your goal is to create interactive photos without development overhead, Kivicube provides a streamlined, web-native solution.
Tutorial: How to Create Augmented Reality Photography with Kivicube
You can build your first interactive AR photo in under 10 minutes.
Before You Start
Prepare:
- A Kivicube account (free tier works)
- A high-contrast trigger image (poster, product photo, detailed artwork)
- Optional AR assets (video, PNG, or 3D model in GLB format)
What Makes a Good Trigger Image?
- High contrast
- Clear edges
- Unique visual details
- Avoid repetitive patterns
- Avoid glossy reflections
Think of your trigger image as a “visual key.” Strong contrast helps the system lock onto it smoothly.
You can also find the image target guidelines in the Kivicube docs.
Step 1: Upload Your Trigger Image
- Log into Kivicube
- Create a new WebAR collection
- Create an Image AR scene
- Upload your selected image as the tracking target
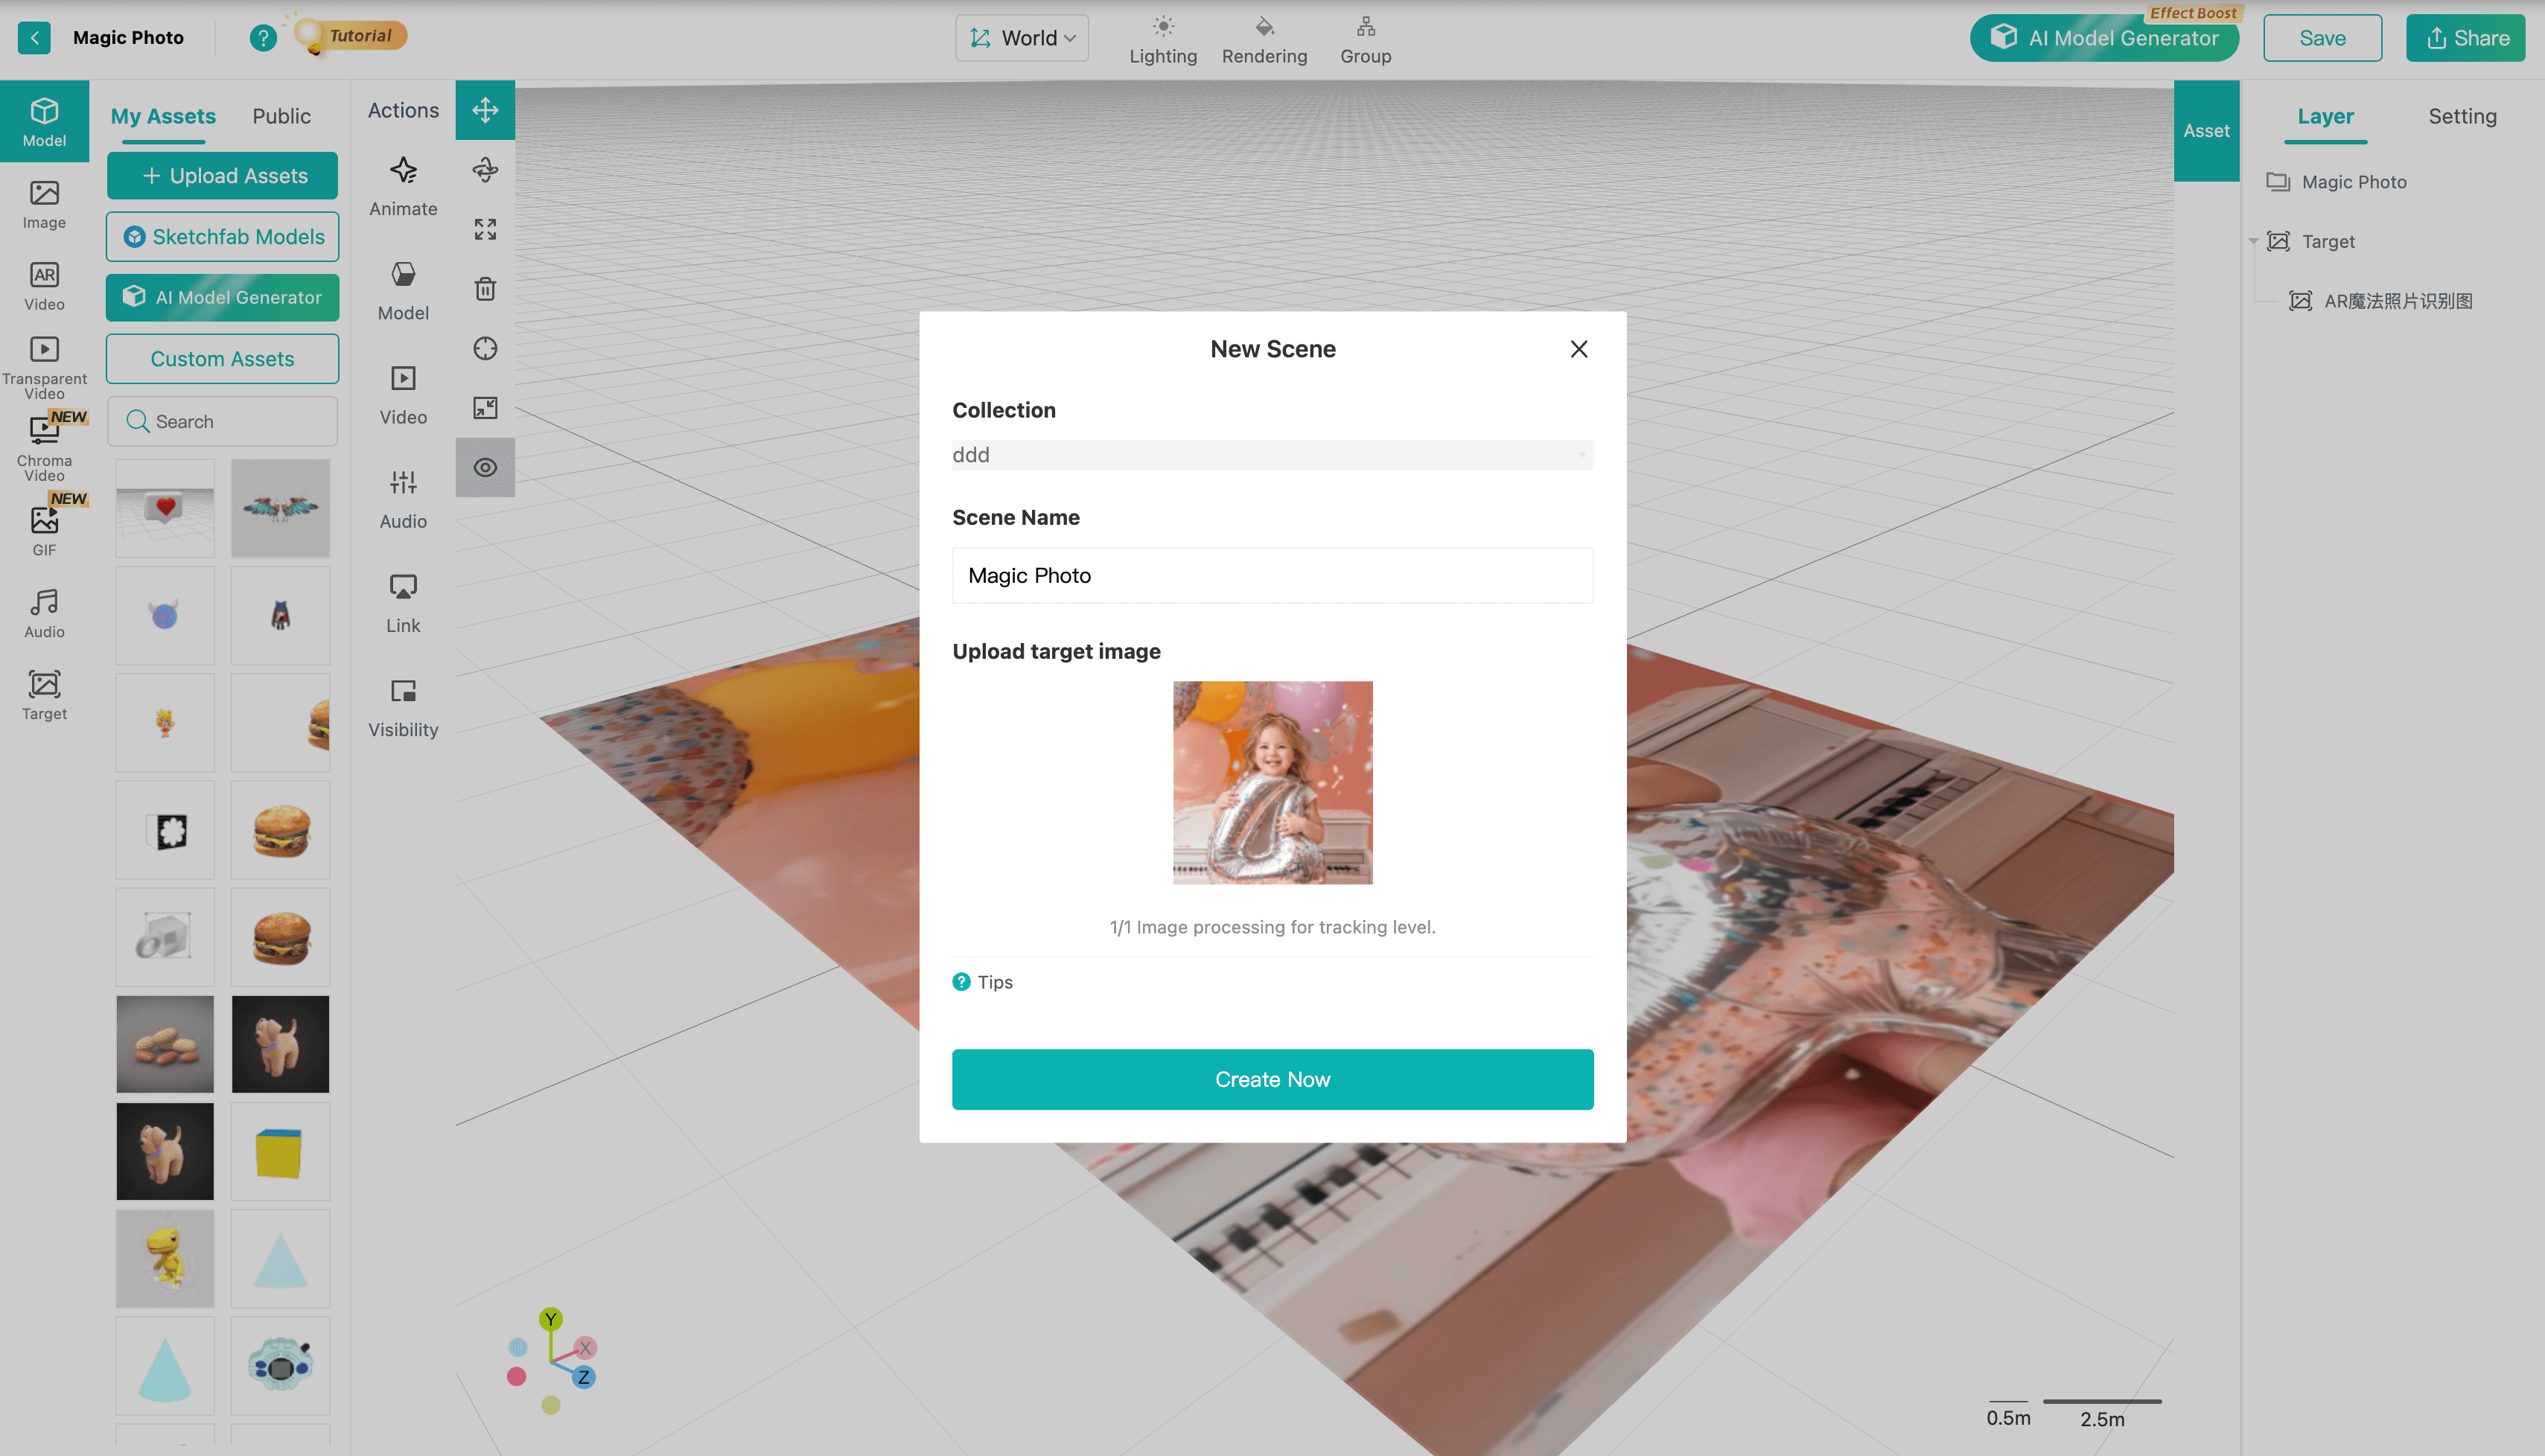
Your photo is now AR-enabled.
Pro tip: you can use the first frame of your video as the recognition image(also known as the Image Target). This helps blend the virtual and real elements more seamlessly.
Step 2: Add Interactive Content
You can overlay:
- 3D models
- Video clips
- Text labels
- Buttons or links
- Animation effects
Drag and drop elements into the editor and position them in 3D space.
You can use the Transform Tool to adjust the position, or right-click on the selected asset to bring up Quick Transform, which offers default layout options to help speed up the AR scene building process.
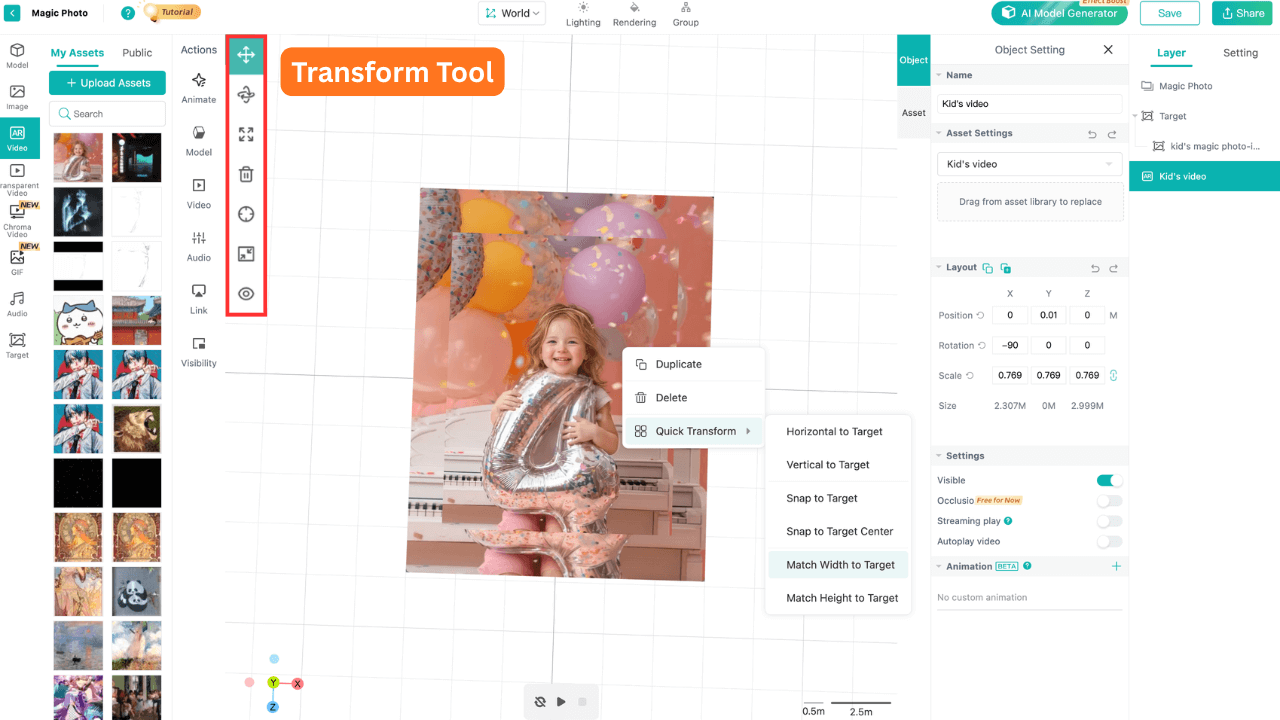
For video assets, make sure to select the video in the Grid Editor, then enable the settings below in the left-hand settings panel.
- Enable “Streaming Play”
- Turn on “Auto-play”
- Set to “Loop” if needed

Step 3: Preview in Browser
Before publishing:
- Open the preview link on your phone
- Test in Chrome (Android) or Safari (iOS)
- Adjust size, placement, and timing
Make sure tracking is stable and smooth.
Step 4: Publish & Share
When ready:
- Click Save and then Share in the top‑right corner
- Generate a QR code or shareable link
- Embed on your website or social media
Your interactive AR photo is now live — accessible directly from the browser.
If you're into AR creation, check out the Kivicube YouTube channel for more creative tutorials.
Learn more on the Kivicube YouTube channel
Frequently Asked Questions
Do users need to download an app?
No. WebAR runs directly in the mobile browser.
What if the AR doesn’t trigger?
Check lighting, avoid reflections, and ensure your scene is properly published.
Can I track views?
Yes. Kivicube provides analytics including scan counts and unique visitors.
Is Kivicube free?
Yes. The free plan and the starter plan are suitable for personal hobbies and learning, while paid plans are designed for high-traffic commercial use.
The Future of AR Photography
As browsers continue to improve and WebXR standards mature, browser-based augmented reality will likely become the default way people interact with AR content.Interactive images are no longer experimental — they’re practical, scalable, and easy to deploy.For creators who want to move beyond static visuals, WebAR offers a direct path forward.
Start Building Your Own WebAR Experience
Augmented reality photography no longer requires app development or complex engineering.With WebAR and Kivicube, you can create immersive, browser-based AR photo experiences that are easy to publish, easy to access, and easy to share.If you're ready to turn static images into interactive experiences, start building your first WebAR project with Kivicube today.