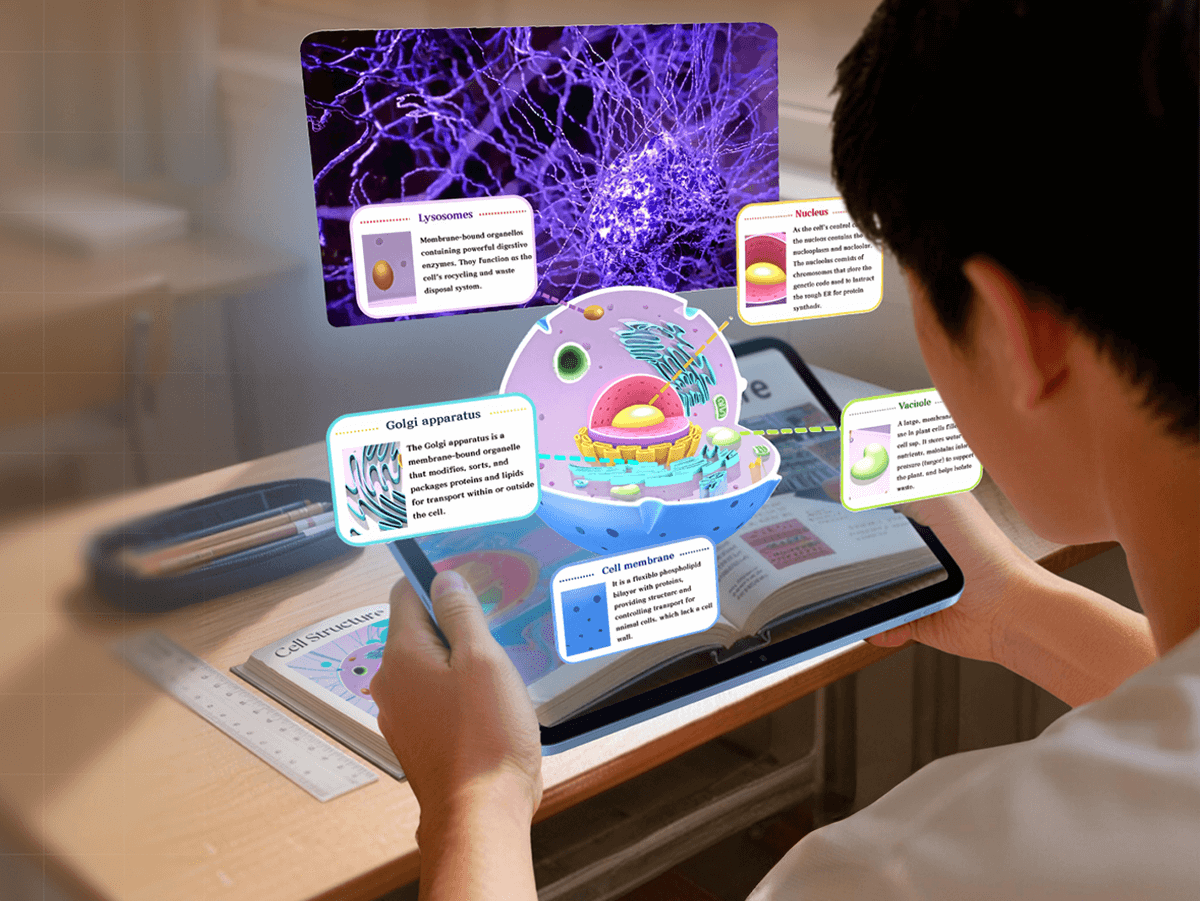
How to Make Your First AR Drawing: A Precise Step-by-Step Tutorial
Want your drawings to come alive in AR? This hands-on guide shows how artists can create augmented reality drawings with a no-code WebAR platform like Kivicube.
AR used to feel like a distant, technical tool for artists.
But today, augmented reality drawing is available to anyone with a sketch and an internet browser — all thanks to WebAR.
You don’t need 3D training, coding, or expensive software.
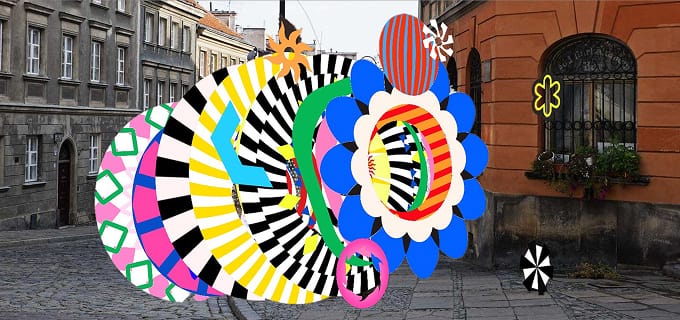
In this guide, you’ll turn a simple drawing into a fully interactive augmented reality experience that anyone can view on their phone, with just a link or QR code.
No app. No downloads. No complications.
What You’ll Need
- A sketch or drawing (PNG with transparent background works best)
- A free Kivicube account
- A computer for easier editing
- 10–15 minutes
If you’re a visual learner, start with the video tutorial below to see the AR drawing effect in action.
Kivicube Tutorial| How to make your first AR drawing
For the full step-by-step written guide, keep scrolling right here.
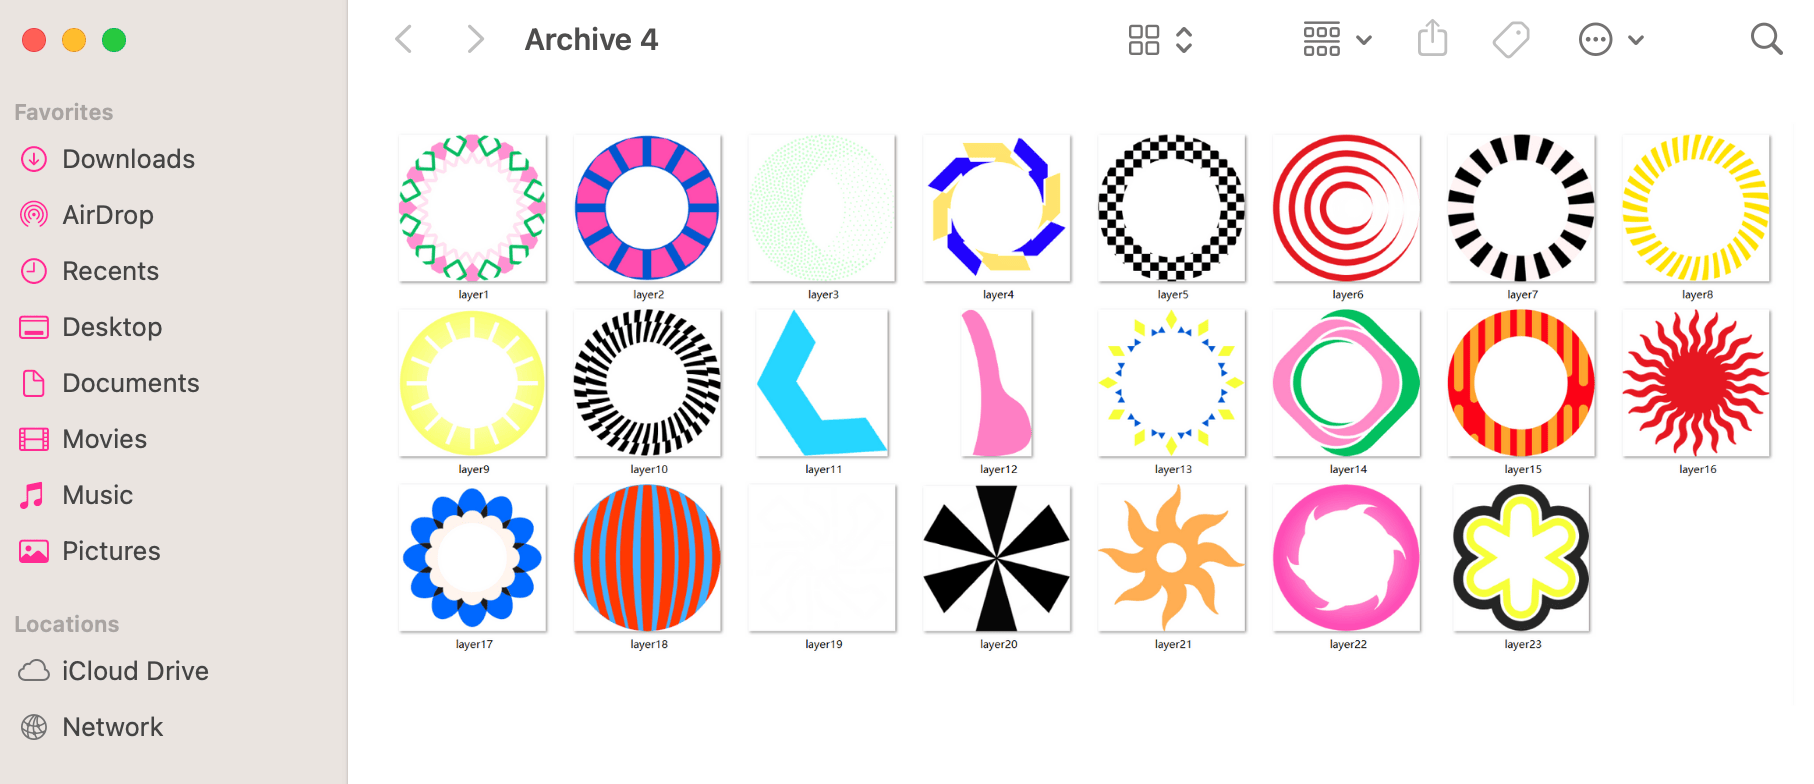
Step 1: Prepare Your Image
- Open your drawing in software like Photoshop or Procreate.
- Export the background, mid-ground, and foreground elements as separate transparent PNGs. Clear layers are crucial for a good AR drawing.
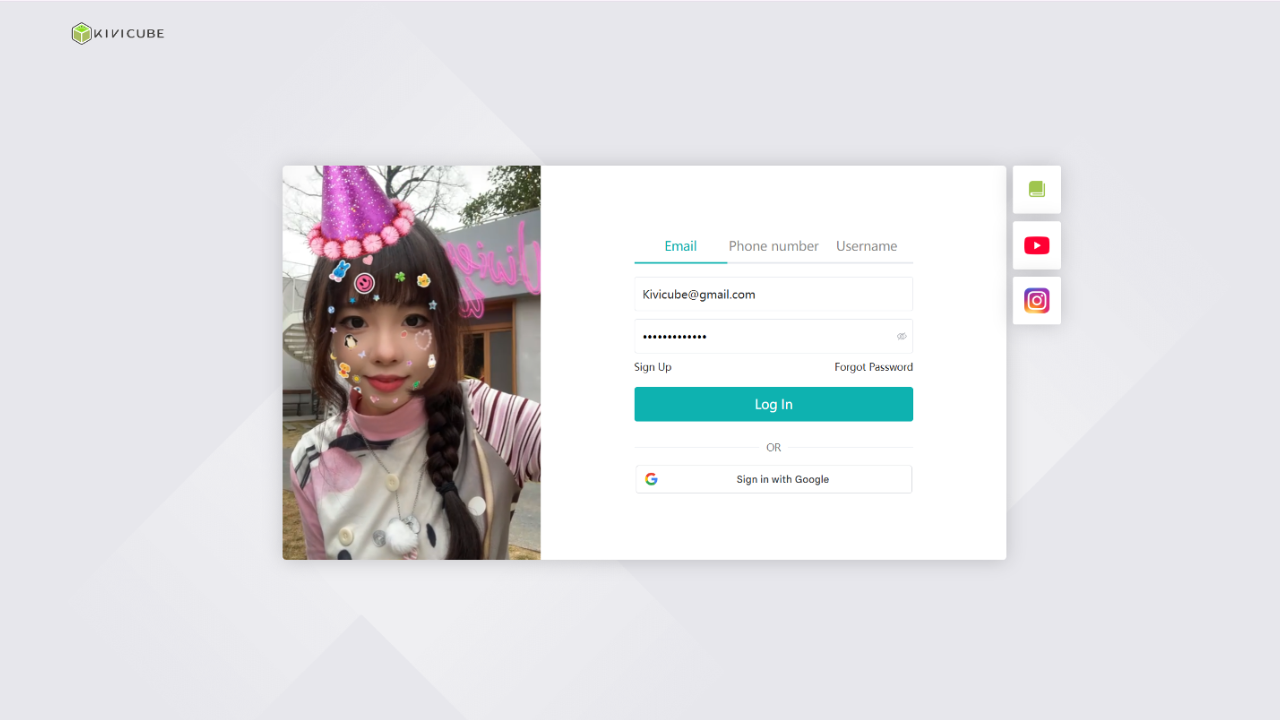
Step 2: Build Your AR Scene in Kivicube
1.Register for a free Kivicube account and log in.
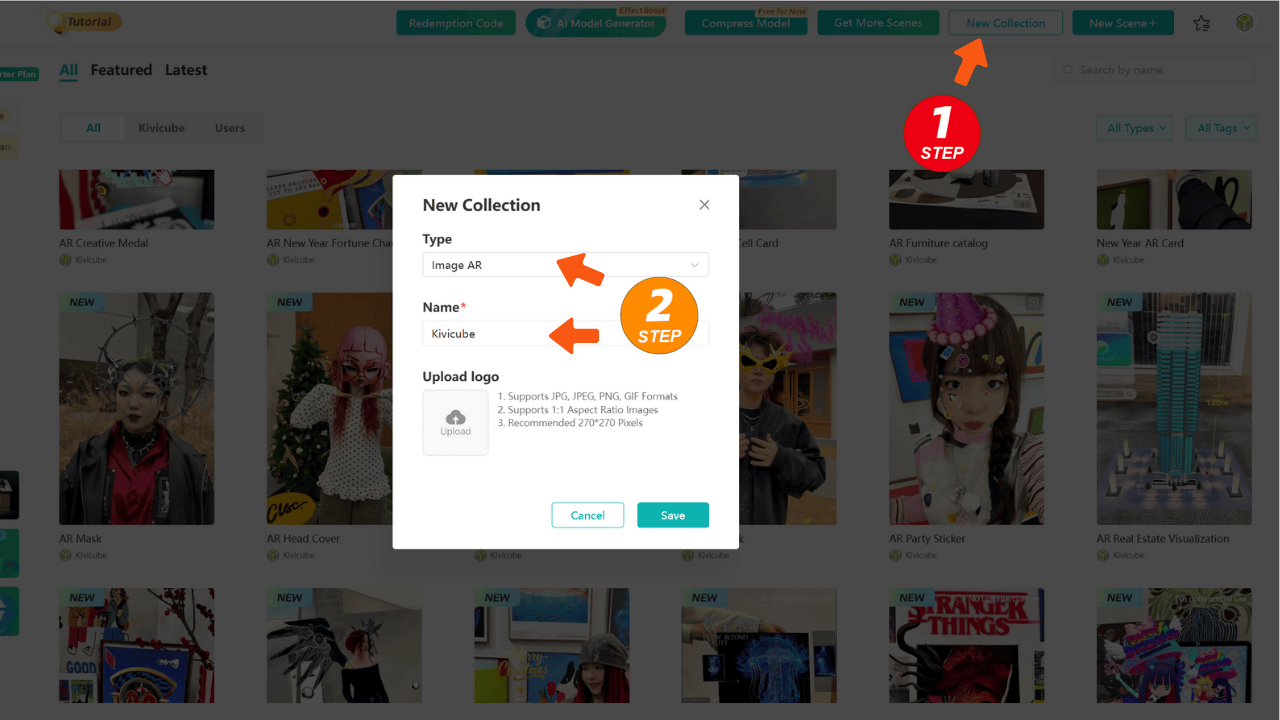
2.Click "New Collection" in the top right corner, select "Image AR", and give your collection a name.
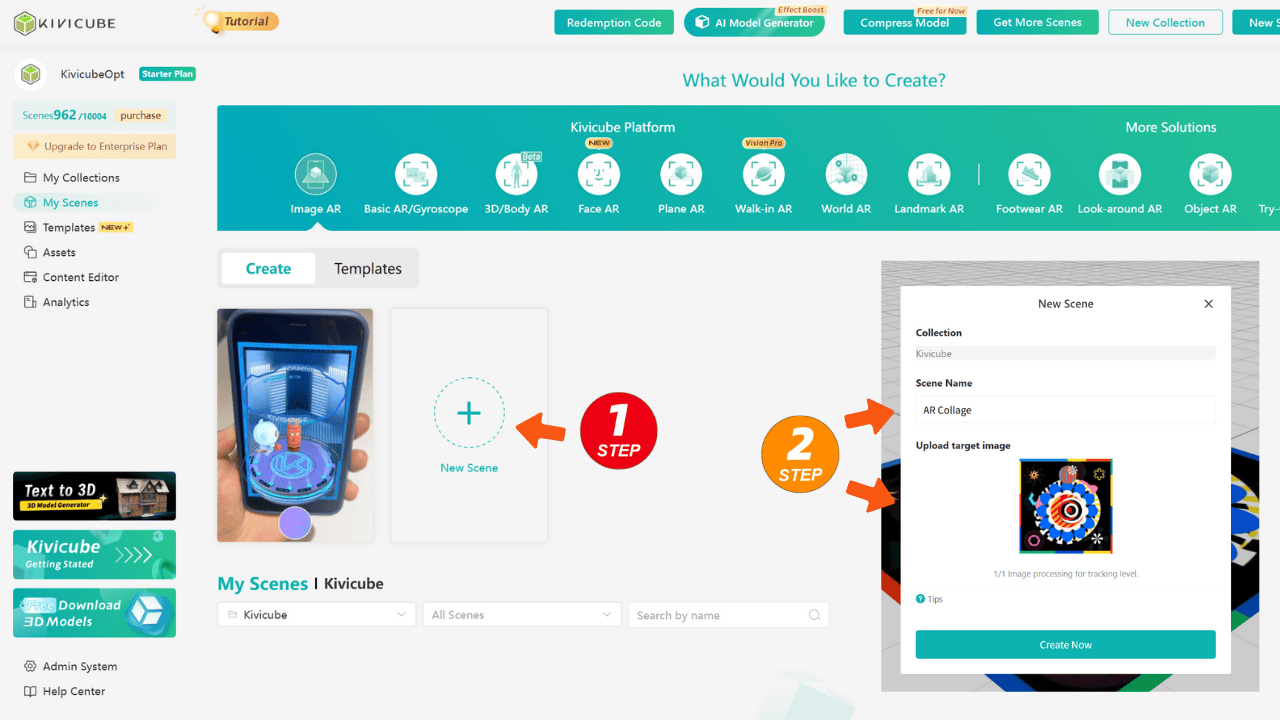
3.Then click "New Scene" and select the "Image AR" type. Name your scene.
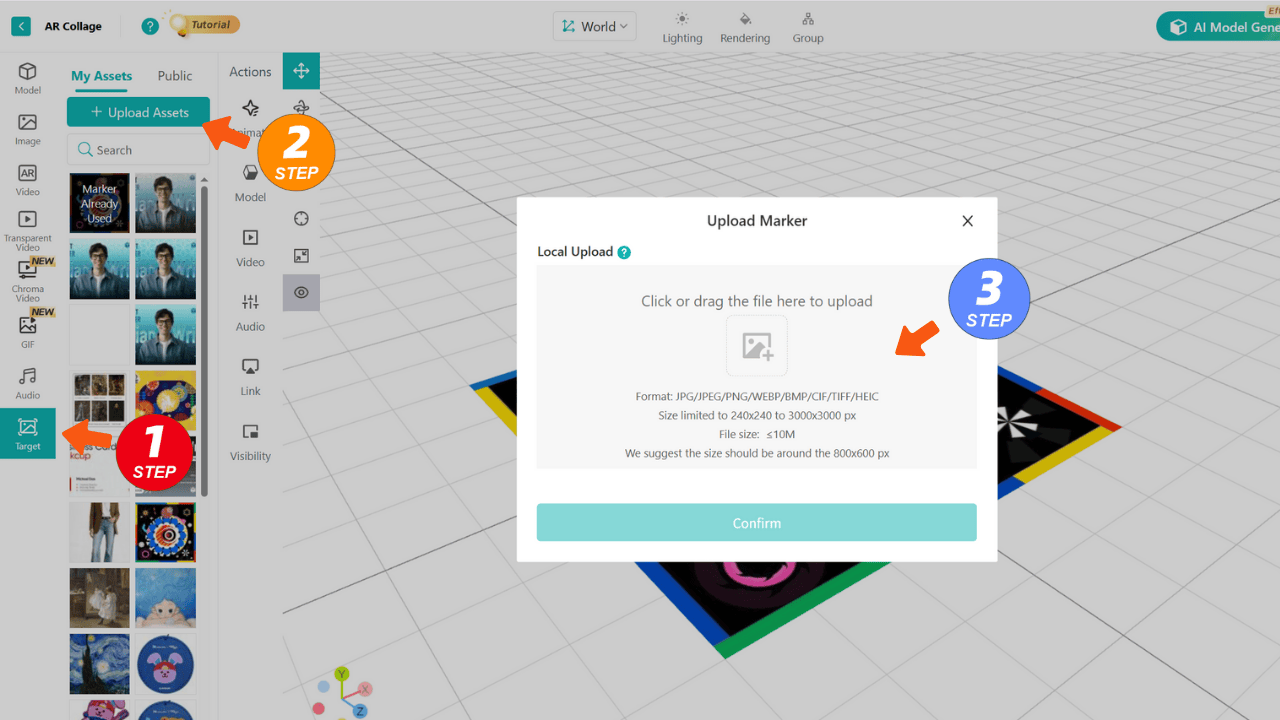
Step3. Upload Your Marker
In the editor, go to the left panel. Under "Target Image", upload your final drawing. This is what users will scan.
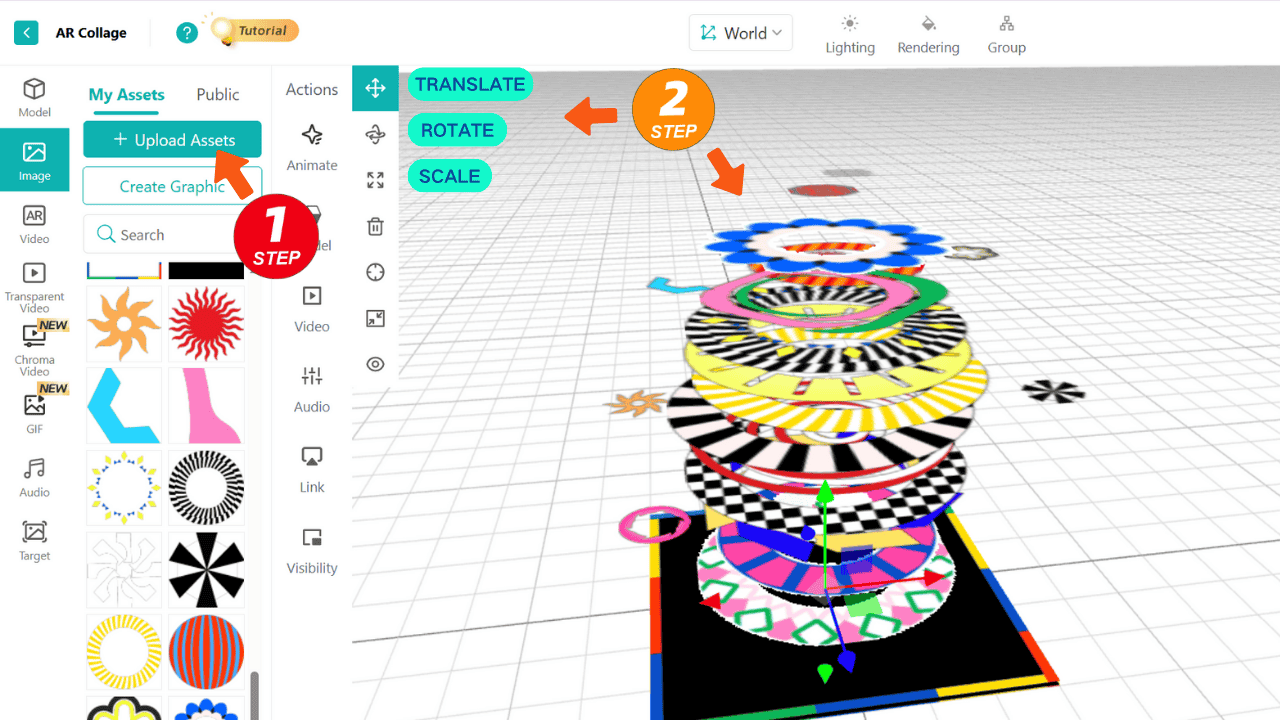
Step 4: Add Your AR Content
Under "Image" in the asset library, upload your transparent PNG layers. Then, drag each layer into the scene. Use the transform tools to position them in 3D space.
Step 5: Animate Your AR Drawing
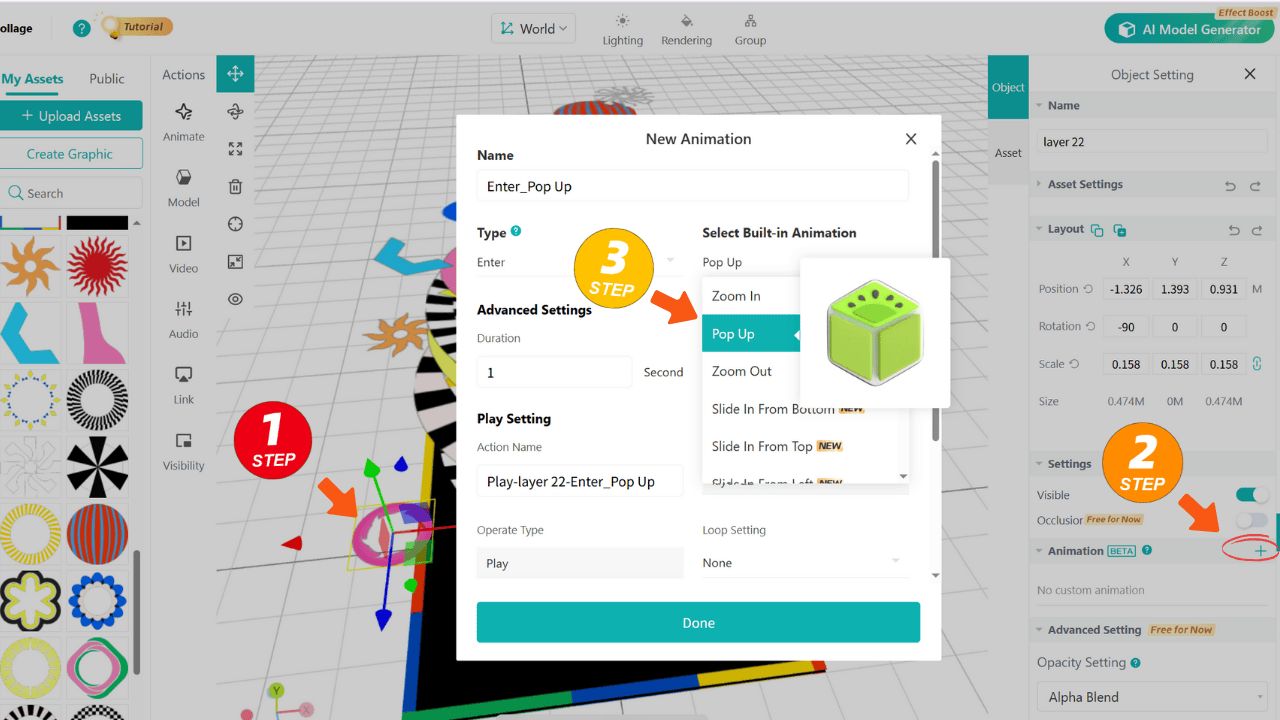
Add Pop-up Animation:
- Select a layer.
- Click the "Animation" tab on the right.
- Choose "Pop Up".
- Set the Trigger to "Tracked" (so it plays when the image is scanned).
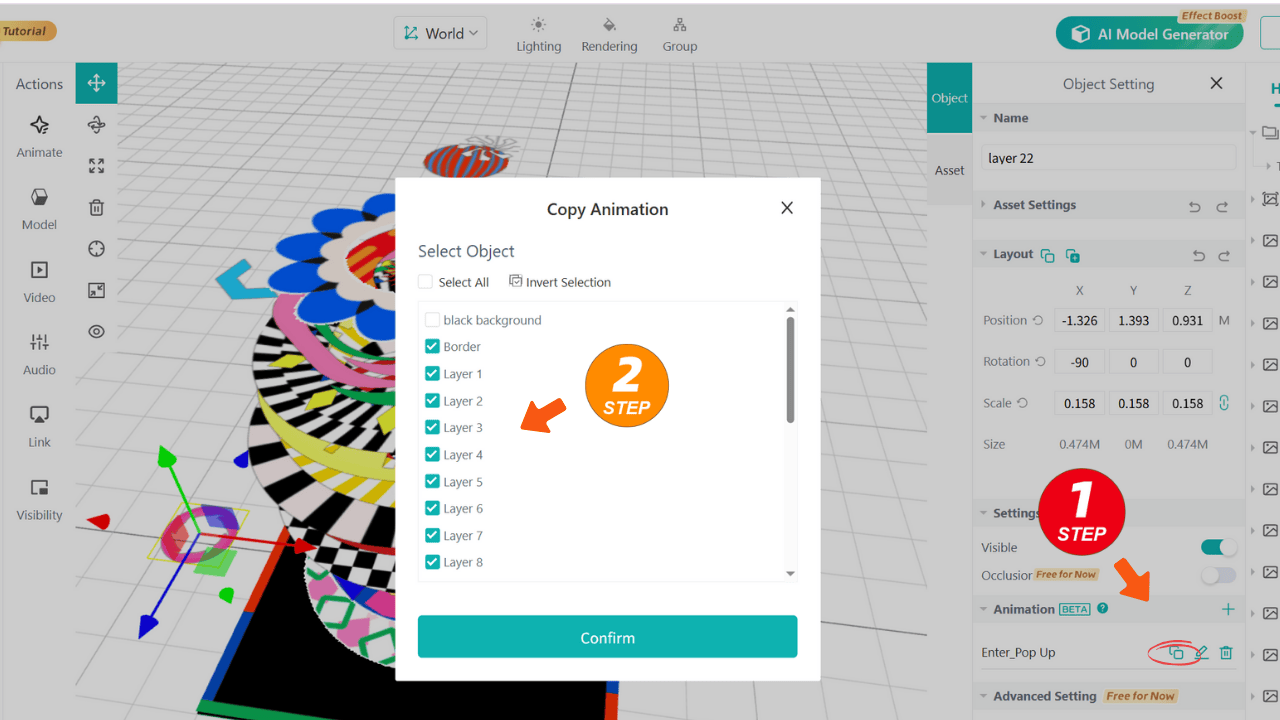
Copy This Animation:
- In the animation panel, hover over the "Pop Up" animation you just created and click the "Copy" icon.
- In the pop-up window, select all other layers that need the same animation and confirm. This applies the animation to multiple layers at once.
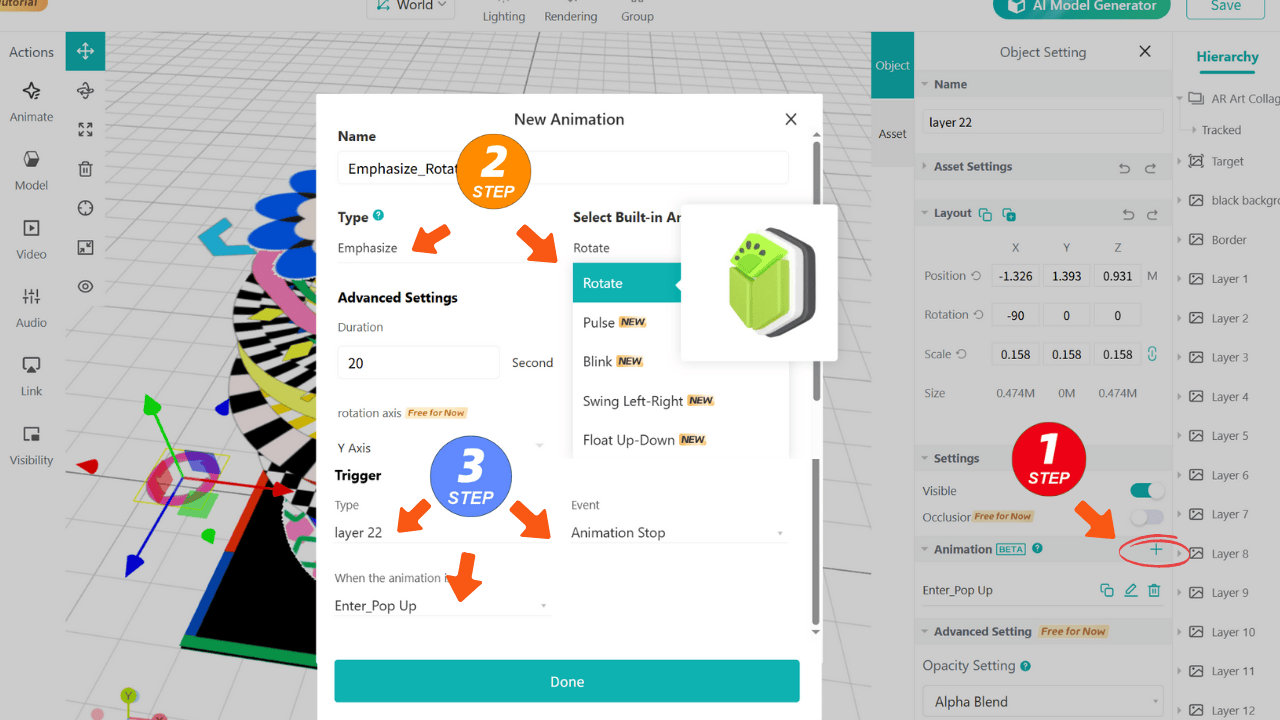
Add Rotation Animation:
- Select a layer again.
- Click "Animation" and add a new one. Choose "Rotate".
- To make it play after the pop-up, set its Trigger to "After Pop Up ends".
- Copy this rotation animation to other layers using the same method above.
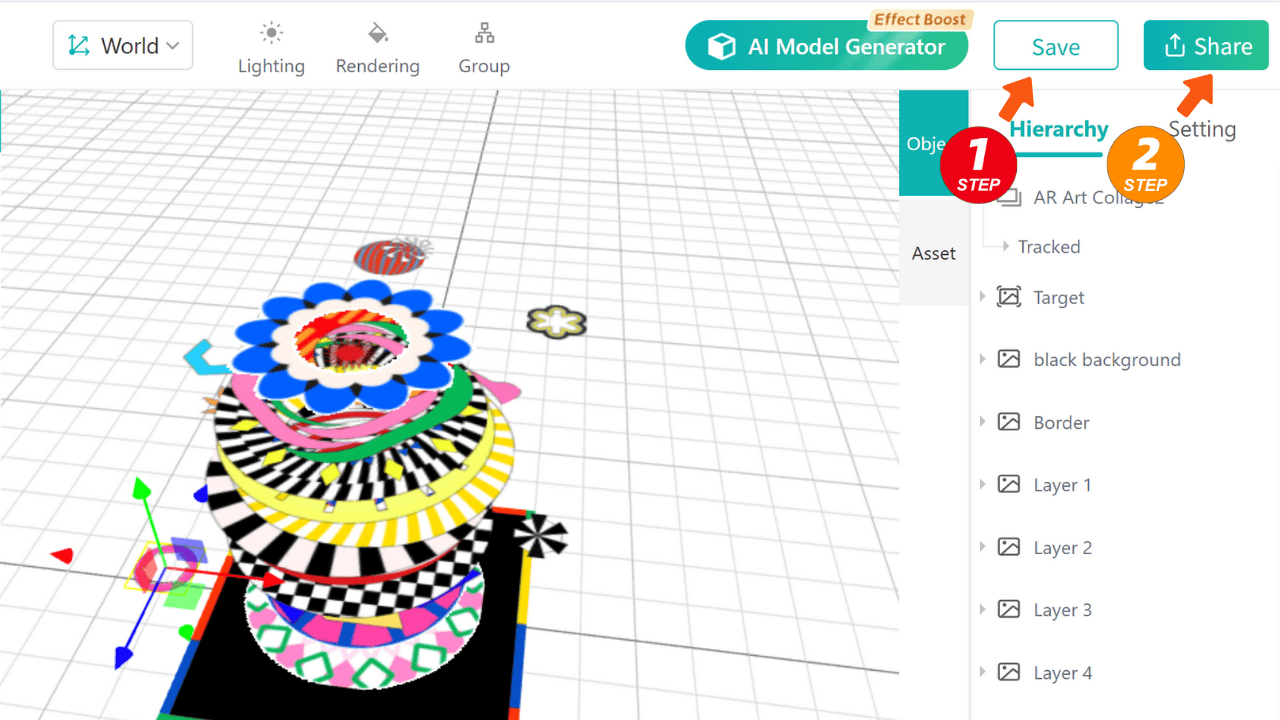
Step 6: Preview & Publish
- Click the "Save & Share" button in the top right.
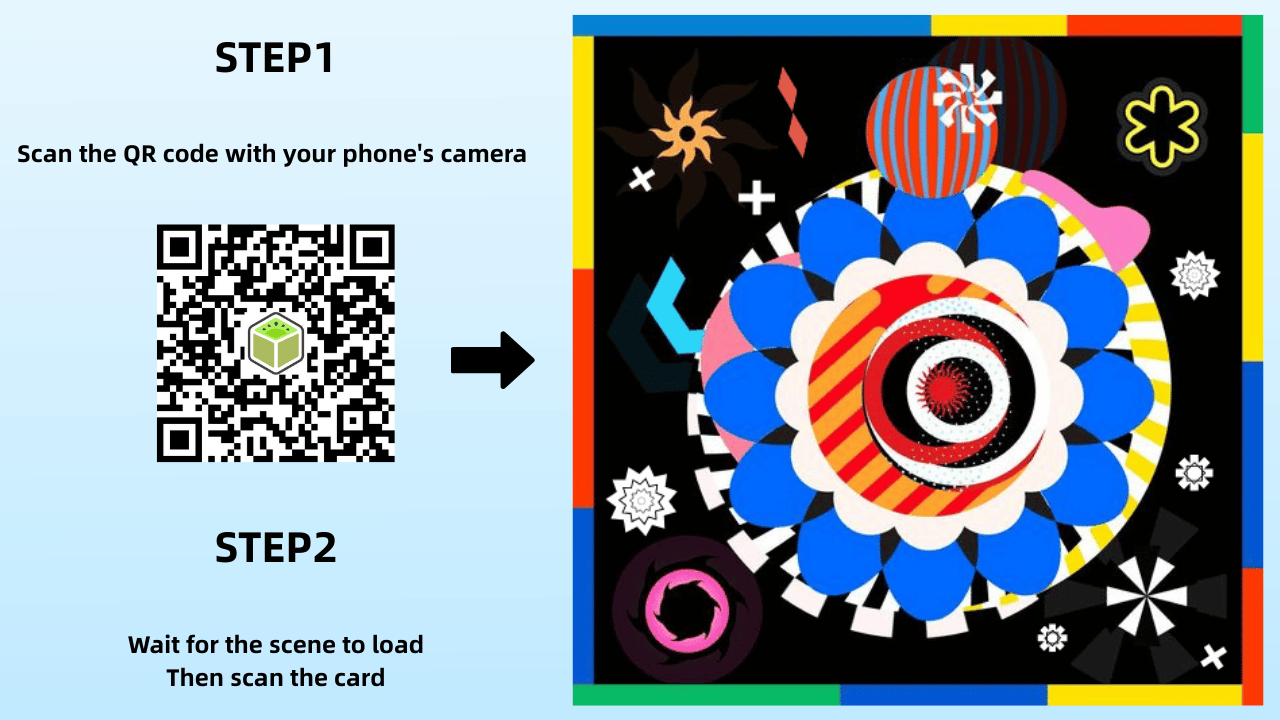
- Scan the generated QR code with your phone, pointing the camera at your original drawing (the Target Image).
- Observe how it looks in real space. Return to the editor to adjust positions or timing if needed. This step is vital for any AR artwork.
Love this animation effect? Keep creating with Kivicube’s free plan — all the tools you need for AR art, no cost for starters.
Step 7: Share Your Augmented Reality Drawing
- Once published, Kivicube provides a permanent link and QR code.
- Share this link on social media, or print the QR code next to your physical artwork. Anyone can experience your augmented reality drawing instantly in their browser—no app required.
Why WebAR Is Perfect for Augmented Reality Drawing
What makes WebAR different from traditional AR tools?It’s built for accessibility.You don’t need to install apps, manage updates, or navigate complex software.Your audience doesn’t need to download anything either.Anyone can open your augmented reality drawing in one tap —on any phone, any browser, anywhere.That’s the power of WebAR for artists and creators.
Who Is This For?
This workflow works for:
- Illustrators & visual artists
- Educators creating interactive content
- Designers building immersive projects
- Hobbyists exploring creative AR
- Anyone who wants to try AR without learning technical skills
Augmented reality drawing is a new way to share your art, tell stories, and connect with audiences.
FAQ
Do I need 3D skills to make augmented reality drawings?
No. This tutorial uses 2D art and no-code WebAR tools.
Do I need to download an app?
No. Everything runs on WebAR which means you can experience it based on browser.
Can I edit my AR drawing on mobile?
You can view and share it on mobile, but editing is smoother on desktop.
Is the WebAR tool free?
Yes. Kivicube’s free plan lets you create and share augmented reality drawings right away.
Final Thoughts
You've just turned a static image into interactive AR art using a no-code WebAR platform. This workflow is the foundation for many AR projects — from illustrations and books to exhibitions and portfolios.
If you get stuck or want feedback, join our friendly Discord community and connect with other creators building in AR.
Want to explore more creative ideas for augmented reality drawings? Check out our guide to turning sketches into interactive AR art.