Why I Started Adding AR to My Artwork (2026 Artist’s No-Code Guide)
For a long time,my drawings lived exactly where I left them:
on paper, on a screen, inside a frame.
People looked.
They liked.
They moved on.
The first time I turned a drawing into an augmented reality artwork, something changed. Viewers didn’t just see it — they walked around it. They leaned closer. They smiled. Some of them pulled out their phones and showed someone else.
That’s when it clicked for me:
AR doesn’t decorate artwork. It extends it.
What AR Actually Does for Art (No Tech Talk)
When you add AR to your work, three things happen:
- Your drawing leaves the surface and enters real space
- The viewer becomes part of the experience
- Your art gains scale, presence, and memory
This is why AR art feels different from digital art on a screen. It’s not about pixels — it’s about place. The artwork exists where the viewer exists.
That’s a powerful upgrade.
The Good News: You Don’t Need “AR-Style” Art to Start
This surprised me at first.
You can turn almost any drawing into an AR piece:
- Sketches
- Illustrations
- Line art
- Murals
- Digital drawings
If you’ve ever made something you wished people could step into, that’s already an augmented reality drawing mindset — even if you didn’t call it that yet.
My Simple Process for Turning a Drawing Into AR Art
This is the workflow I use, stripped down to what actually matters.
Step 1: Start With One Clear Artwork
Don’t overthink it. One drawing is enough.
Clean shapes help, but perfection isn’t necessary. AR is forgiving in a way that paper isn’t. What matters more is clarity — an artwork that still reads when viewed from different angles.
If this is your first AR experiment, simpler is always better.
Step 2: Decide Where the Art Should Exist
This is the part most beginners skip — and it’s also the most important.
Before opening any AR tool, ask yourself:
- Will this artwork live on a wall?
- Should it float in a room?
- Sit on a table?
- Exist in a public space?
Augmented reality drawing is about space first, visuals second.
Thinking about placement early will save you a lot of frustration later.
Step 3: Plan How the Artwork Comes Alive in AR
At this stage, you’re not adding effects — you’re designing an experience.
There are three beginner-friendly approaches that work well:
- Triggering motion or video
If you want your artwork to animate when scanned, prepare a short video or animation. A small trick that helps a lot: use your original artwork as the first frame of the video. This creates a seamless transition from physical to digital, which feels almost magical.
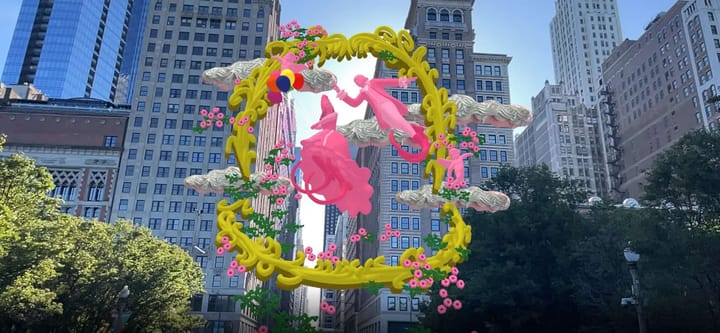
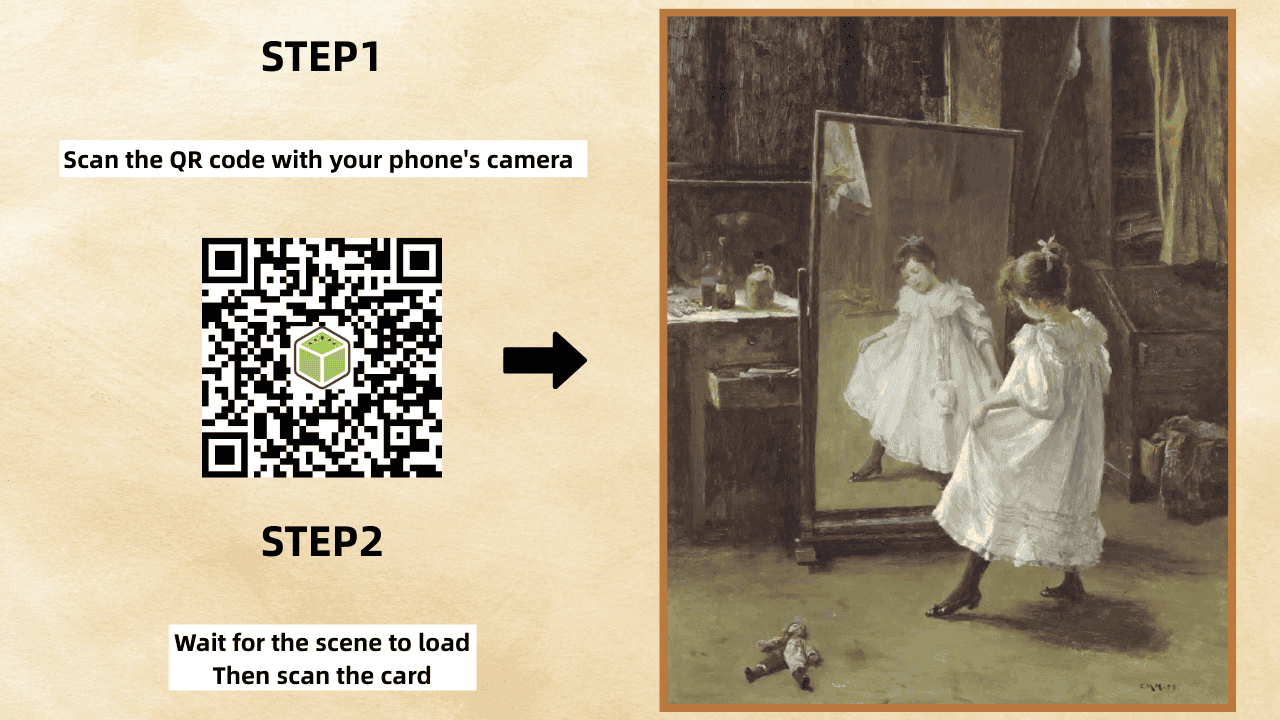
For example, a painting like Girl with a Pearl Earring could be scanned to start a subtle animated sequence.
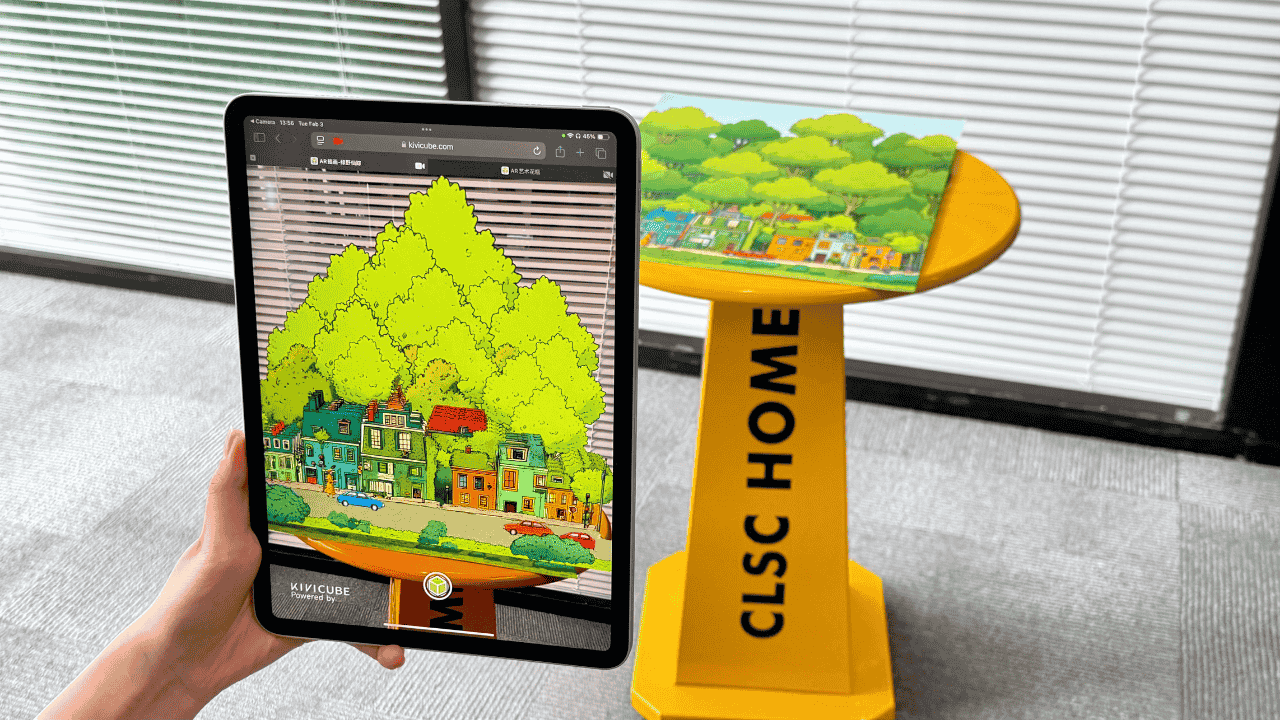
- Creating depth without 3D modeling
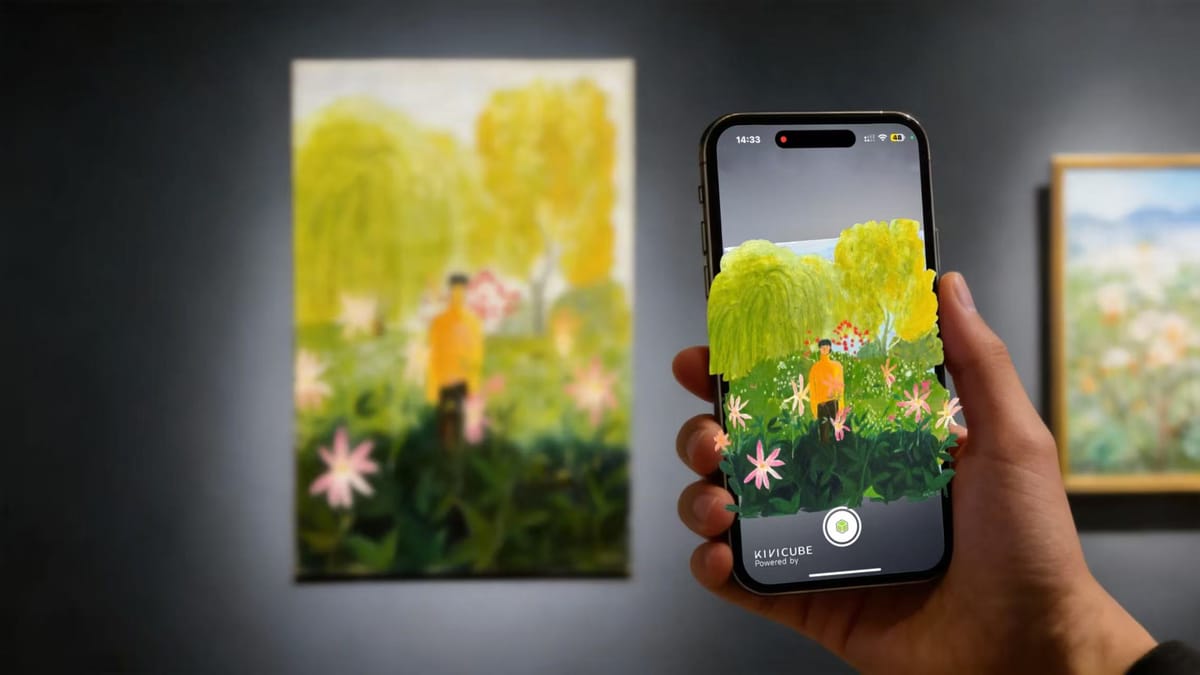
If you don’t have 3D skills, you can still create strong spatial depth. Break your artwork into layers and place them on different planes. Stacking illustrations this way creates a convincing sense of space. I used this approach for a forest-themed illustration, and it worked better than I expected.
Step 4: Bring the Artwork Into AR
This is where an AR creation platform becomes essential.
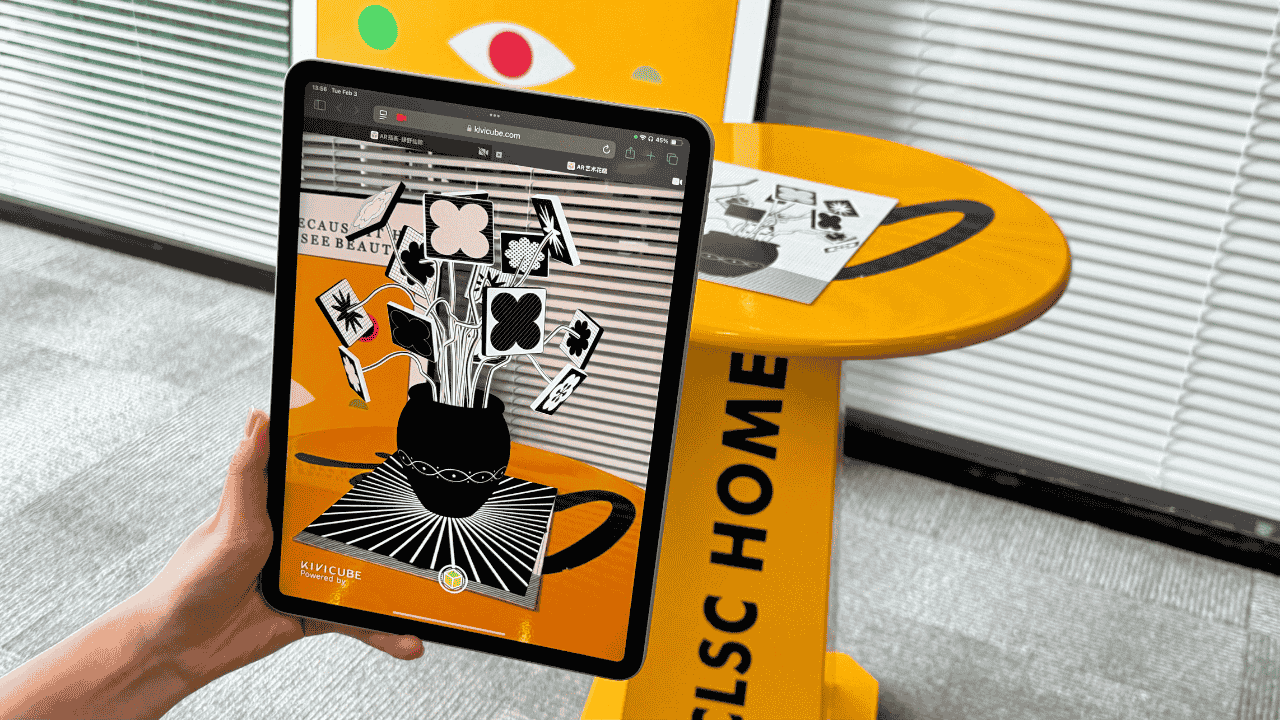
There are many no-code tools available today. For this project, I chose Kivicube because it lets me focus on the artwork instead of the technology.
What stood out to me:
- An intuitive drag-and-drop interface for building AR scenes
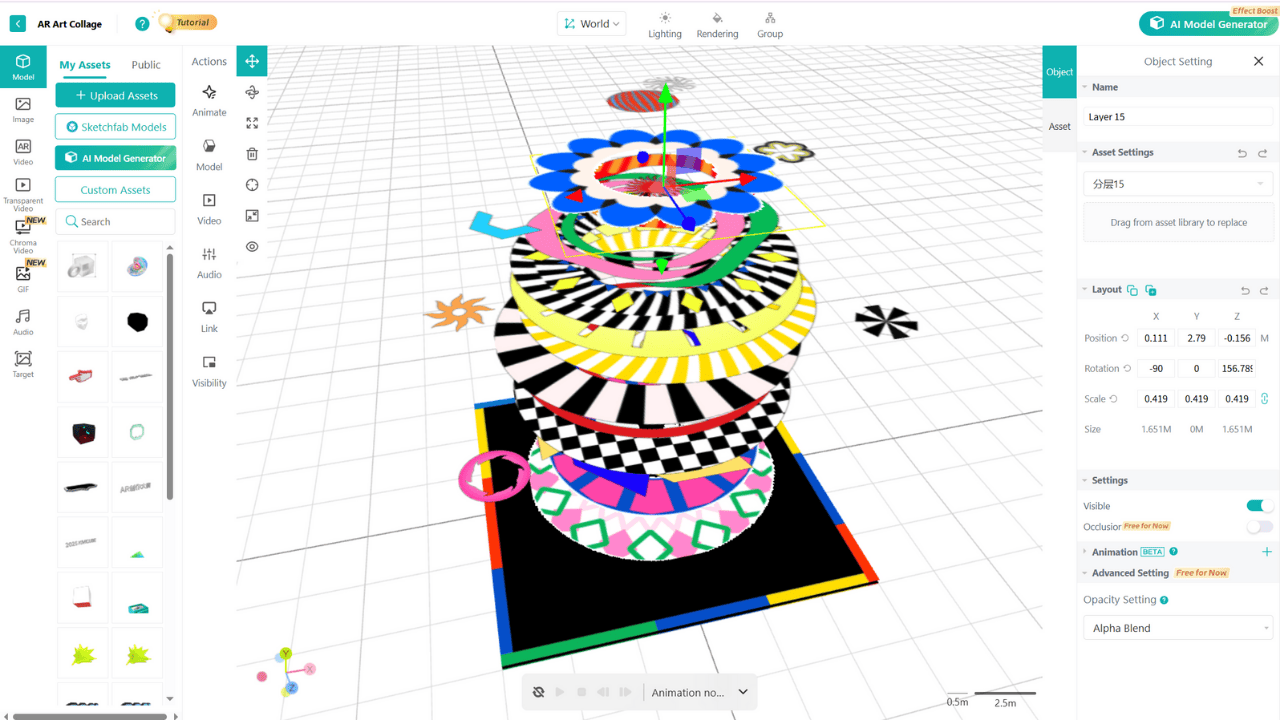
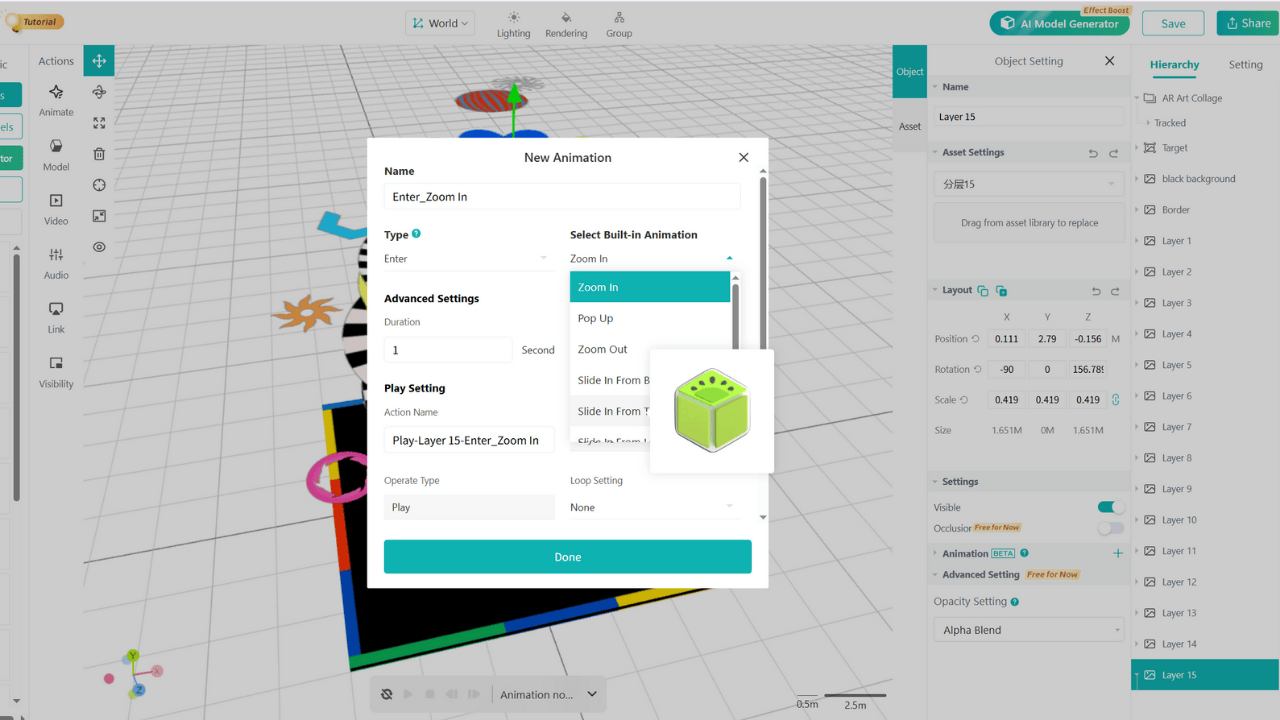
- A library of pre-built animations that make testing ideas fast
- Web-based AR experiences that run directly in a browser — no app download required

Kivicube’s YouTube channel also has detailed tutorials on combining AR with art. I followed one of them to build my first piece, then adjusted things until the AR version actually felt right in real space.
View Full Tutorial: Create an AR Collage
How I Make AR Art Feel Less “Gimmicky”
This matters.
A few principles that helped me:
- Keep motion subtle
- Let viewers move instead of forcing animation
- Think “installation,” not “effect”
The best AR art doesn’t scream “technology.” It quietly invites people closer.
Lessons from My Early AR Art Experiments
When I first started creating augmented reality art, I made a few common mistakes. Here’s what I learned.
Trying to build a huge AR scene too early
I began with an illustration that had very complex layers. I quickly got stuck: I couldn’t easily animate it in 2D, and because I hadn’t planned the layers properly, I couldn’t separate them to create a satisfying 3D effect. Starting with a smaller, simpler scene would have saved me a lot of time.
Treating AR like flat animation
AR interacts with the real world. If you don’t constantly check how your artwork looks through the camera, you risk ending up with an effect that feels worse than the original flat image. This is where Kivicube helped — quick previews made it easy to iterate and adjust.
Ignoring lighting and scale
Lighting and scale have a huge impact on how AR art feels in real environments. Being able to fine-tune both was essential for polishing my final piece.
The core lesson? Start small. One strong, coherent AR artwork is far more powerful than ten confusing ones.
Why I Recommend Kivicube for Artists New to AR
Not because it’s flashy — but because it gets out of the way.
It lets you:
- Focus on the artwork, not the tech
- Experiment without pressure
- Share AR experiences easily
That’s important when you’re still figuring out your AR voice.
Final Thought
AR won’t replace drawing.
It won’t replace painting.
It won’t replace physical art.
But it does give your work another dimension — literally.
If you’re curious, try turning just one piece into AR and see how people react.
That reaction is usually the moment artists don’t want to go back.
Try Kivicube for free and see what your artwork feels like when it steps into the real world.