How to Create an Interactive AR Card for AR Learning (No-Code WebAR)
Having trouble making boring, hard-to-understand knowledge interesting and keeping students motivated to learn?
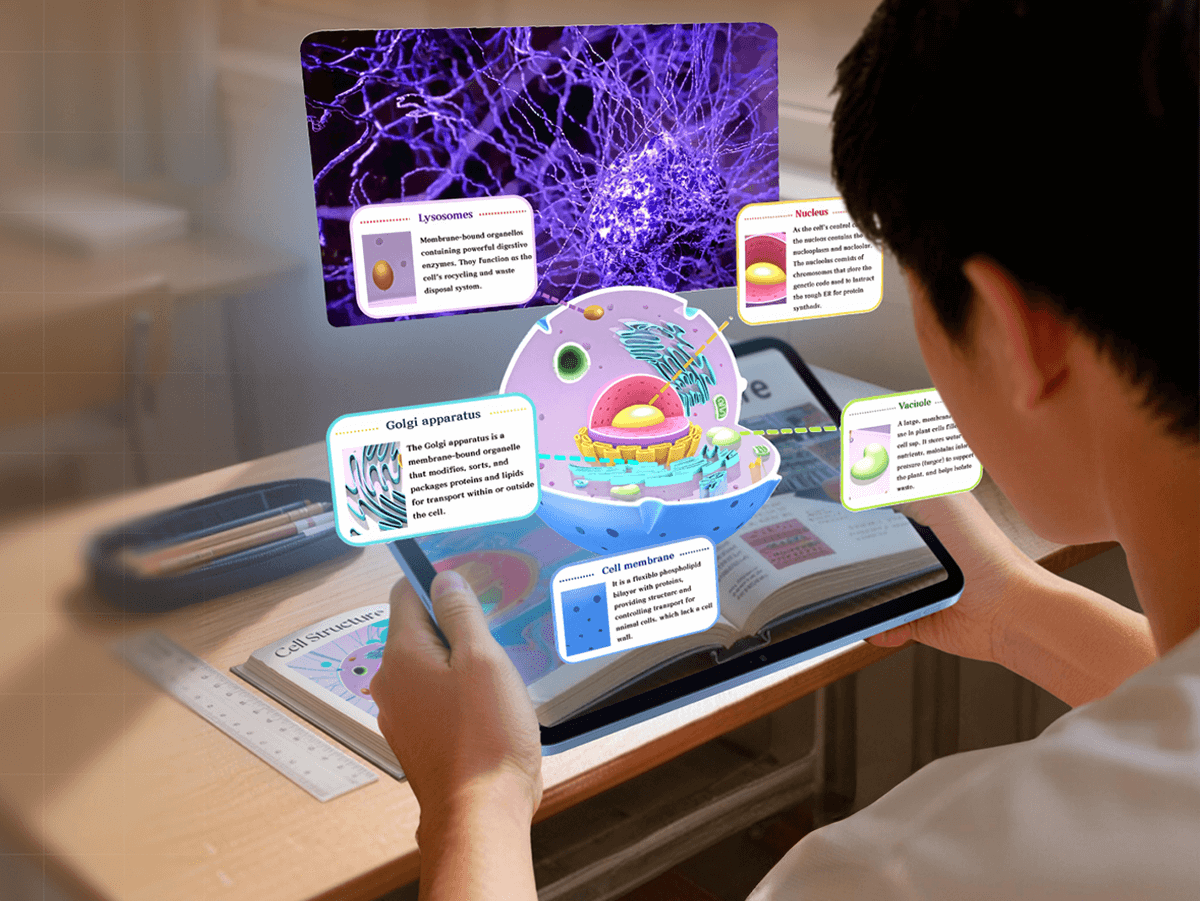
Through this tutorial, you’ll learn how to create an interactive AR card that makes knowledge three-dimensional and visible, helping students absorb knowledge points better.
Any popular science content can be turned into AR learning experiences. Moreover, with Kivicube, a WebAR platform, you don’t even need any coding skills—you can complete the production of the AR card directly through drag-and-drop!
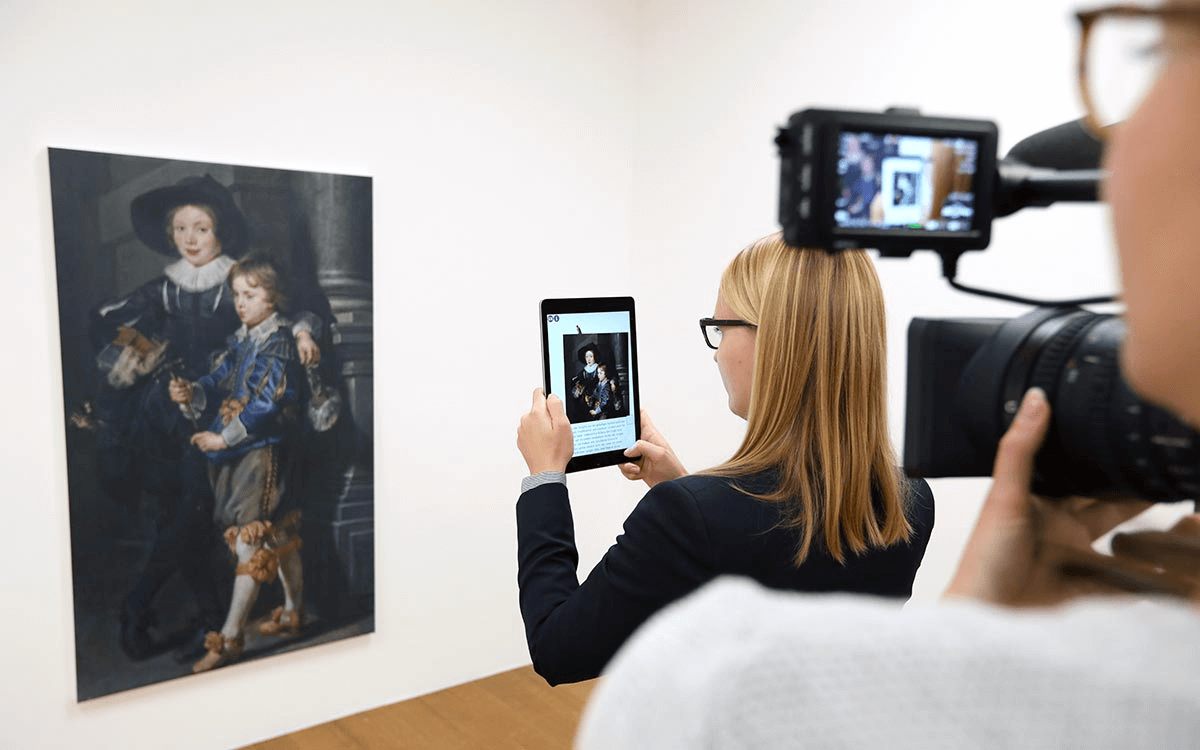
The combination of AR and education can visualize abstract knowledge, making it easier for students to accept. This tutorial is widely applicable to education practitioners, teachers, and developers of educational supporting products.
If you want to see more cases of AR combined with education, you can check out this link:

If you prefer to follow along with a video walkthrough for this project, I’ve also created a beginner friendly tutorial. You can watch it here:
How to Create an AR Learning Card with Kivicube
Step 1: Create an Image AR Scene in Kivicube
Sign up for free and log in to Kivicube.
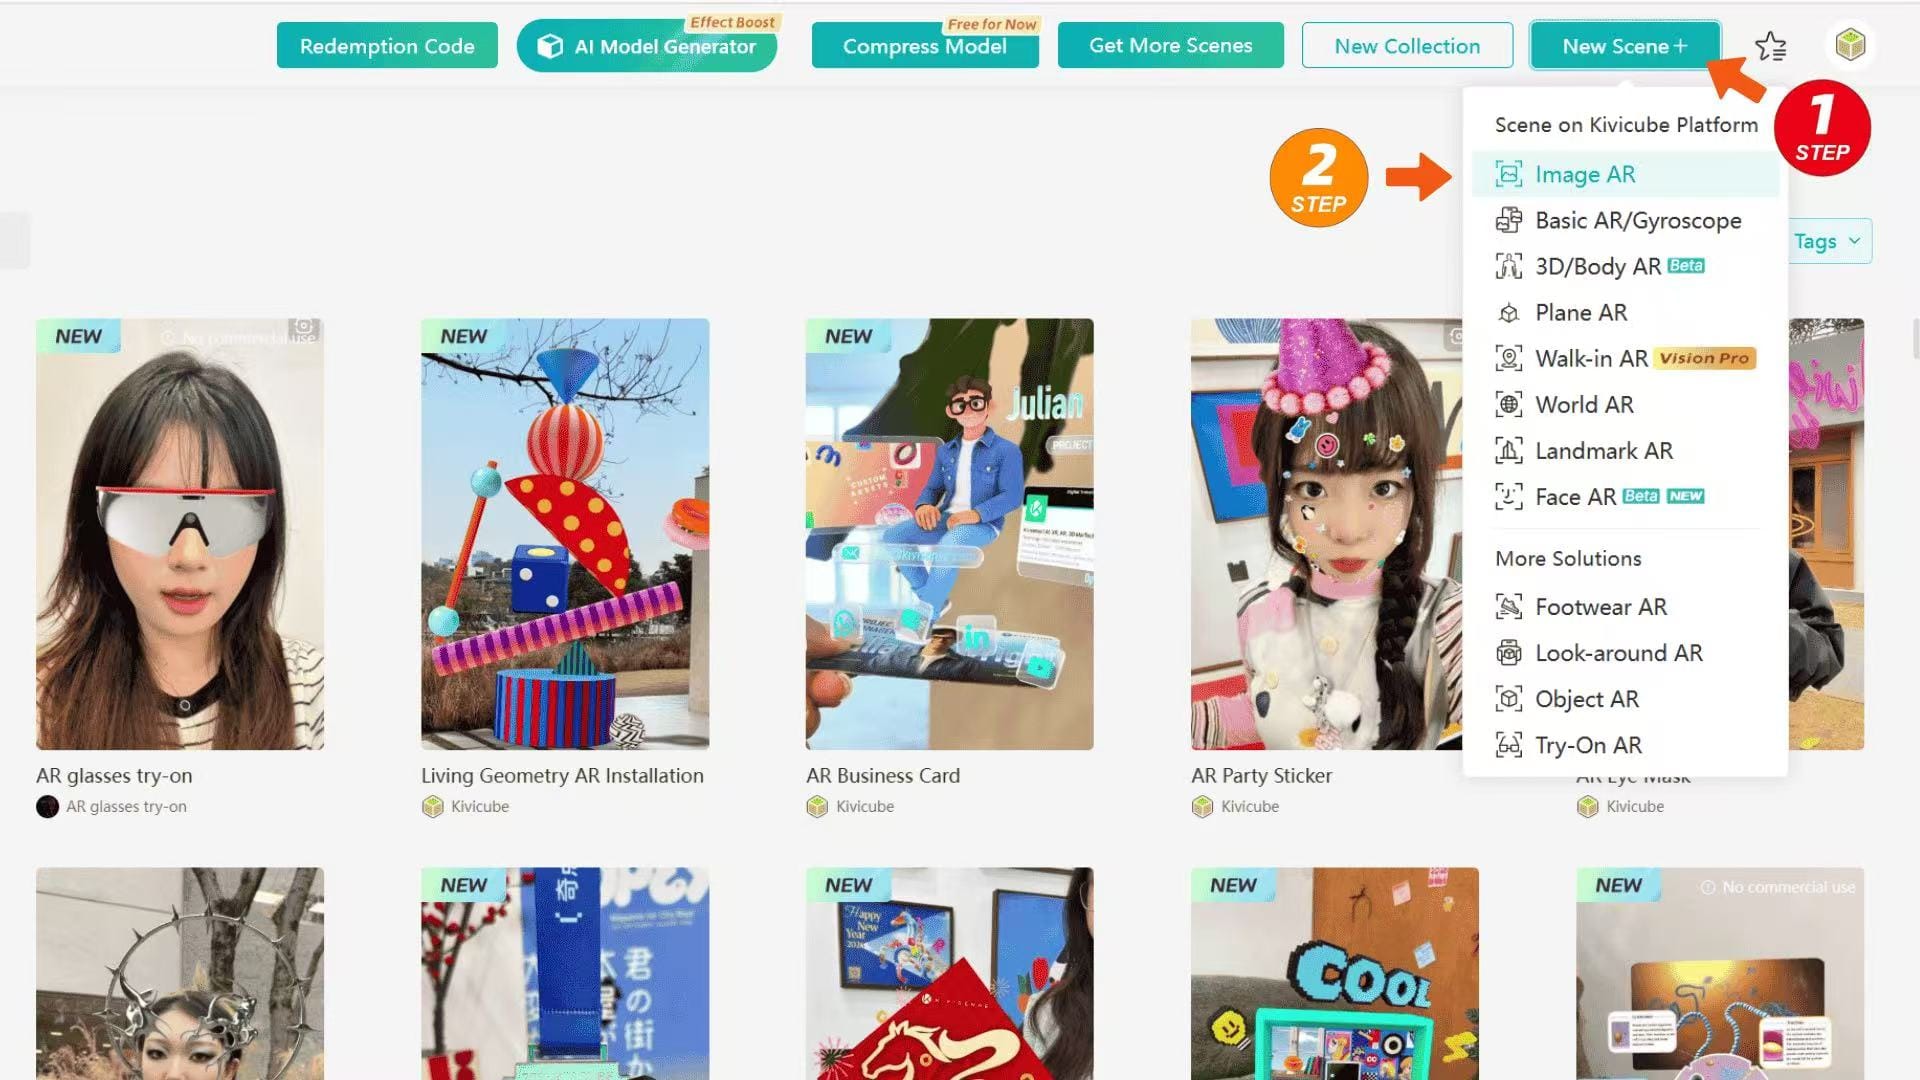
Click [New Scene+] in the top-right corner, select [Image AR], name the scene, and upload the marker image to enter the scene and start creating.
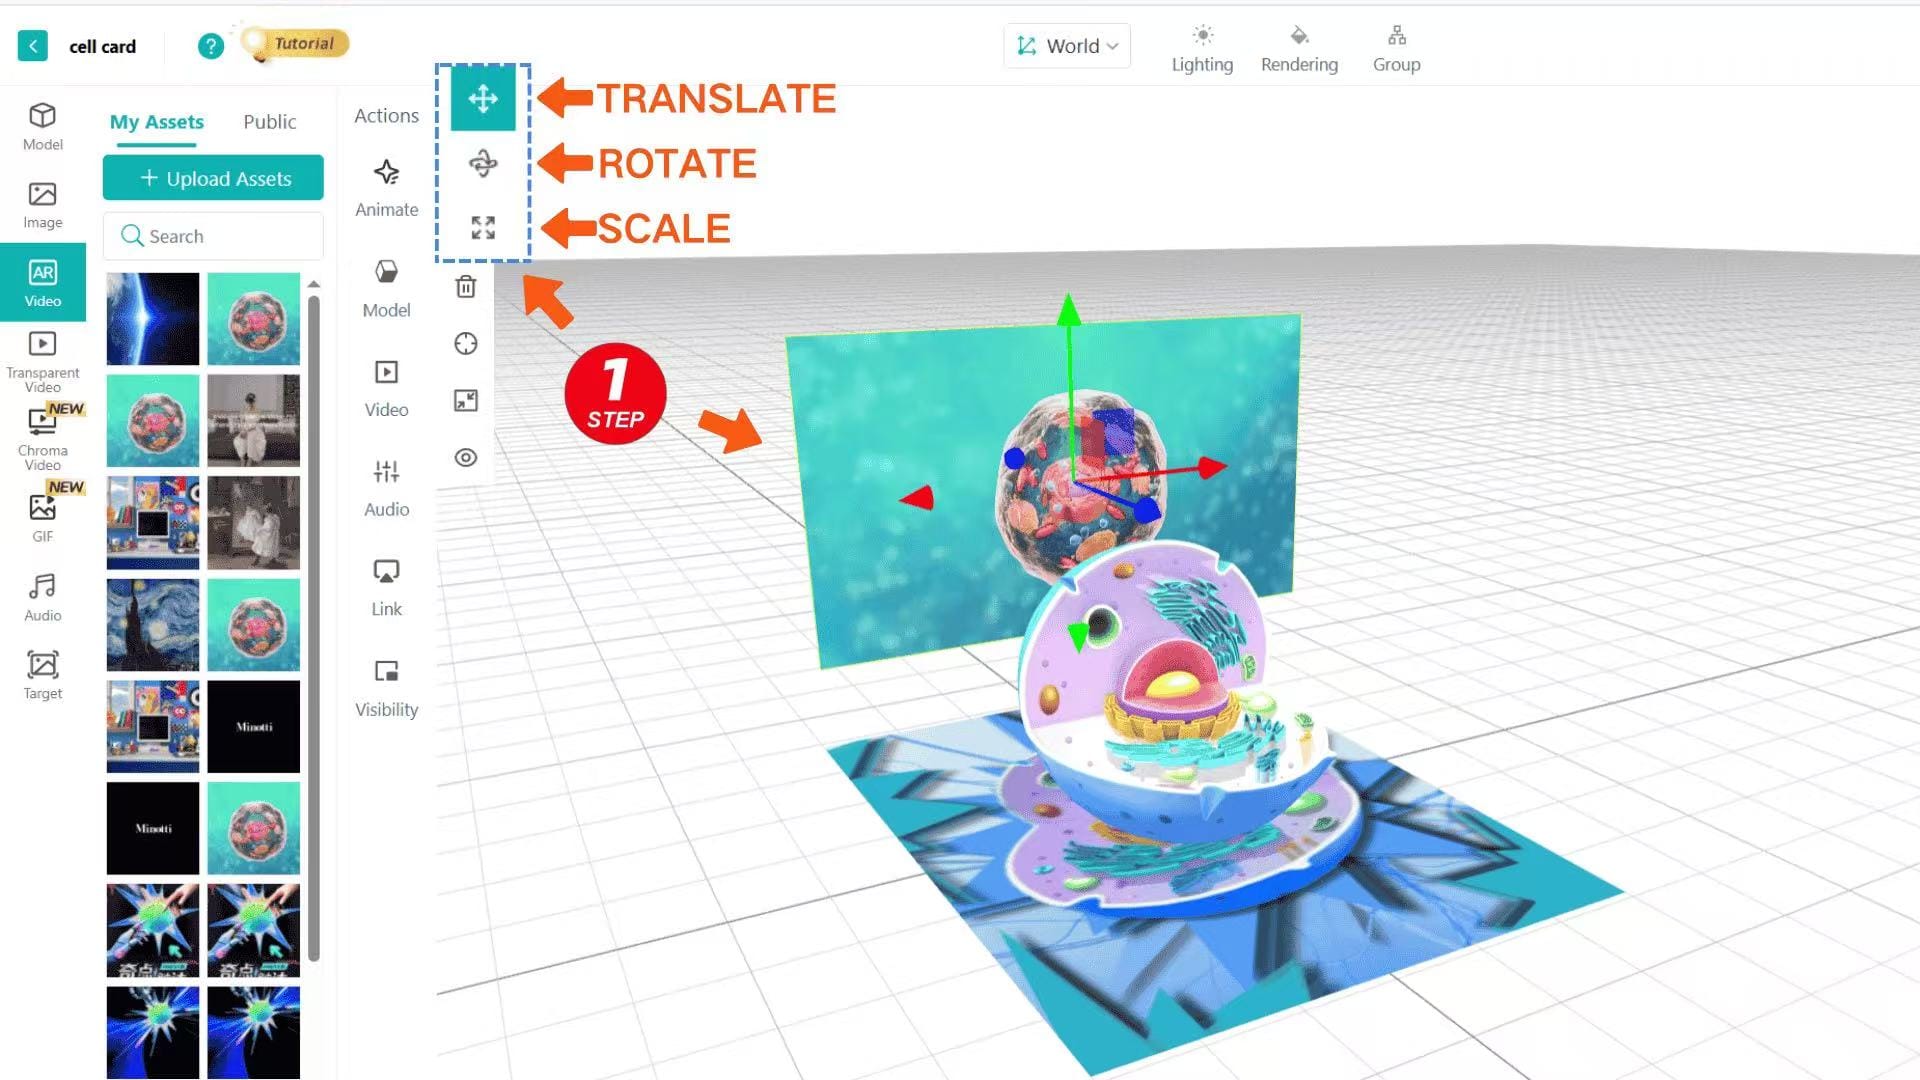
Step 2: Upload and Position Assets for Your AR Card
Upload your assets by type or use the assets in public assets library. Drag the assets you need into the workspace in the middle.
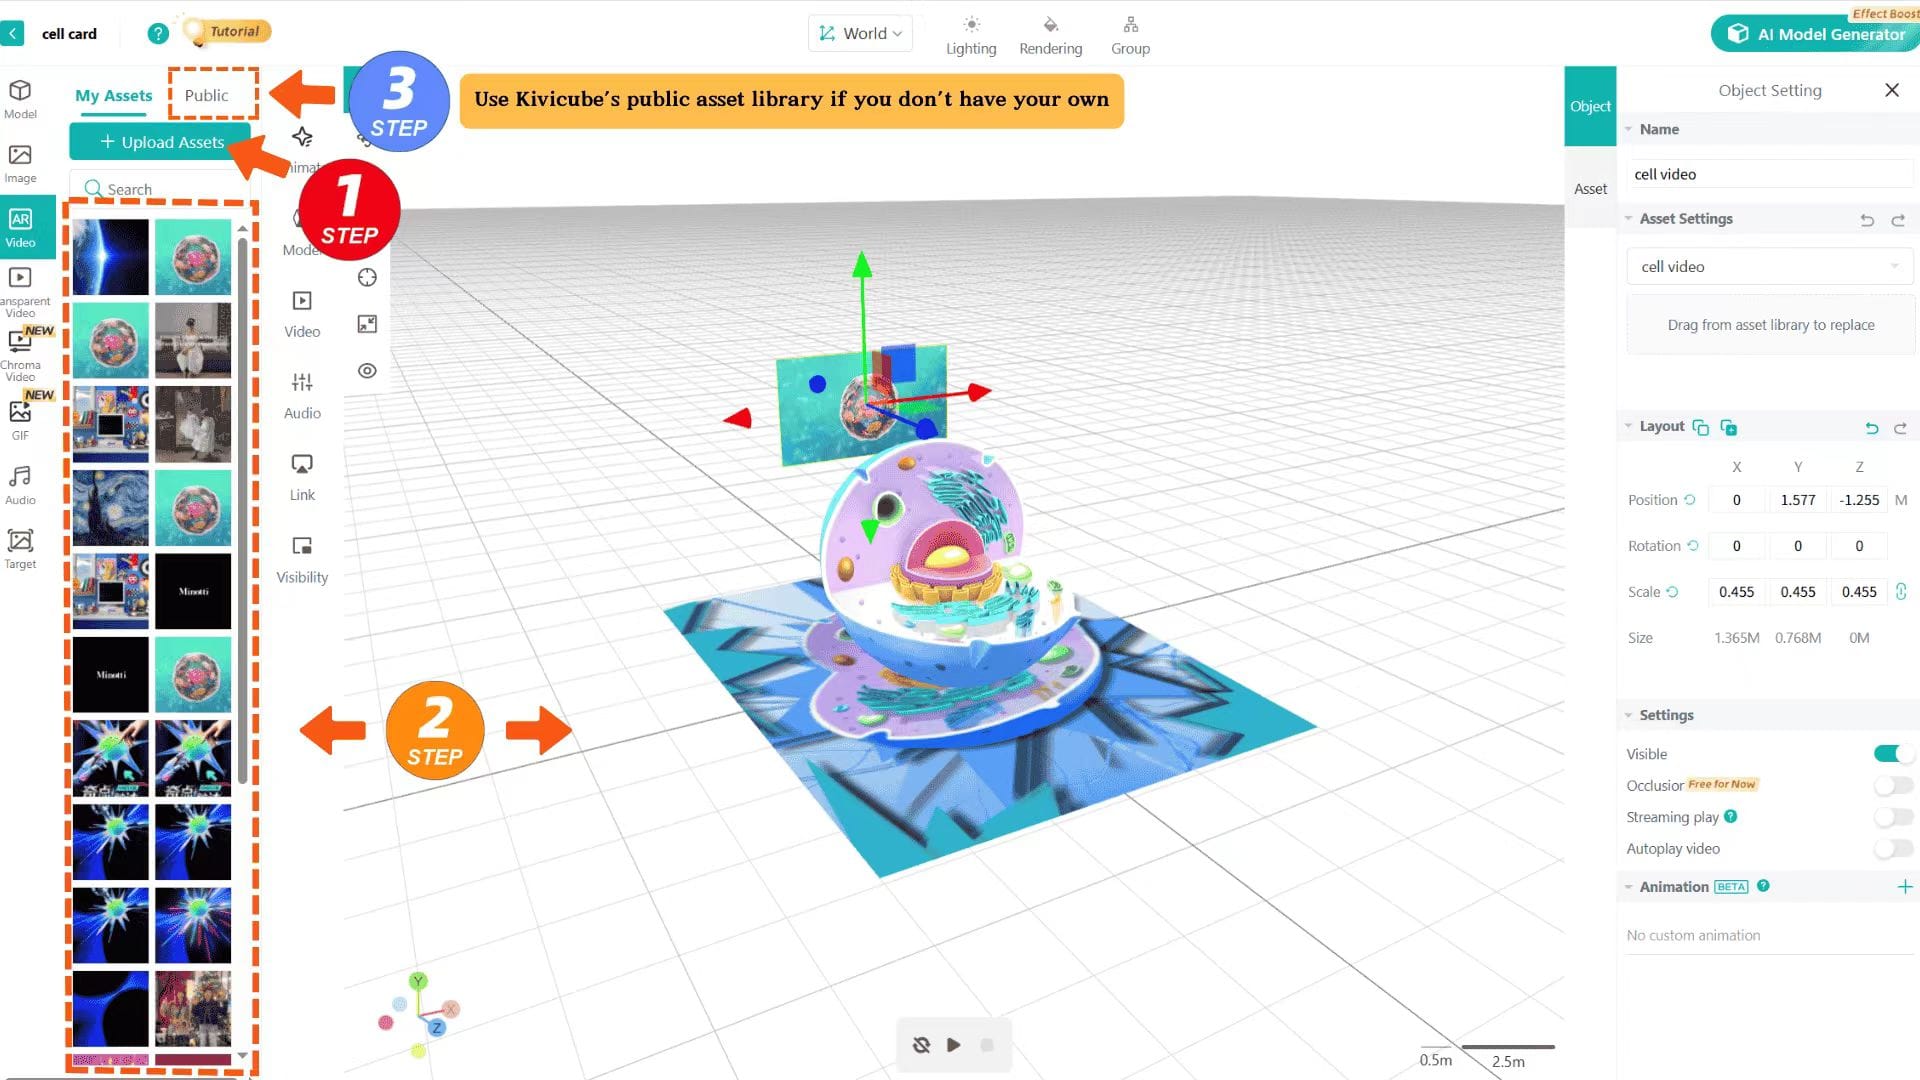
Use Transform tools to adjust the asset’s position, size and rotation to finish placing.
Once you’ve finished placing your assets, let’s add some AR interactions below.
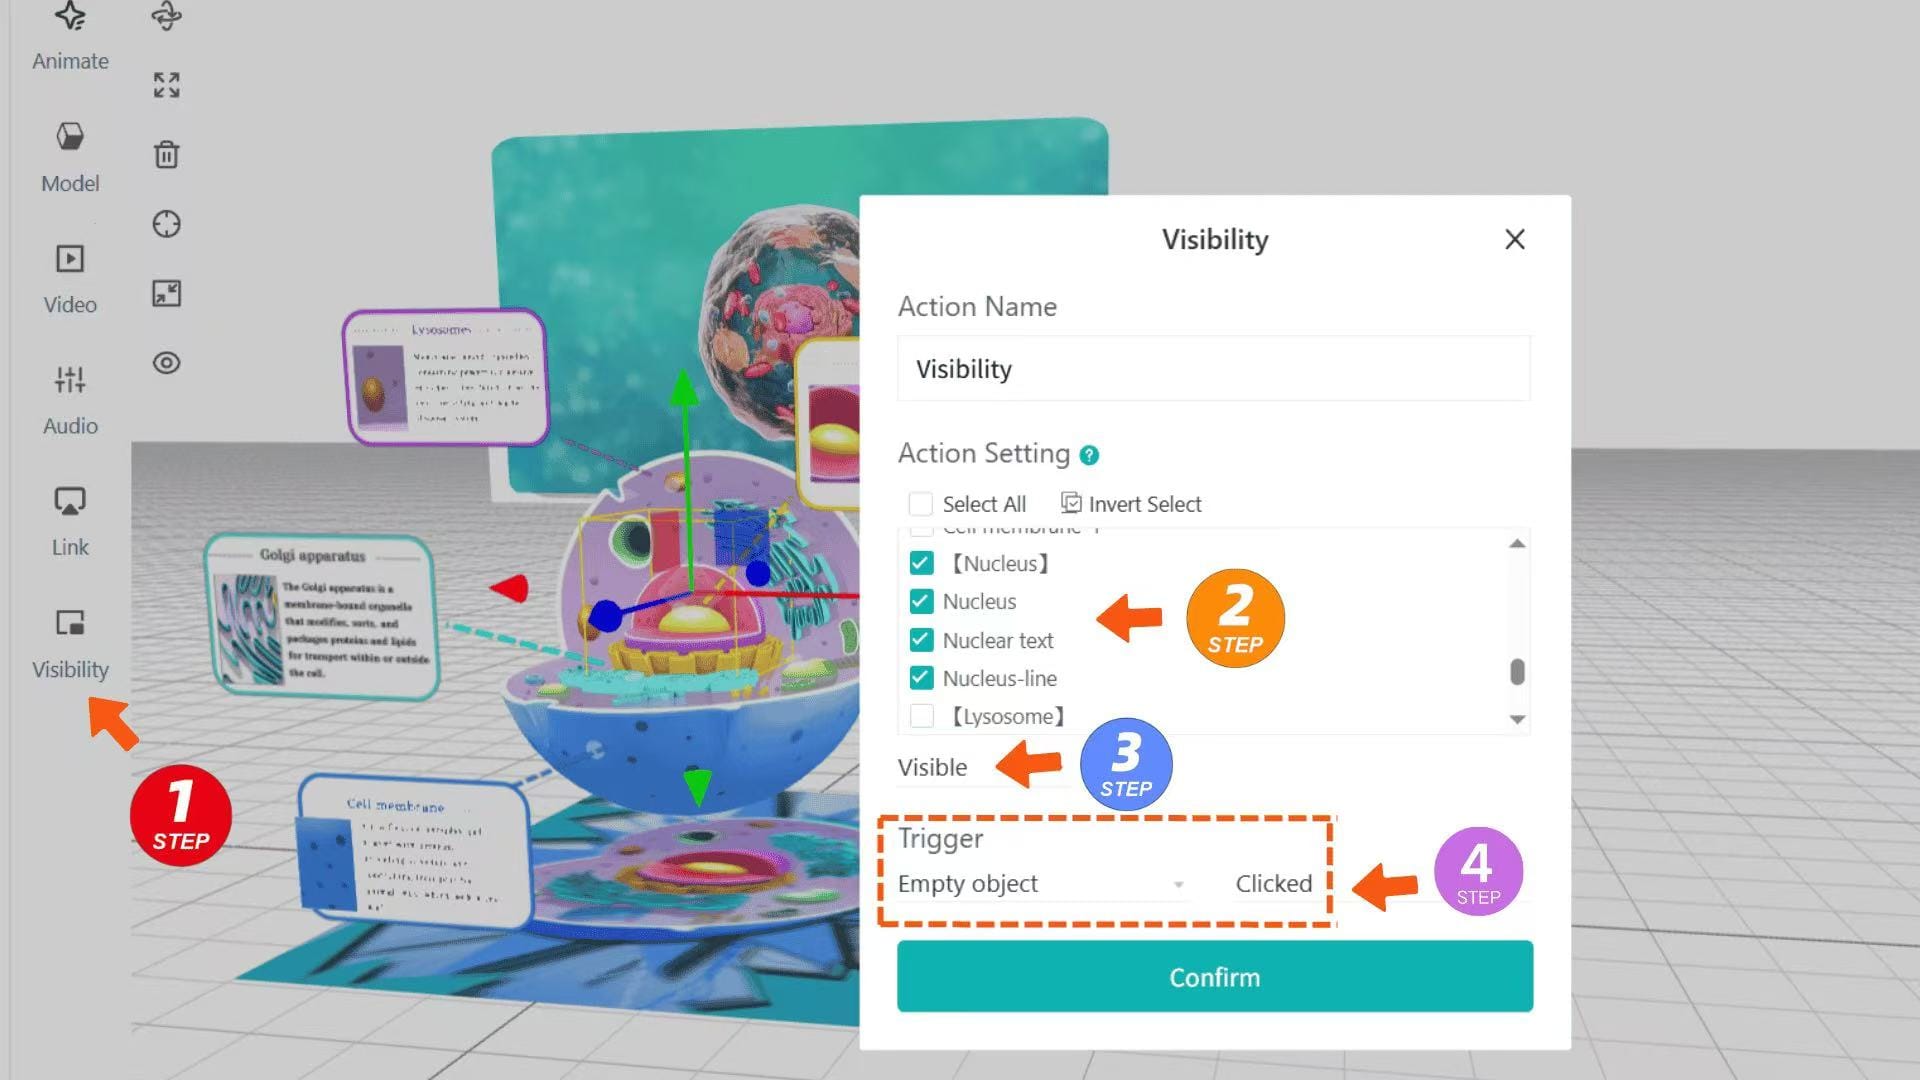
Step 3: Add Click-Interactive AR Effects
Assets dragged into the Kivicube grid editor are considered visible by default.
If you want to display assets according to your requirements, you need to use the Visibility function.
- To display only the cell model after scanning: Click [Visibility], set all assets except the cell model to [Invisible], and select [Tracked] for [Trigger].
- To set up click interactions: Check the assets you want to display in [Visibility], set them to [Visible], select "When an asset is clicked" for [Trigger], and click the corresponding asset to trigger the display of other assets.
- If you find that the POI point is not easy to click during the WebAR experience, you can try associating the AR interaction with an empty object. You can search for [Empty object] in [Model] - [Public] to make the empty object wrap the clickable asset with a larger area. Select "When the empty object is clicked" for the interaction [Trigger]. In this way, the empty object replaces the clickable asset, has a larger click area, and the click will be more successful during the experience.
Step 4: Add Animations to Improve Engagement
Now let’s add animations to your AR card. Kivicube’s custom animation feature is very easy to use.
Select an asset, click the + next to [Animation] on the right, select your favorite animation under the [Enter] type and adjust the parameters.
Note that the animation [Trigger] must be consistent with the interaction [Trigger] of the asset. You can set animations for all assets according to this principle.

How to Publish and Share Your WebAR Learning Experience
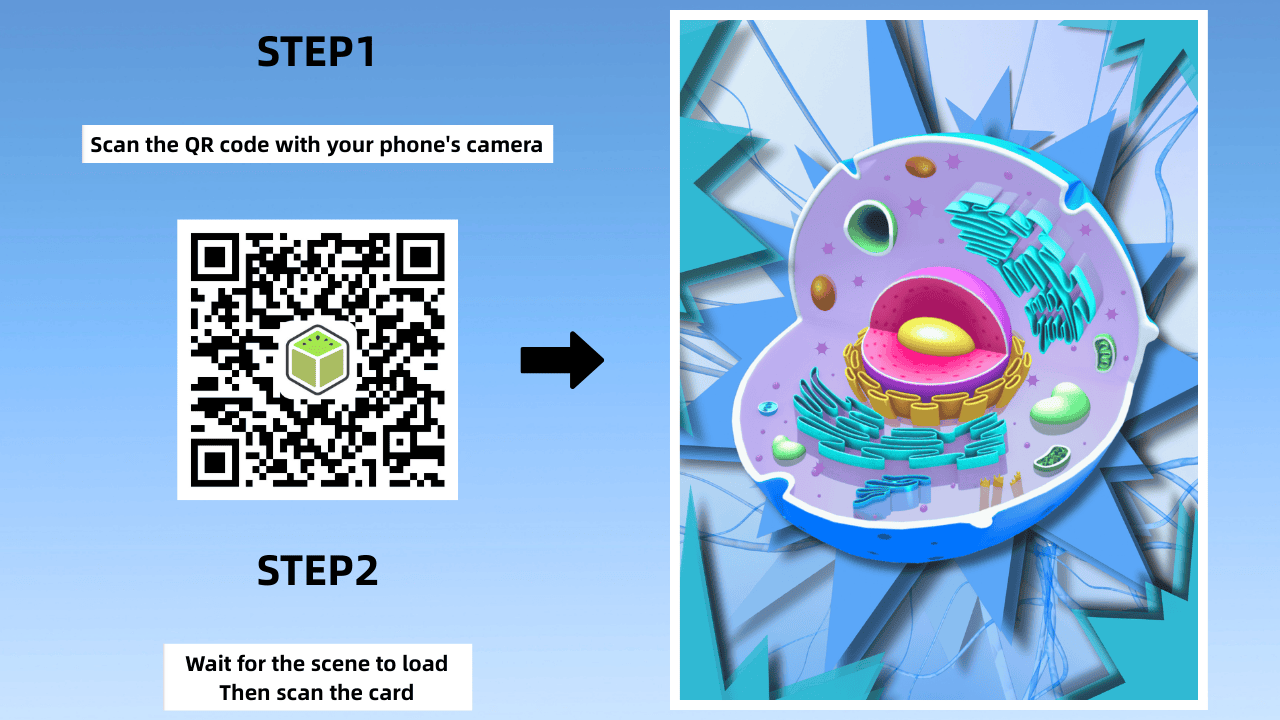
After completion, click [Save] and [Share] to get the experience QR code and link. Scan the QR code and point it at the marker image to experience it, or share the link on social media to let more people see your creation of augmented reality online.
Faster Method: Use a Ready-Made AR Learning Template
The fastest way to make an AR card is to use a Kivicube template and replace the assets directly.
Search for [AR Animal Cell Card] in the top-right corner of the Kivicube template library to quickly find the ready-made template.
Click [Duplicate], name the scene, and you will enter the ready-made scene.
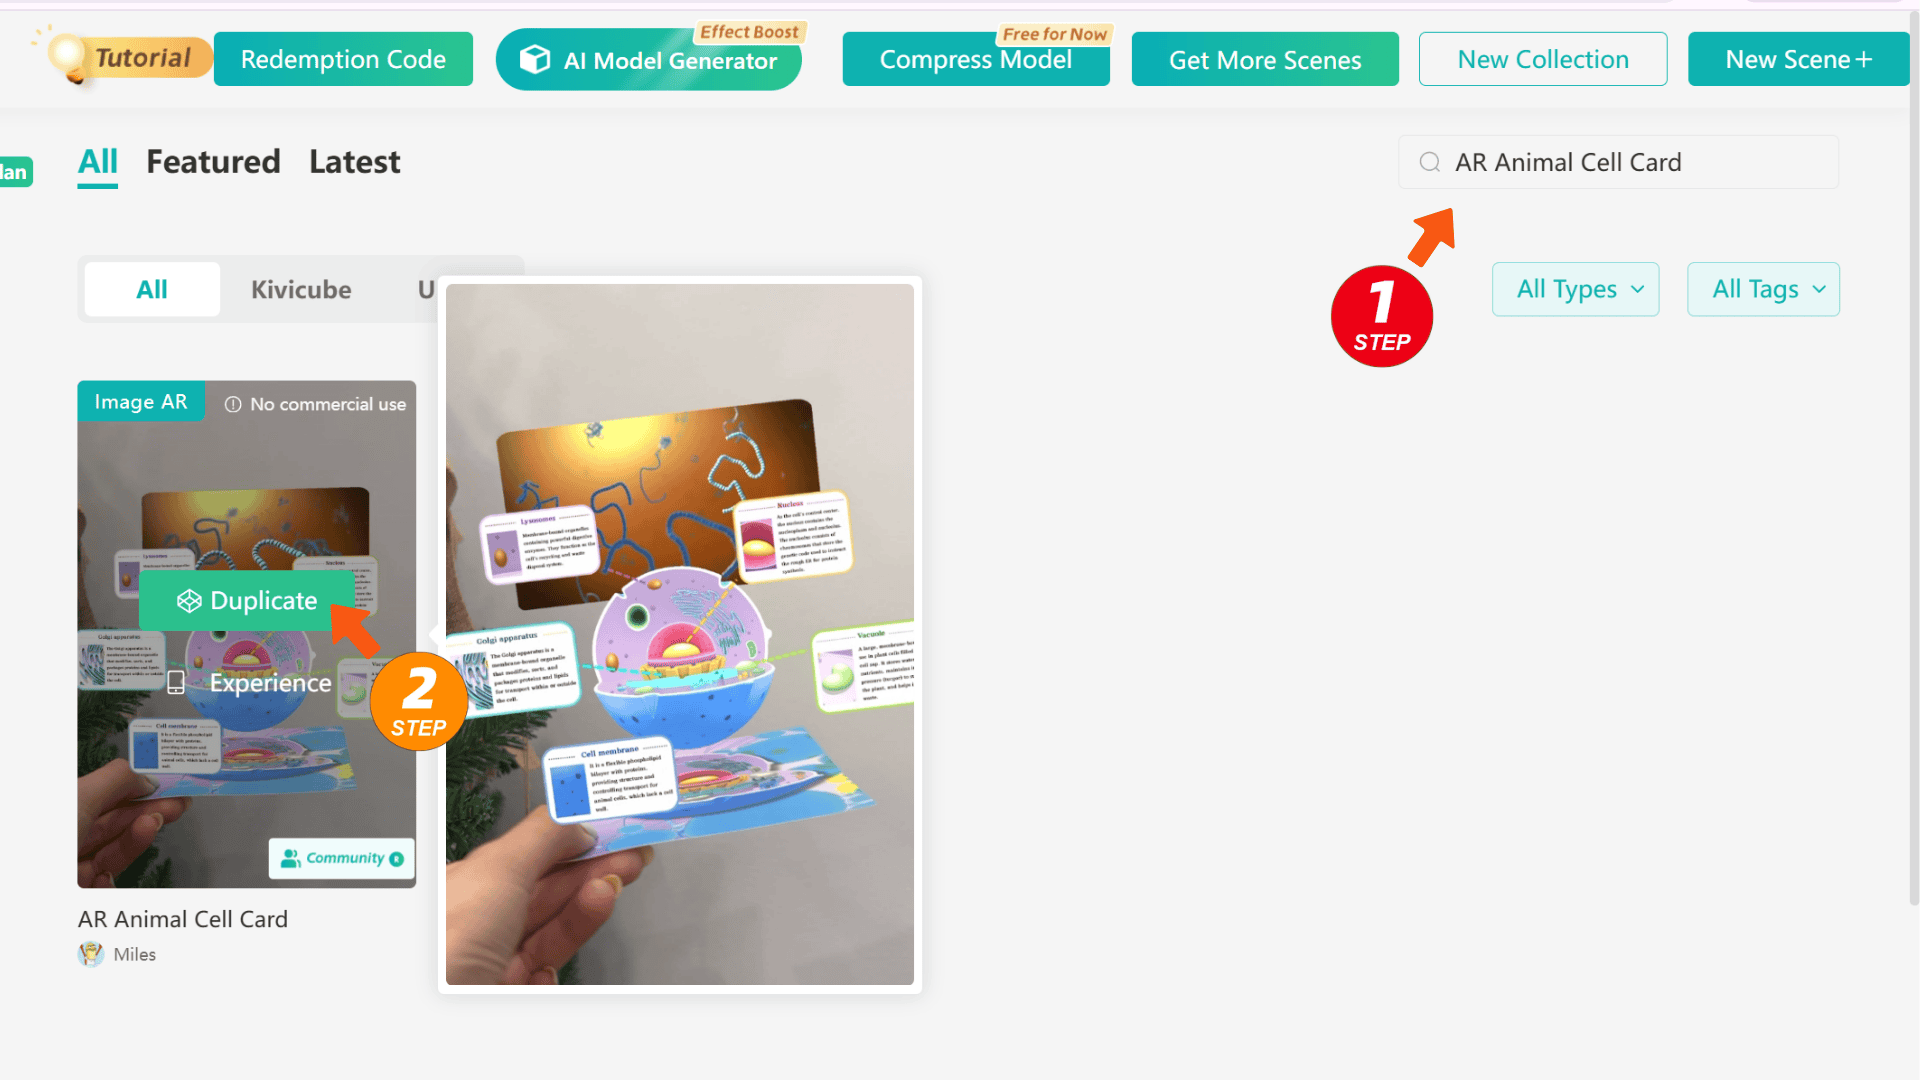
Select the asset you want to modify, drag your own asset here to replace it, and adjust the position with [Transform tools].
You will have your own AR card in no time!
FAQ About AR Learning with WebAR
Q: What should I do if I encounter problems while using Kivicube?
A: Welcome to join our Discord community. Our staff and enthusiastic creators will answer your questions.
Q: Can I experience the webAR content I created on a tablet?
A: Yes, Kivicube not only supports experiencing on tablets but also allows direct creation on tablets.
Q: How long can my AR education card be saved? Will it suddenly become inaccessible?
A: No matter which version of the Kivicube account you have, as long as the scene is not deleted, it can be experienced permanently.
Q: Will modifying the content of the scene change the experience link after my AR education card is completed?
A: No. Once the scene is created, your experience link and QR code are fixed and will not change.
Q: What skills do I need to master to use Kivicube well?
A: It is very simple to create AR scenes with Kivicube. Beginner users do not need any foundation. If you have basic modeling and front-end development skills, you can control more complex interactions.
Final Thought
An interactive AR card turns learning from "reading text" to "exploring the world", which can better guide students to actively explore knowledge.
Of course, the combination of AR with picture books and textbooks also has a very good effect. If you happen to need to create AR book content related to textbooks, you can watch our equally detailed and exquisite tutorial here:
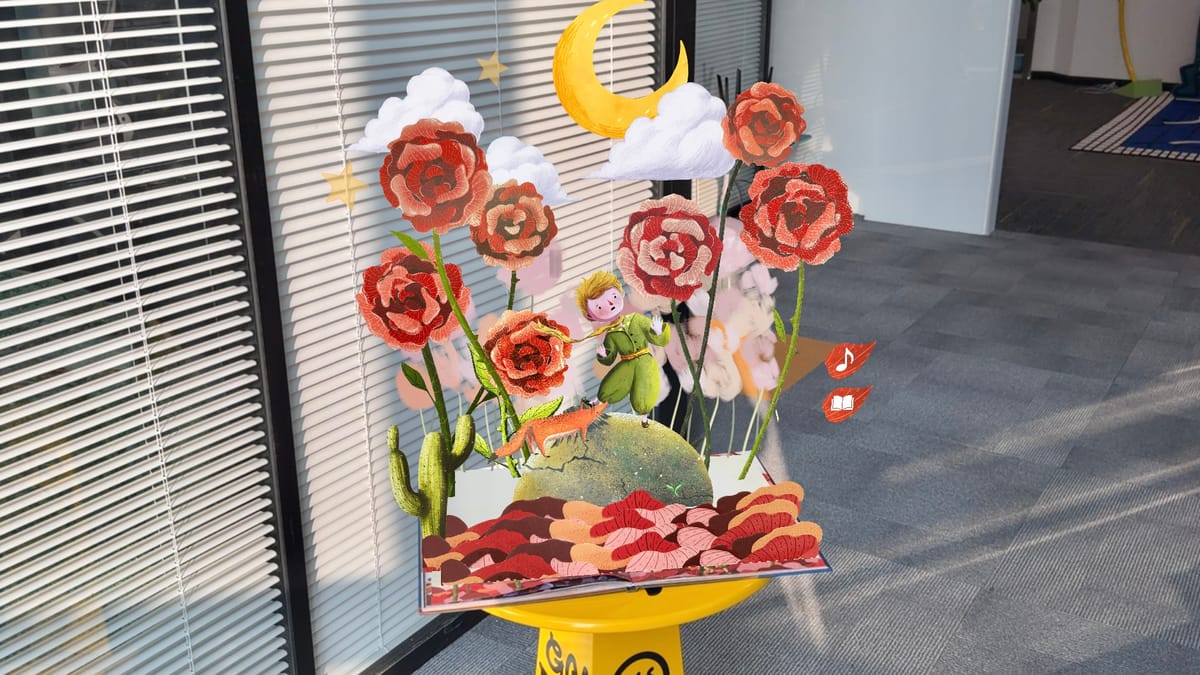
Step-by-Step Tutorial: How to Create an AR Storybook
Log in to Kivicube now and start creating your first AR card!