How to Create Eye-Catching AR Menus Simply from an Image?
AR menus have become essential among restaurants. Instead of reading static and monotonous menus, customers now can directly view dishes in a much more engaging and interactive 3D format on their devices without any app required.
Research from Washington State University confirms that AR-enhanced menus significantly increase customer engagement and purchase interest, making them effective to convey dish information and influence customers’ intention to visit restaurants.
In this tutorial, you’ll learn how to create your own interactive AR menu with a no-code WebAR platform.
Benefits of AR Menu
AR menus are favored by both diners and restaurants over traditional menus for these advantages:
- Speed up ordering decisions: It provides rich practical info like reviews and ratings for quicker, assured purchases
- Make waiting enjoyable: Instead of a tedious wait for the dishes, users can interact with the immersive 3D AR menu scene right with their phones.
- Reduce dishes return rate: The ingredients and allergens in the dishes can be transparent in the AR menu, so restaurants can be free of explaining the dish details and avoid dishes return.
- Drive social sharing: Unique AR experience motivates users to post online, boosting restaurant exposure naturally
Convert Any Menu Image to Interactive AR Scene
Watch the step-by-step tutorial video below to explore advanced workflows, creative ideas, and practical tips for building an interactive AR menu. Once you understand the basics, you can start designing your own customized AR dining experience with ease.
Video Tutorial of AR Menu Creation
How Can You Make an Interactive AR Menu with Kivicube?
Now it’s time to learn how to make an immersive 3D menu using the powerful AR creator app online - Kivicube step by step.
Before making your food augmented reality scene, please first prepare your assets, including 3D models, food images, audio, GIFs and videos.
>> If you want a fast AR menus generation, just search the menu template in the dashboard and hit “Duplicate”, then you can replace the elements you want (image, 3d model, etc.) and make a simple edit for your own AR menu. Please notice that the replacement function works on the same type of assets, such as image-to-image and model-to-model.
If the templates cannot entirely meet your needs, you can also generate one from scratch - totally from your own ideas. Let’s explore how to work on it.
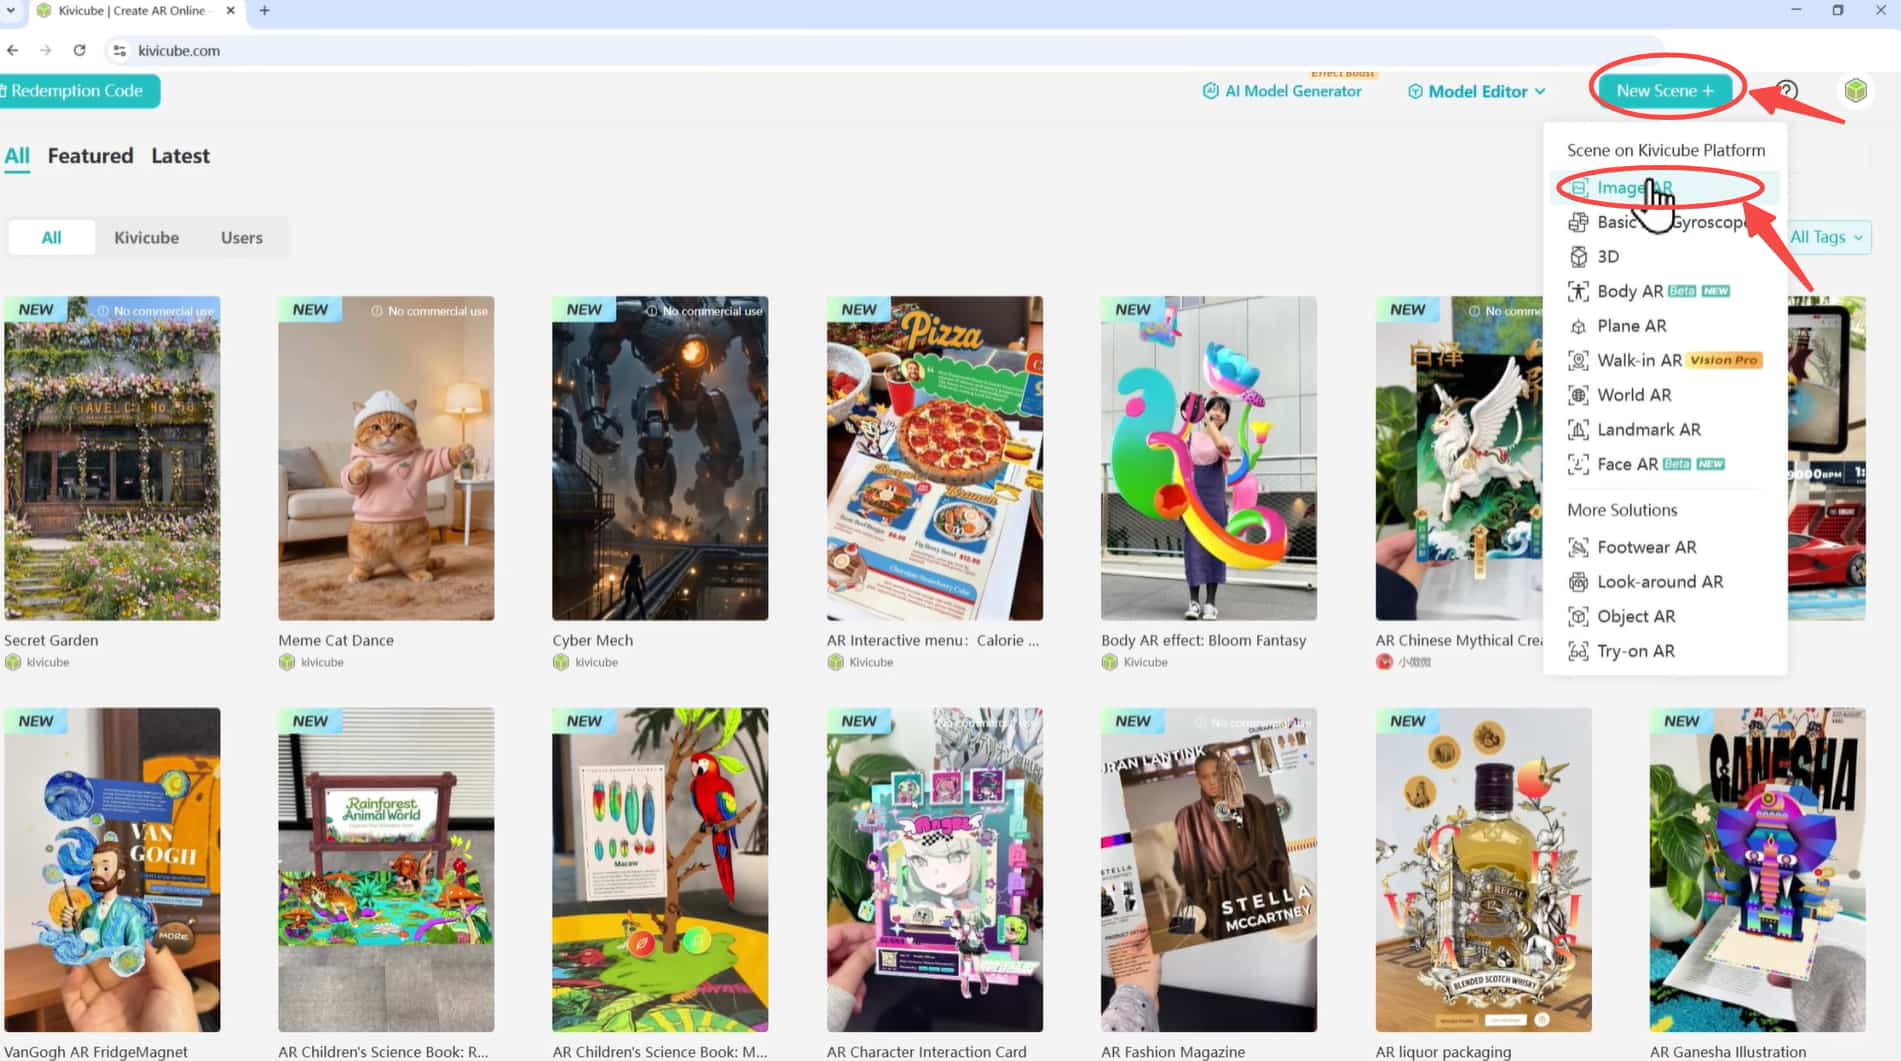
Step 1. Create a New Image AR Scene in Kivicube
Sign up for free with a new account and log in to Kivicube.
Click “New Scene+” in the top right corner of the page, choose “Image AR”, name the scene and upload the menu target image.
Step 2. Upload & Position Menu Assets
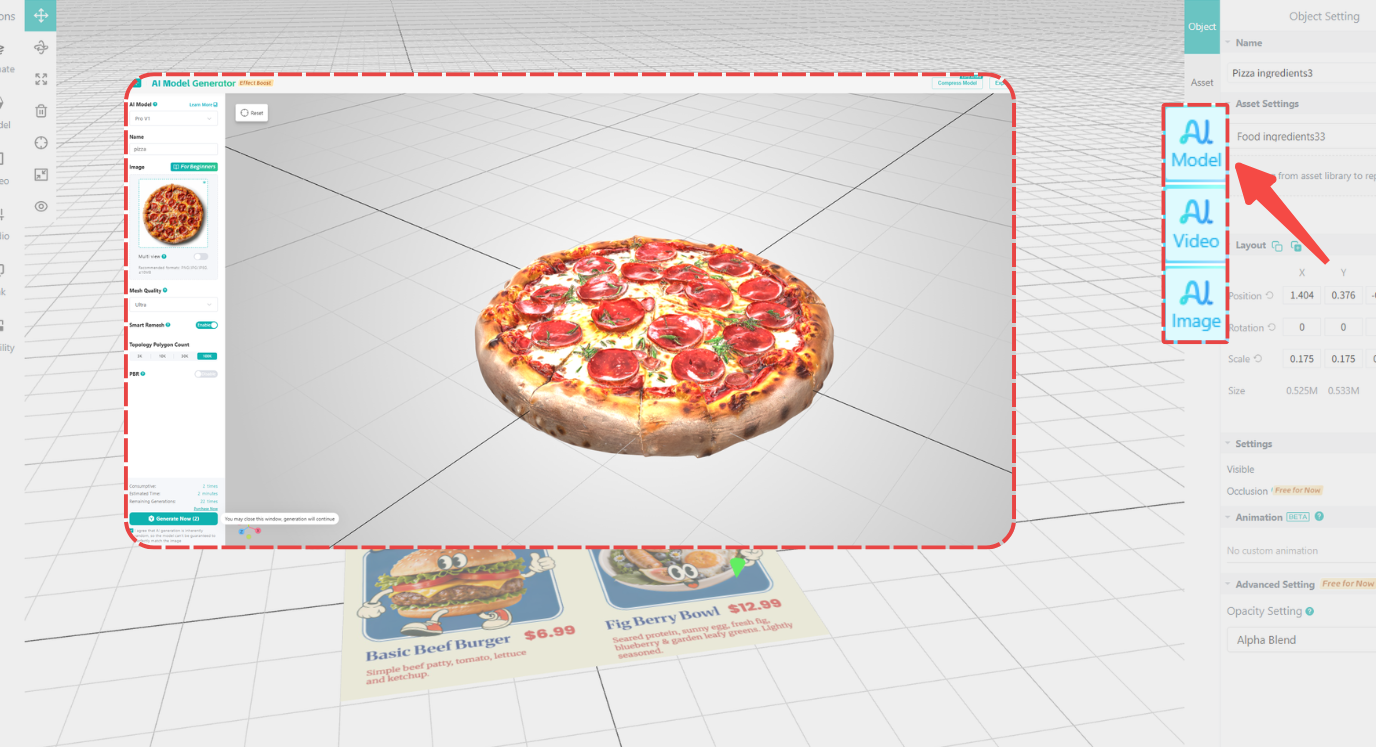
Upload your assets in different types from your device or select assets directly from the built-in asset library. You can upload your own 3D assets to the content editor to adjust it for a better result.
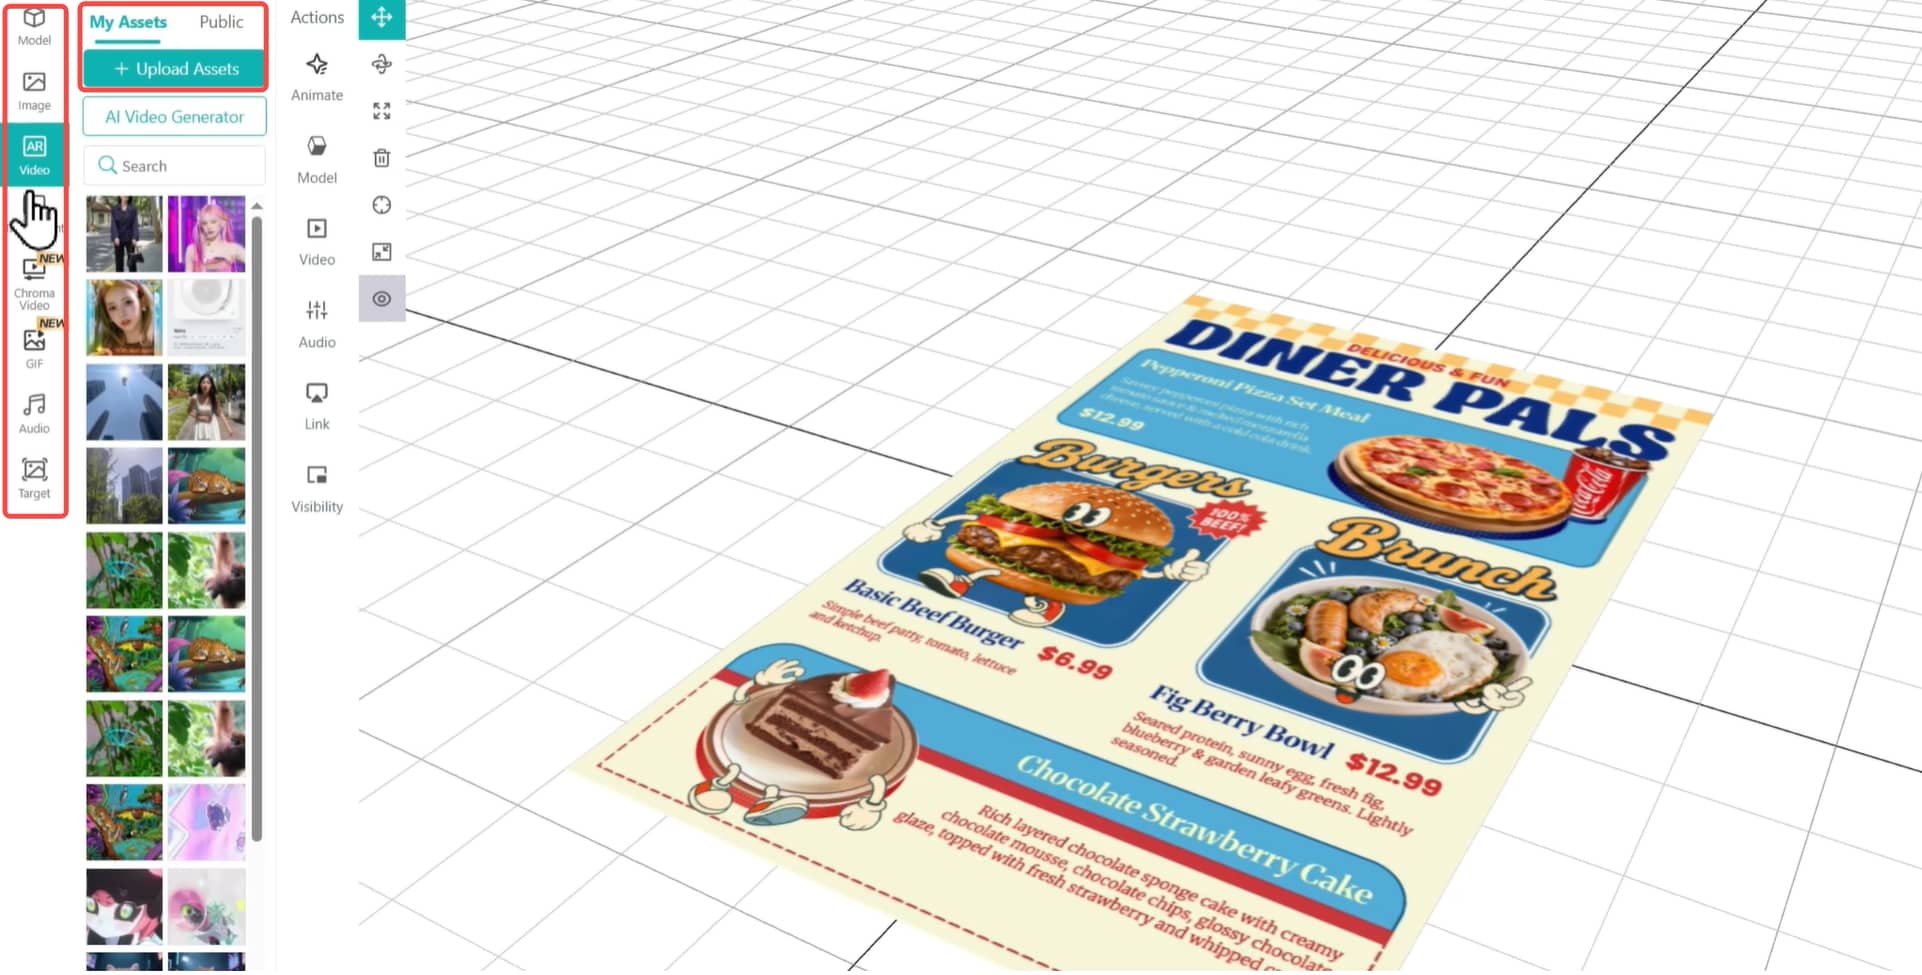
Tip: When you have no better ideas on the assets, you might as well try the Gen AI generators which can create image, model and video assets from prompts.
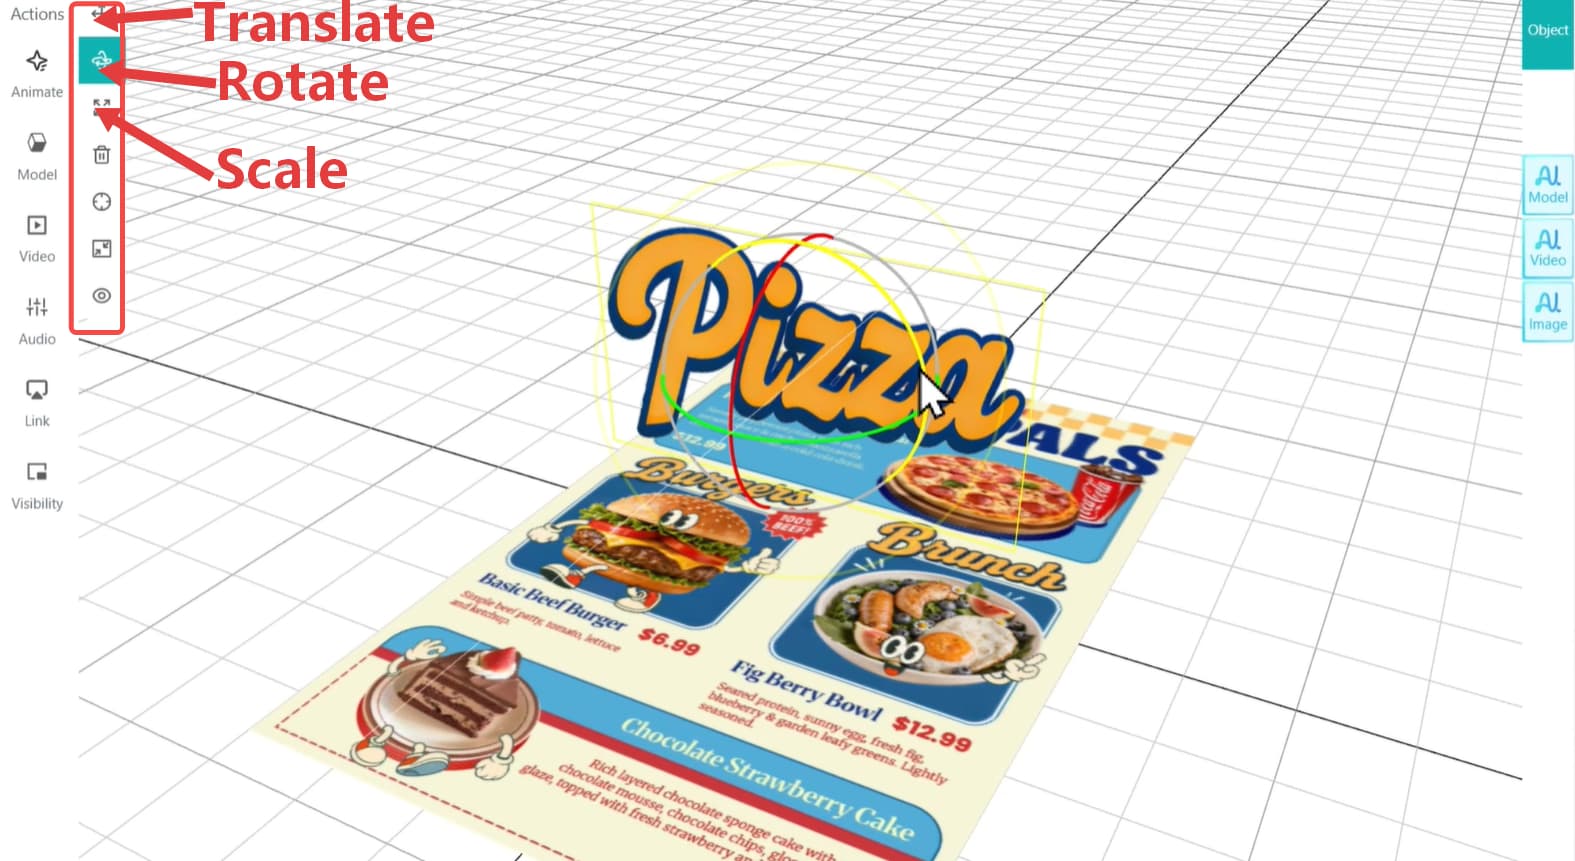
Drag and drop the assets to the grid editor, then adjust the food assets with the Transform tools, changing the size, rotation and position in detail.
Note: To better arrange assets in the grid editor, you can hit “Group” on the top and “Composite” to create asset groups.
Step 3. Put in Clickable AR Effects
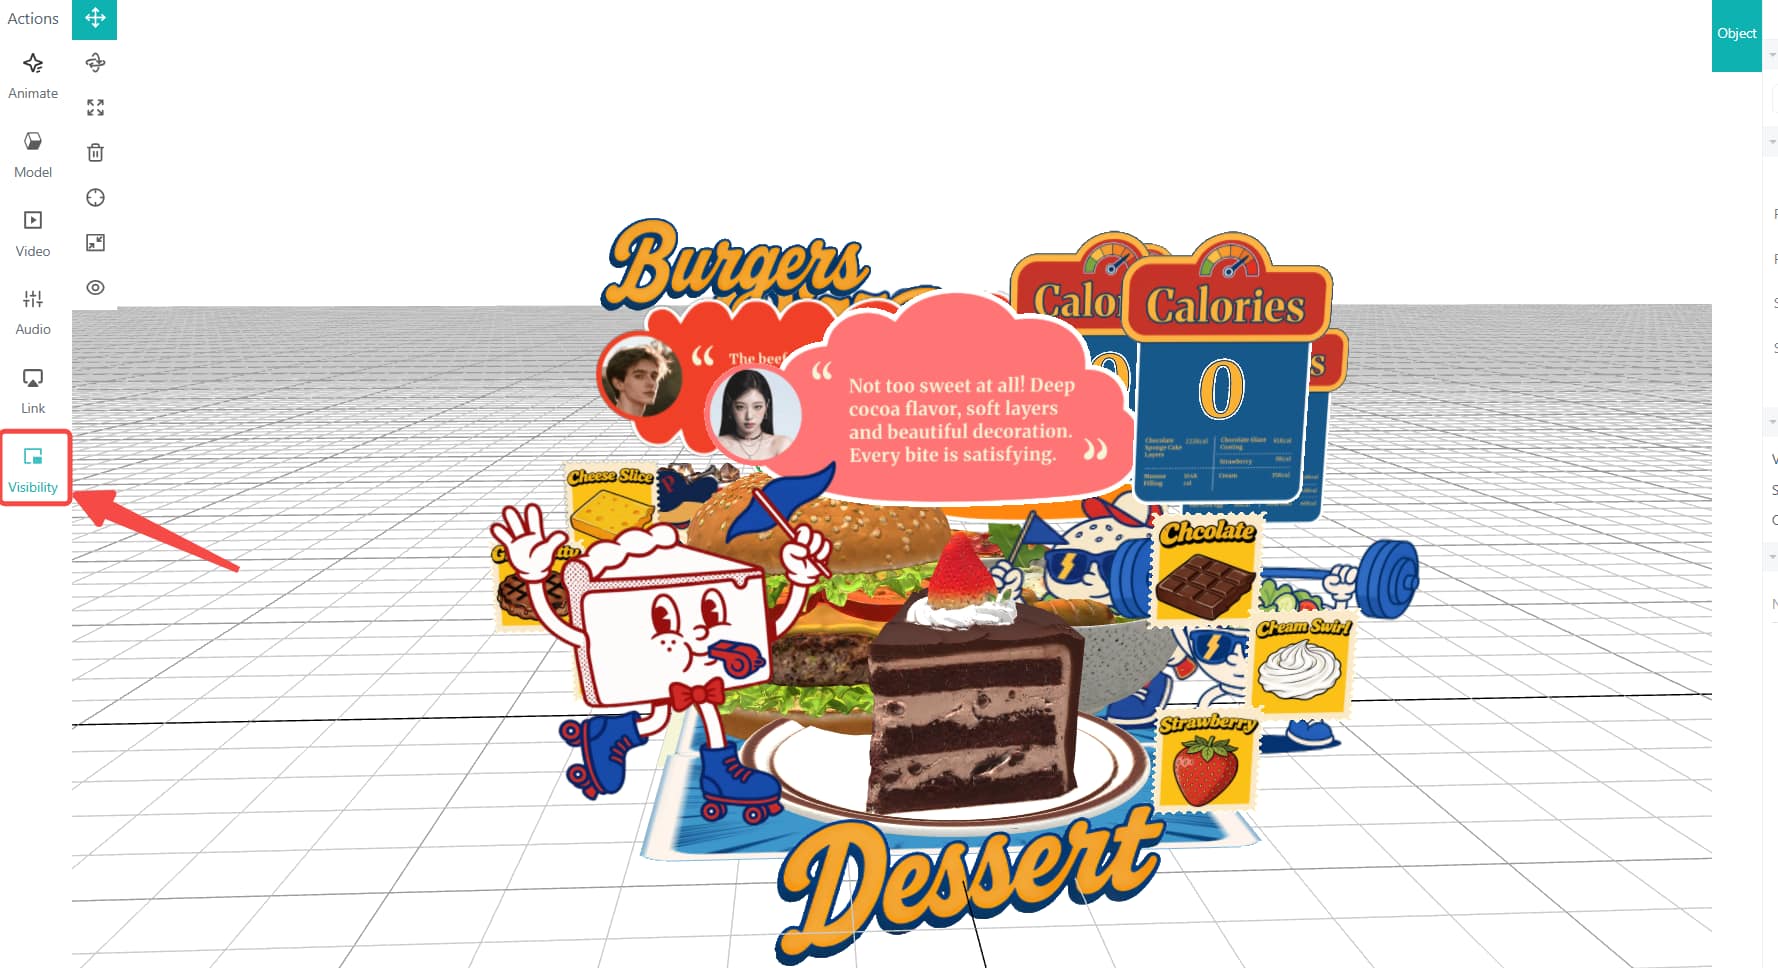
Assets on the viewpoint of Kivicube grid editor are visible by default, so if you want to display assets according to your current needs, try the "Visibility" function.
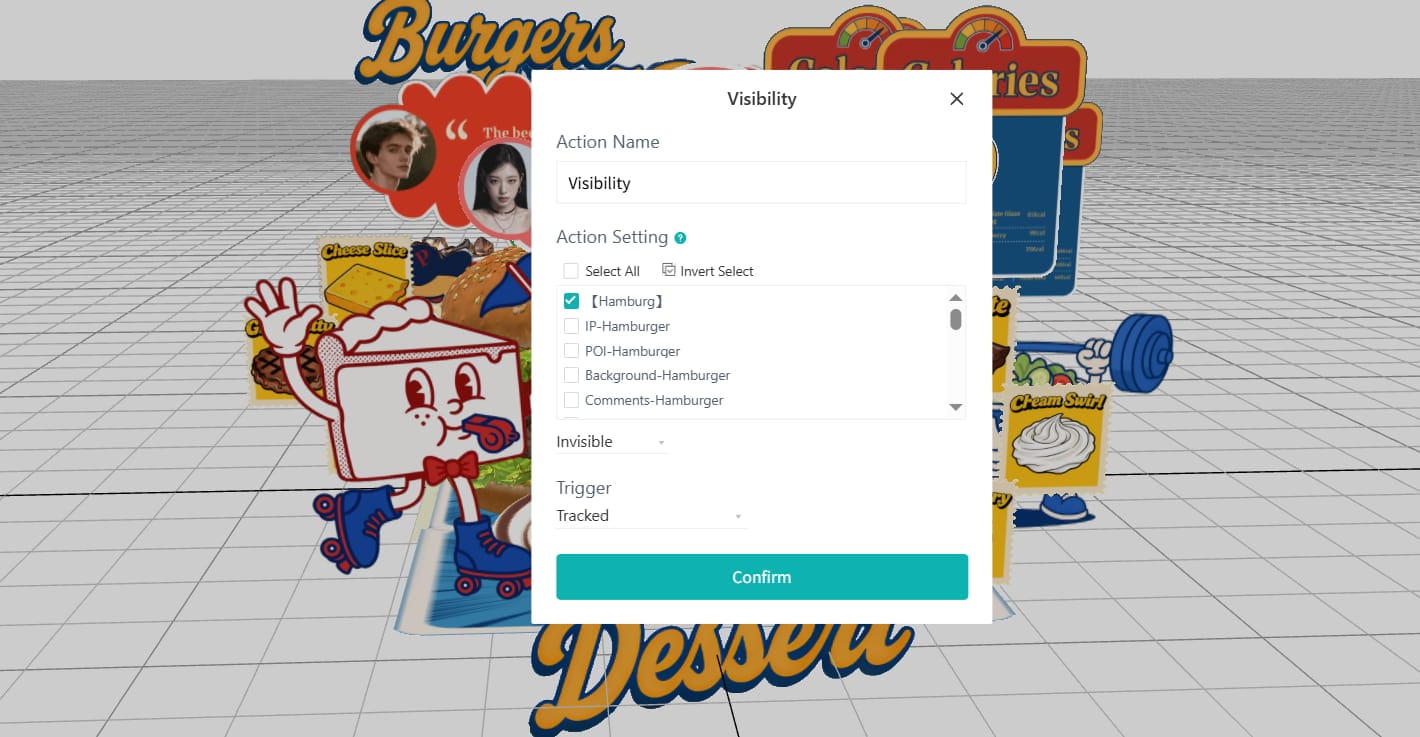
To display only the one asset group after scanning, you can click "Visibility", set all assets except the group to "Invisible", and select the "Tracked" option under "Trigger".
Next, we’ll go for POI point-touching interaction settings.
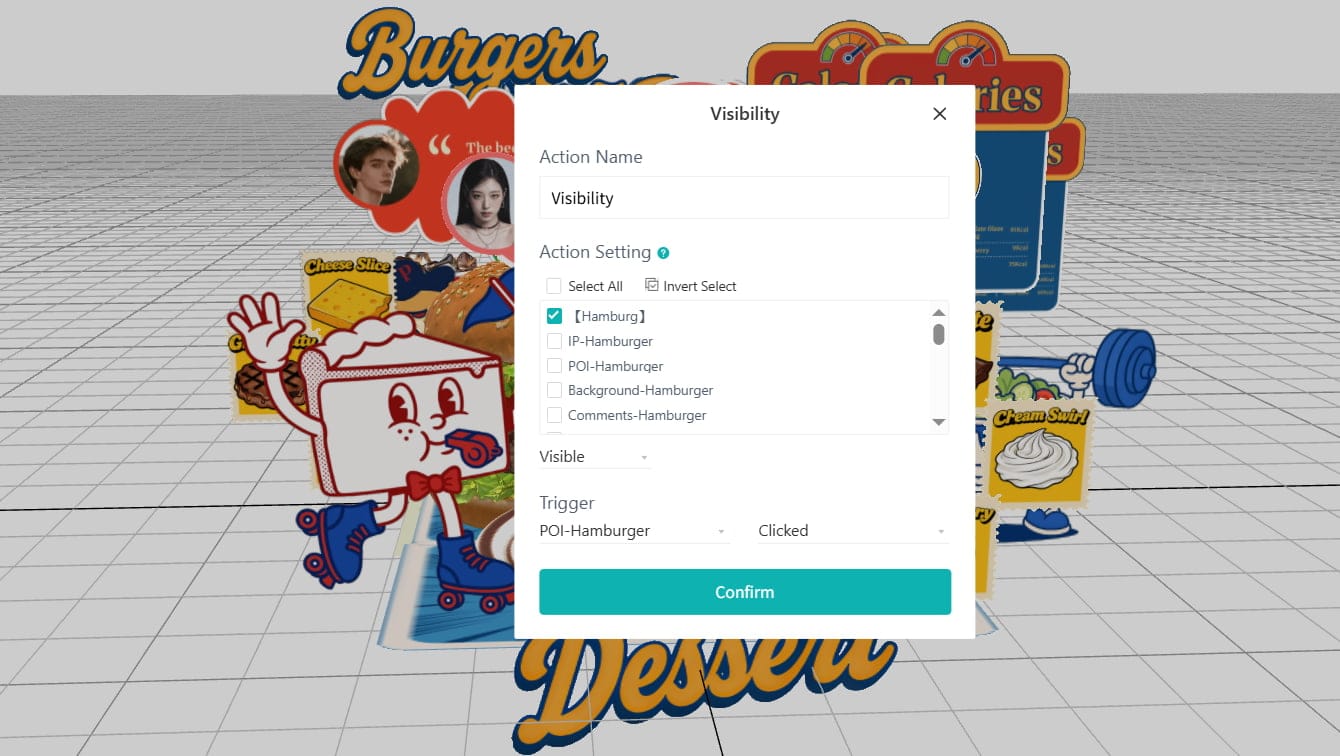
If you want to show the hamburger group display when tapping a POI point, click “[Hamburger]” asset group > set it to “Visible” > select “POI-Hamburger” and “Clicked” as the trigger.
To make the interaction cleaner, you need to select the other dishes as invisible using the same POI-Hamburger clicked trigger.
You can then set the rest dishes just like you did with the Hamburger group for the POI triggered appearance for an engaging experience.
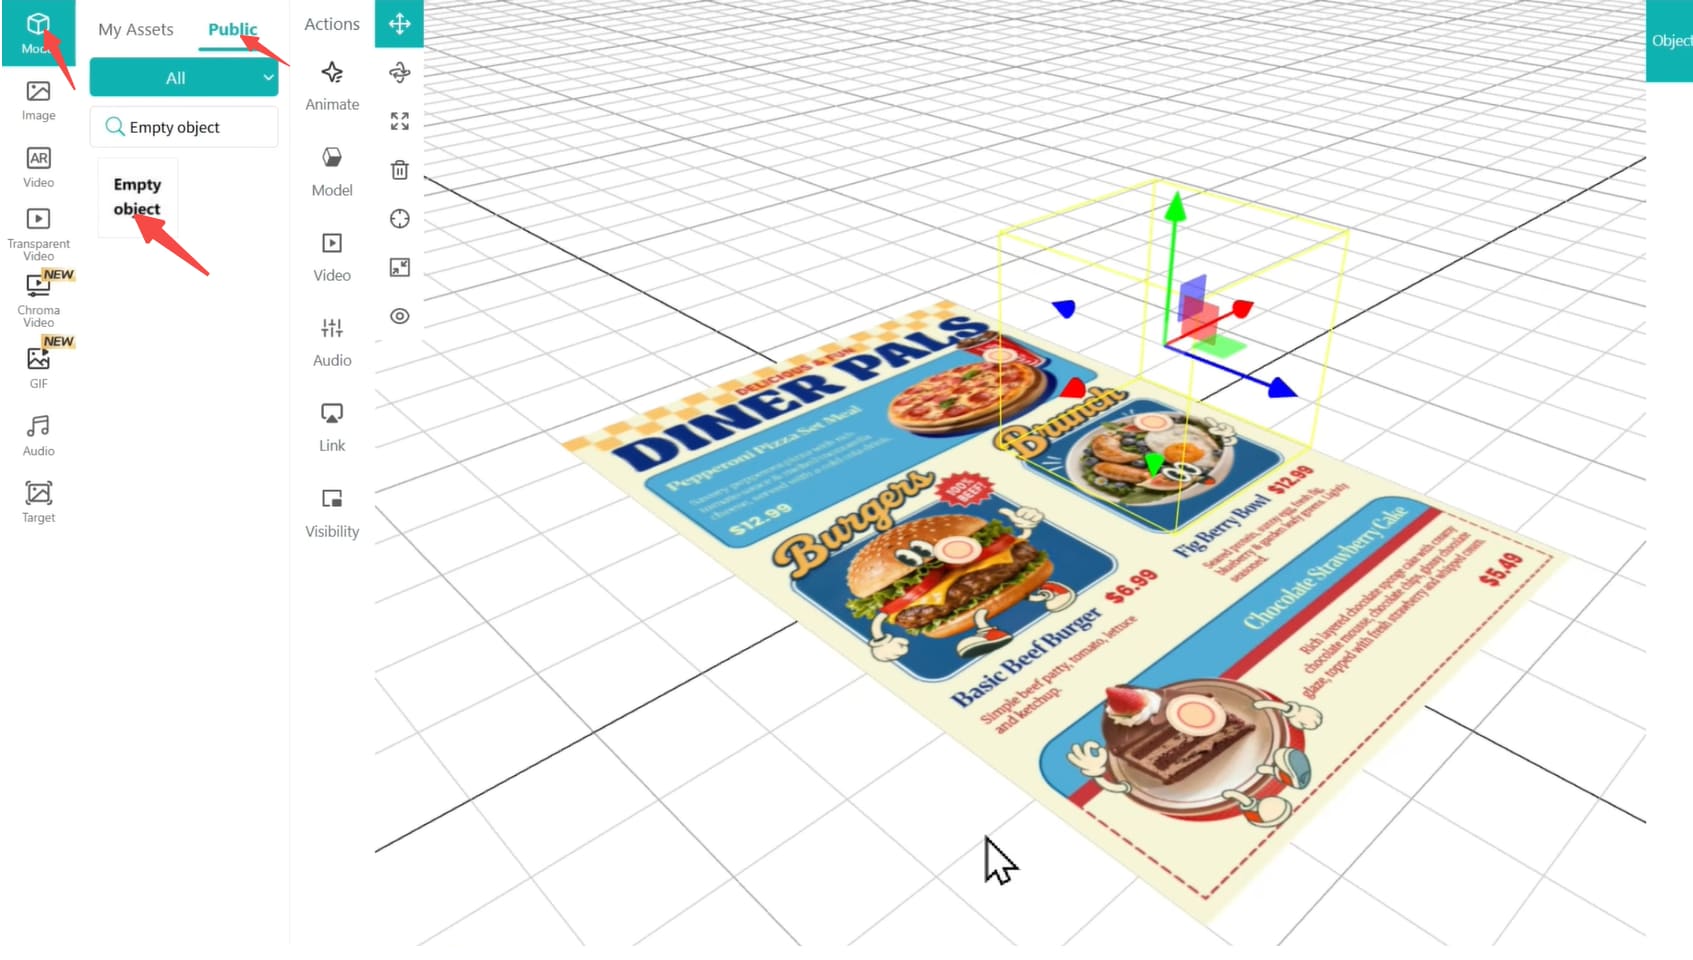
Note: If there's a large 3D dish nearby POI buttons and makes them difficult to tap, you can go to "Model" > "Public", search and add an "Empty Object" to the scene. Place it over the POI target area, then use it as the clickable trigger for the target group. Since the object is invisible but easier to tap, it helps improve the interaction experience on mobile devices.
Step 4. Add More Interactive Animations
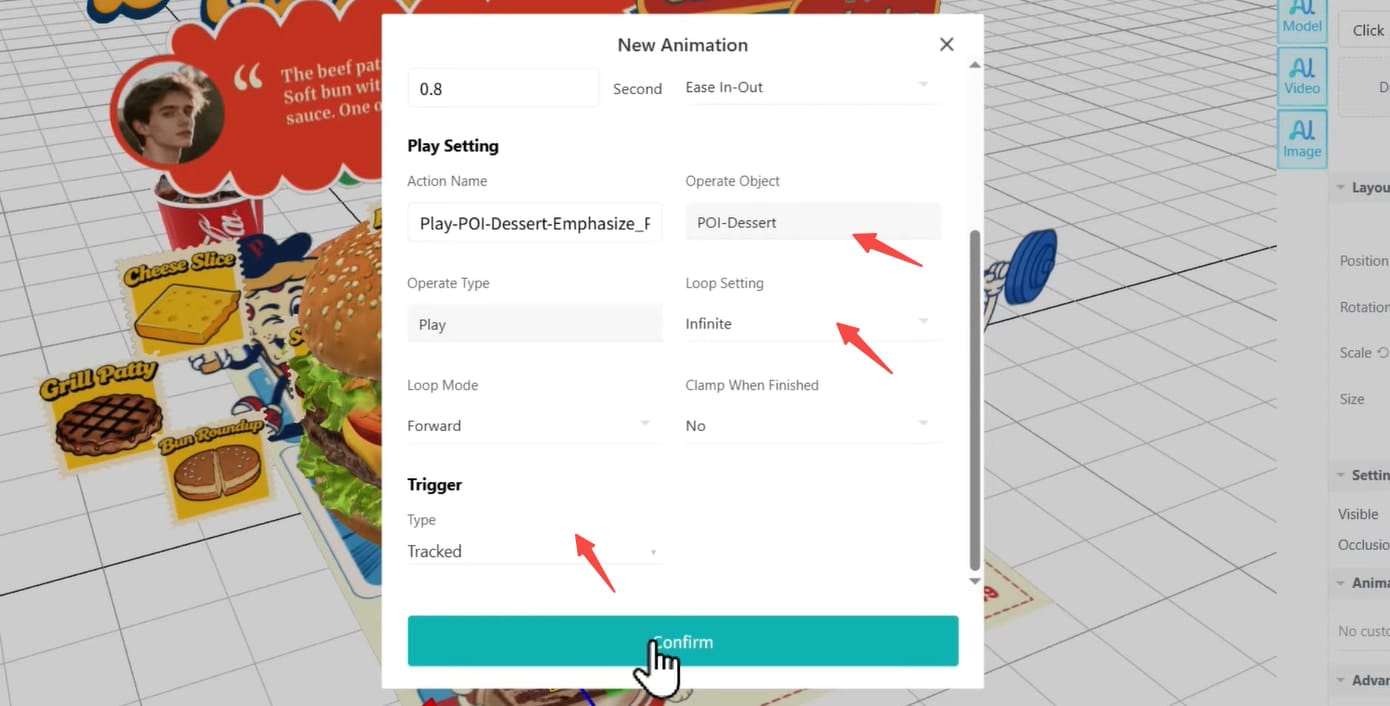
To better attract the customers with funny visual effects, captivating animations are required. First, select the POI points in the scene and click the “+” icon next to “Animation” in the right sidebar. Choose “emphasize”, “Pause”, “Infinite” and “Tracked” in the popup. Then your POI points appear with animation once the menu image is scanned.
Similarly, you can add animations to the dishes with ease. Take Pizza as a case, select it and hit “+” next to “Animation”, then select “Pop Up” and “Empty object-pizza” clicked in the new window.
Continue to add a new animation, select “Emphasize”, “Rotate”, then set speed of spinning under the “Duration” and choose “Infinite” to make it loop. Set the trigger to the same empty object-pizza clicked.
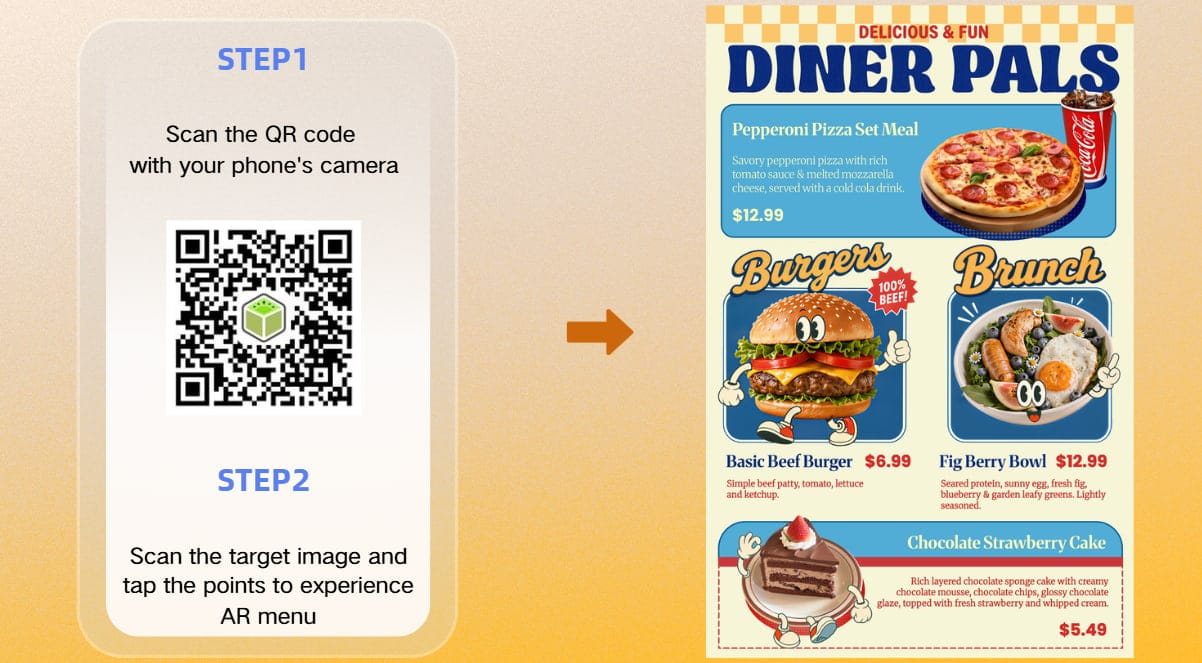
Step 5. Save and Share Your AR Menu
When everything is done, click “Save” and followed by “Share” to get the code and link for sharing. Scan the QR code and track your menu to see how it comes to life with engaging effects.
Why Kivicube for an AR Menu
Kivicube is a cutting-edge augmented reality generator transforming how restaurant owners display their food. Here are what it provides:
- 100% free to create AR menus with no coding needed
- Pre-built templates and exclusive assets for fast food AR production
- Easy-to-use visual editor, letting beginners make 3D restaurant menus effortlessly
- Built-in GenAI tools to generate original AR images, videos and 3D models
- Support fast cross-platform release, share WebAR menus via links or embed into apps
Augmented Reality Menu FAQs
Q: What is an AR menu?
A: It is an interactive menu that enables people to view the 3D version of the dishes on their devices before placing an order.
Q: Why do restaurants use Augmented Reality menus?
A: The augmented reality menus enable users to visualize allergic ingredients, portion size and other details instead of guessing the dishes just from the description, drastically leveling up users’ dining experience and merchants’ sales within a 3D restaurant.
Q: Do I need coding skills to make an AR menu?
A: No, with the powerful augmented reality generators like Kivicube, you can easily drag and drop to create a digital restaurant menu without coding.
Q: Do I need to download an app for AR menu creation?
A: No. Kivicube is a Web-based AR menu creating platform which supports people to make their AR menus directly online. With tools like it, you can not only make an augmented reality menu but also experience it just in a browser.
If you want to explore other augmented reality marketing ideas instead of AR menu, don’t miss this article:
To Sum Up
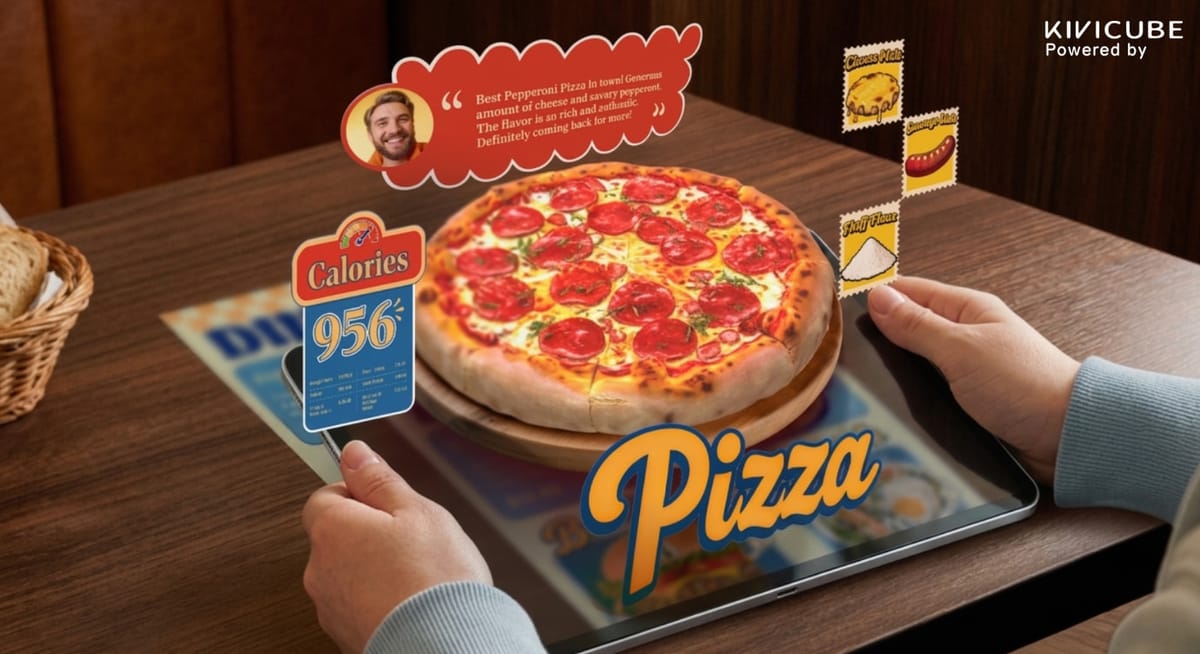
AR menus are now changing the restaurant industry. Restaurant menus are getting as interactive and engaging as enough to encourage people to select the food they are most interested in. With Kivicube, everyone can easily display the 3D food models and other information such as ingredients and calories, attracting the customers to quickly decide which dishes for a deal.