English
Appearance
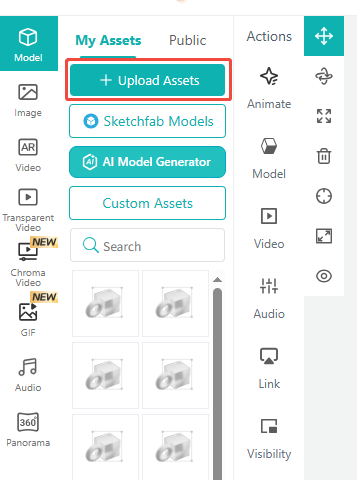
Scene Editor — Upload Assets
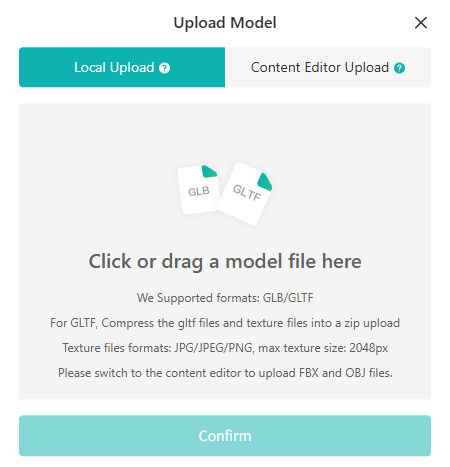
Supported model formats: GLB, GLTF, OBJ, FBX. GLB format is strongly recommended. For GLTF, FBX, and OBJ files, package the model together with its textures into a single ZIP archive before uploading.
Supported image formats: JPG, JPEG, PNG. Maximum resolution: 2048 px.
Recommended upload file size: ≤ 10 MB; optimal: ≤ 5 MB; hard limit: 30 MB.
Newly uploaded models will appear at the top of the asset library. Drag them into the viewport on the right to add them to the current scene.
The Scene Editor controls adjustments that directly affect the end-user experience. There are two critical settings to configure first.
When creating a new scene, you'll first be asked to select an engine version. This can be changed later, but should be adjusted based on the feature support shown below.
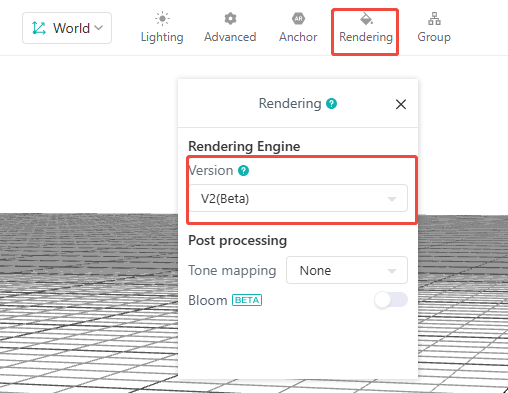
| Version | Supported Features | Platform Support |
|---|---|---|
| v1 | PBR, Unlit | Web, Wechat Mini-Program |
| v2 | PBR, Unlit, Clearcoat, Anisotropy, Sheen, Specular, Transmission, IOR, Dispersion, Iridescence | Web |
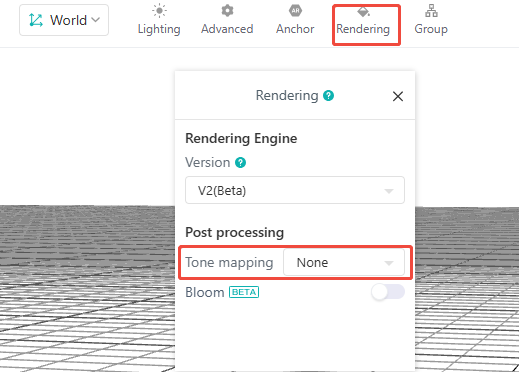
| Type | Effect |
|---|---|
| None | No tone mapping applied. Highlights are prone to overexposure and color bleeding. |
| Linear | Uses linear mapping. Visual result is the same as None. |
| ACES | Uses ACES tone mapping. Reduces highlight overexposure and produces smoother highlight roll-off with more retained detail, but introduces a slight color shift. |
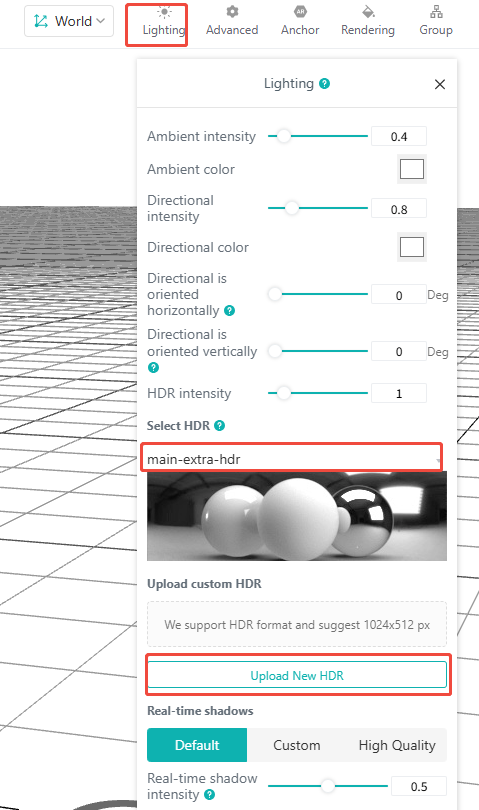
The scene includes a default light setup and HDRI by default. You can switch to a different built-in HDRI environment and adjust based on the desired result. You can also upload your own custom HDRI. If you want the scene to be lit entirely by the HDRI environment, set both the ambient light intensity and directional light intensity to 0.
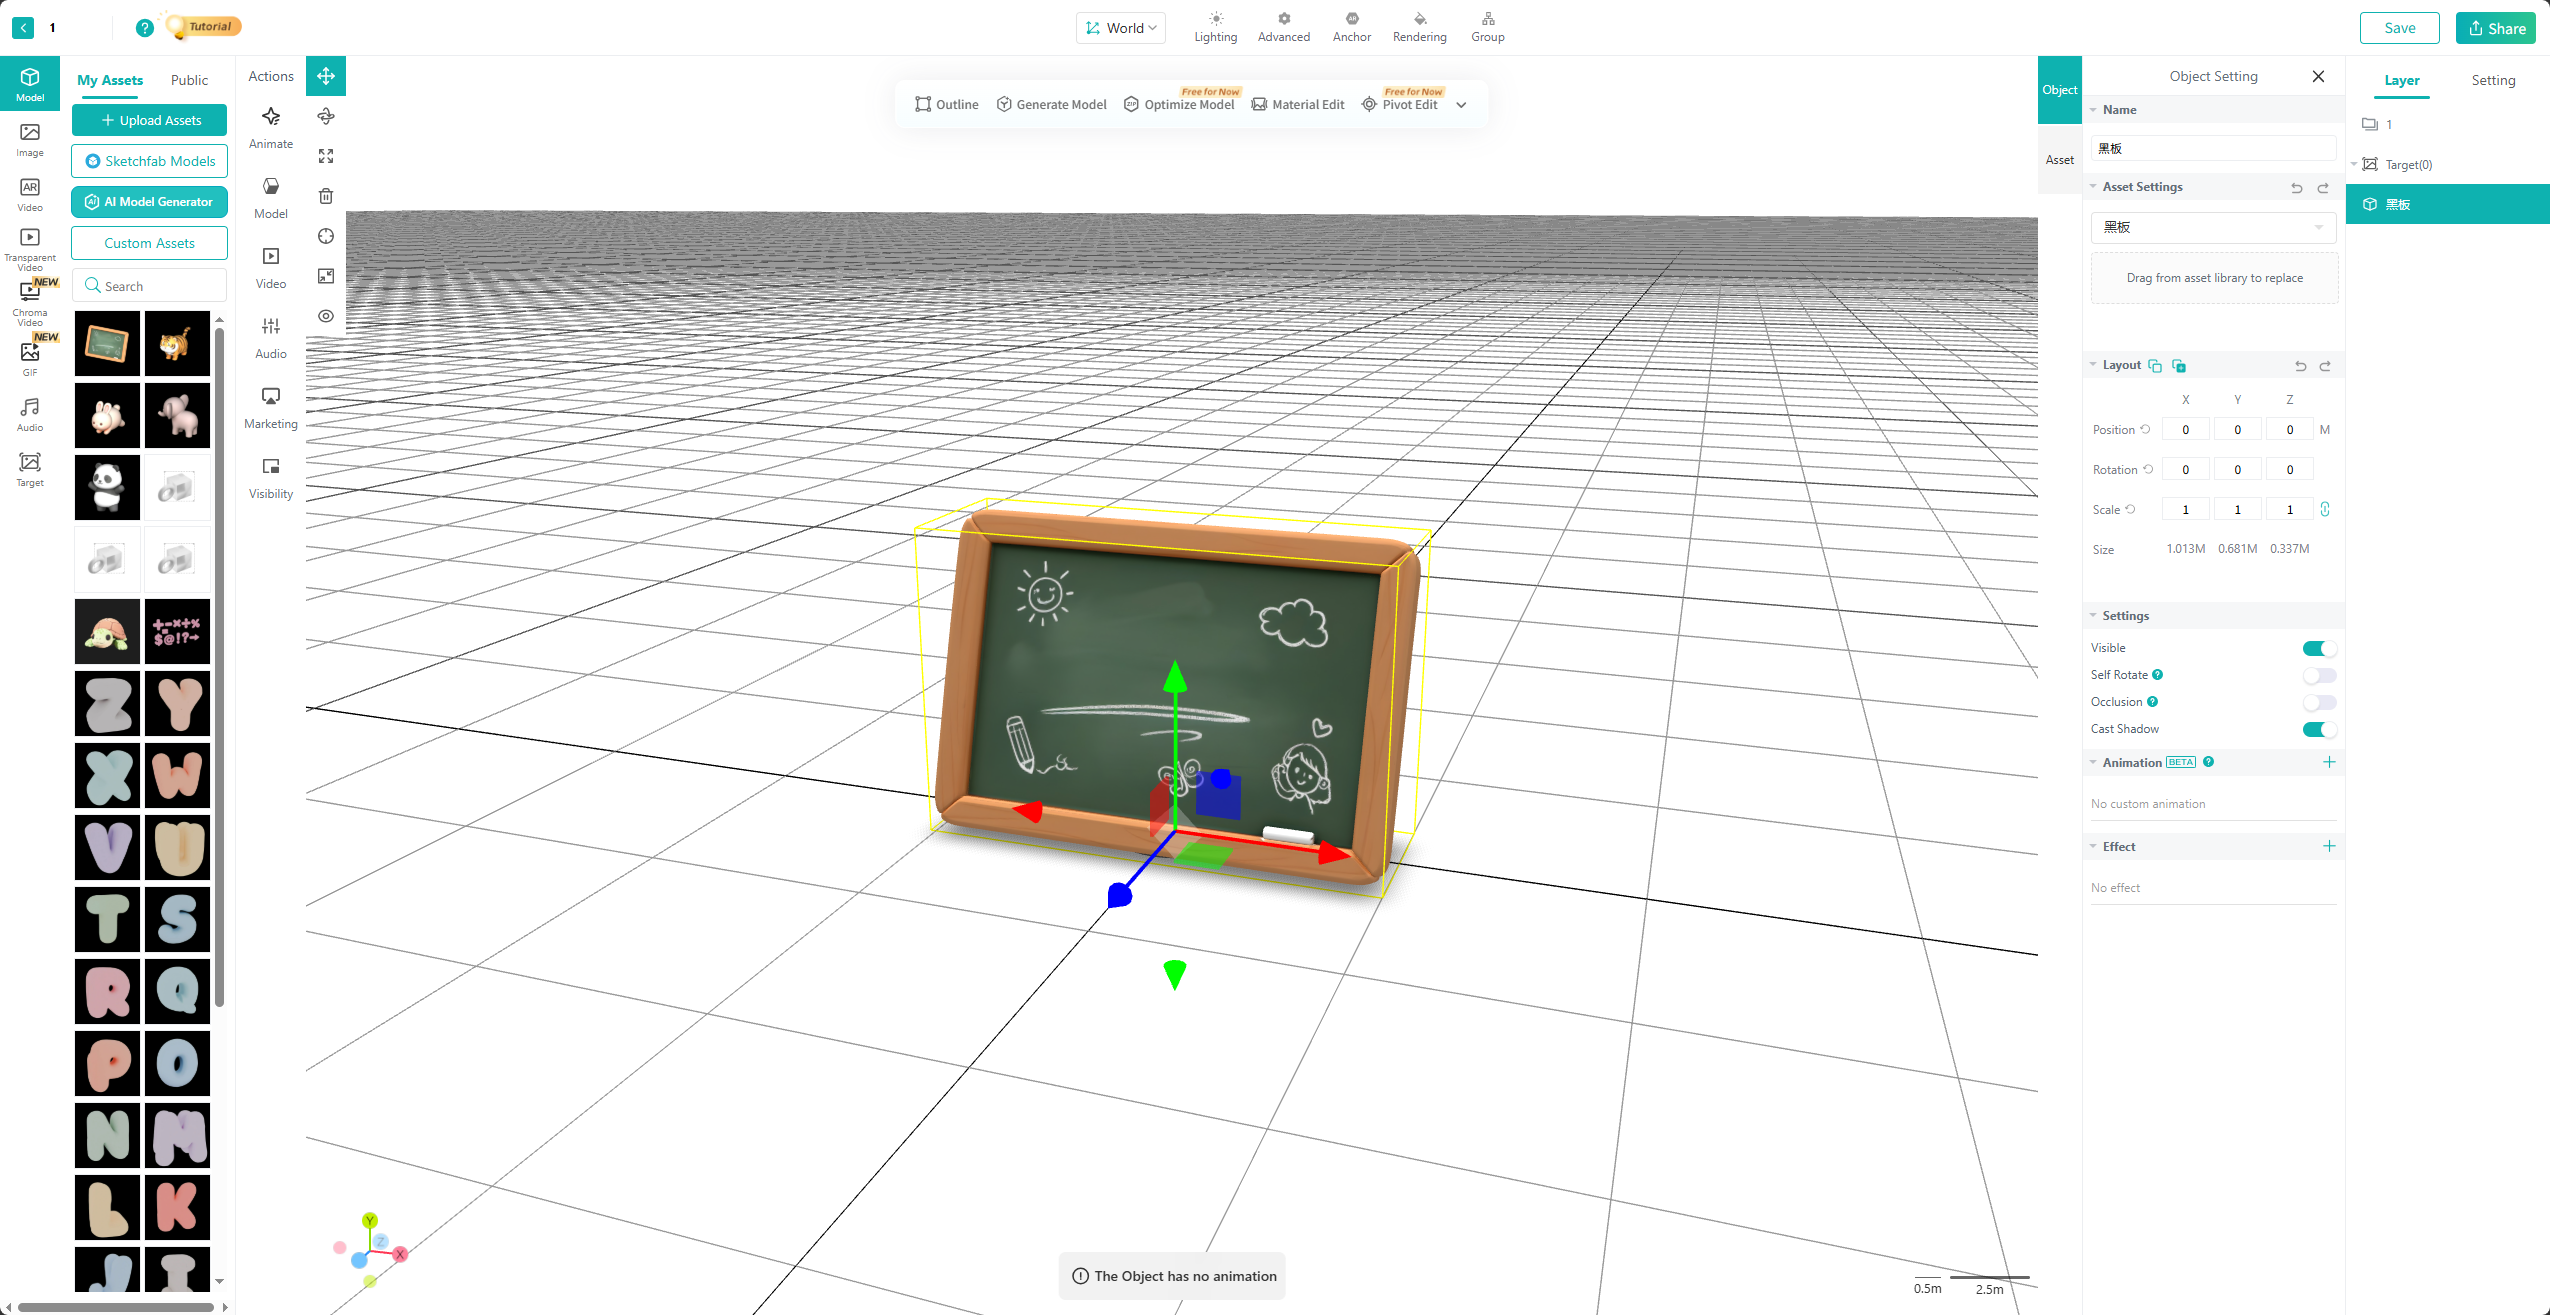
When a model in the scene is selected, a toolbar appears above the viewport with quick tools for adjusting the selected model.
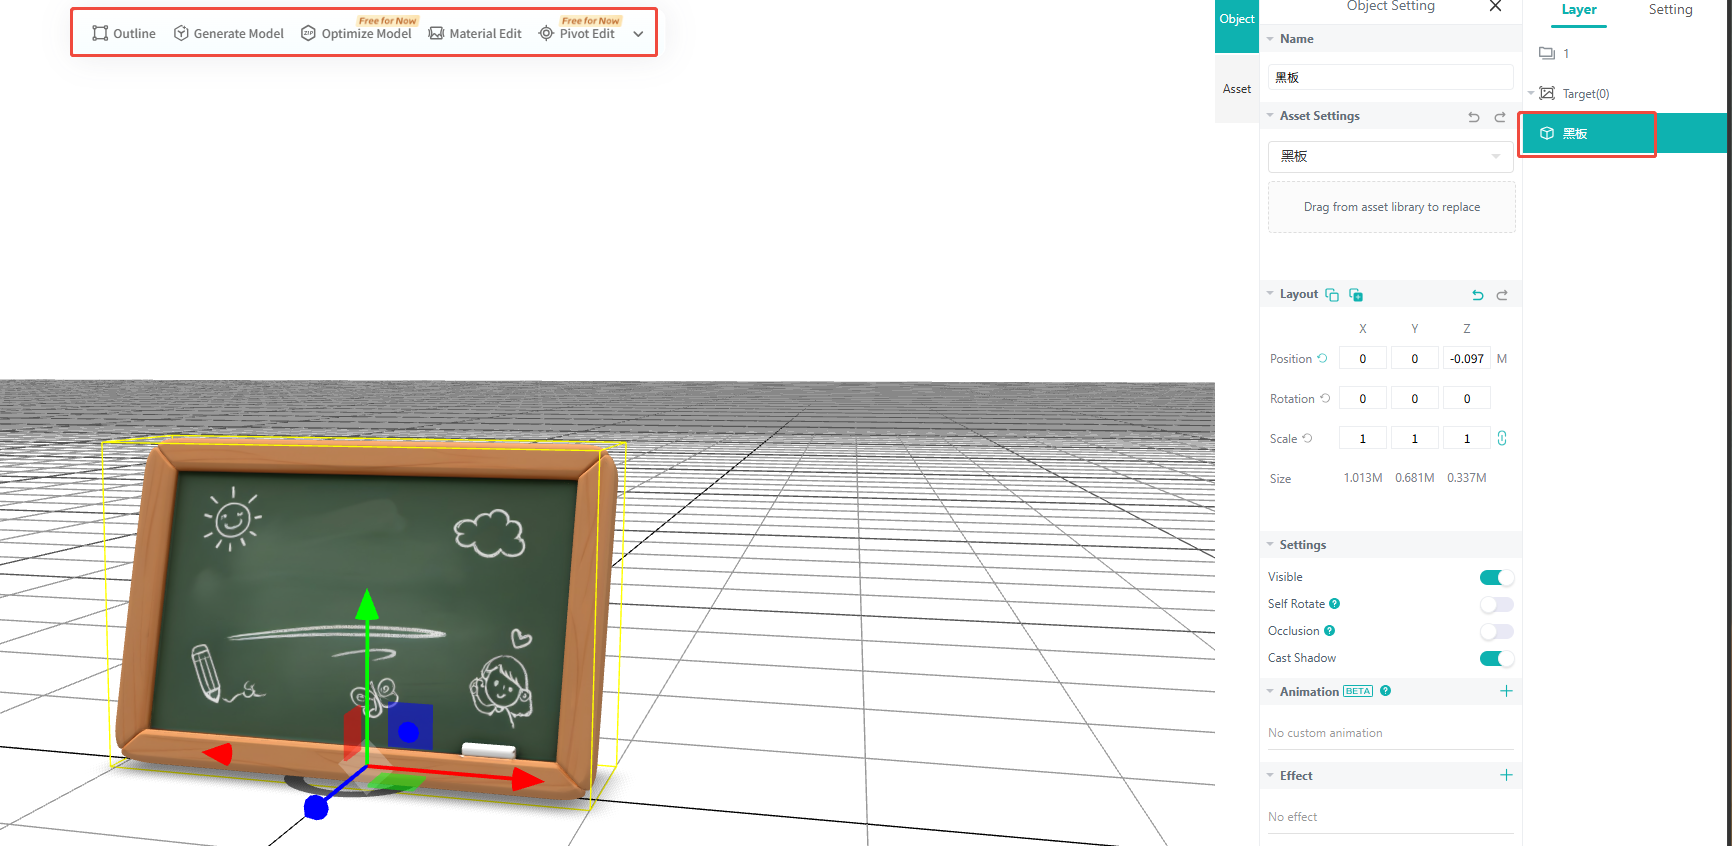
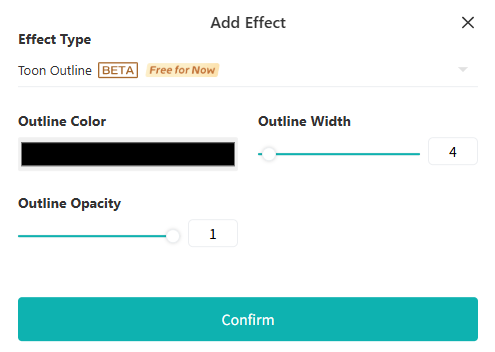
Apply an outline effect to the model.
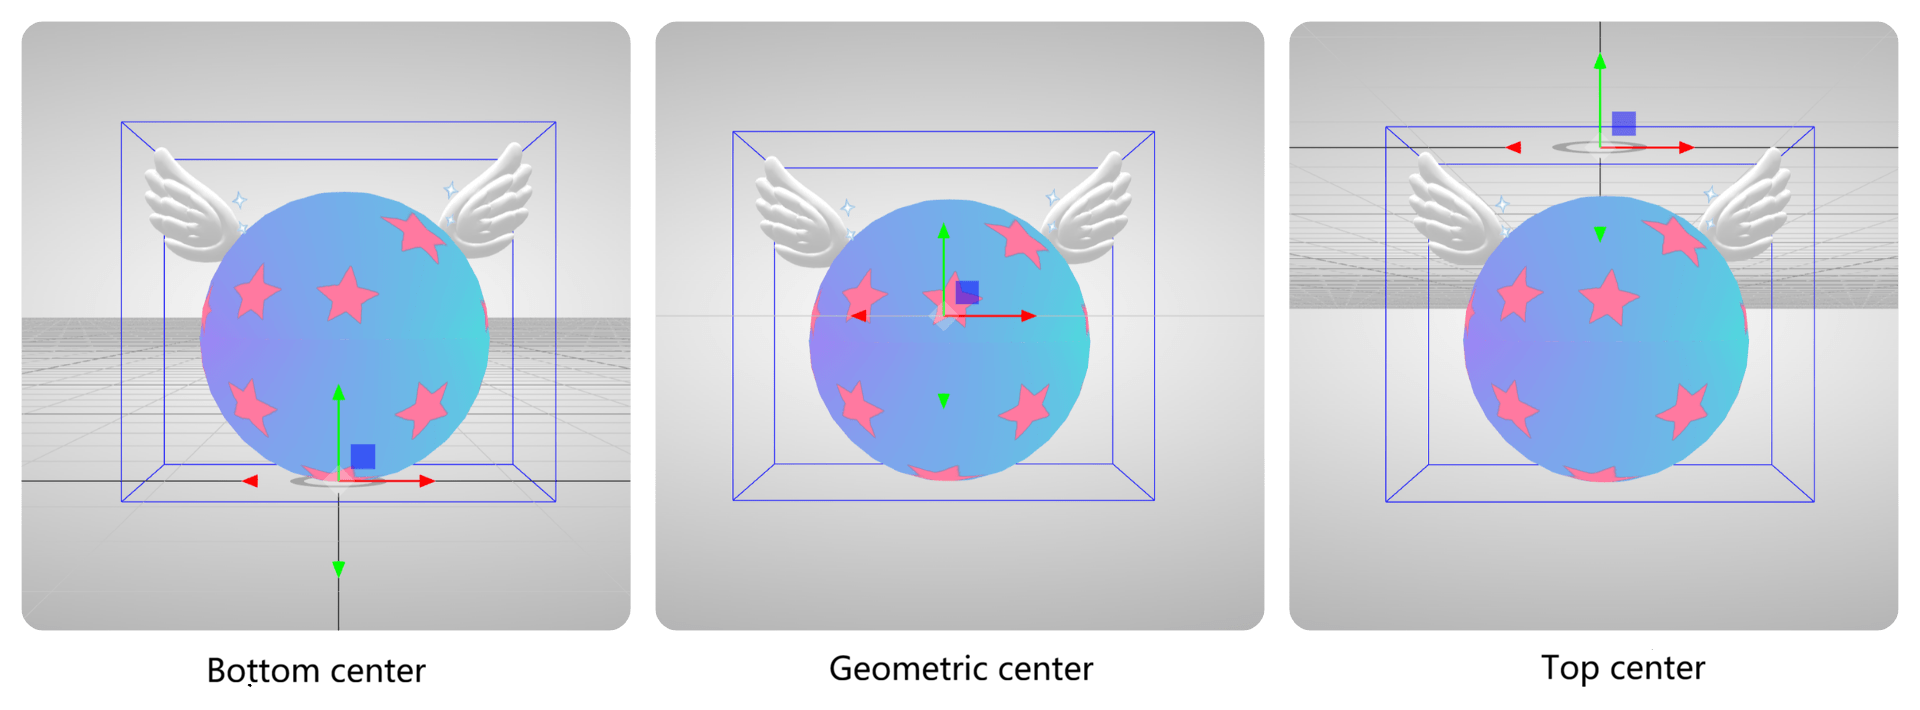
Modify the model's pivot point.
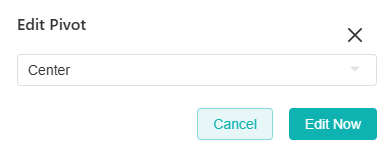
Note: This adjustment is calculated based on the model's overall bounding box. If no change occurs after adjusting, return to your DCC application to make the correction there, or check whether the model was exported correctly.
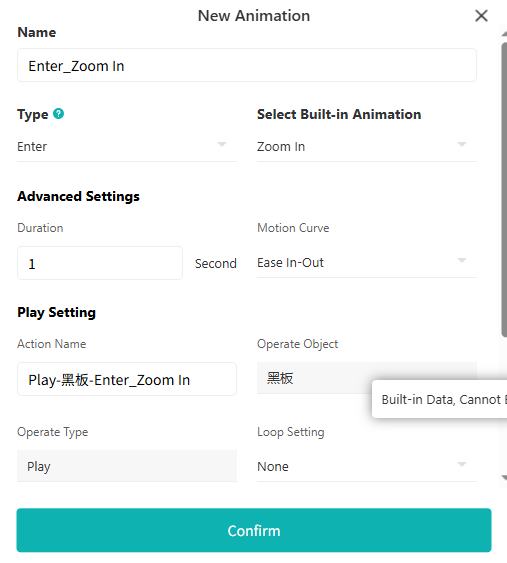
Assign a custom animation to the model.
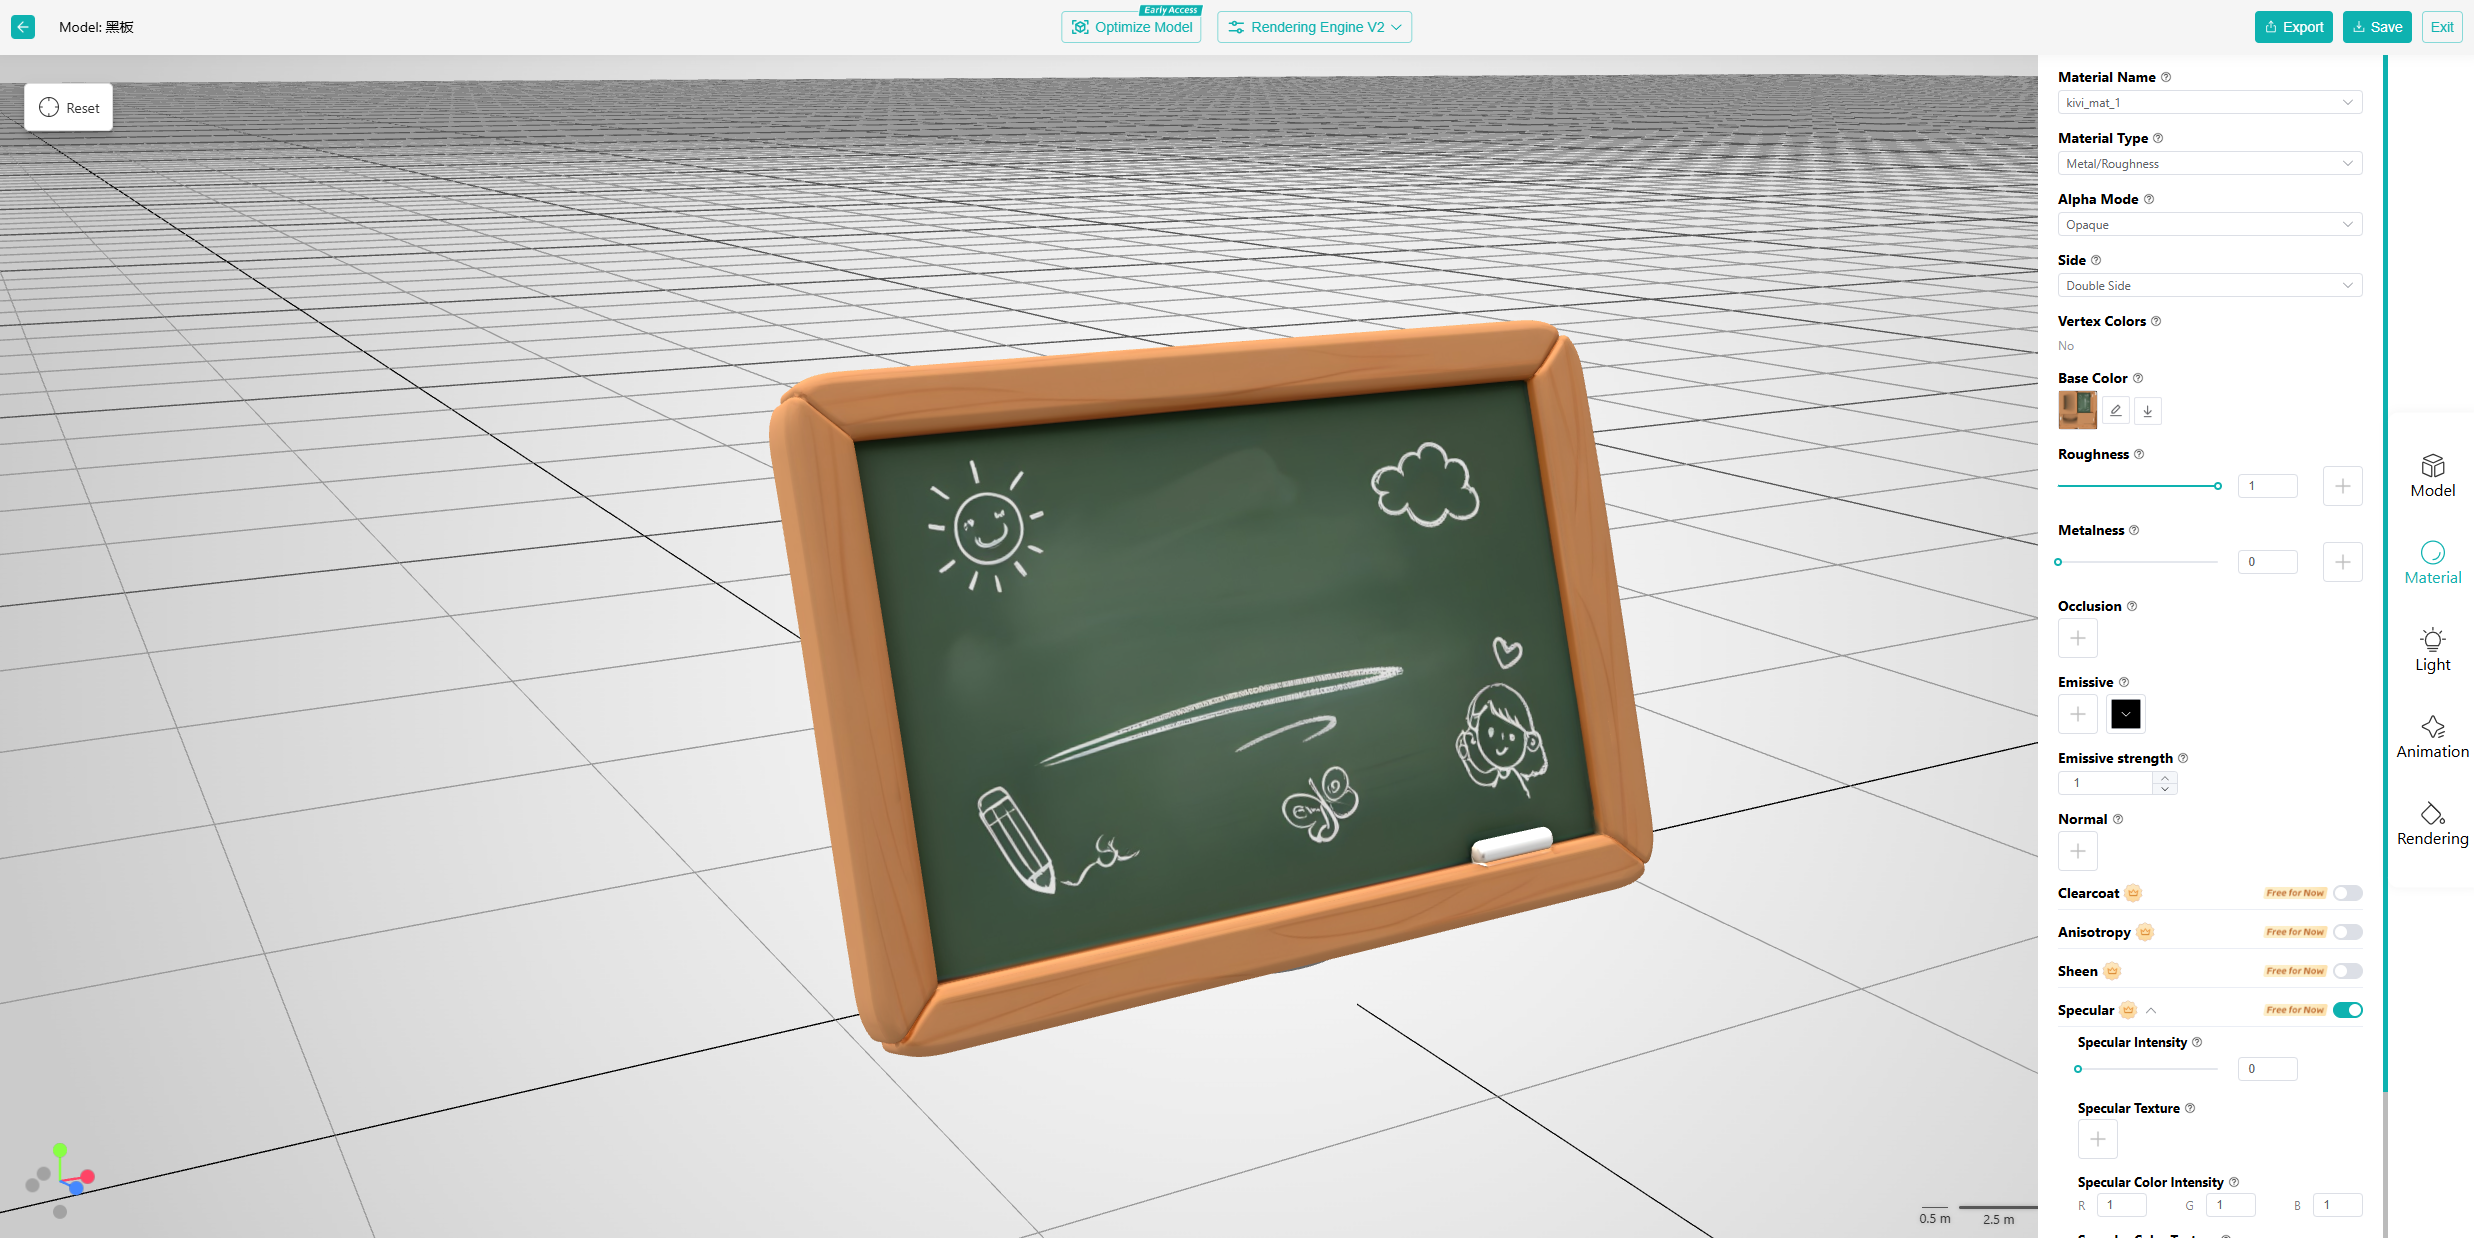
Jump to the Content Editor to adjust the model's materials.