English
Appearance
Custom Animation allows you to freely add and combine a wide range of built-in animations in Kivicube, bringing static assets to life through motion. In AR experiences, animation plays a key role in making virtual content more engaging and dynamic .
The entire process is designed to be as intuitive and smooth as Canva. You can create compelling results without any prior animation experience.
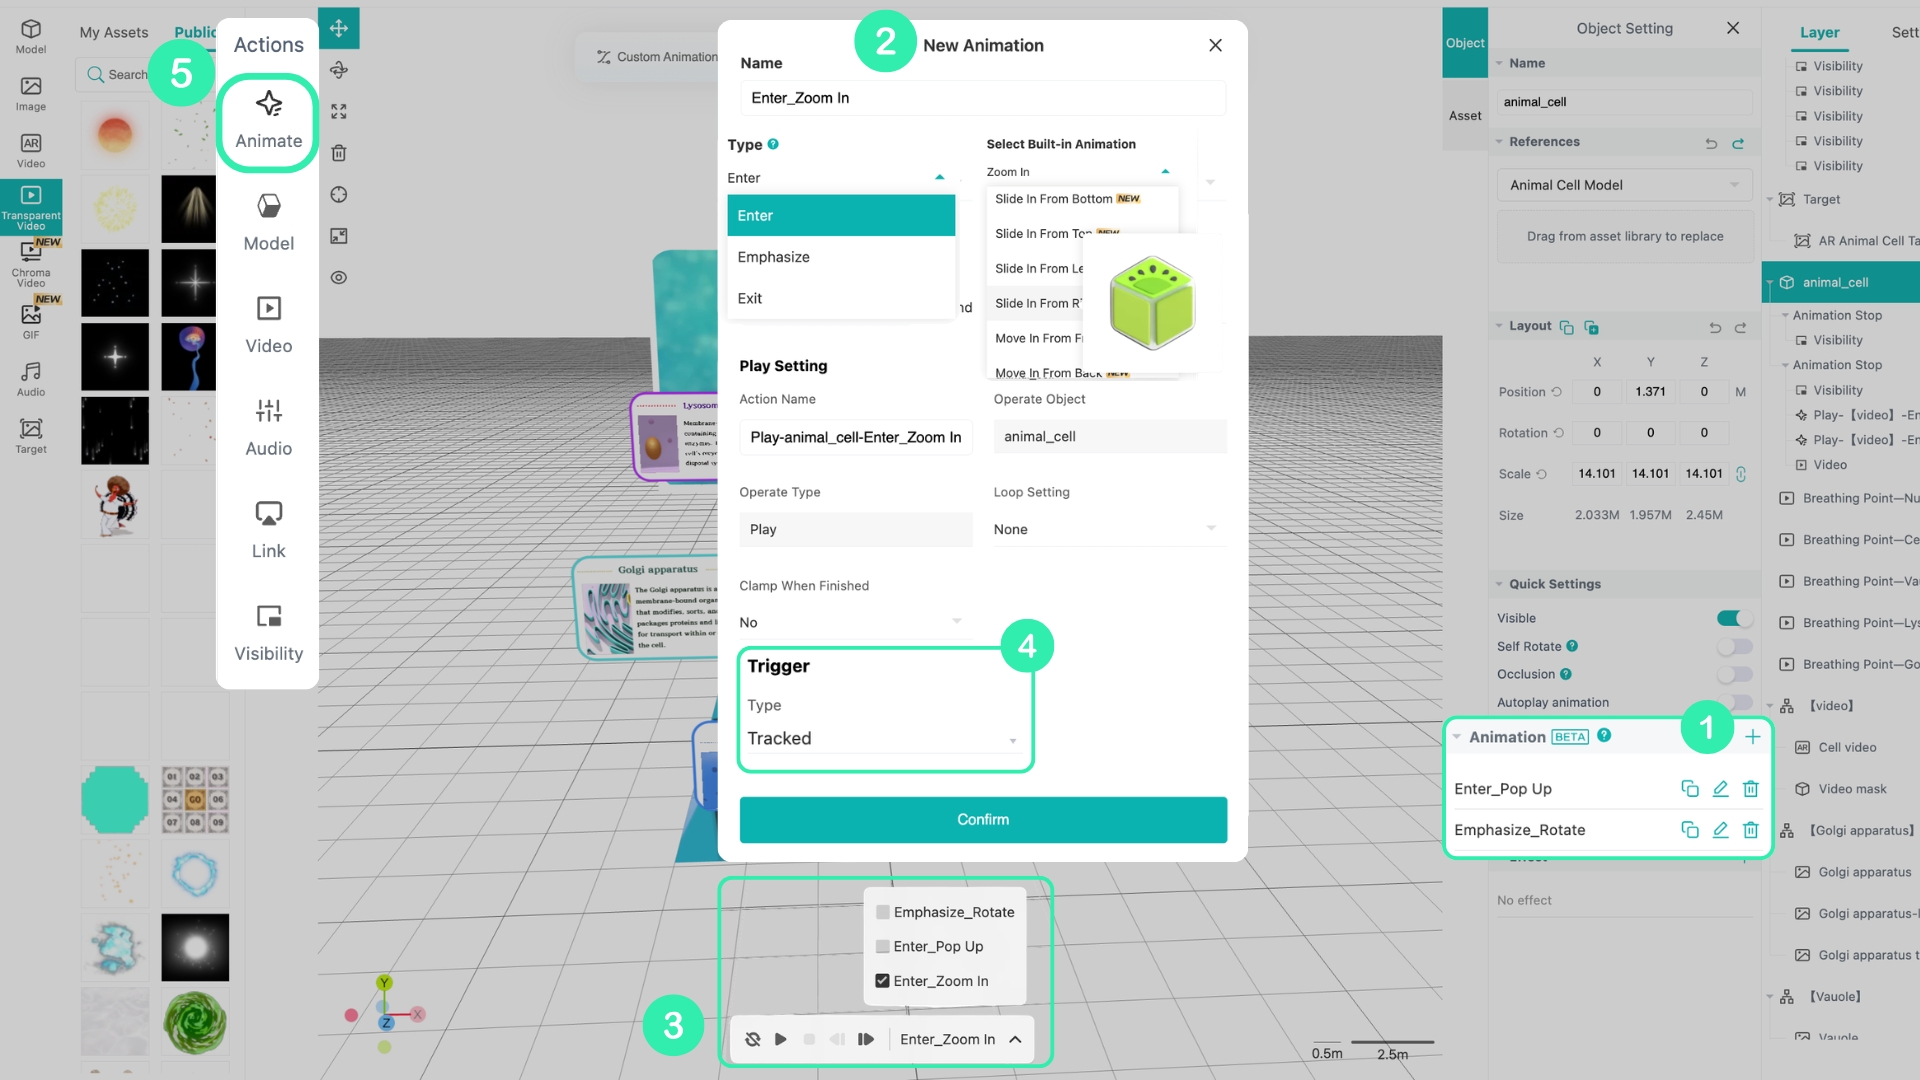
To add a custom animation to an asset:
Start by selecting the object in the 3D Canvas. Then locate the Animation Panel at the bottom of the canvas and click the “+” button.
This will open the Custom Animation dialog, where you can name your animation, choose an animation type, and configure parameters such as duration, loop behavior, and trigger conditions. Each animation option includes a visual preview, allowing you to quickly understand how it will look before applying it.
After completing the setup, you can preview the animation directly in the Animation Preview area below the 3D Canvas. For animations that have already been created, you can use the controls next to each item in the animation list to duplicate, edit, or delete them.
By default, Kivicube assigns a trigger condition when an animation is created. For example, in Image AR, animations are typically triggered when the target is detected. If this default trigger does not meet your needs, you can modify it by selecting the object, locating the animation in the Animation Panel list, reopening the settings dialog, and adjusting the Trigger parameter.
In addition, you can use the Animate controls in the Event Panel on the left to set up additional ways to trigger the animations you’ve already created.
To create more dynamic and expressive effects, you can combine multiple custom animations on a single object.
In practice, adding two animations with the same trigger allows you to achieve results that a single animation cannot produce. For example, a car entrance effect can be created by combining an Enter animation with an Emphasis animation.
To achieve this, select the car model and first apply a Move in from Back animation. Then add a Rotation animation. Set both animations to use the same trigger, such as Scene Start.
With this setup, the car will appear to drift into the scene like a real sports car, creating a much richer visual effect.
Yes. Custom Animation works with images, GIFs, and transparent videos as well, and the workflow is the same as for 3D models.
Yes. Built-in model animations can be configured in the Event Panel under the Model section, where you define their trigger conditions. If you want both built-in and custom animations to play together, make sure they share the same trigger.
Yes. You can select a group and apply animations in the same way as you would for a single asset.
In the Animation Panel, locate the animation you want to duplicate and click the copy button next to it. This will open a dialog where you can select other objects in the scene and apply the animation to them.
When a custom animation is first created, it is assigned a default trigger—typically “play on tracked.” If you did not modify this trigger in the animation settings dialog, the animation will automatically play as soon as the target is recognized.