English
Appearance
Landmark AR target image and tracking video are two essential assets required to create a Landmark AR scene.
Landmark AR scene is designed to recognize and track real-world buildings. It is suitable for outdoor AR experiences that require large-scale tracking, such as buildings, landmarks, store facades, tourist attractions, and shopping malls.
Before creating a Landmark AR scene, you need to capture a tracking video and a target image of the target building.
With these two assets, you can quickly create large-scale Landmark AR experiences while significantly lowering the production barrier.
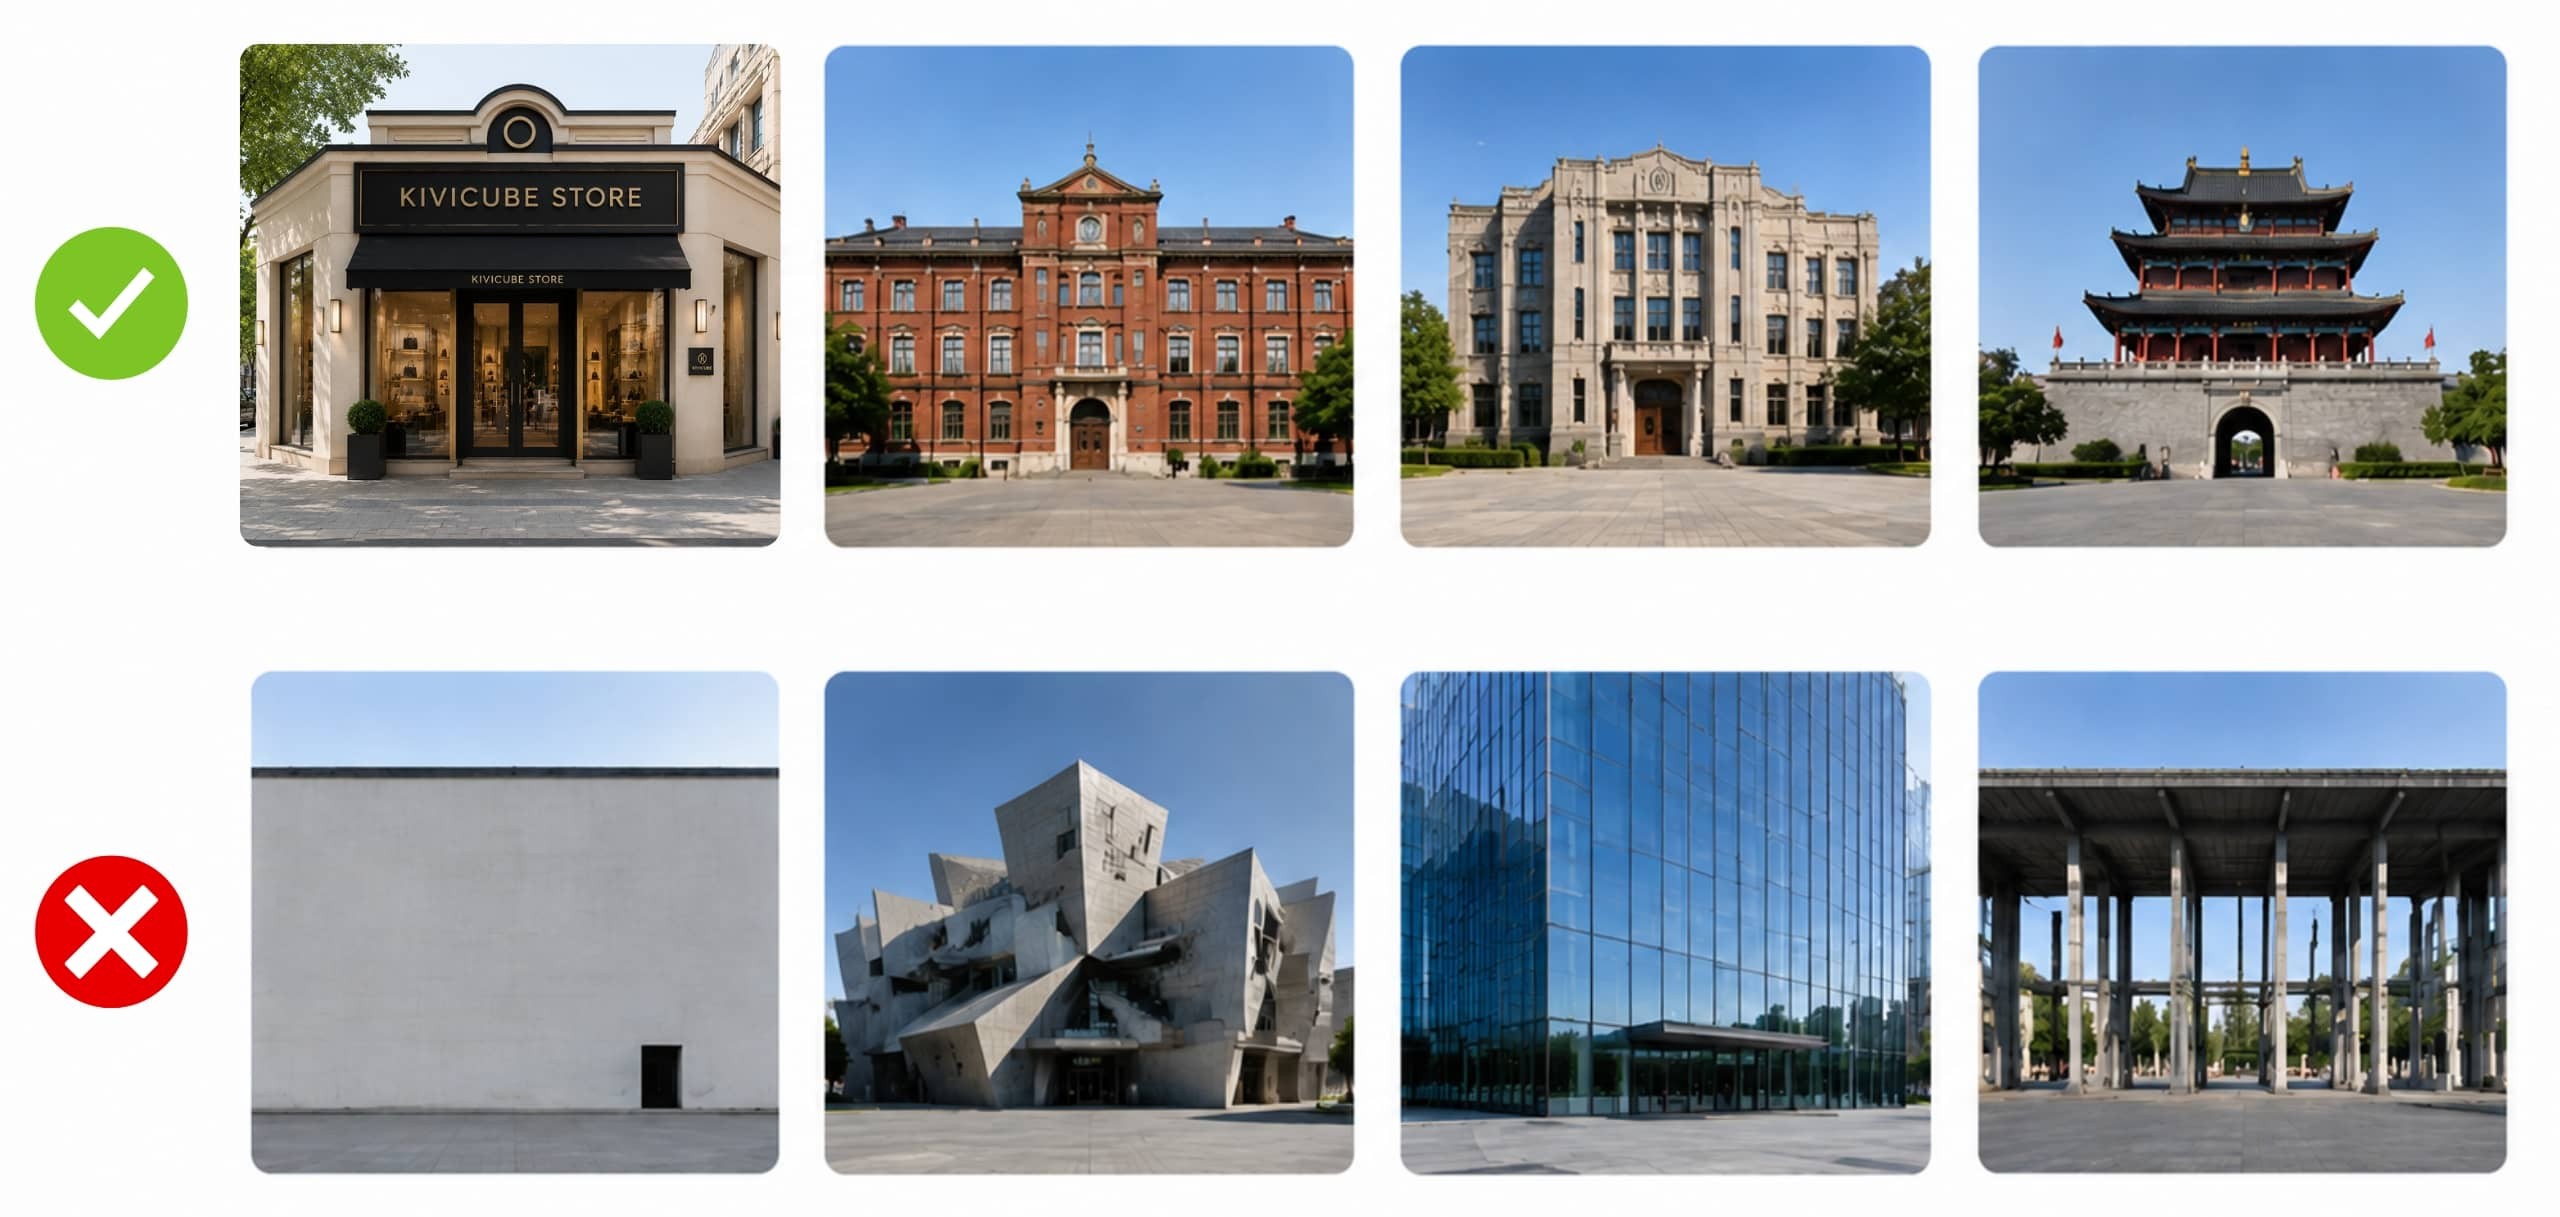
To ensure accurate recognition and stable tracking, choose a suitable target building before creating an AR scene and collecting tracking assets. Follow these guidelines:
Choose a complete building facade with rich visual details. Avoid large blank walls.
Avoid facades with overly complex 3D structures or large depth differences.
Avoid highly reflective surfaces and full glass curtain walls, such as office buildings with large glass facades.
Avoid large openings, dense columns, or structures that may block important details.
Choose a building with a suitable size. The entire building should fit within the phone screen during the experience.
Make sure there is enough open space in front of the building for users to move around and enjoy the AR experience.
TIP
The guidelines above are only recommendations for selecting a suitable building. After choosing a Landmark, capture the tracking video and target image, then upload them to Kivicube for testing.
The final recognition and tracking performance should be evaluated through real device testing.
After selecting the target building, stand directly in front of the building facade. Adjust your distance until the facade takes up about 80% of the phone screen. This is the recommended experience point for capturing the tracking video and target image.
However, the actual shooting and experience distance may vary depending on the environment. Always use real device testing as the final reference.
Stand at the recommended experience point and record the video in portrait mode. Move your phone smoothly from left to right to capture the entire building facade. Avoid pedestrians, objects, and temporary obstacles during recording.
Use the phone's built-in camera. Set the video resolution to 1080p HD with a frame rate of 30 fps.
Turn off the phone's HDR video feature. This helps avoid changes in lighting and details that may affect the training process.
Keep the video between 15 and 60 seconds to make sure all important details of the building facade are captured.
Supported formats: MP4 and MOV. The file size should be no larger than 200 MB.
Take a front-facing photo of the building facade from the recommended experience point. Do not capture the image from a corner, as this may cause perspective distortion and affect tracking accuracy.
The image should contain rich details and balanced contrast. Avoid large areas of solid color, blank walls, or repetitive patterns. Keep the image clean and free of obstacles.
Format: JPG/JPEG/PNG/WEBP/BMP/CIF/TIFF/HEIC
Aspect ratio: between 9:16 and 16:9, 1:1 recommended
Size: 600×600 ~ 3000×300, 1200×1200 suggested; File size: ≤10M
TIP
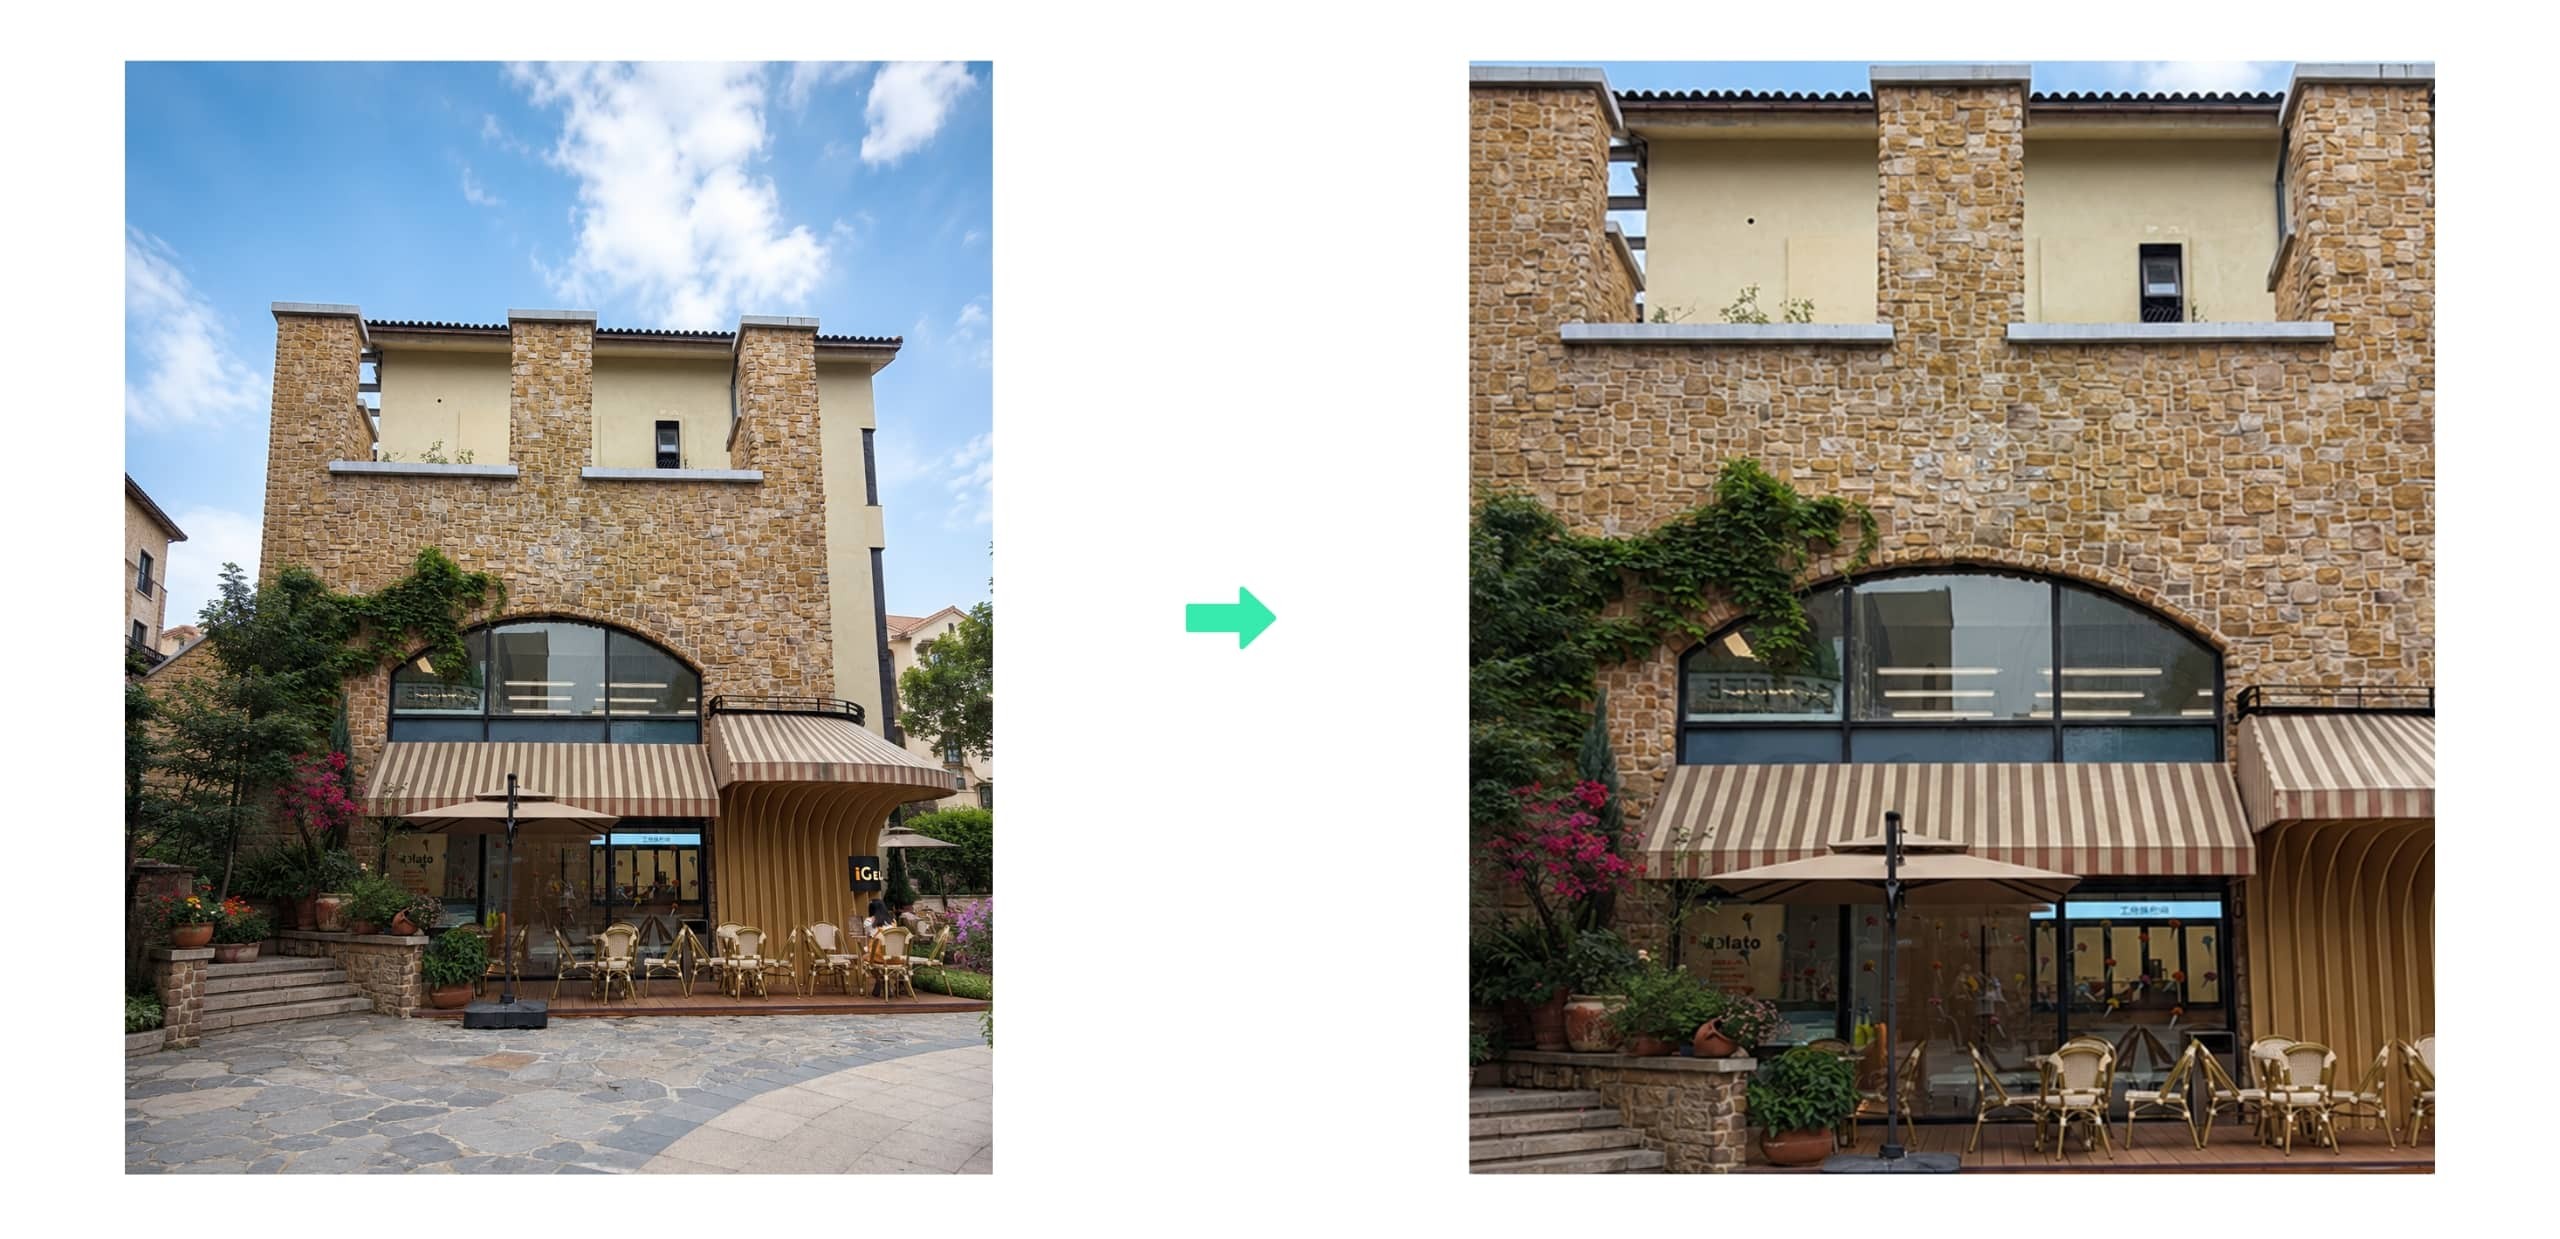
To help the system better understand the building and analyze the tracking video, please further process the captured target image.
Keeping the main building features and removing unnecessary areas can reduce interference and improve AR experience stability.
Correct the perspective and adjust the building to a straight-on front view.
Crop out unnecessary elements around the building.
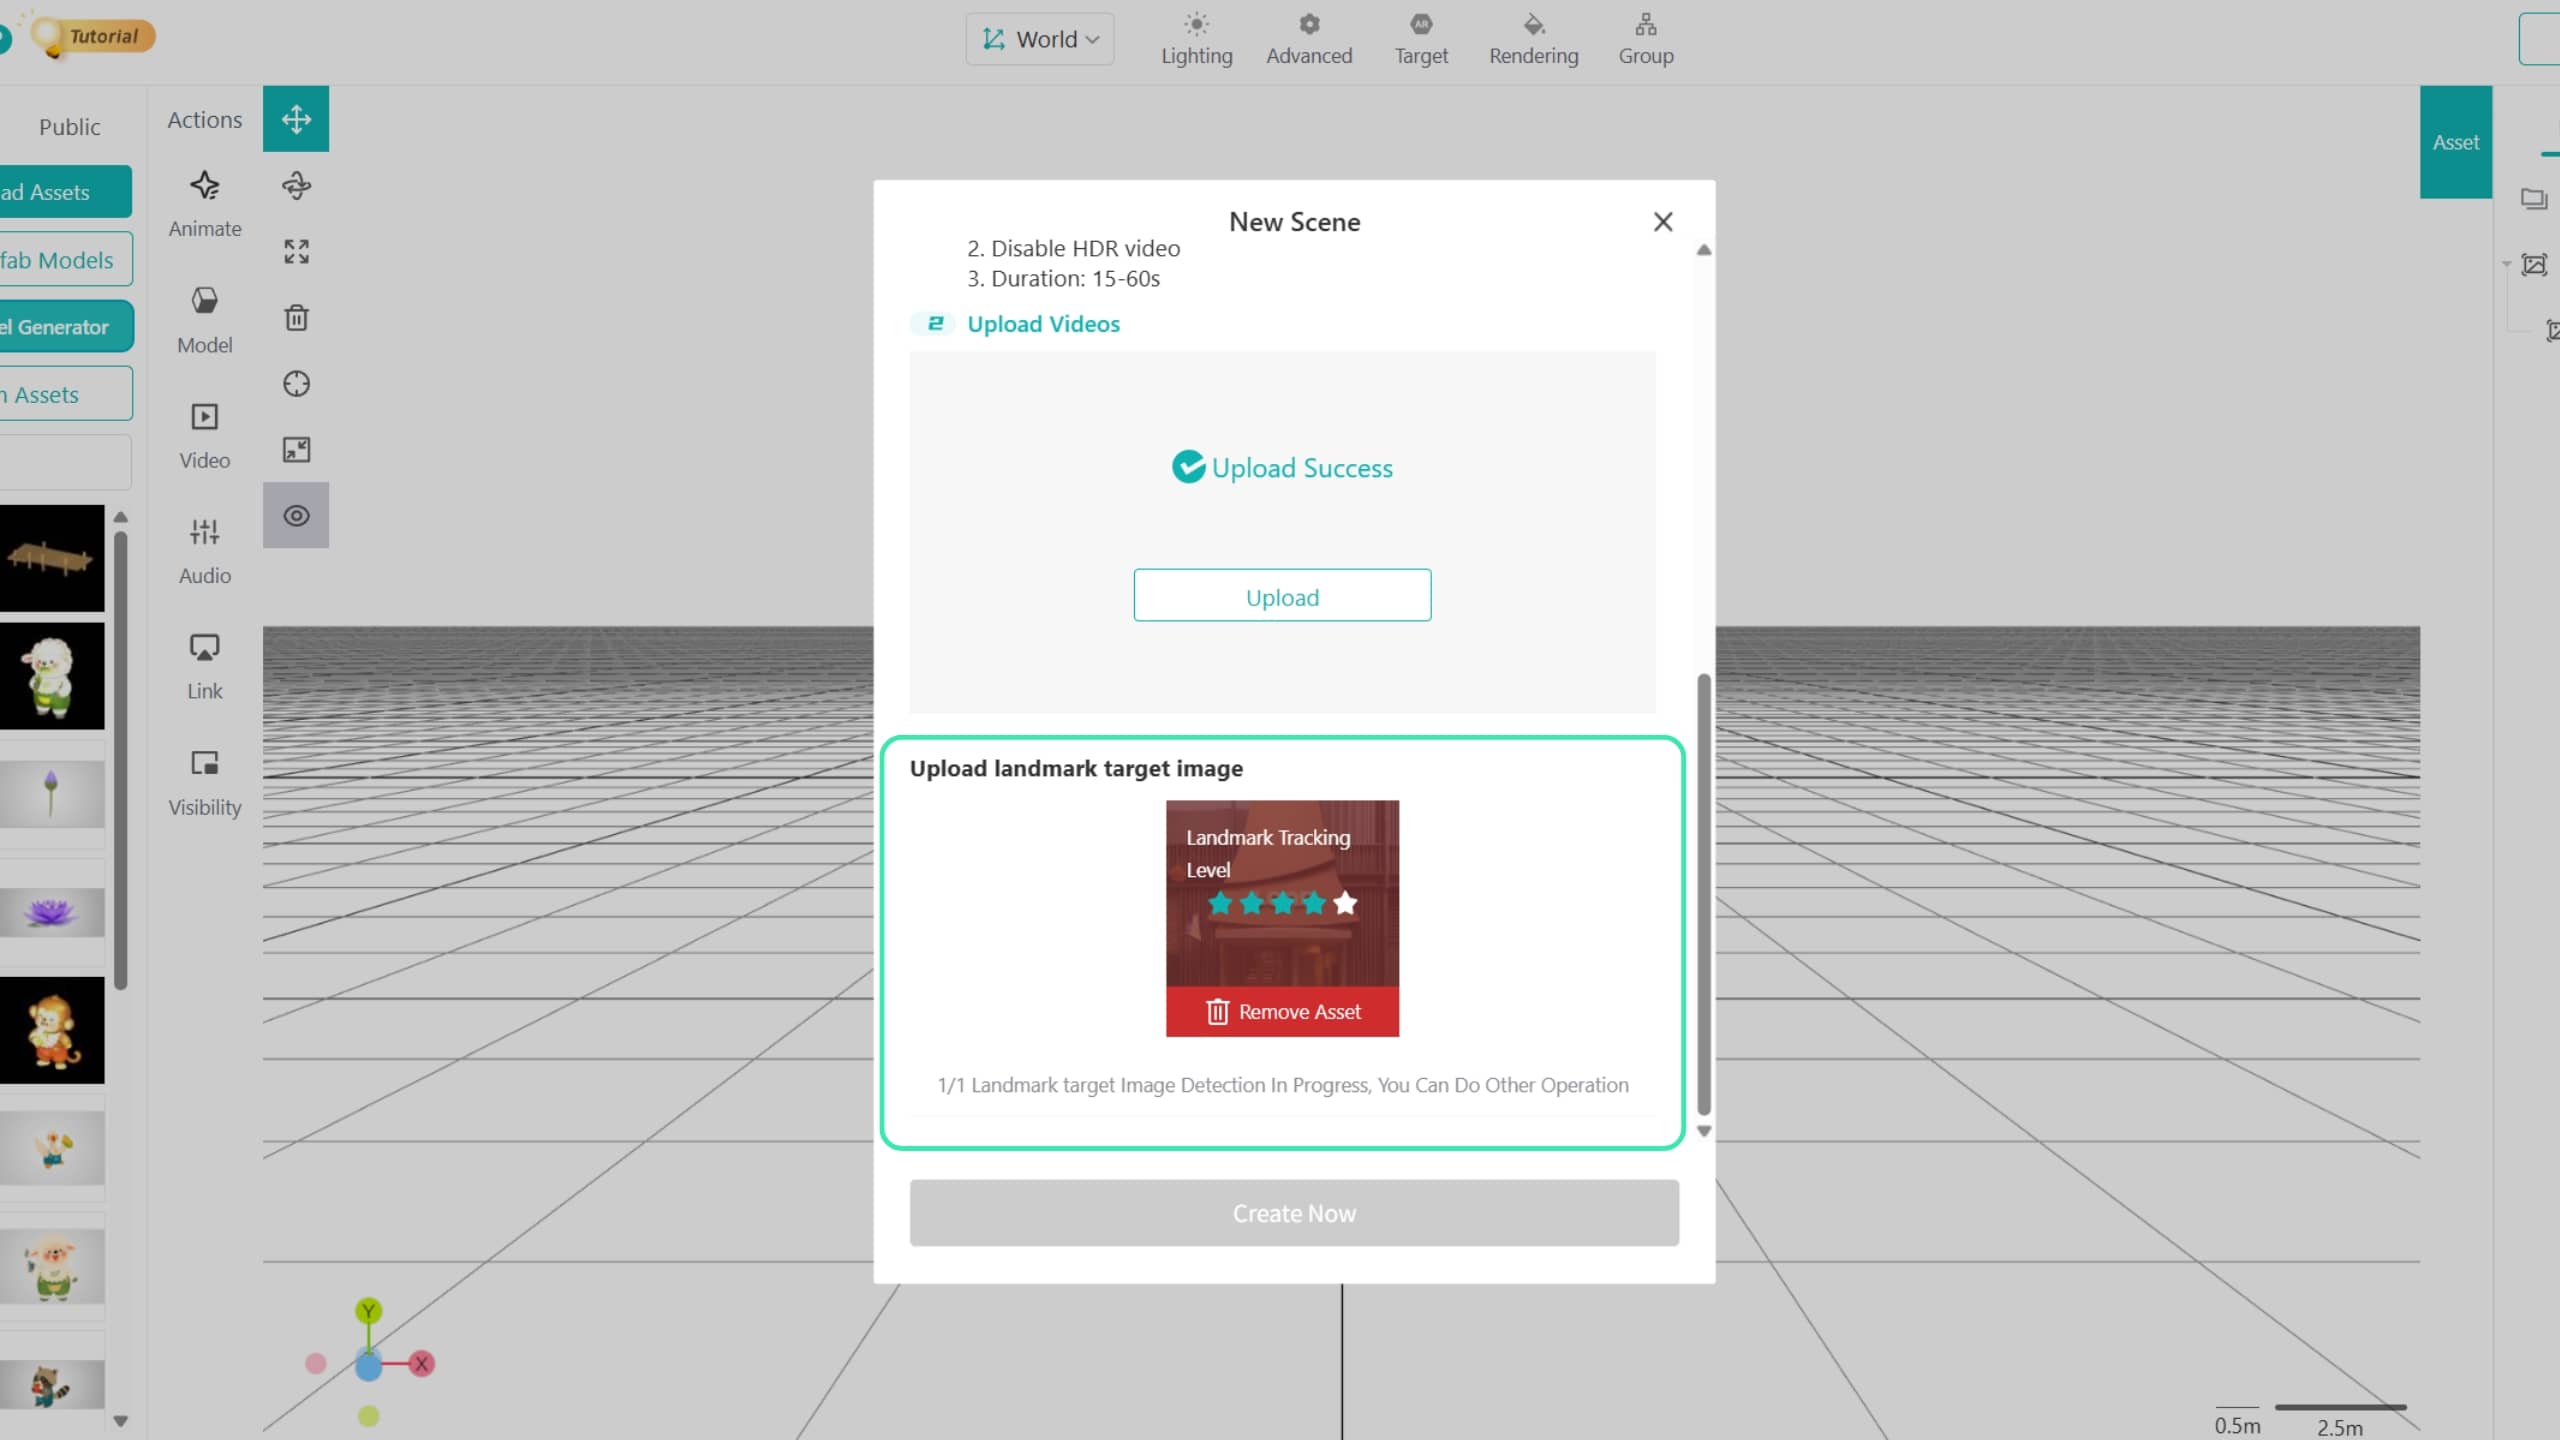
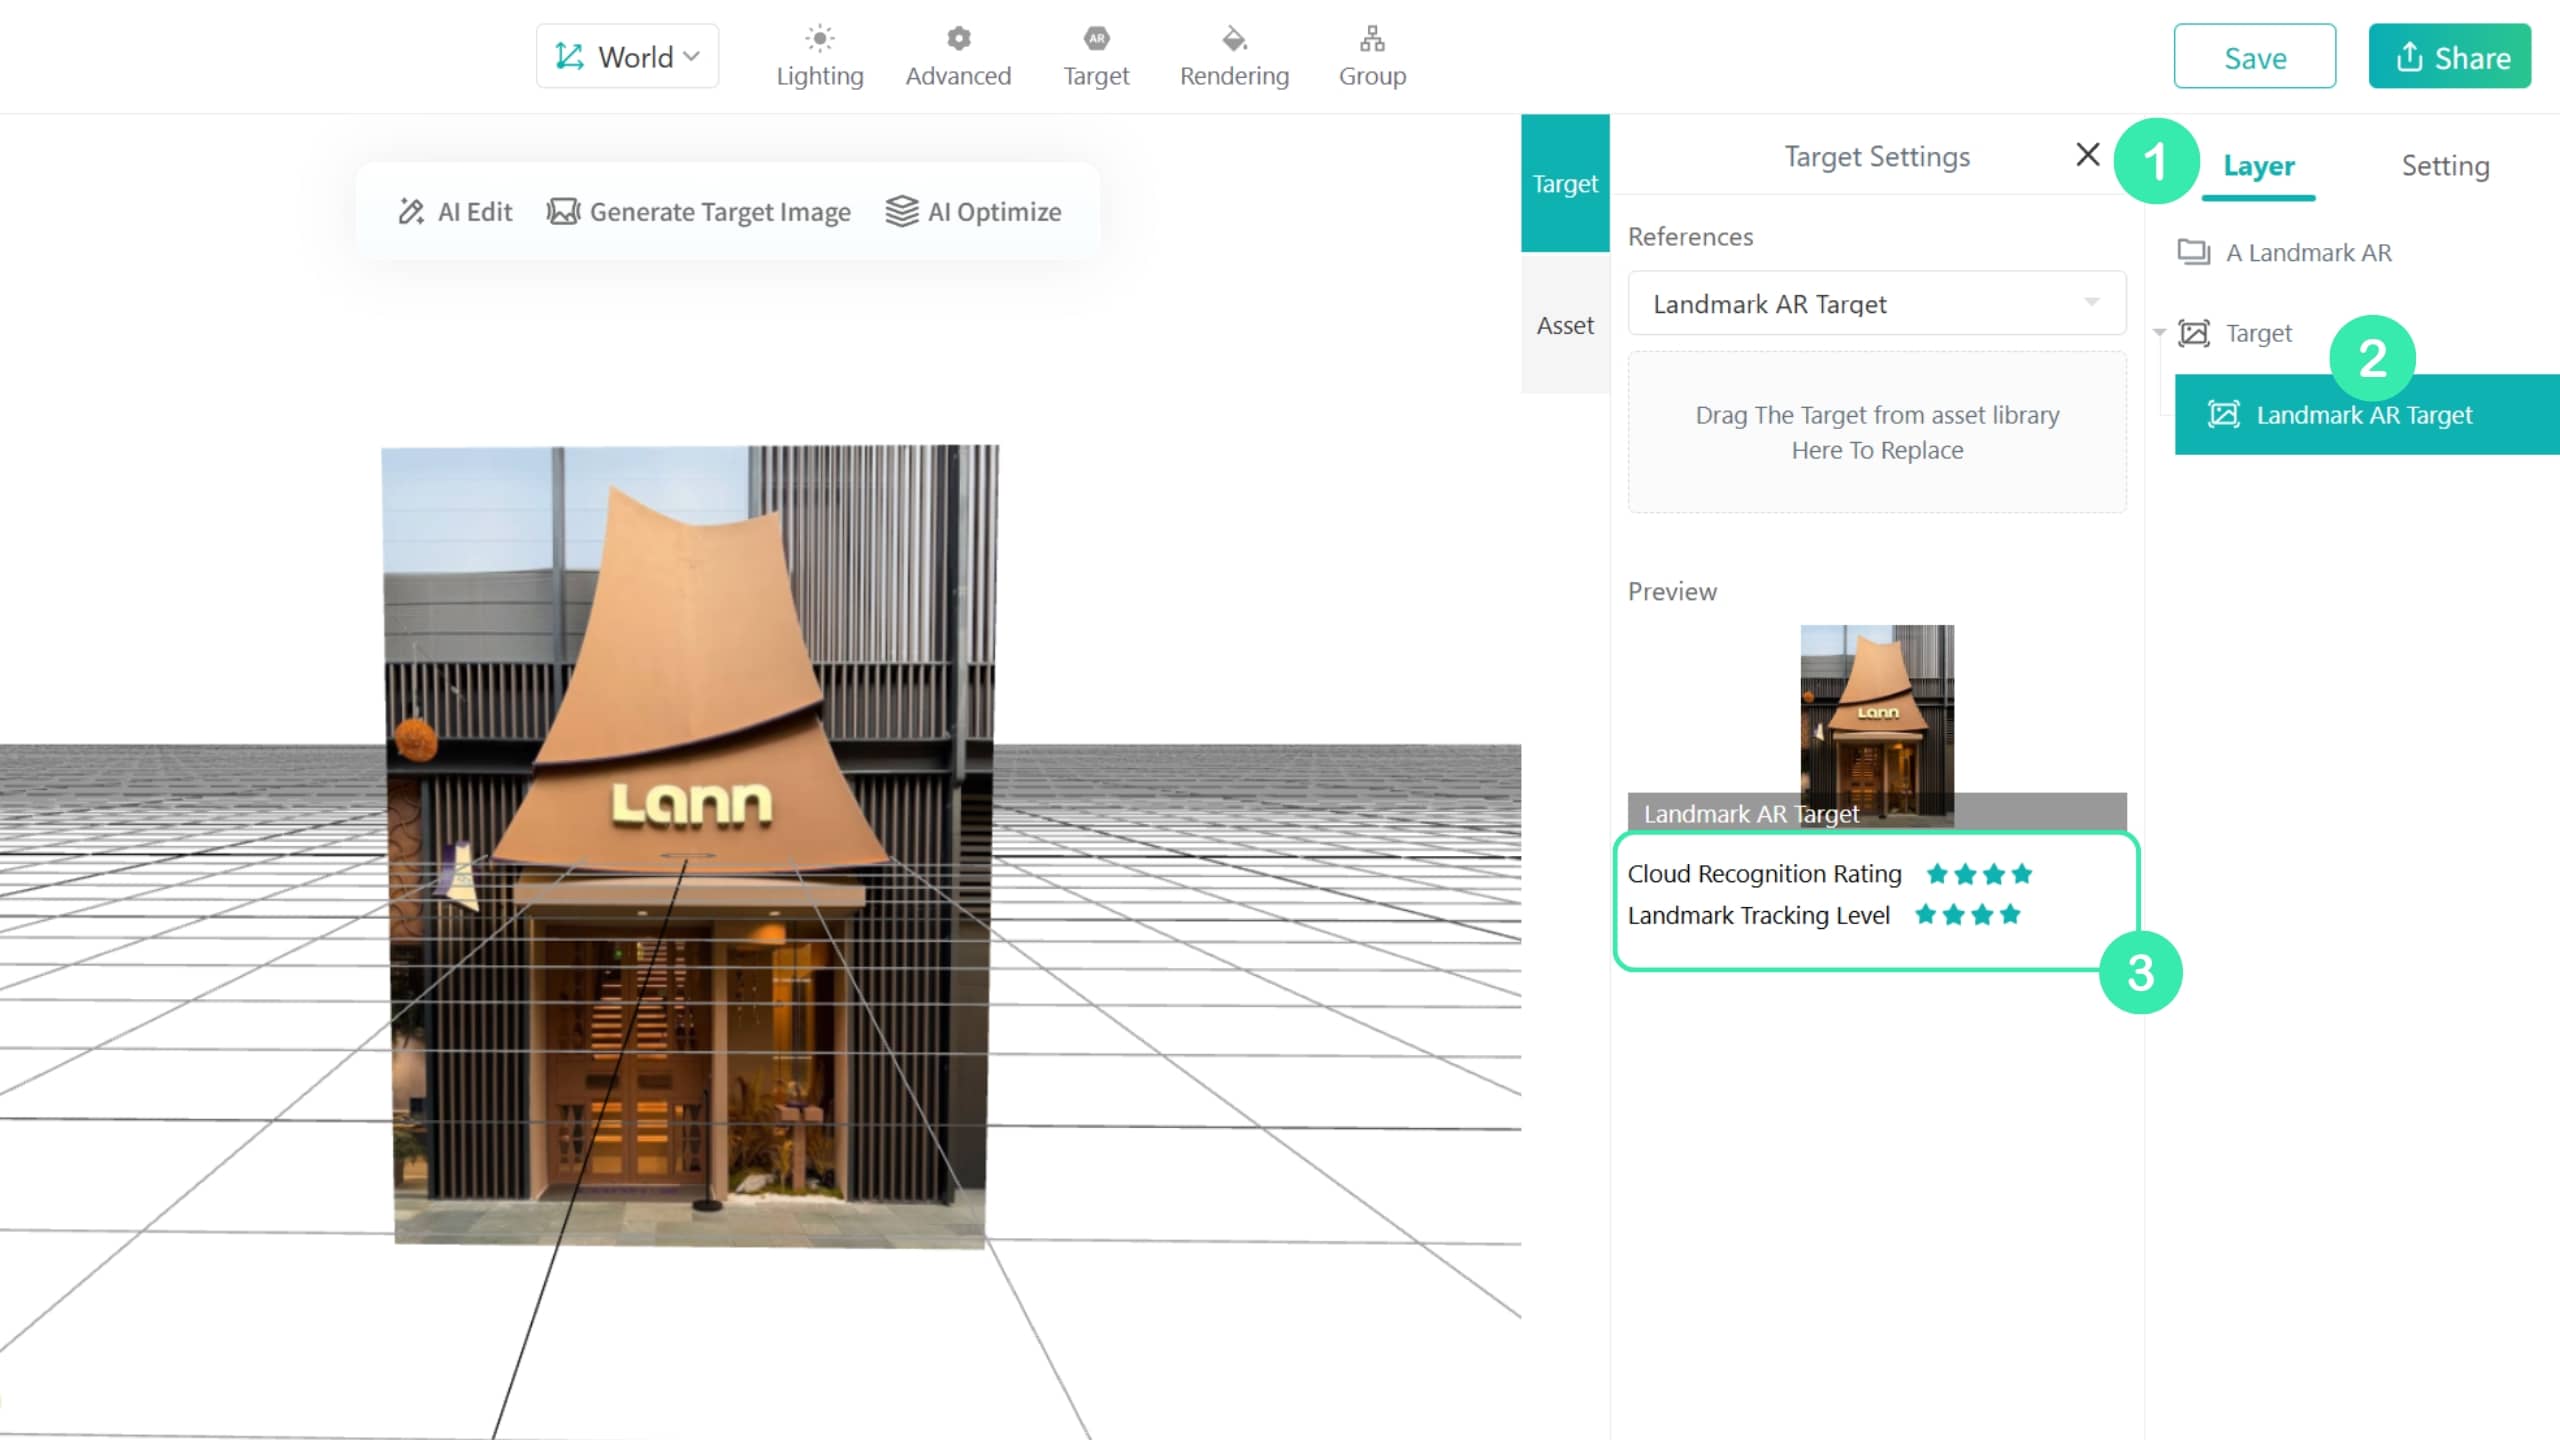
The system automatically performs a basic check on uploaded target images and generates a star rating. The rating helps evaluate the recognition performance of the target image.
In most cases, a higher rating indicates better recognition and tracking stability. If the rating is below 3 stars, we recommend optimizing the target image based on the Landmark AR target image guidelines.
Click here to upload your processed target image and quickly check its star rating.
After uploading a target image in a Landmark AR scene, hover over the thumbnail to view its rating.
TIP
Star ratings are for reference only. Final results depend on real-world testing.
During a real Landmark AR experience, recognition and tracking performance can be affected by different environmental conditions.
Environmental changes such as day and night, weather conditions, and lighting intensity
Lighting and reflections on the building surface
Differences in the actual experience distance and viewing angle
Differences in phone camera framing and image quality
For example, in the target image below, the left image shows the original photo of the building, while the right image highlights the visual feature points detected by the algorithm (yellow marks).
Although the system detects many feature points and gives the image a high star rating, the actual AR experience may still not perform well.
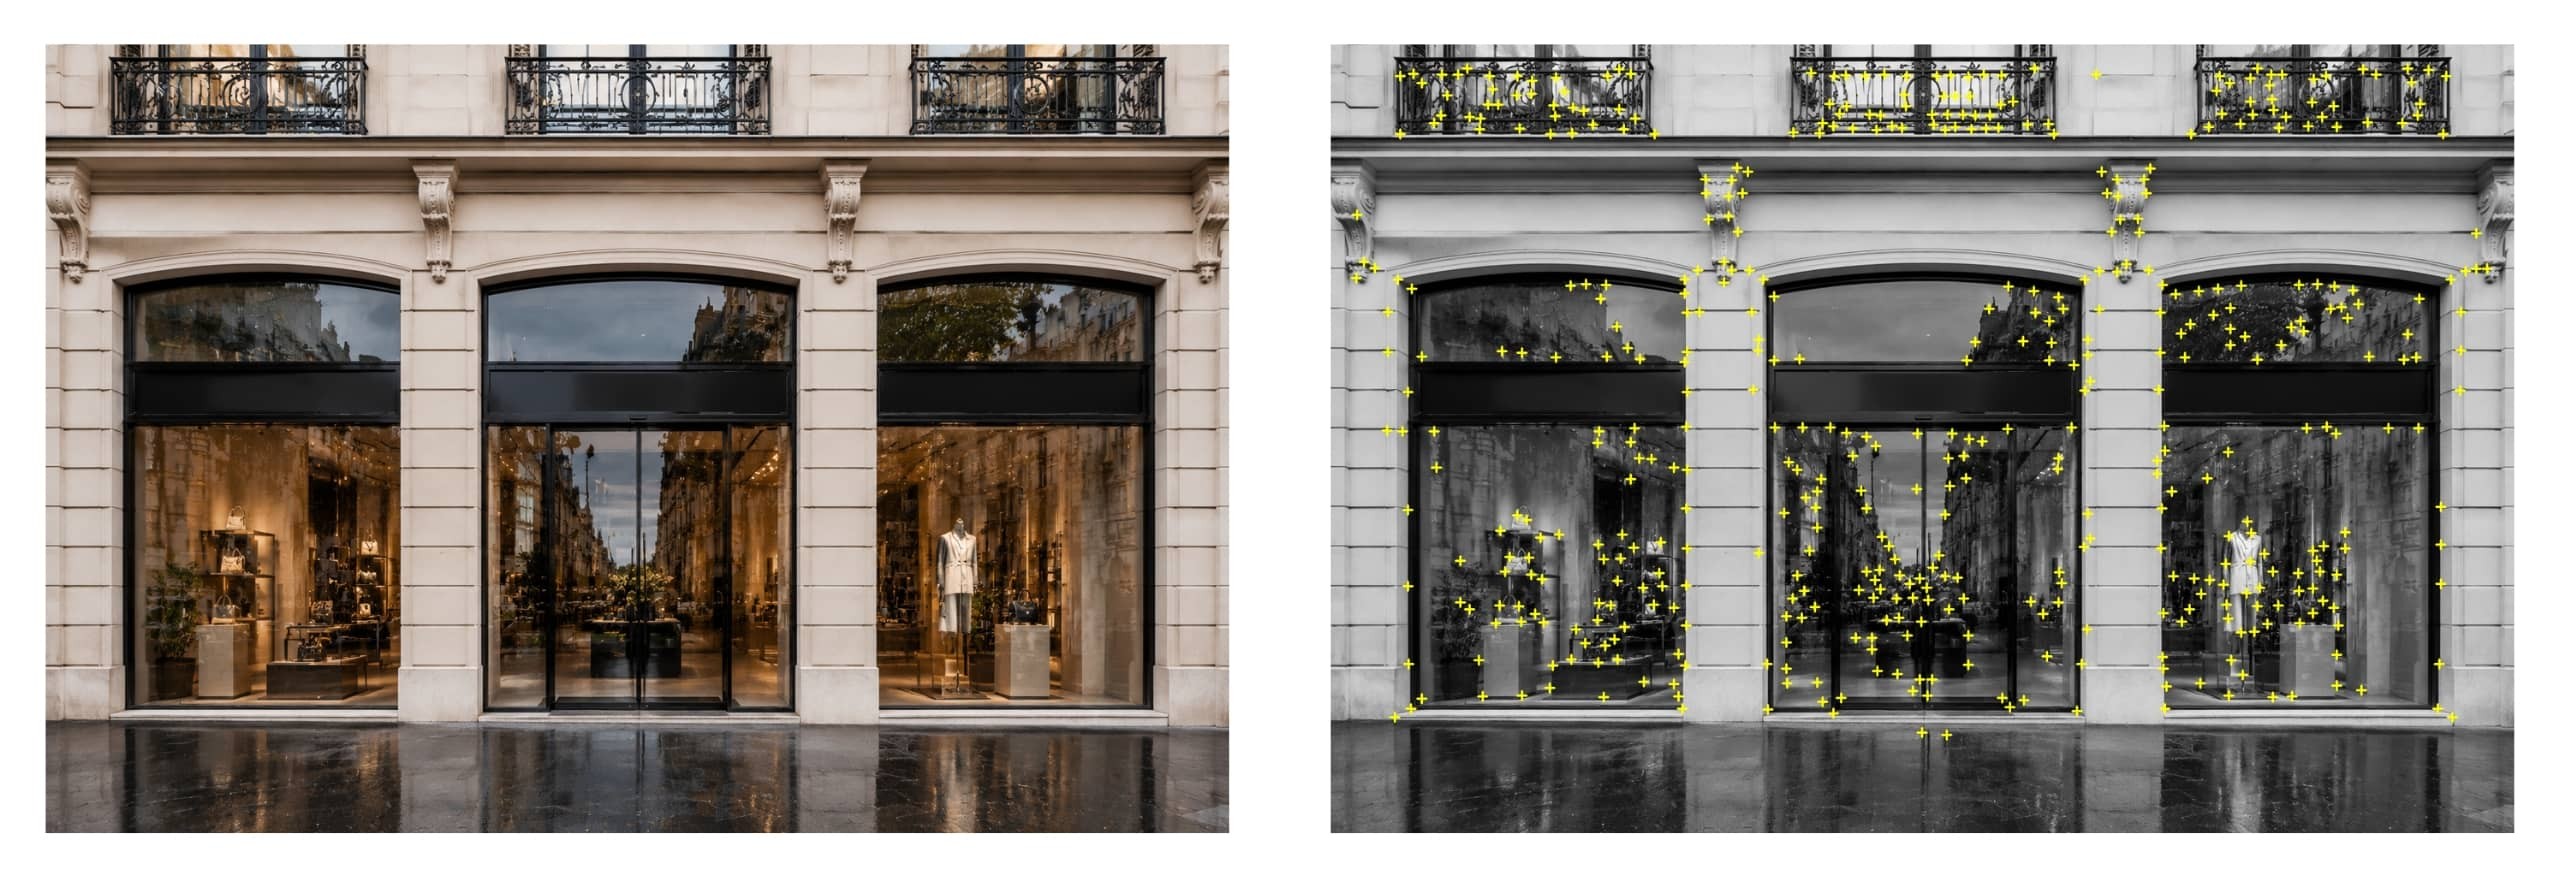
As shown in the image, most of the yellow feature points are located on store displays behind the glass windows and reflective areas, rather than stable details of the building itself.
During the real-world experience, changes in lighting and glass reflections can continuously affect these features, reducing the number of reliable tracking points and eventually causing landmark recognition failure or tracking loss.
Click here to sign up or log in to Kivicube.
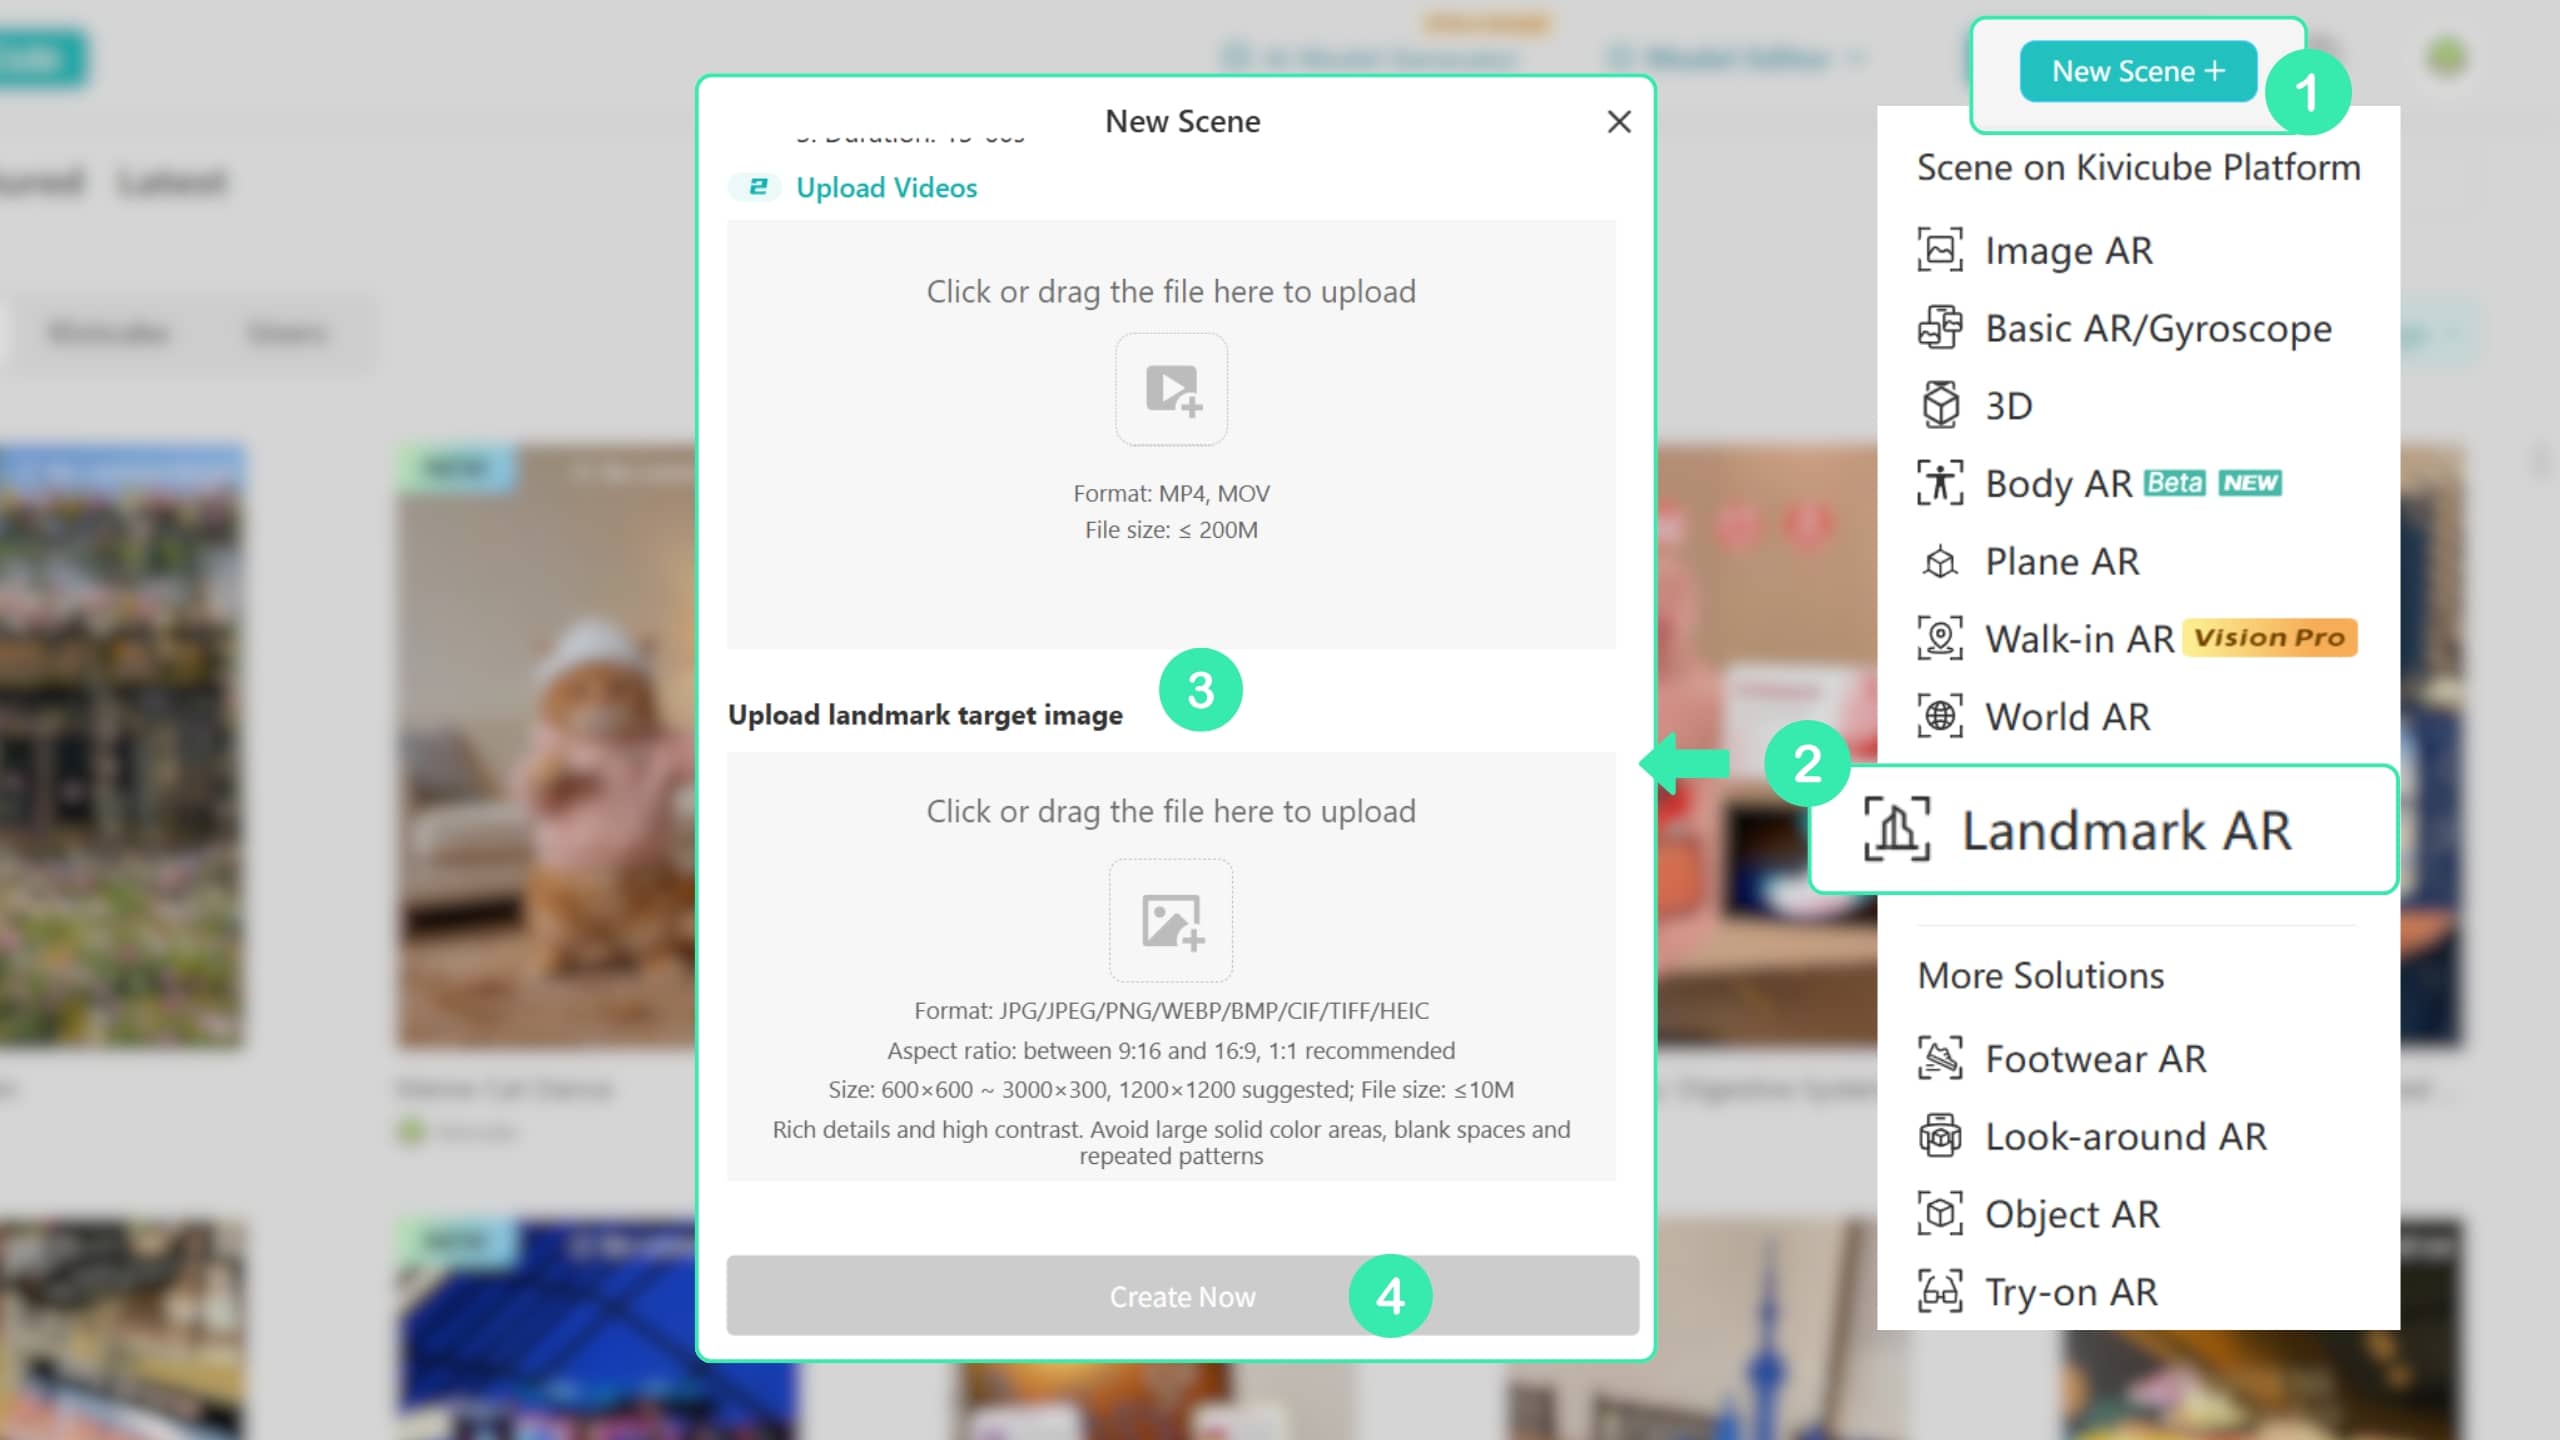
Click “New Scene+” in the top-right corner to create a new Landmark AR scene. Upload the tracking video and target image in the pop-up window, enter the scene name, and click Create Now.
In the Scene Editor, click AR Settings in the top toolbar and upload a new Landmark AR tracking video.
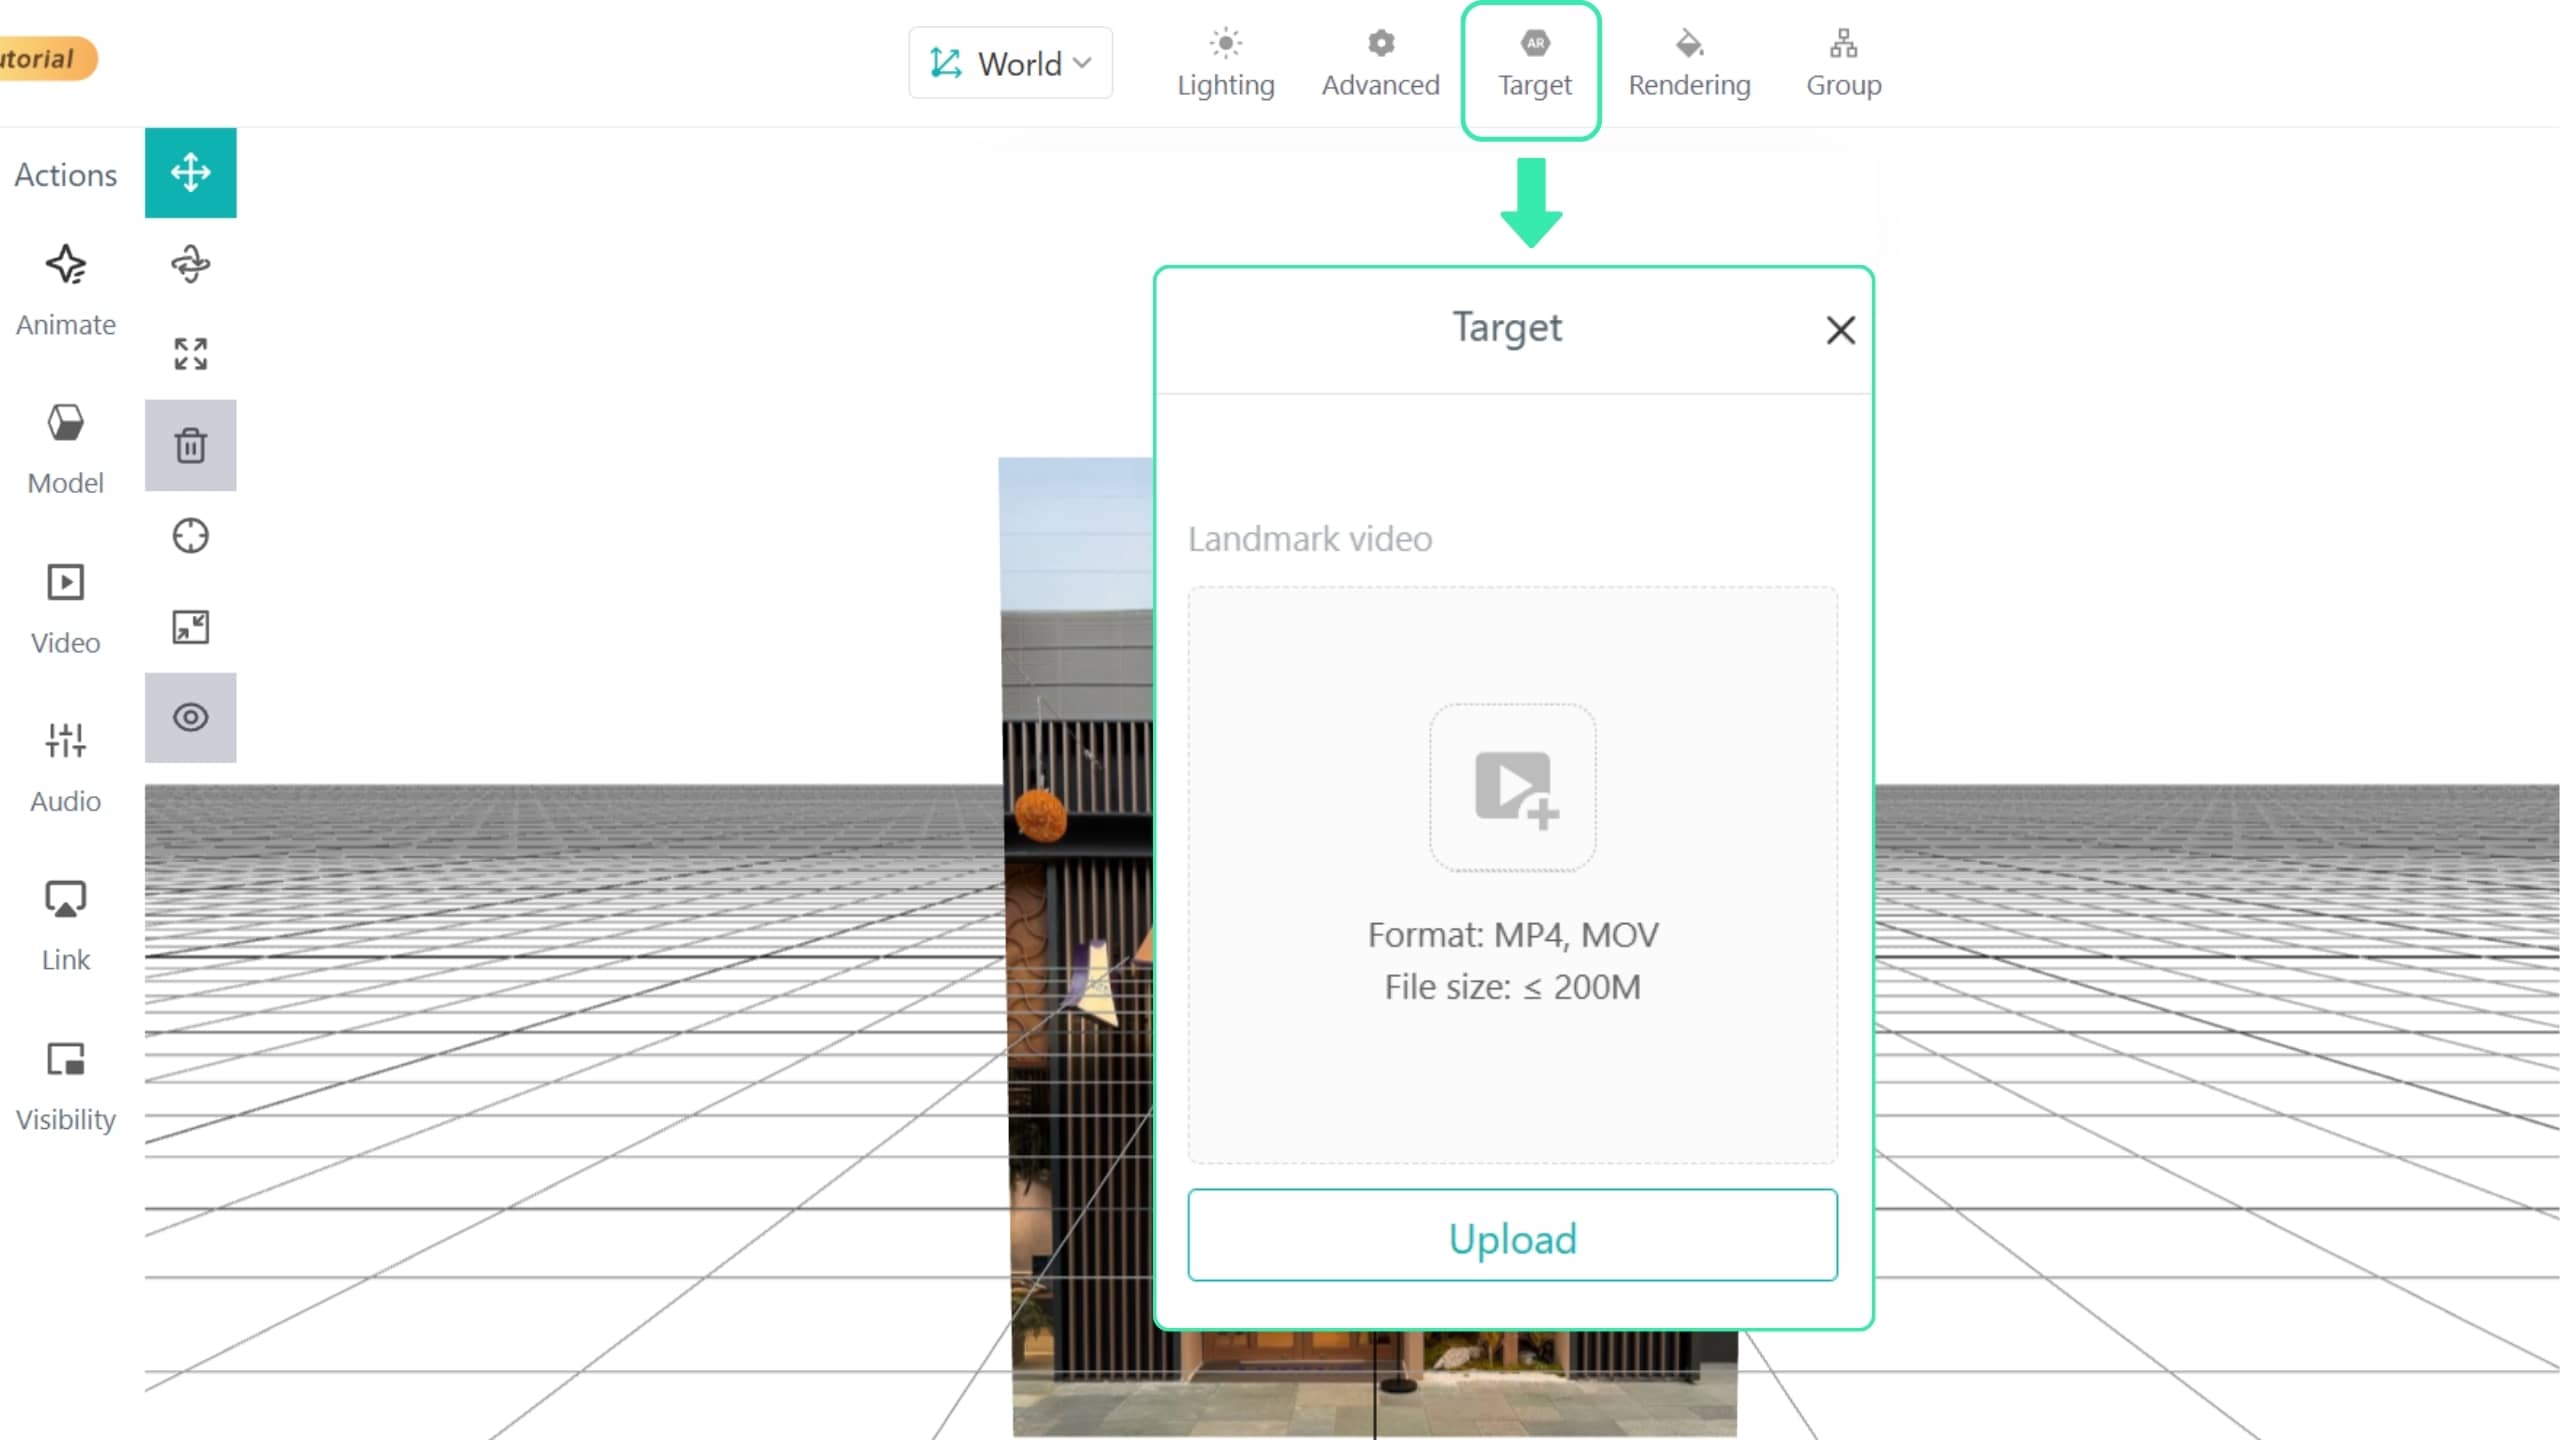
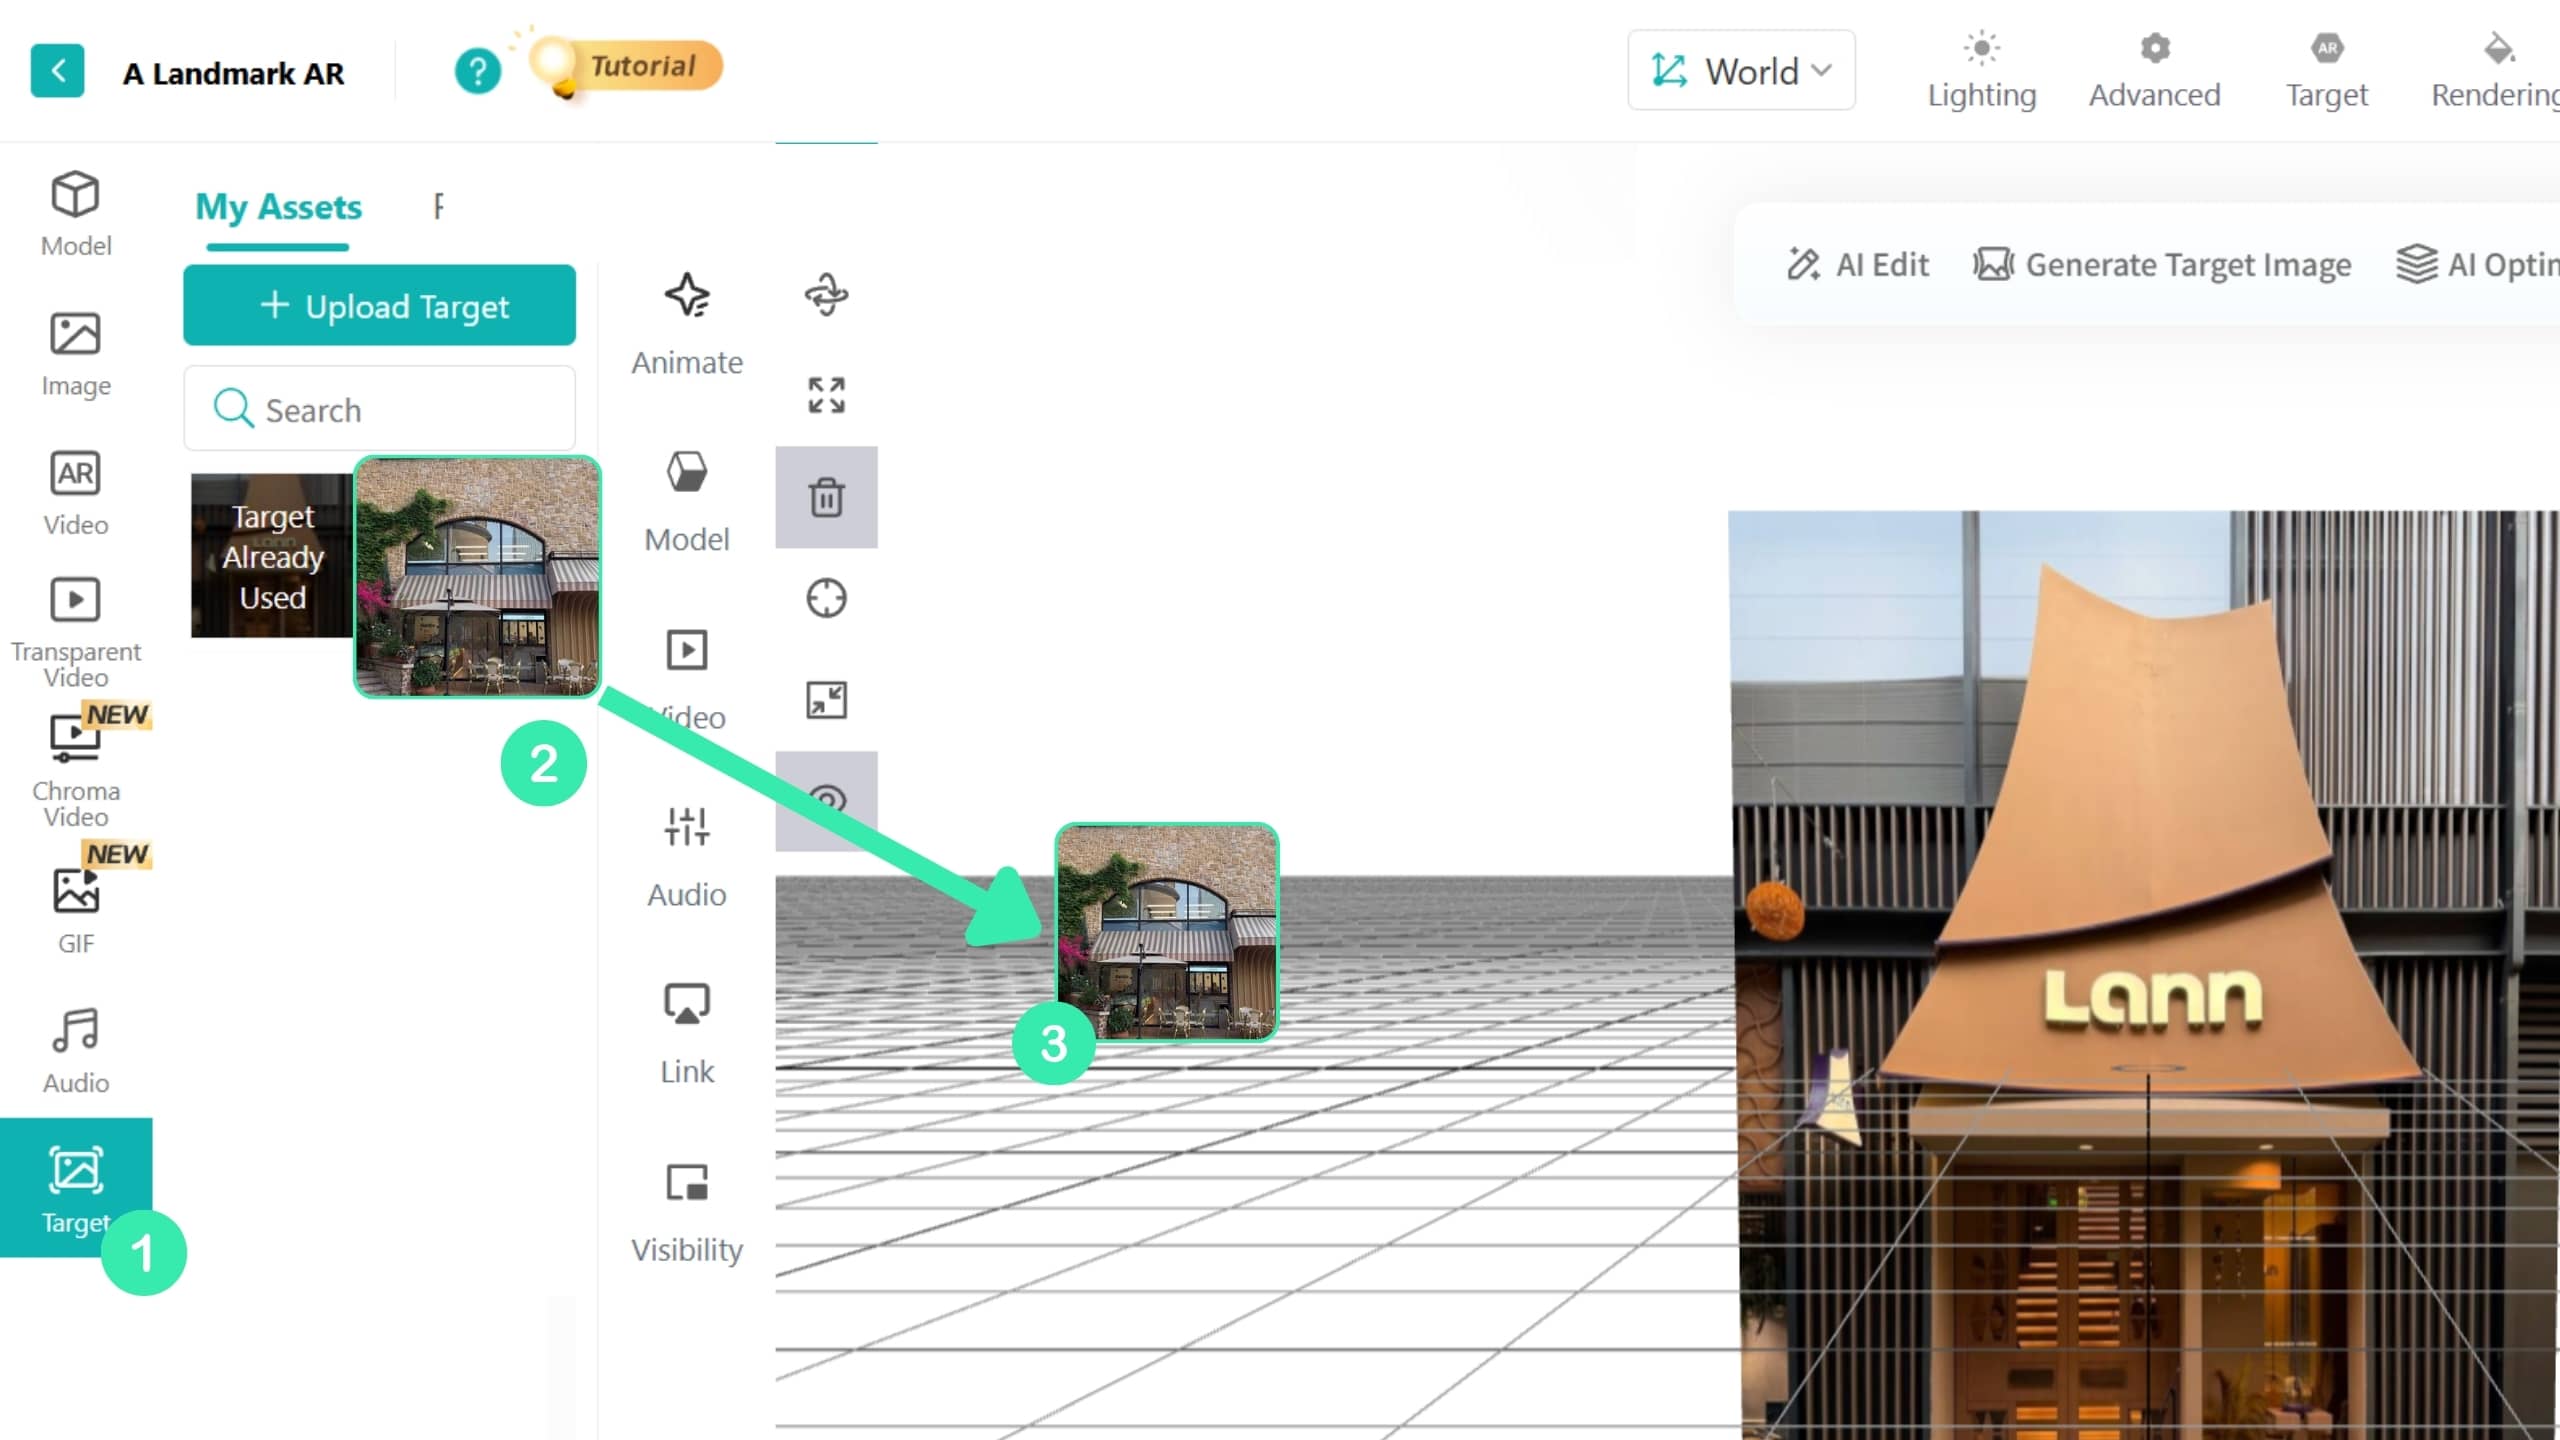
Click Target at the bottom of the asset panel on the left side of the Scene Editor. Upload a new target image and drag it into the grid area to replace the existing one.
Each Landmark AR scene can contain only one target image.
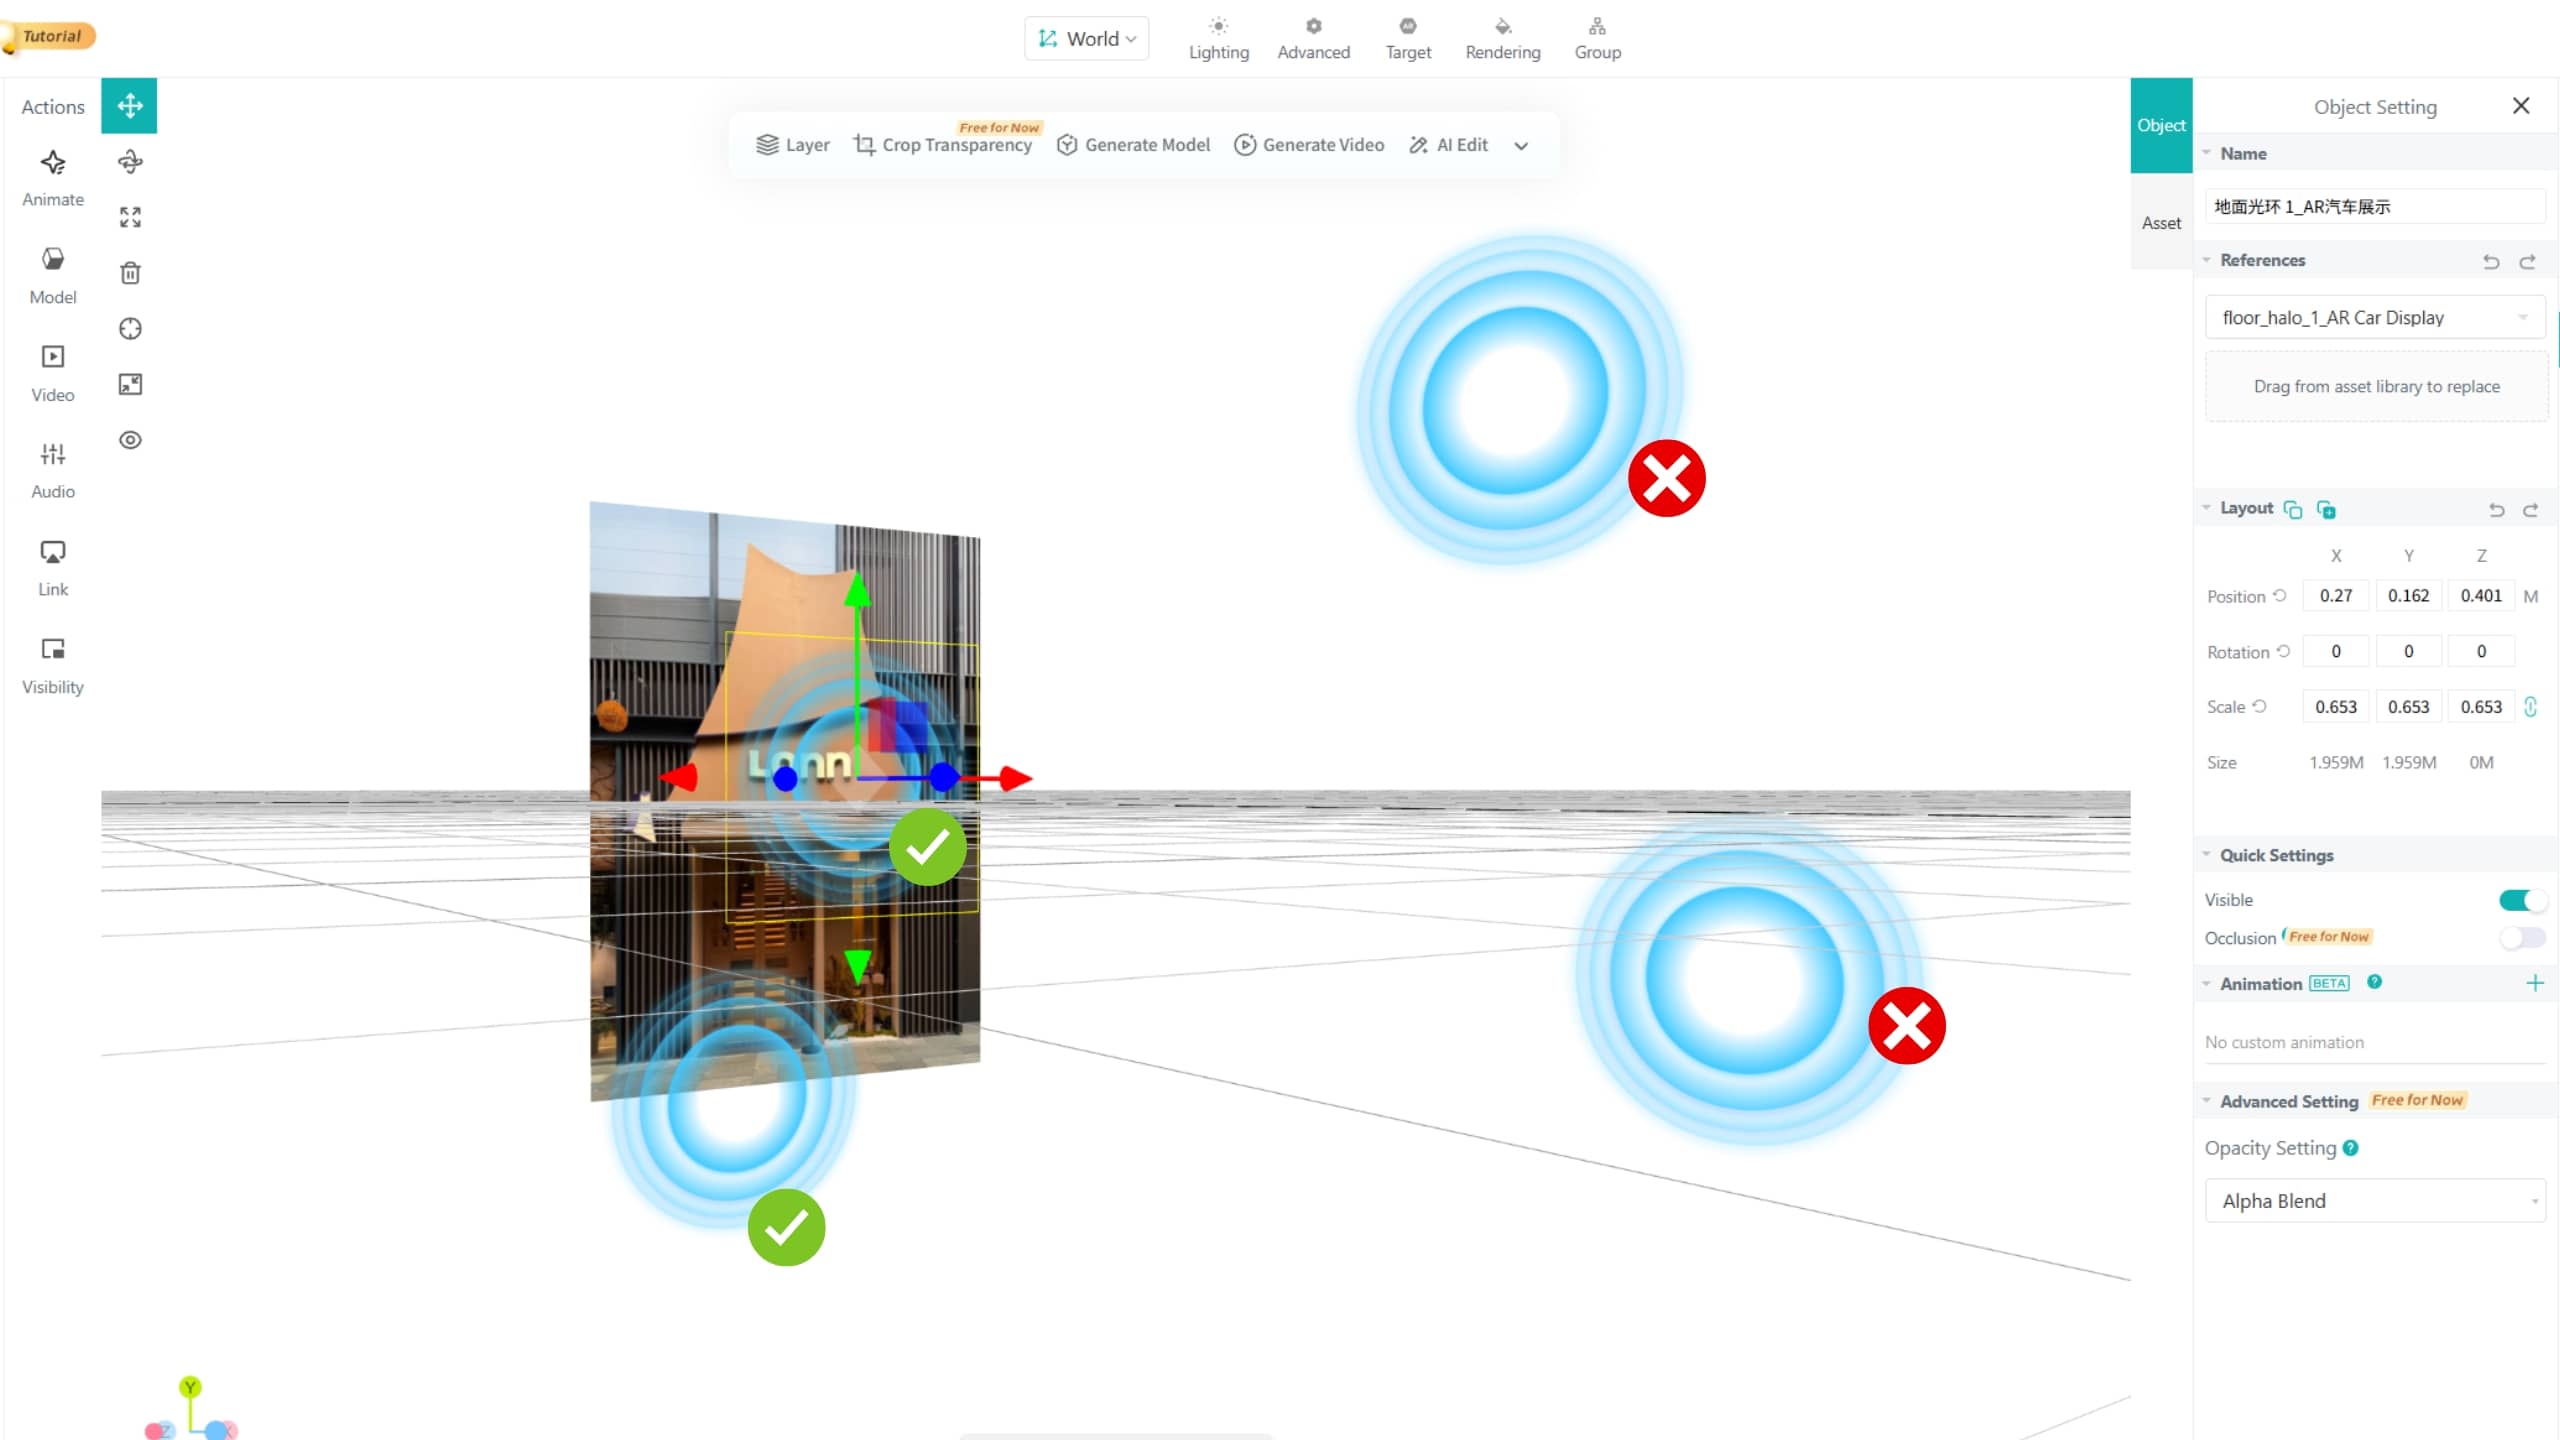
Besides choosing a suitable Landmark building and optimizing the tracking video and target image, you can further improve AR experience stability by adjusting the position and interactions of AR assets in the scene, reducing visual shaking during use.
In the Scene Editor, we recommend placing AR assets close to the building facade rather than too far away. Keep the size of AR assets reasonable and avoid making them too large or too high.
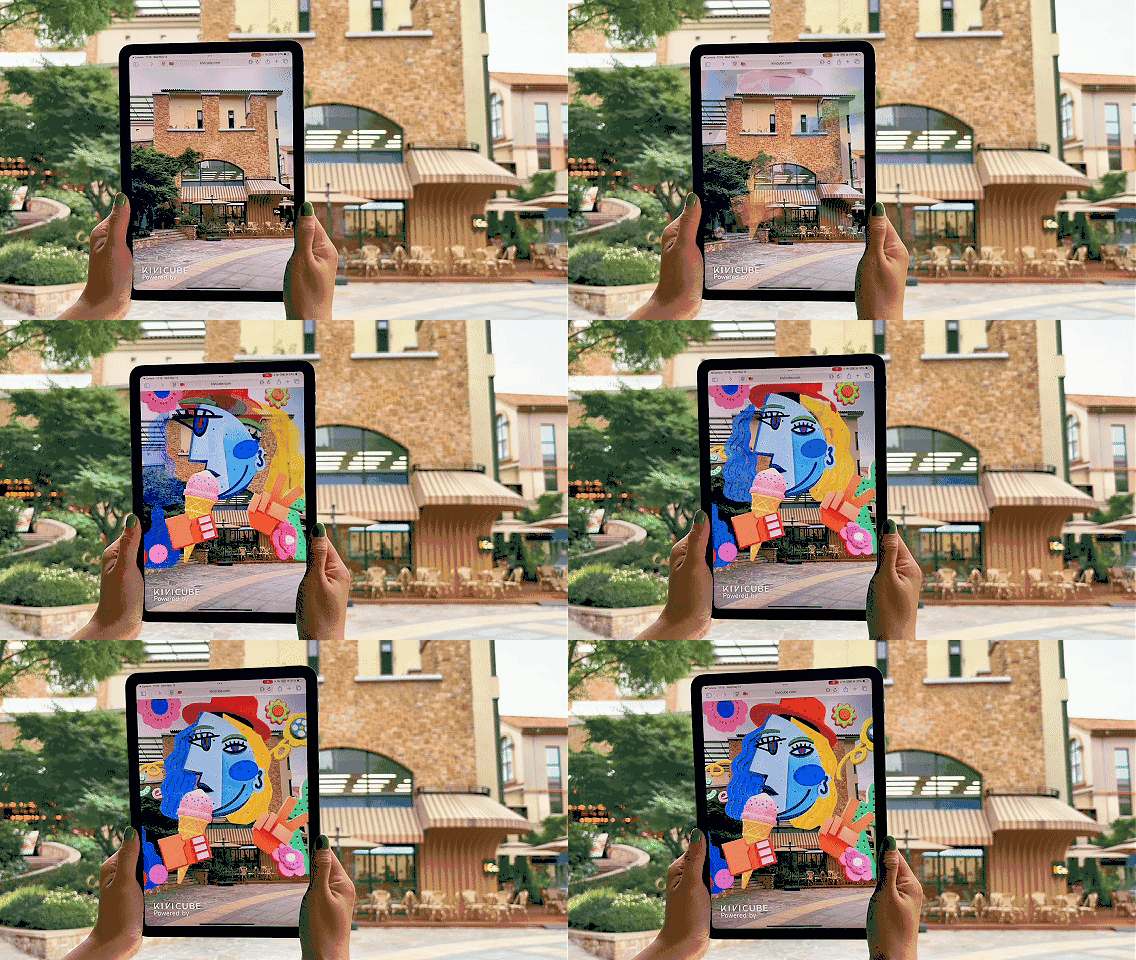
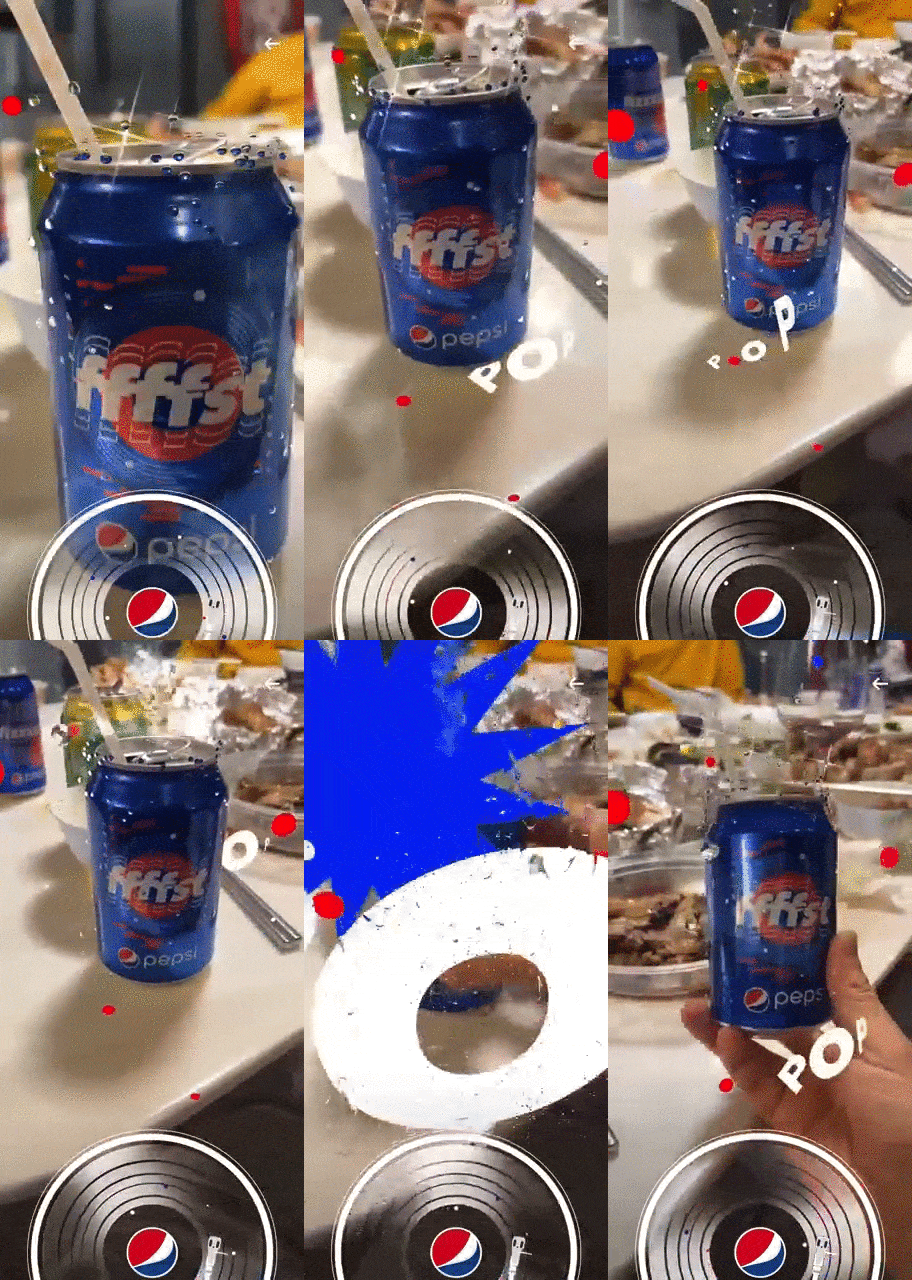
People are highly visual. Adding rich animations to AR assets can help reduce the negative impact of visual shaking.
For example, in the AR tracking case below, the scene contains rich animations. Although slight tracking jitter may occur, it is difficult to notice during the actual experience.
When there are many people on site, pedestrians may frequently block the building facade, causing tracking loss. Users may need to point the camera at the Landmark again to restore the AR experience.
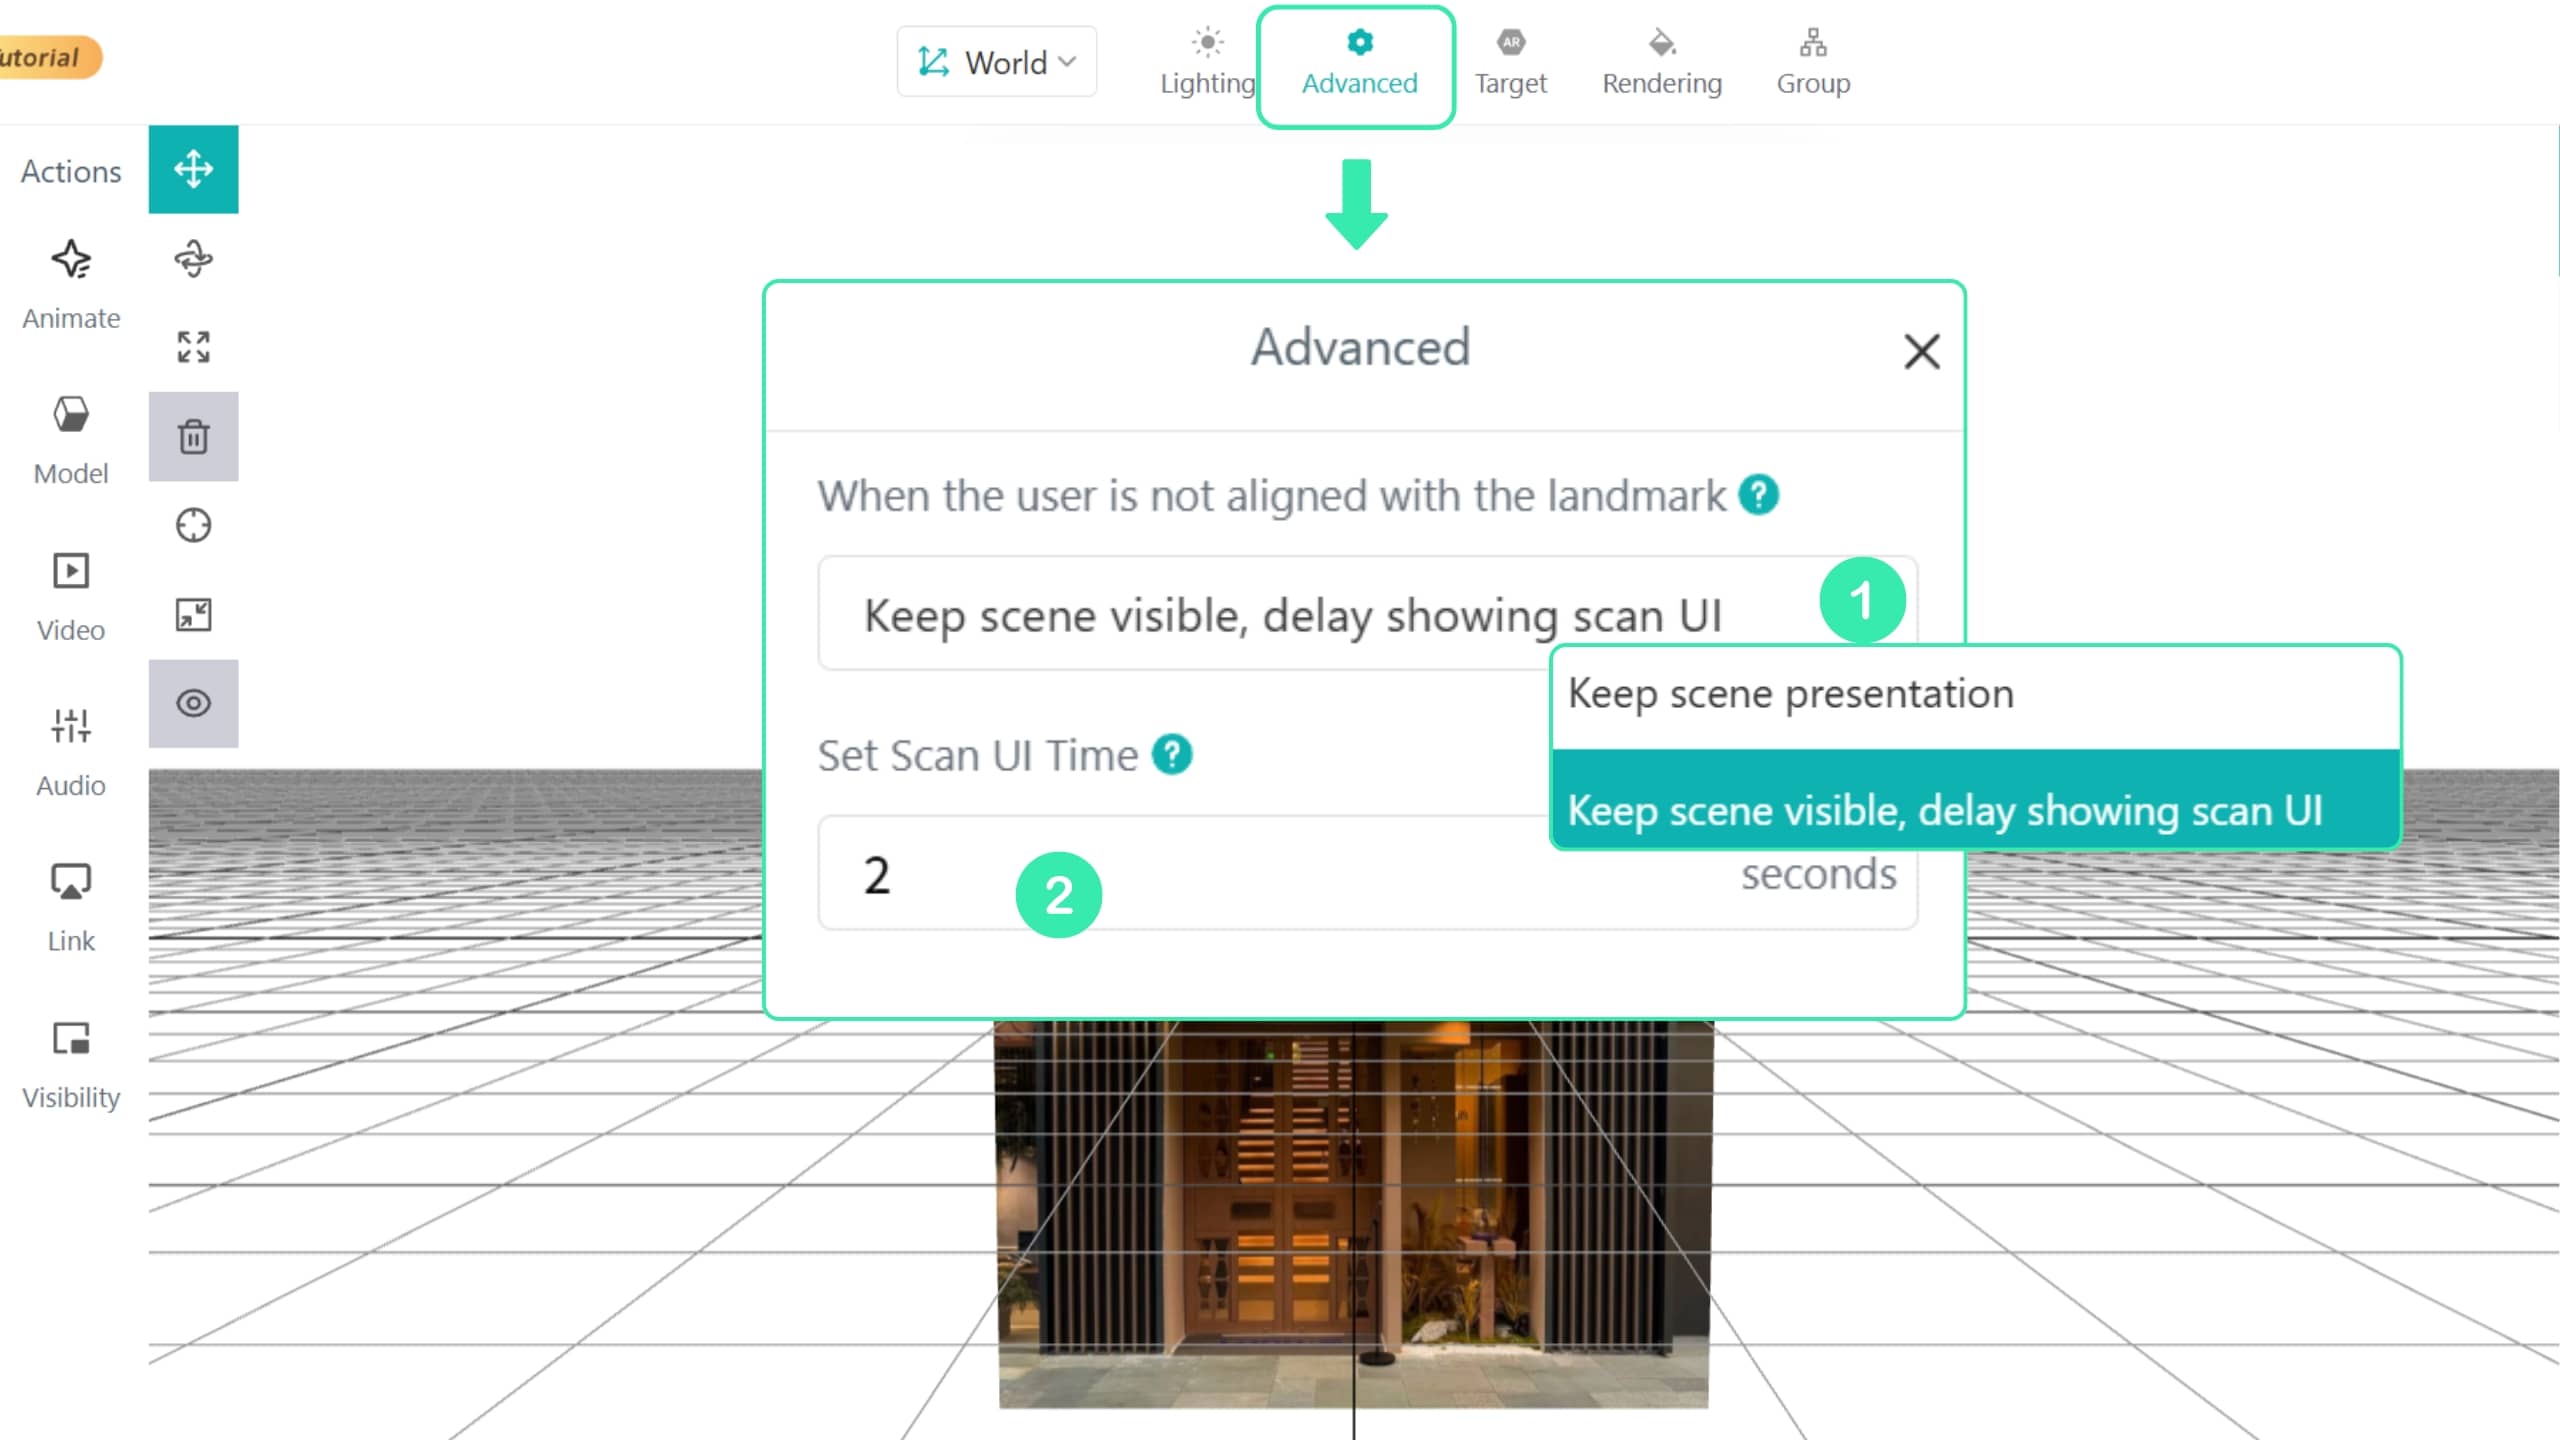
Open Advanced in the top toolbar of the Scene Editor to customize how long AR assets remains visible after the Landmark is no longer in view:
Keep Scene Visible: When the Landmark is blocked or the camera moves away from the building, AR assets remains visible and does not disappear.
Keep Scene Visible, Show Scan UI After a Delay: When tracking is lost, AR assets remain on the screen temporarily. After the set time (2 seconds by default, customizable), the content will be hidden and the scan guidance UI will appear automatically.