English
Appearance
World AR target image is a core asset required when creating a World AR scene. It helps the system recognize real-world target objects and accurately place AR content in the correct position.
World AR is an AR scene type designed for large visual targets. It is mainly used to recognize real-world flat or 3D objects, such as large posters, murals, sculptures, art installations, and exhibition pieces. Compared with Landmark AR, which focuses more on buildings and spatial landmarks, World AR is better suited for creating immersive AR experiences around a single visual object.
Before creating a World AR scene, you need to capture a target image of the target object.
The target image helps the system recognize the real-world object and serves as a visual reference when editing the scene, making it easier to adjust the position of AR Assets in the real world and simplify the AR creation process.
To ensure good recognition performance and a stable AR experience, choose a suitable target object before creating a World AR scene. We recommend selecting real-world objects with rich visual details, clear textures, and well-defined structures, such as large posters, murals, sculptures, art installations, and exhibition pieces.
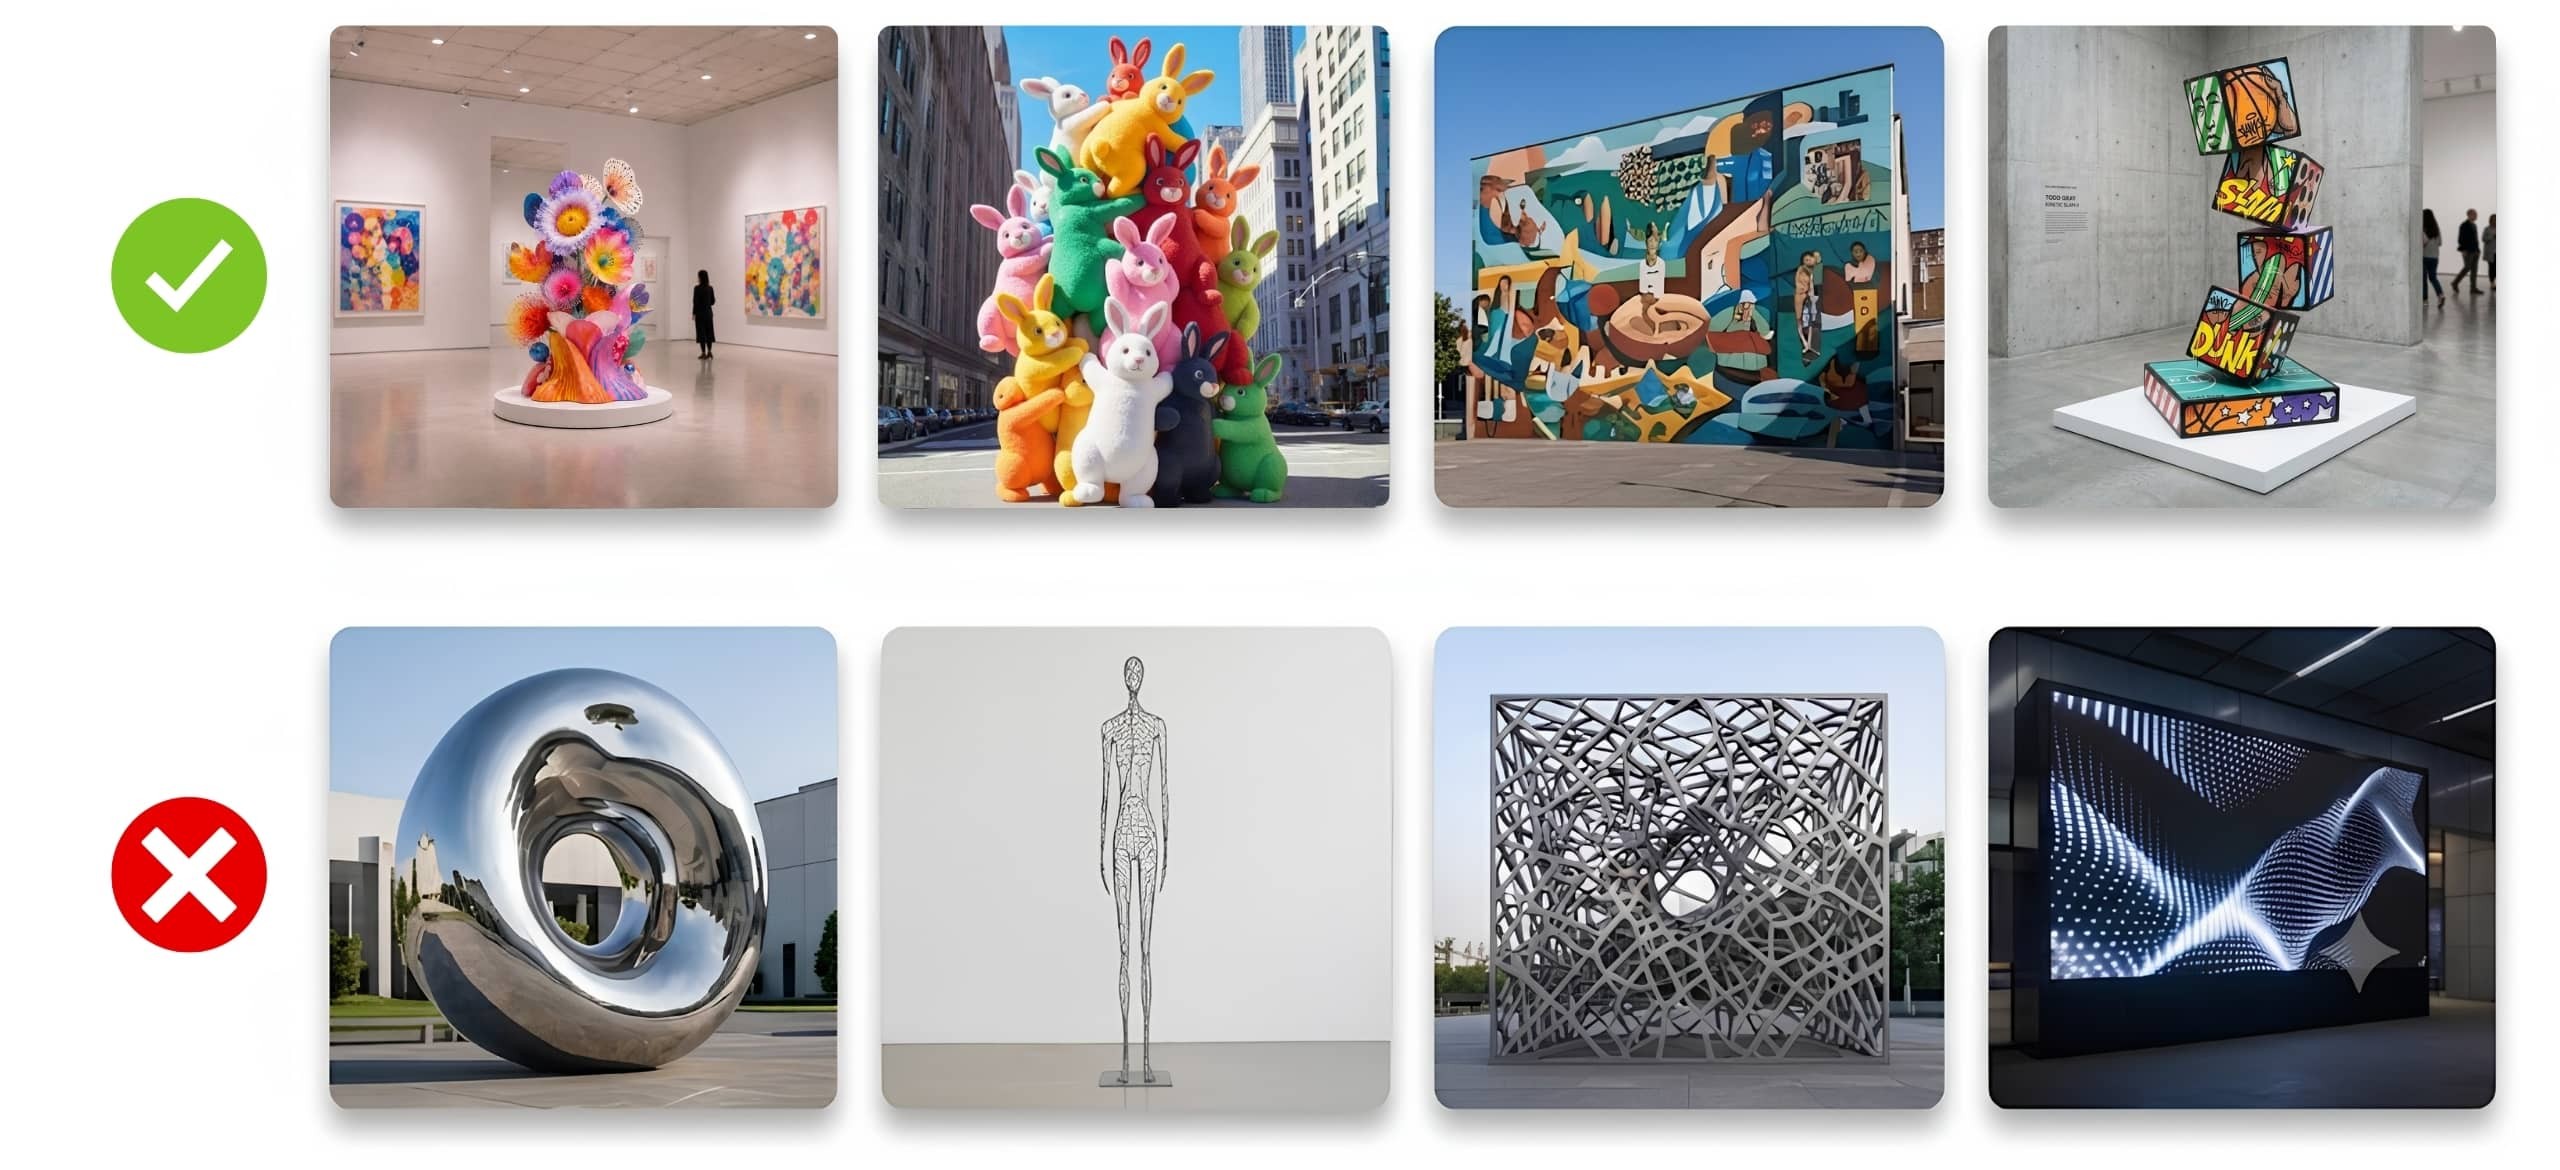
When choosing a target object, follow these guidelines:
Prefer targets with relatively flat surfaces and stable structures. Avoid overly 3D or hollow objects.
The target should be complete and clear, with rich details such as textures, patterns, and text. Avoid overly simple targets or large blank areas.
Avoid targets with highly reflective, transparent, or mirror-like surfaces, such as glass or polished metal.
Avoid targets that change or move, such as video screens or dynamic lighting installations.
Avoid overly narrow targets, such as long banners or thin sculptures.
The target should not be too small. Make sure the entire target can be clearly seen on the phone screen during the experience.
Keep the environment well-lit. Avoid dark environments or strong backlighting.
TIP
The guidelines above are only for reference when choosing a target object. After selecting a target object, capture a target image and upload it for testing. The final recognition performance should be verified through real device testing.
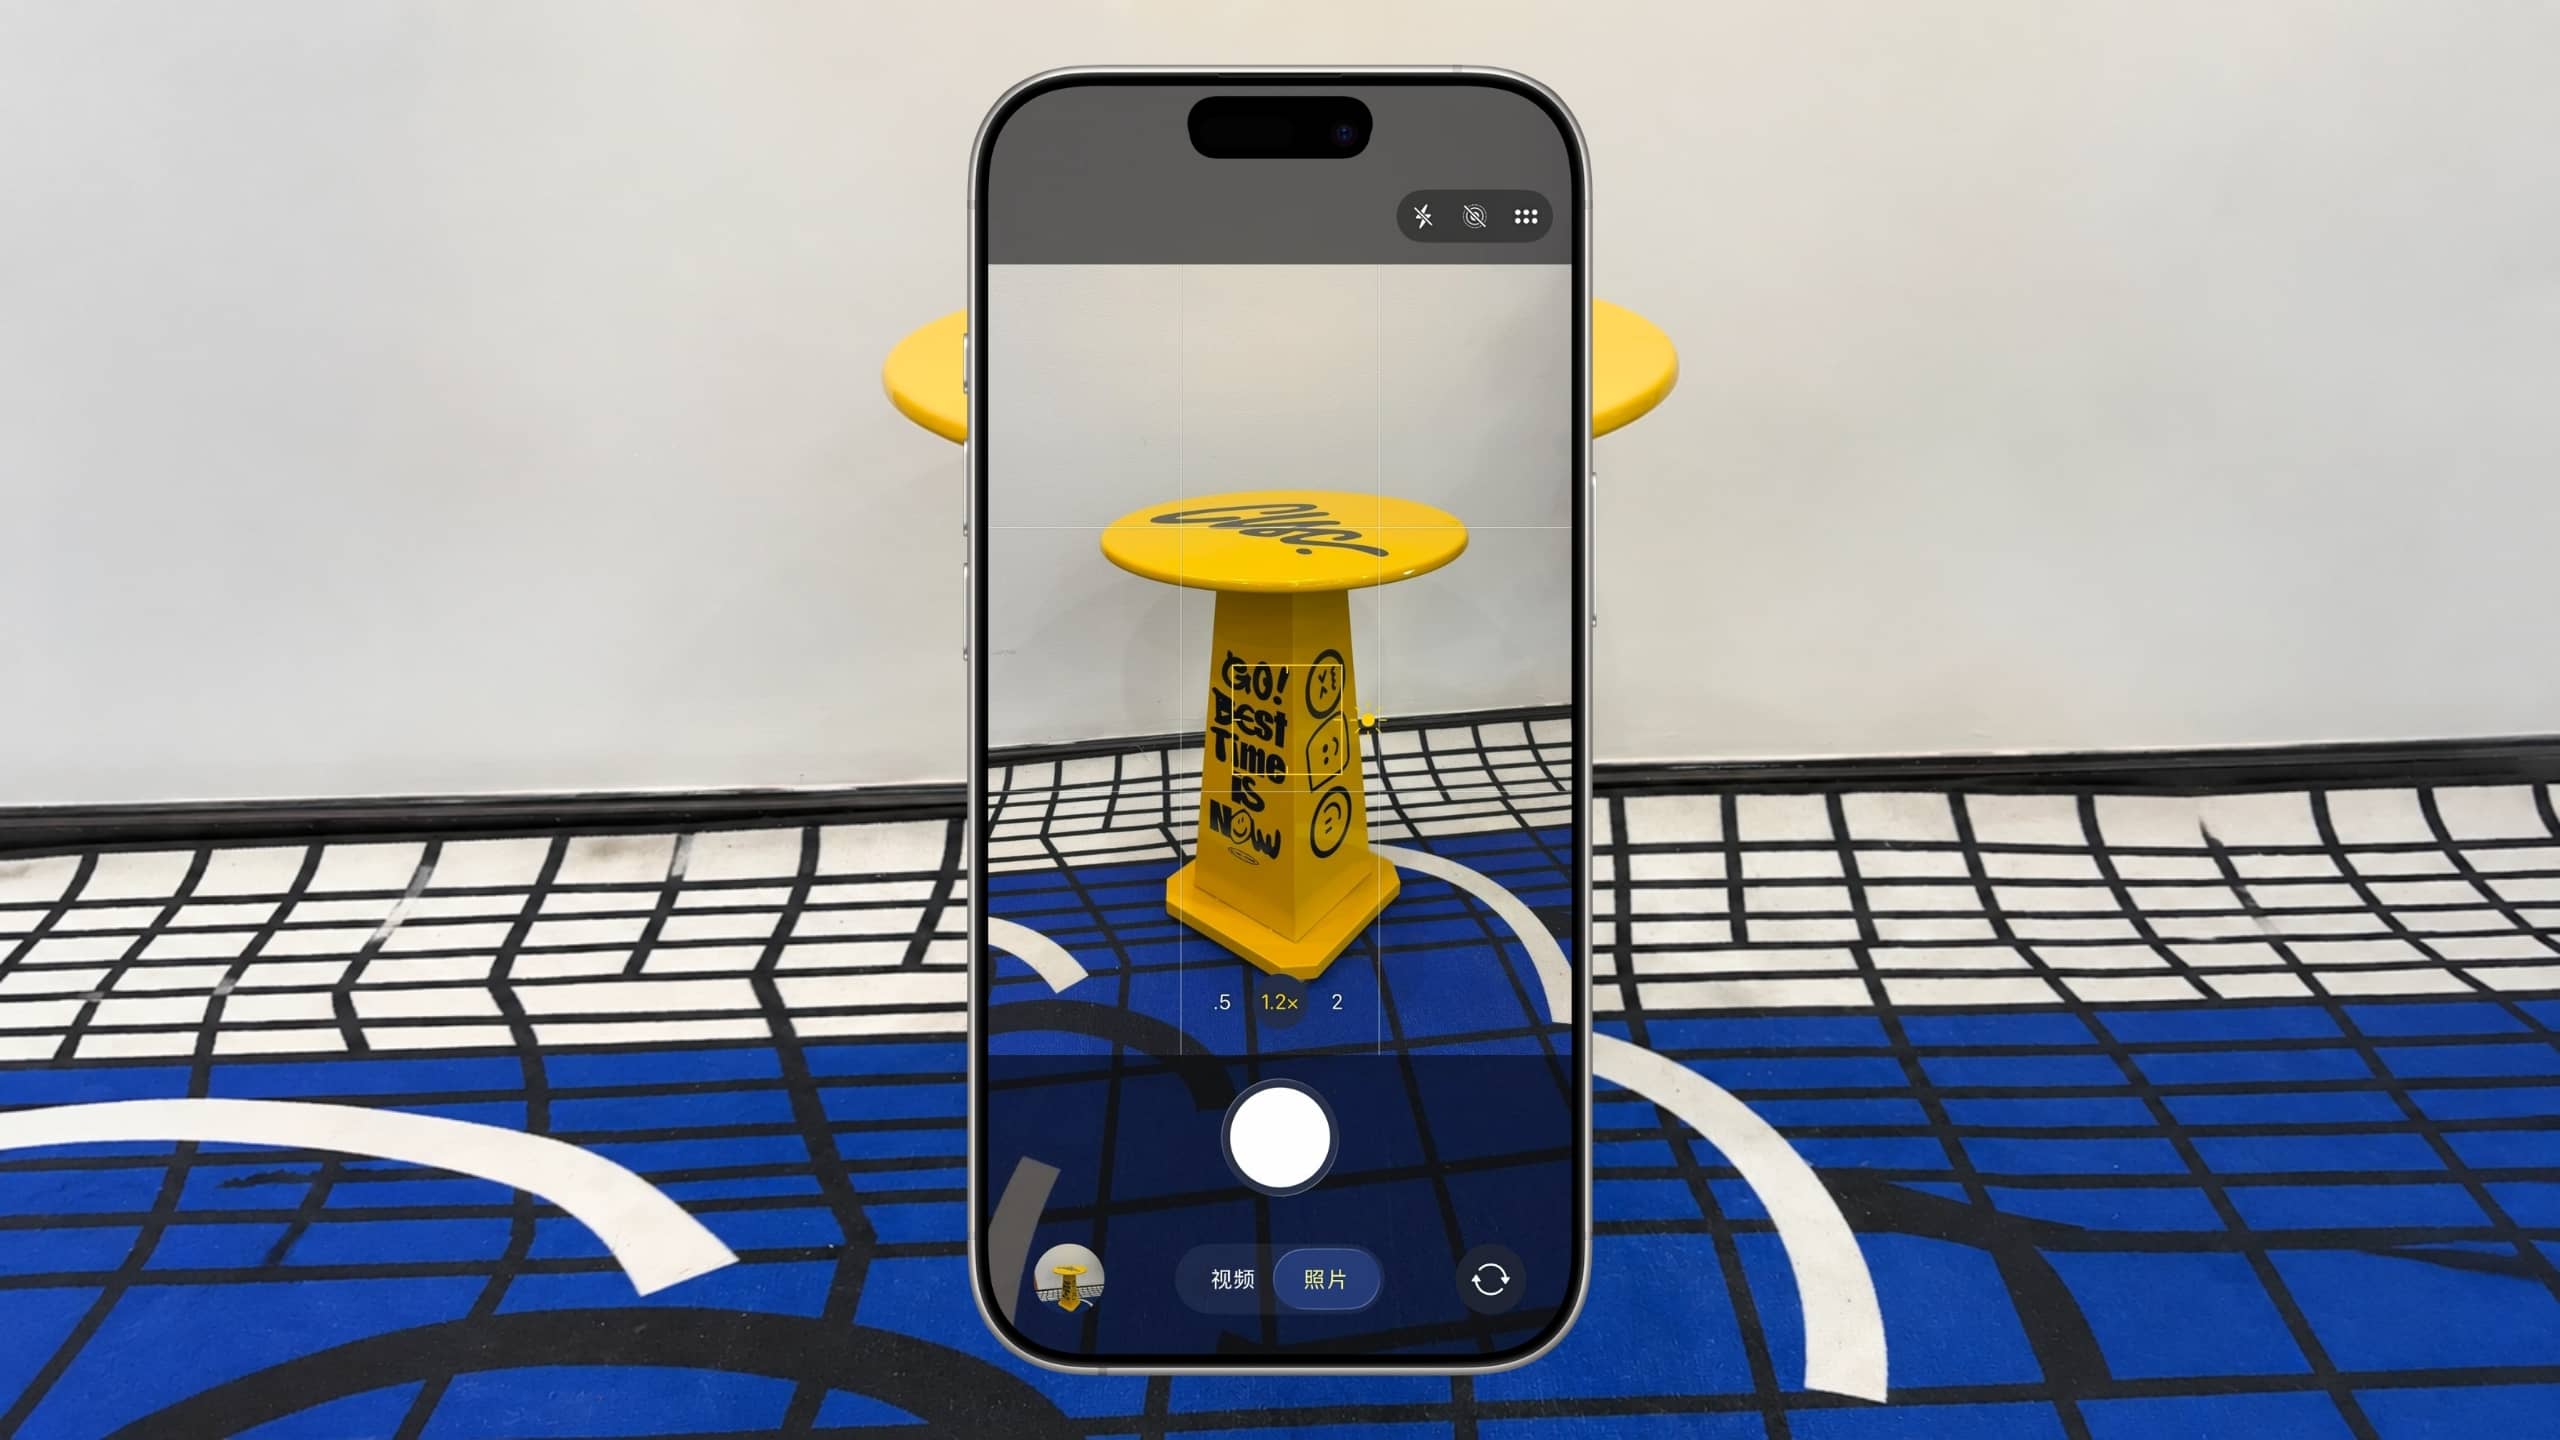
After selecting a target object, capture a front-facing photo of the object as the World AR target image. The target image is used to help the system recognize the object and determine where to place AR content.
When taking the photo, keep the camera facing the target object as much as possible. Avoid tilted angles, distortion, or occlusion, and make sure the image is clear and complete.
Image quality: Keep the target complete and clear. Avoid occlusion, blur, large solid-color areas, or repetitive patterns.
Details: Choose images with rich details and good contrast to ensure the system can extract enough visual features.
Format: Supported formats include JPG, JPEG, PNG, WEBP, BMP, TIF, TIFF, and HEIC.
Size: An image size of around 800×800px is recommended. The recommended aspect ratio is between 1:1 and 16:9.
File size: ≤10MB.
TIP
We recommend using an actual photo of the target object as the target image instead of uploading a design file directly.
During real-world experience, the object material, lighting conditions, and shooting environment can affect recognition performance. Real photos better represent the actual user experience.
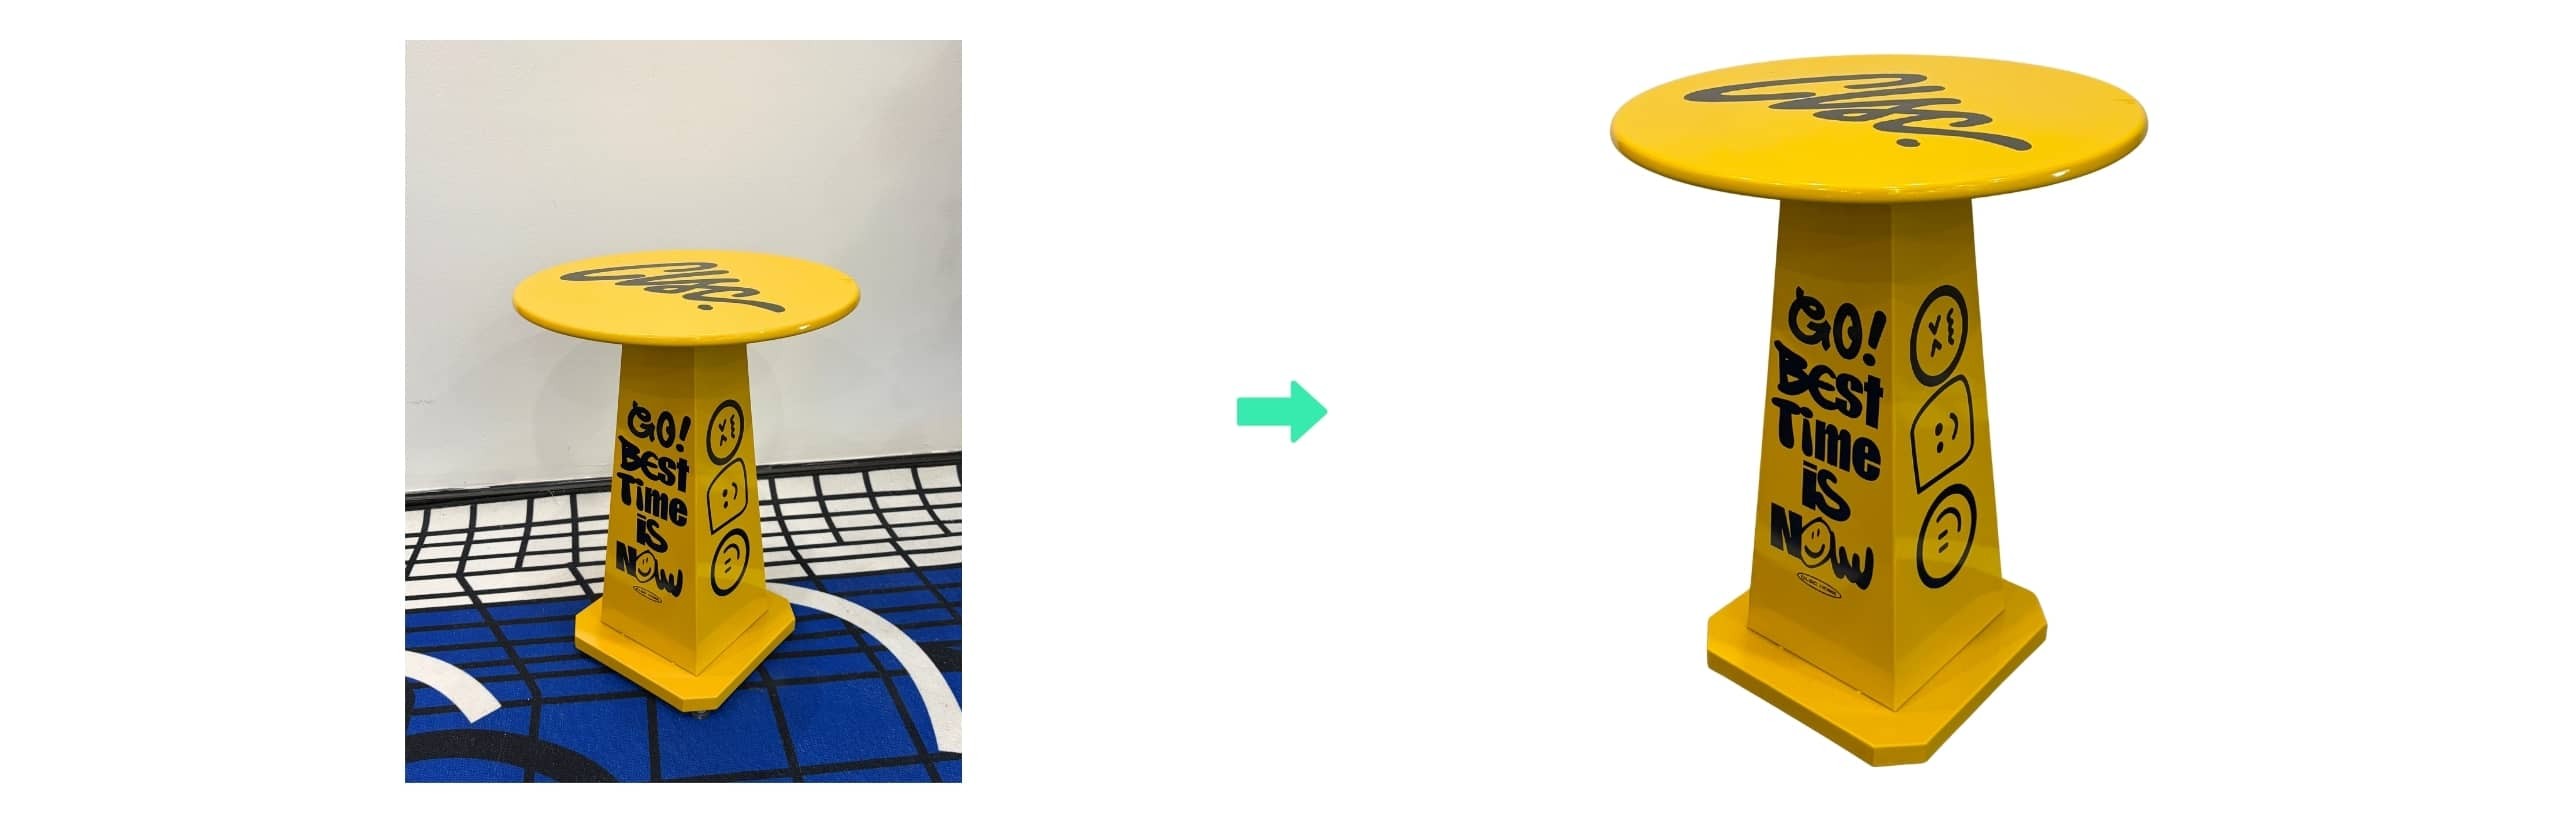
To improve training results and remove unnecessary interference, further process the captured image:
Correct the perspective and adjust the subject to a standard front-facing view.
Crop out unnecessary surrounding elements and remove potential interference.
If the target object can be moved, remove the background and keep only the main subject to preserve key visual features.
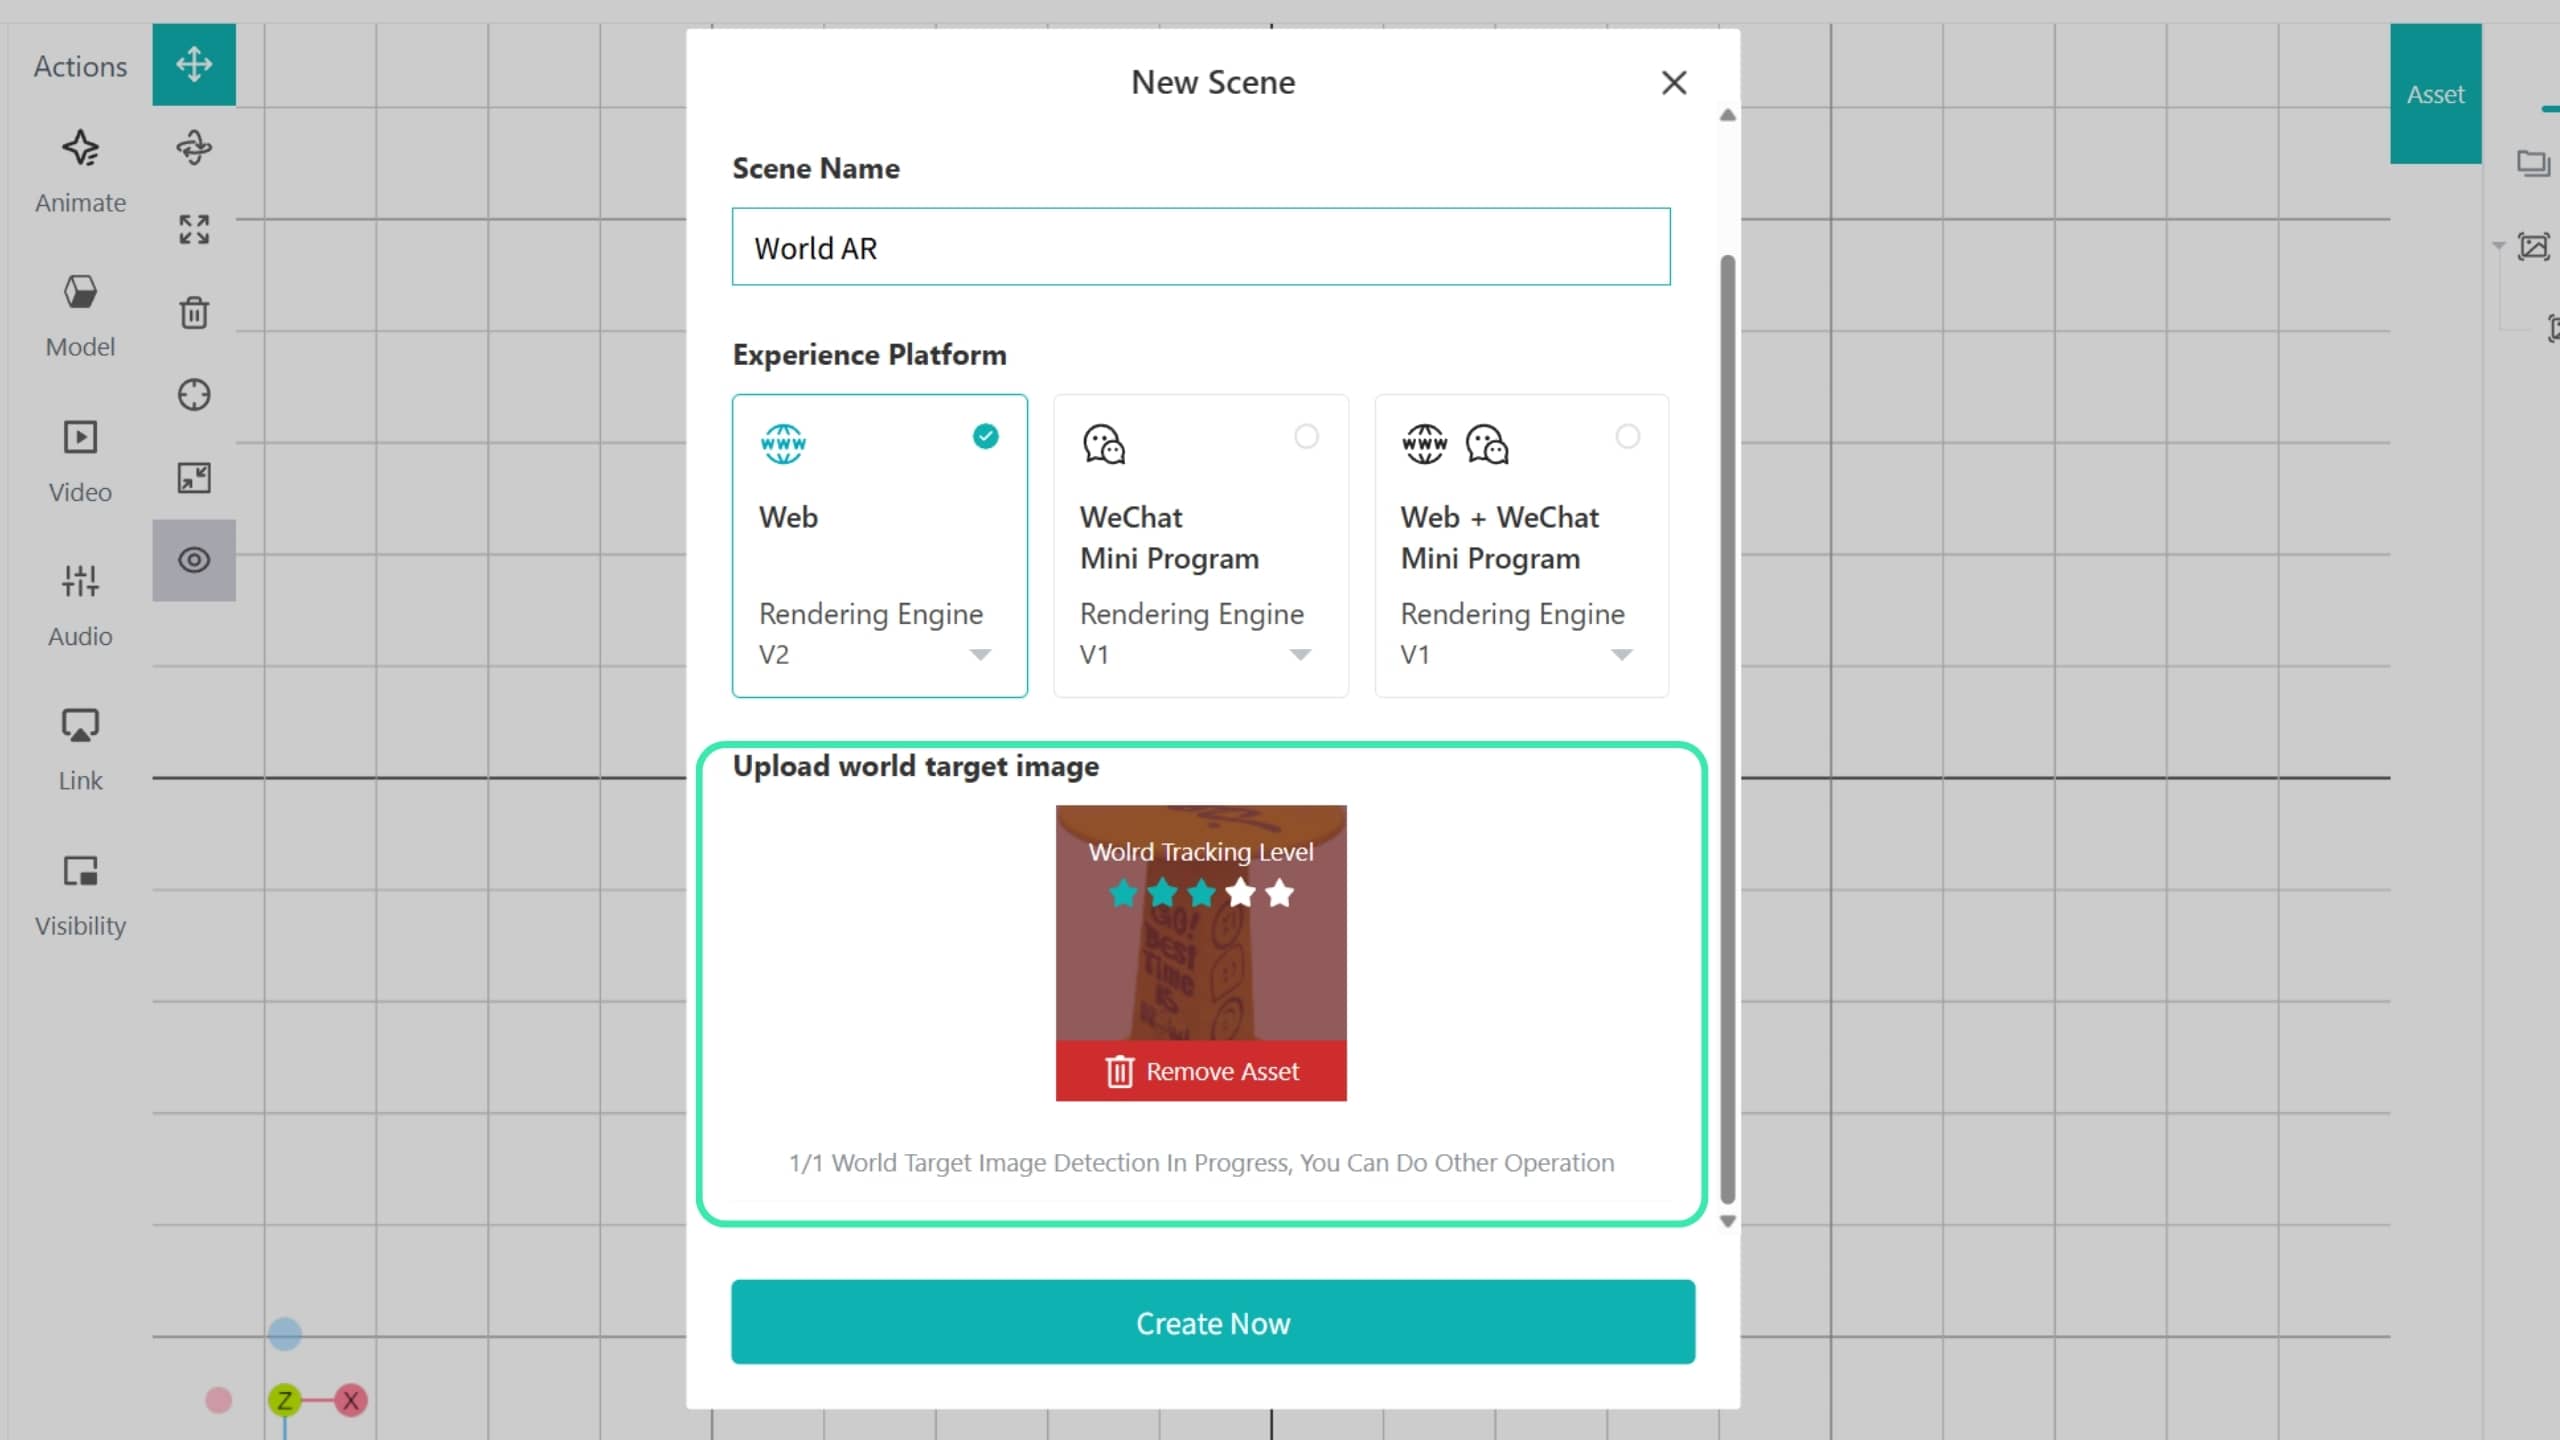
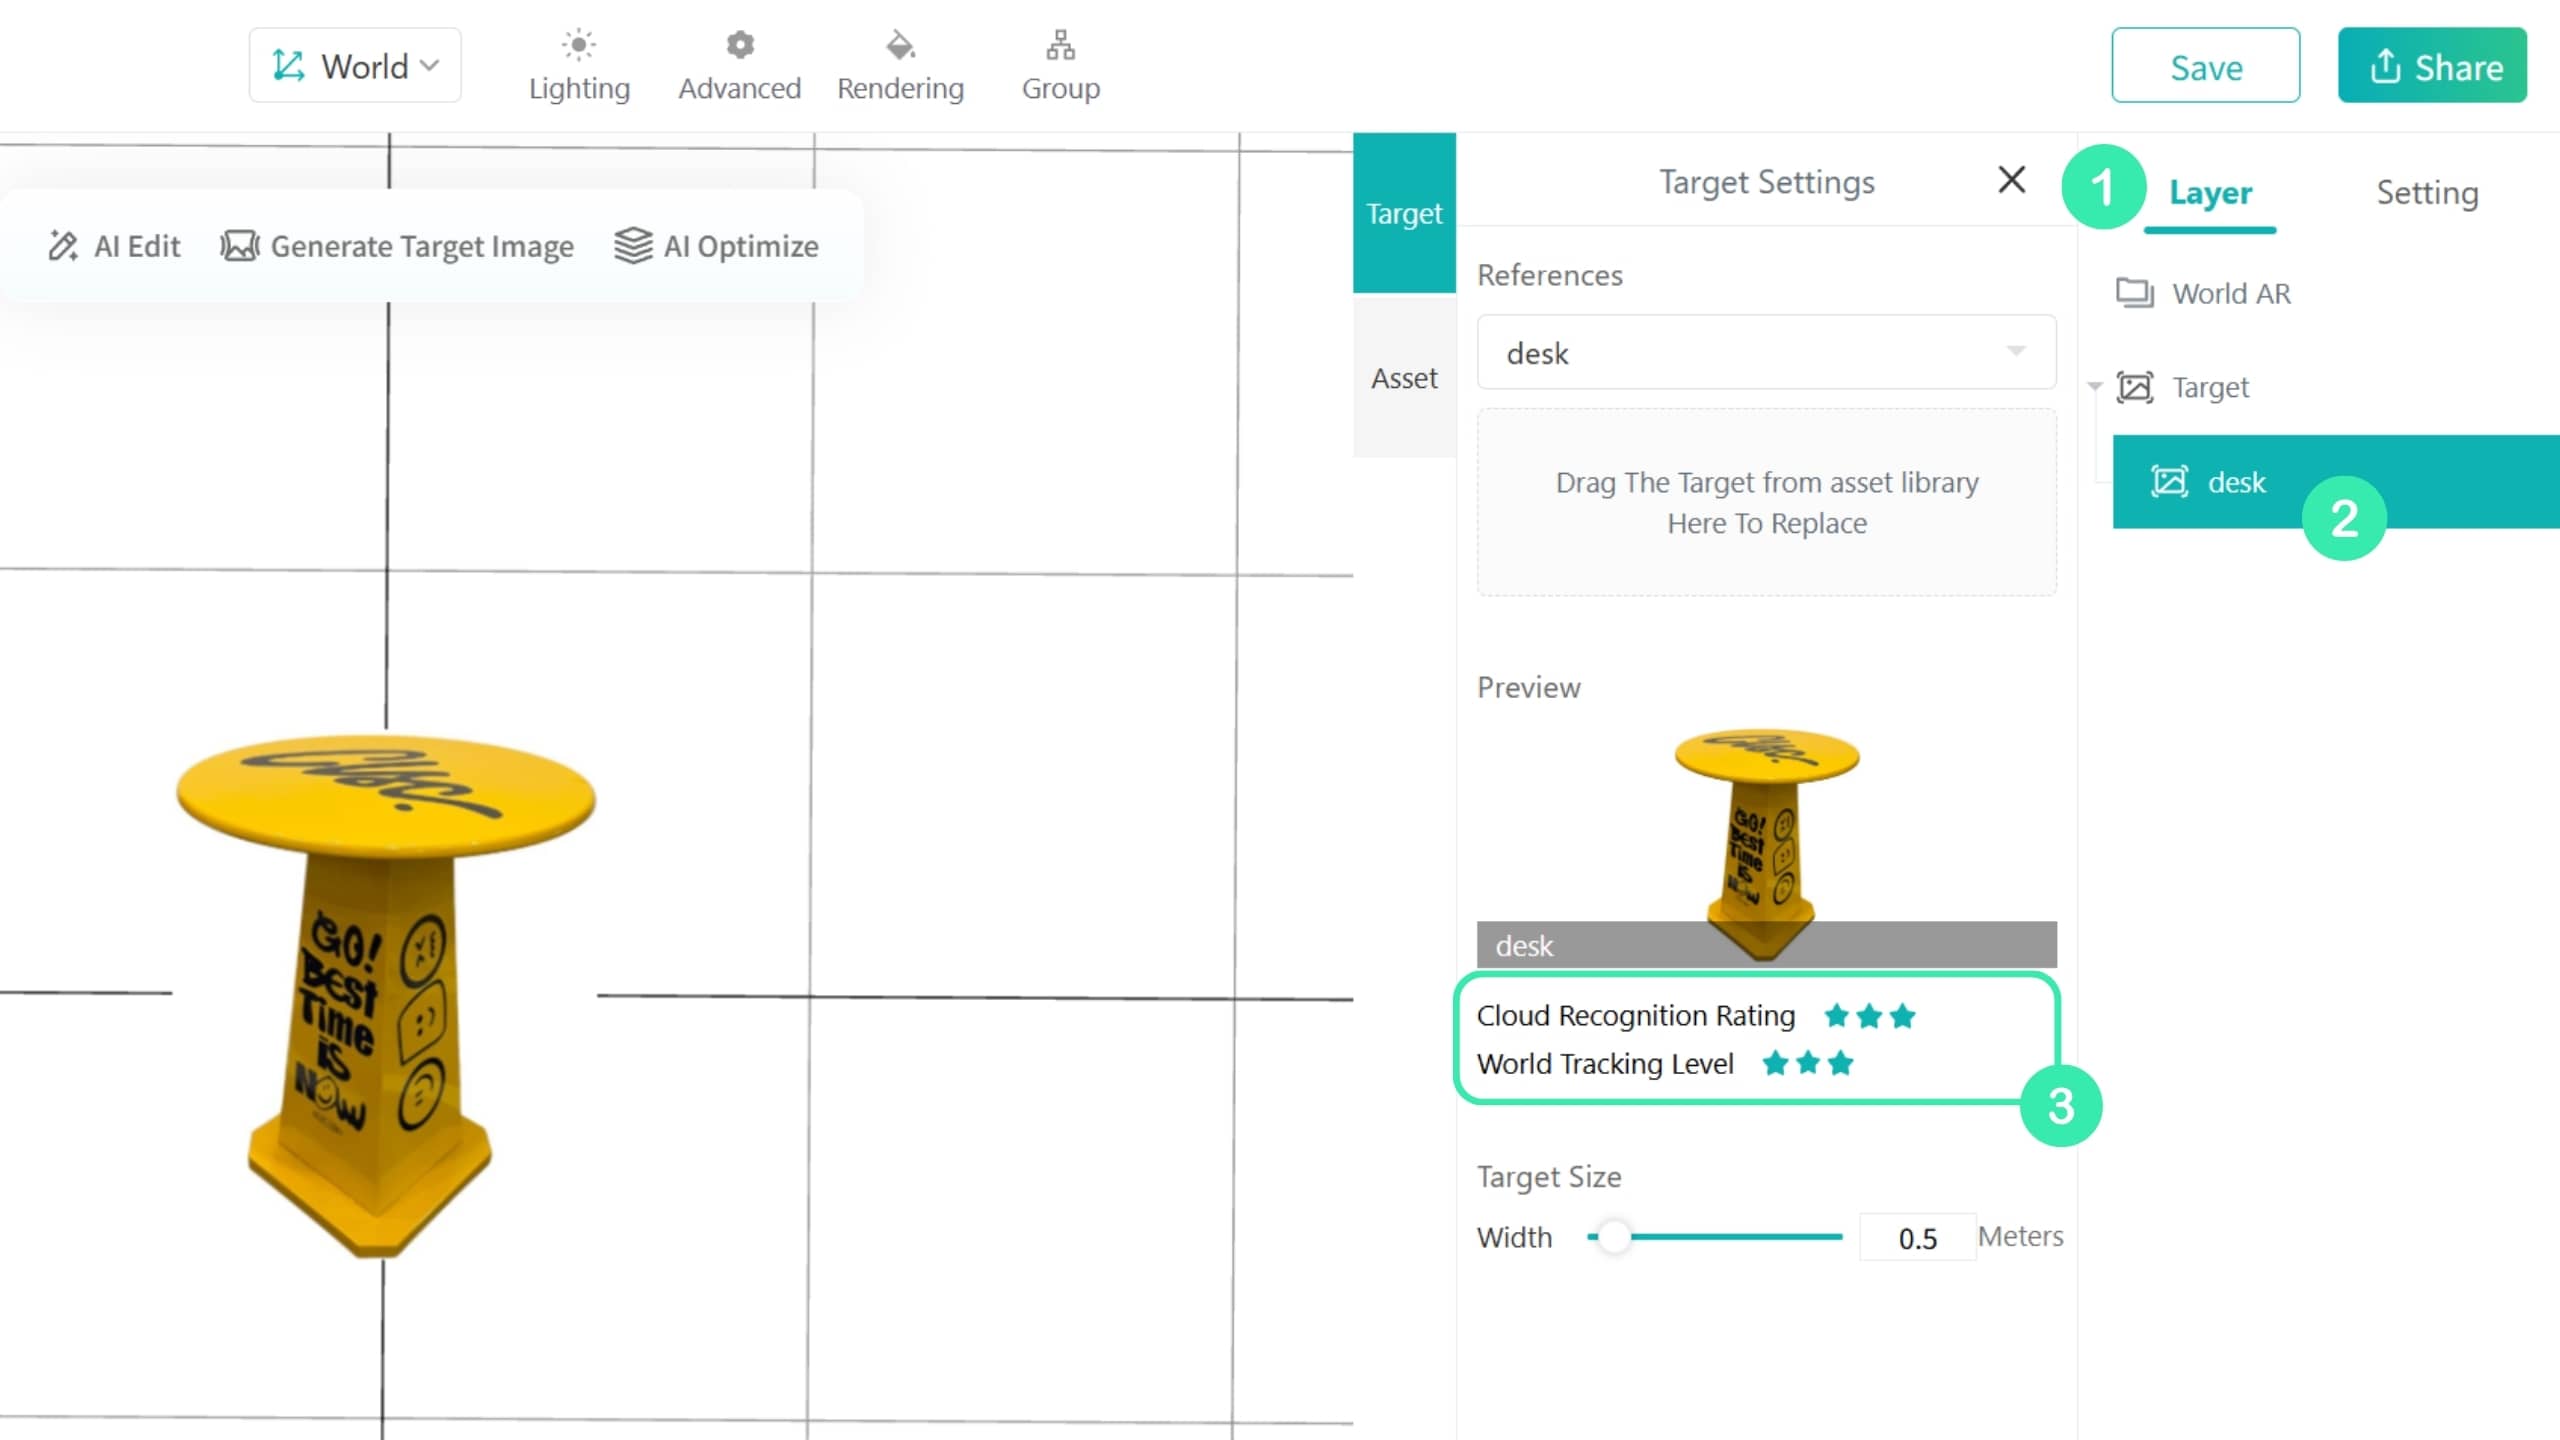
After uploading a target image in a World AR scene, the system automatically performs a basic check and generates a star rating. The star rating helps evaluate the recognition performance of the target image.
In most cases, a higher rating indicates more stable recognition. If the rating is below 3 stars, we recommend optimizing the target image based on the target image guidelines.
Click here to upload your processed target image and quickly check its star rating.
After uploading a target image in a Landmark AR scene, hover over the thumbnail to view its rating.
TIP
Star ratings are for reference only. Final results depend on real-world testing.
During real-world use, recognition performance may be affected by the following factors:
Experience angle, distance, and the actual size of the target object
Target surface materials and reflections
Changes in lighting conditions
Differences in phone camera performance
Click here to sign up or log in to Kivicube.
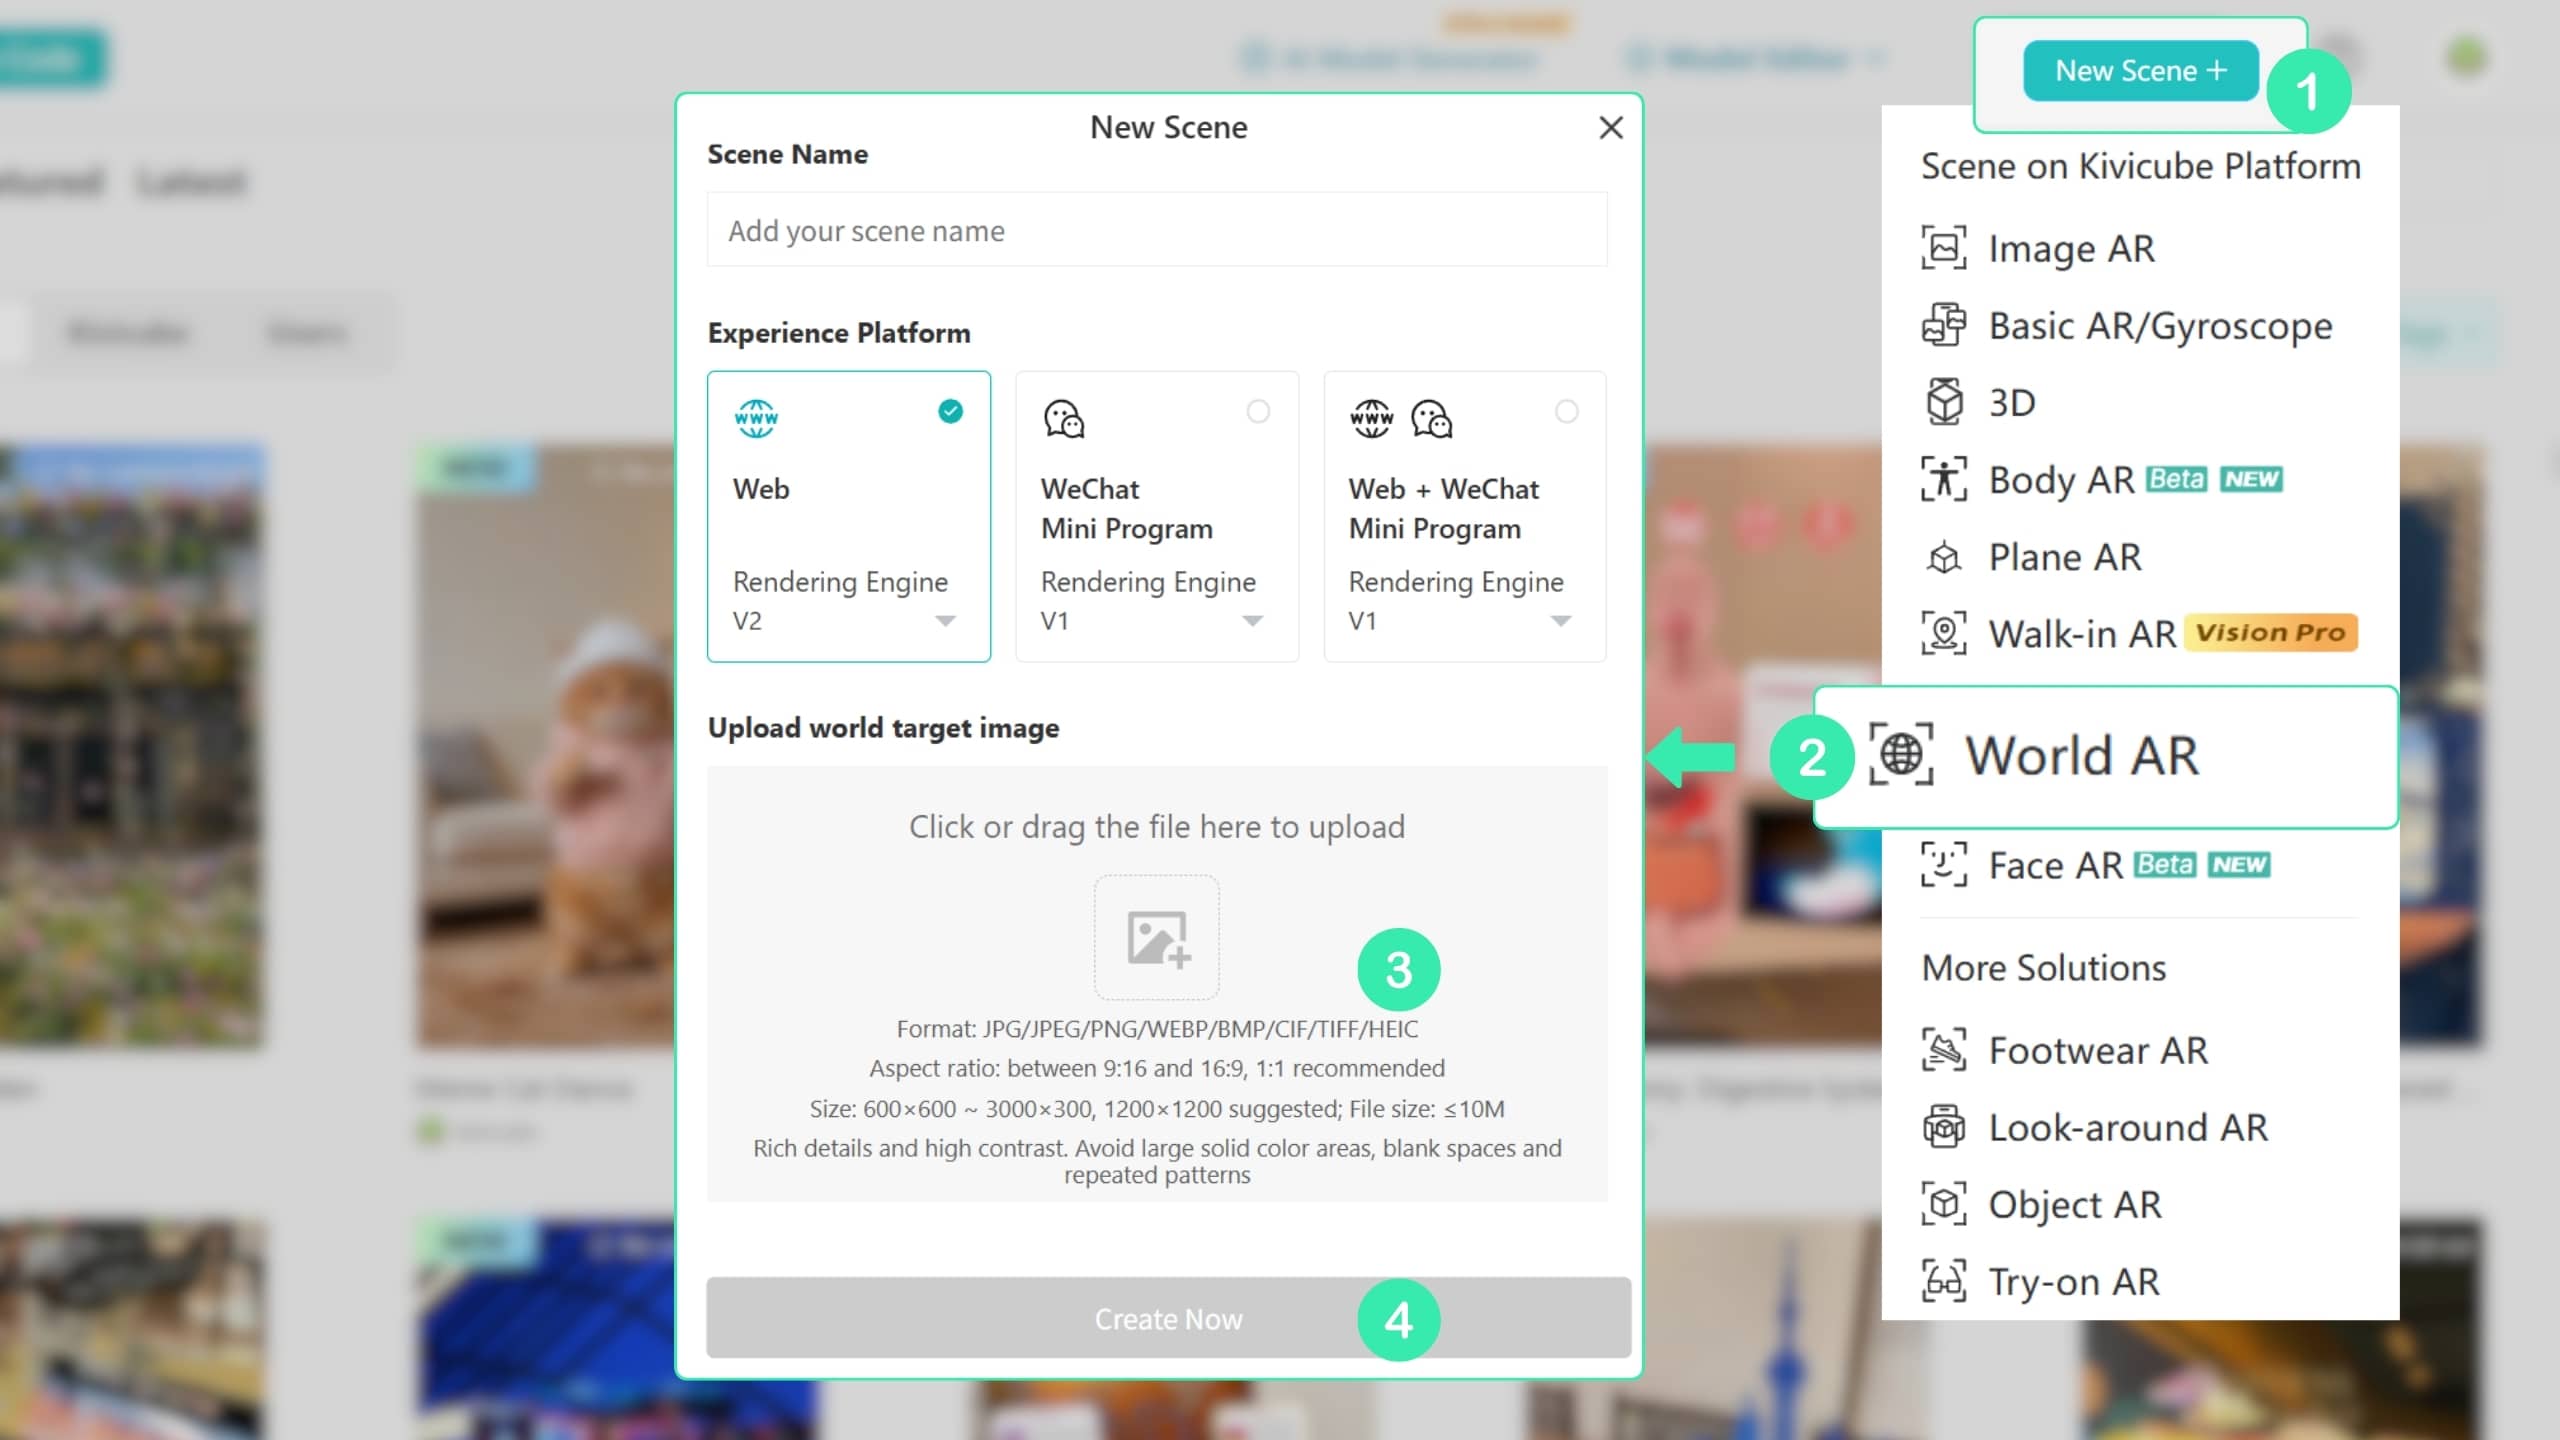
Click “New Scene+” in the top-right corner to create a new World AR scene. Upload the tracking video and target image in the pop-up window, enter the scene name, and click Create Now.
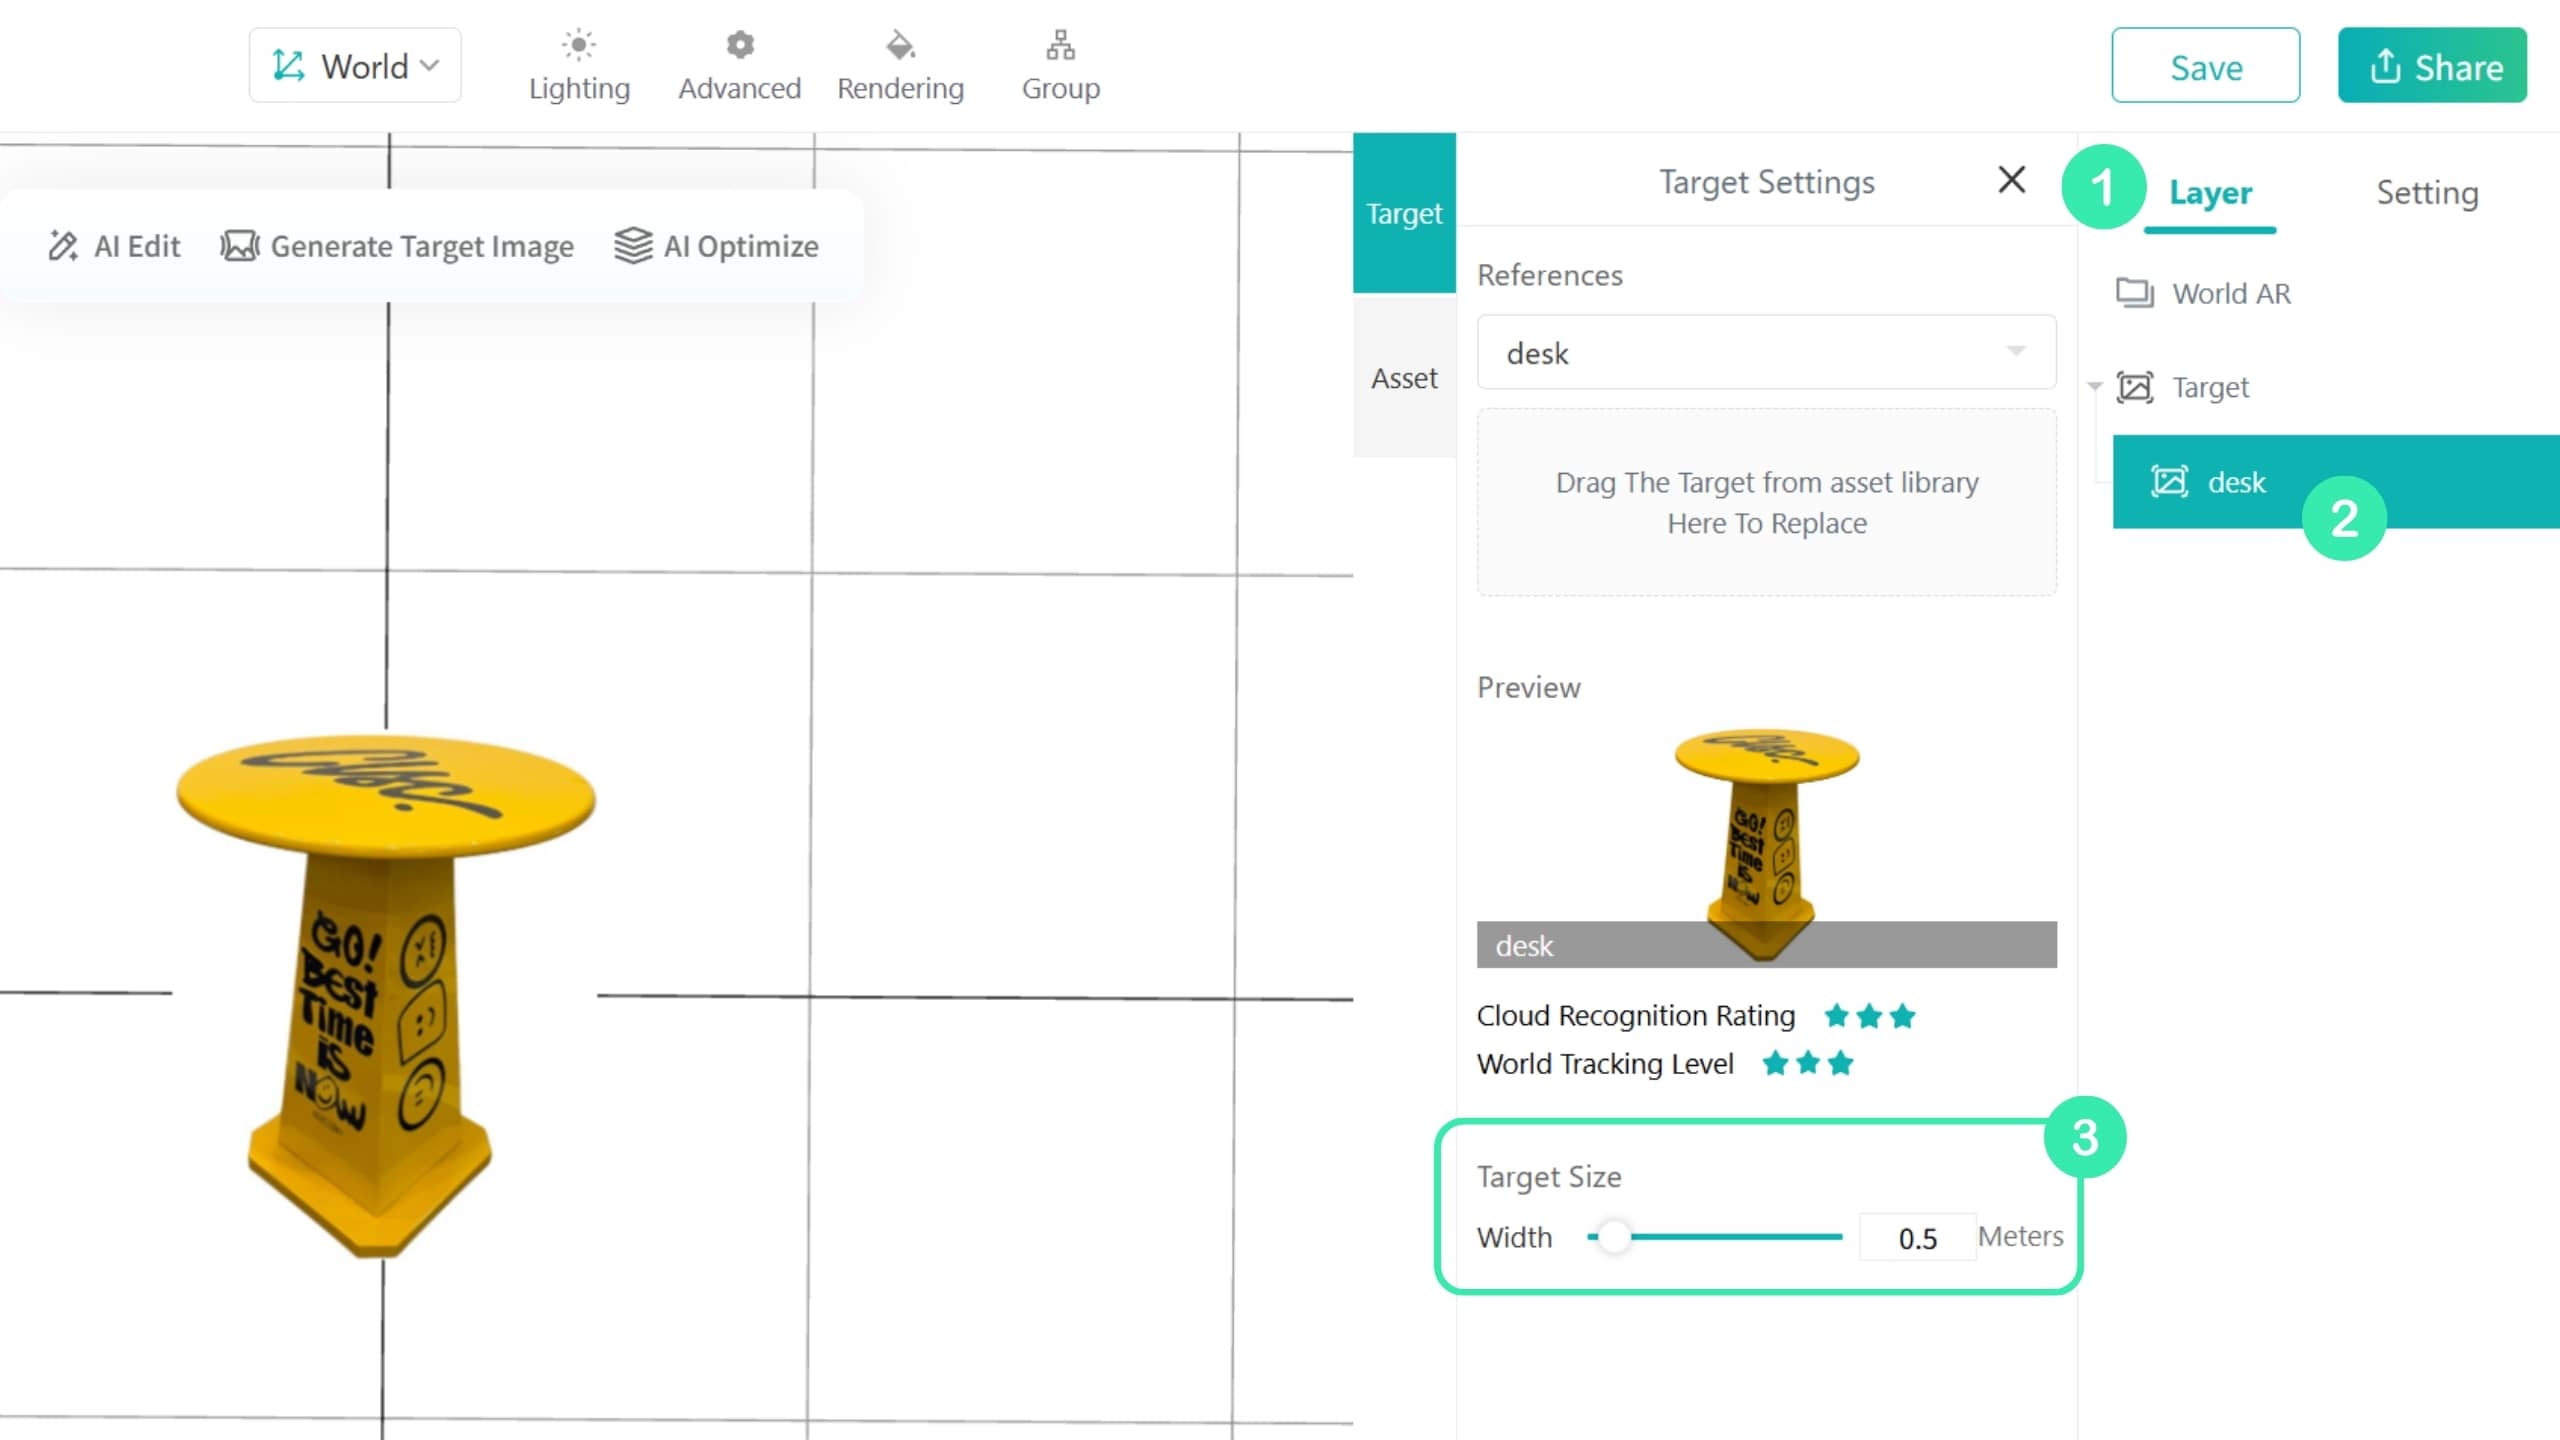
After uploading the target image, select it and enter the actual width of the target object under Target Size.
Click Target at the bottom of the asset panel on the left side of the Scene Editor. Upload a new target image and drag it into the grid area to replace the existing one.
Each World AR scene can contain only one target image.
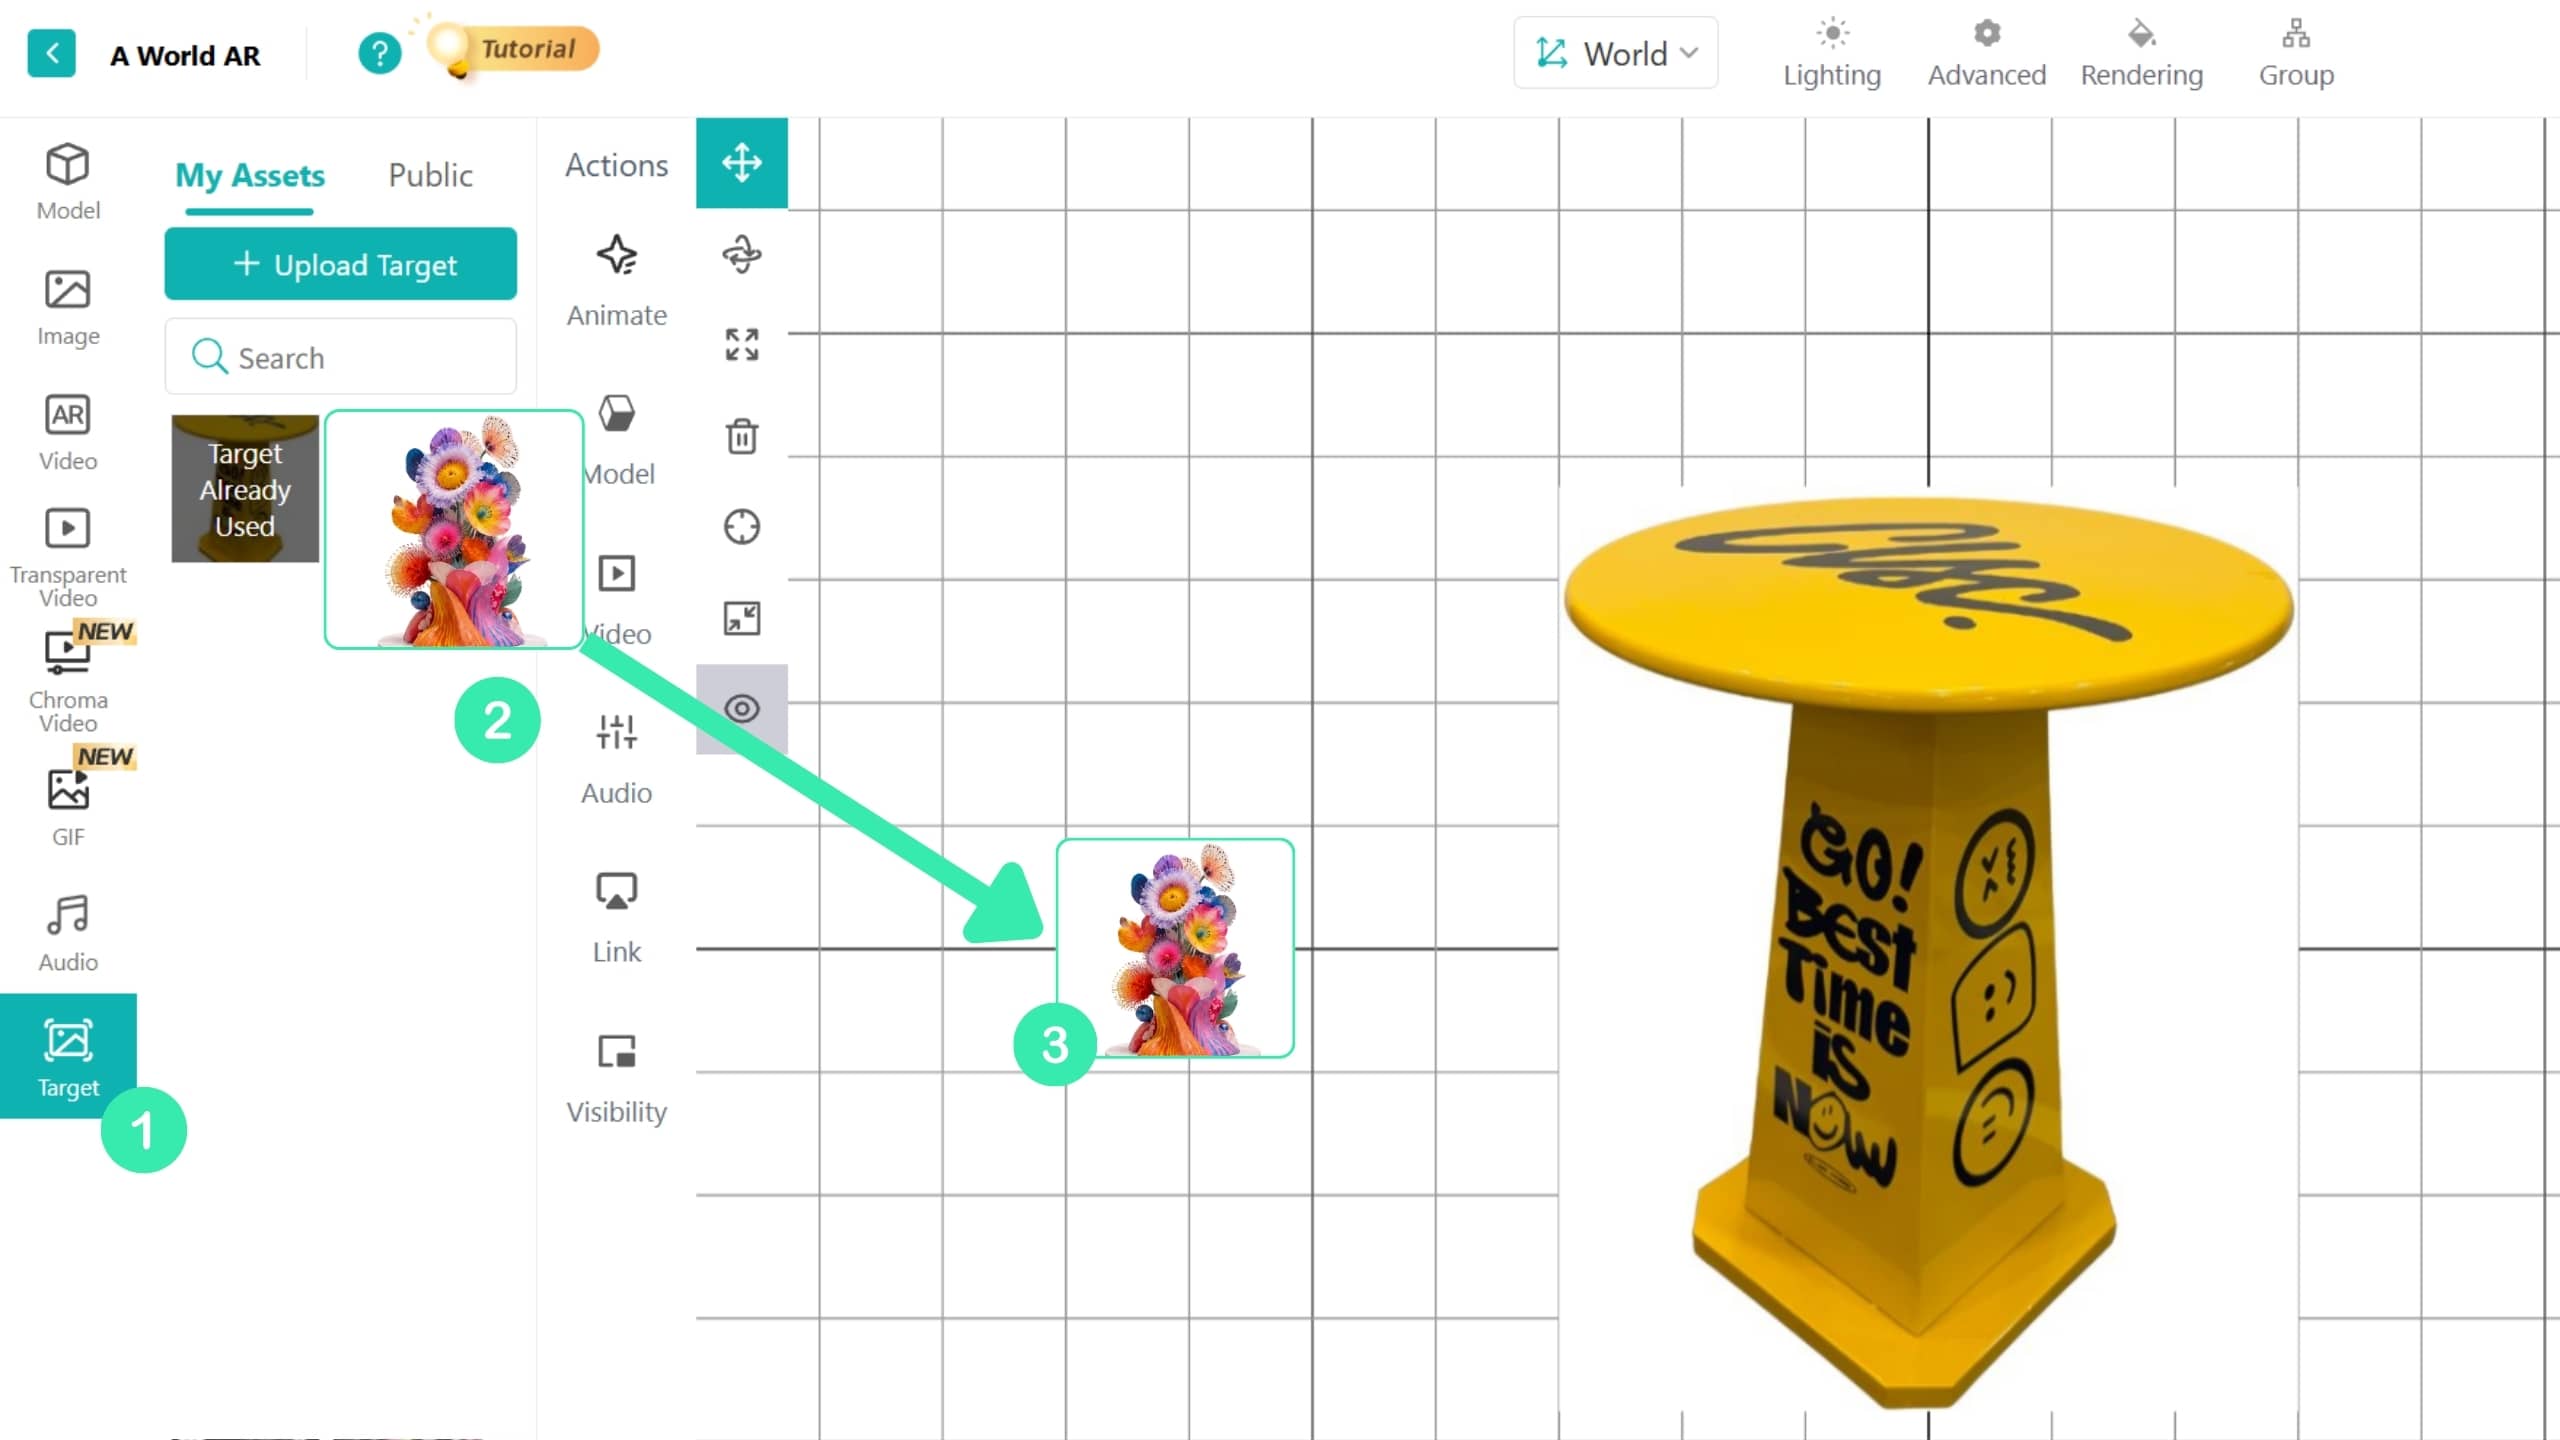
In addition to choosing a suitable target object and optimizing the target image, you can further improve the AR experience by adjusting the position and animations of AR Assets in the scene to reduce visual shaking during the experience.
In the Scene Editor, we recommend placing AR Assets close to the target object rather than too far away. Keep the size of AR Assets reasonable and avoid making them too large or too high.
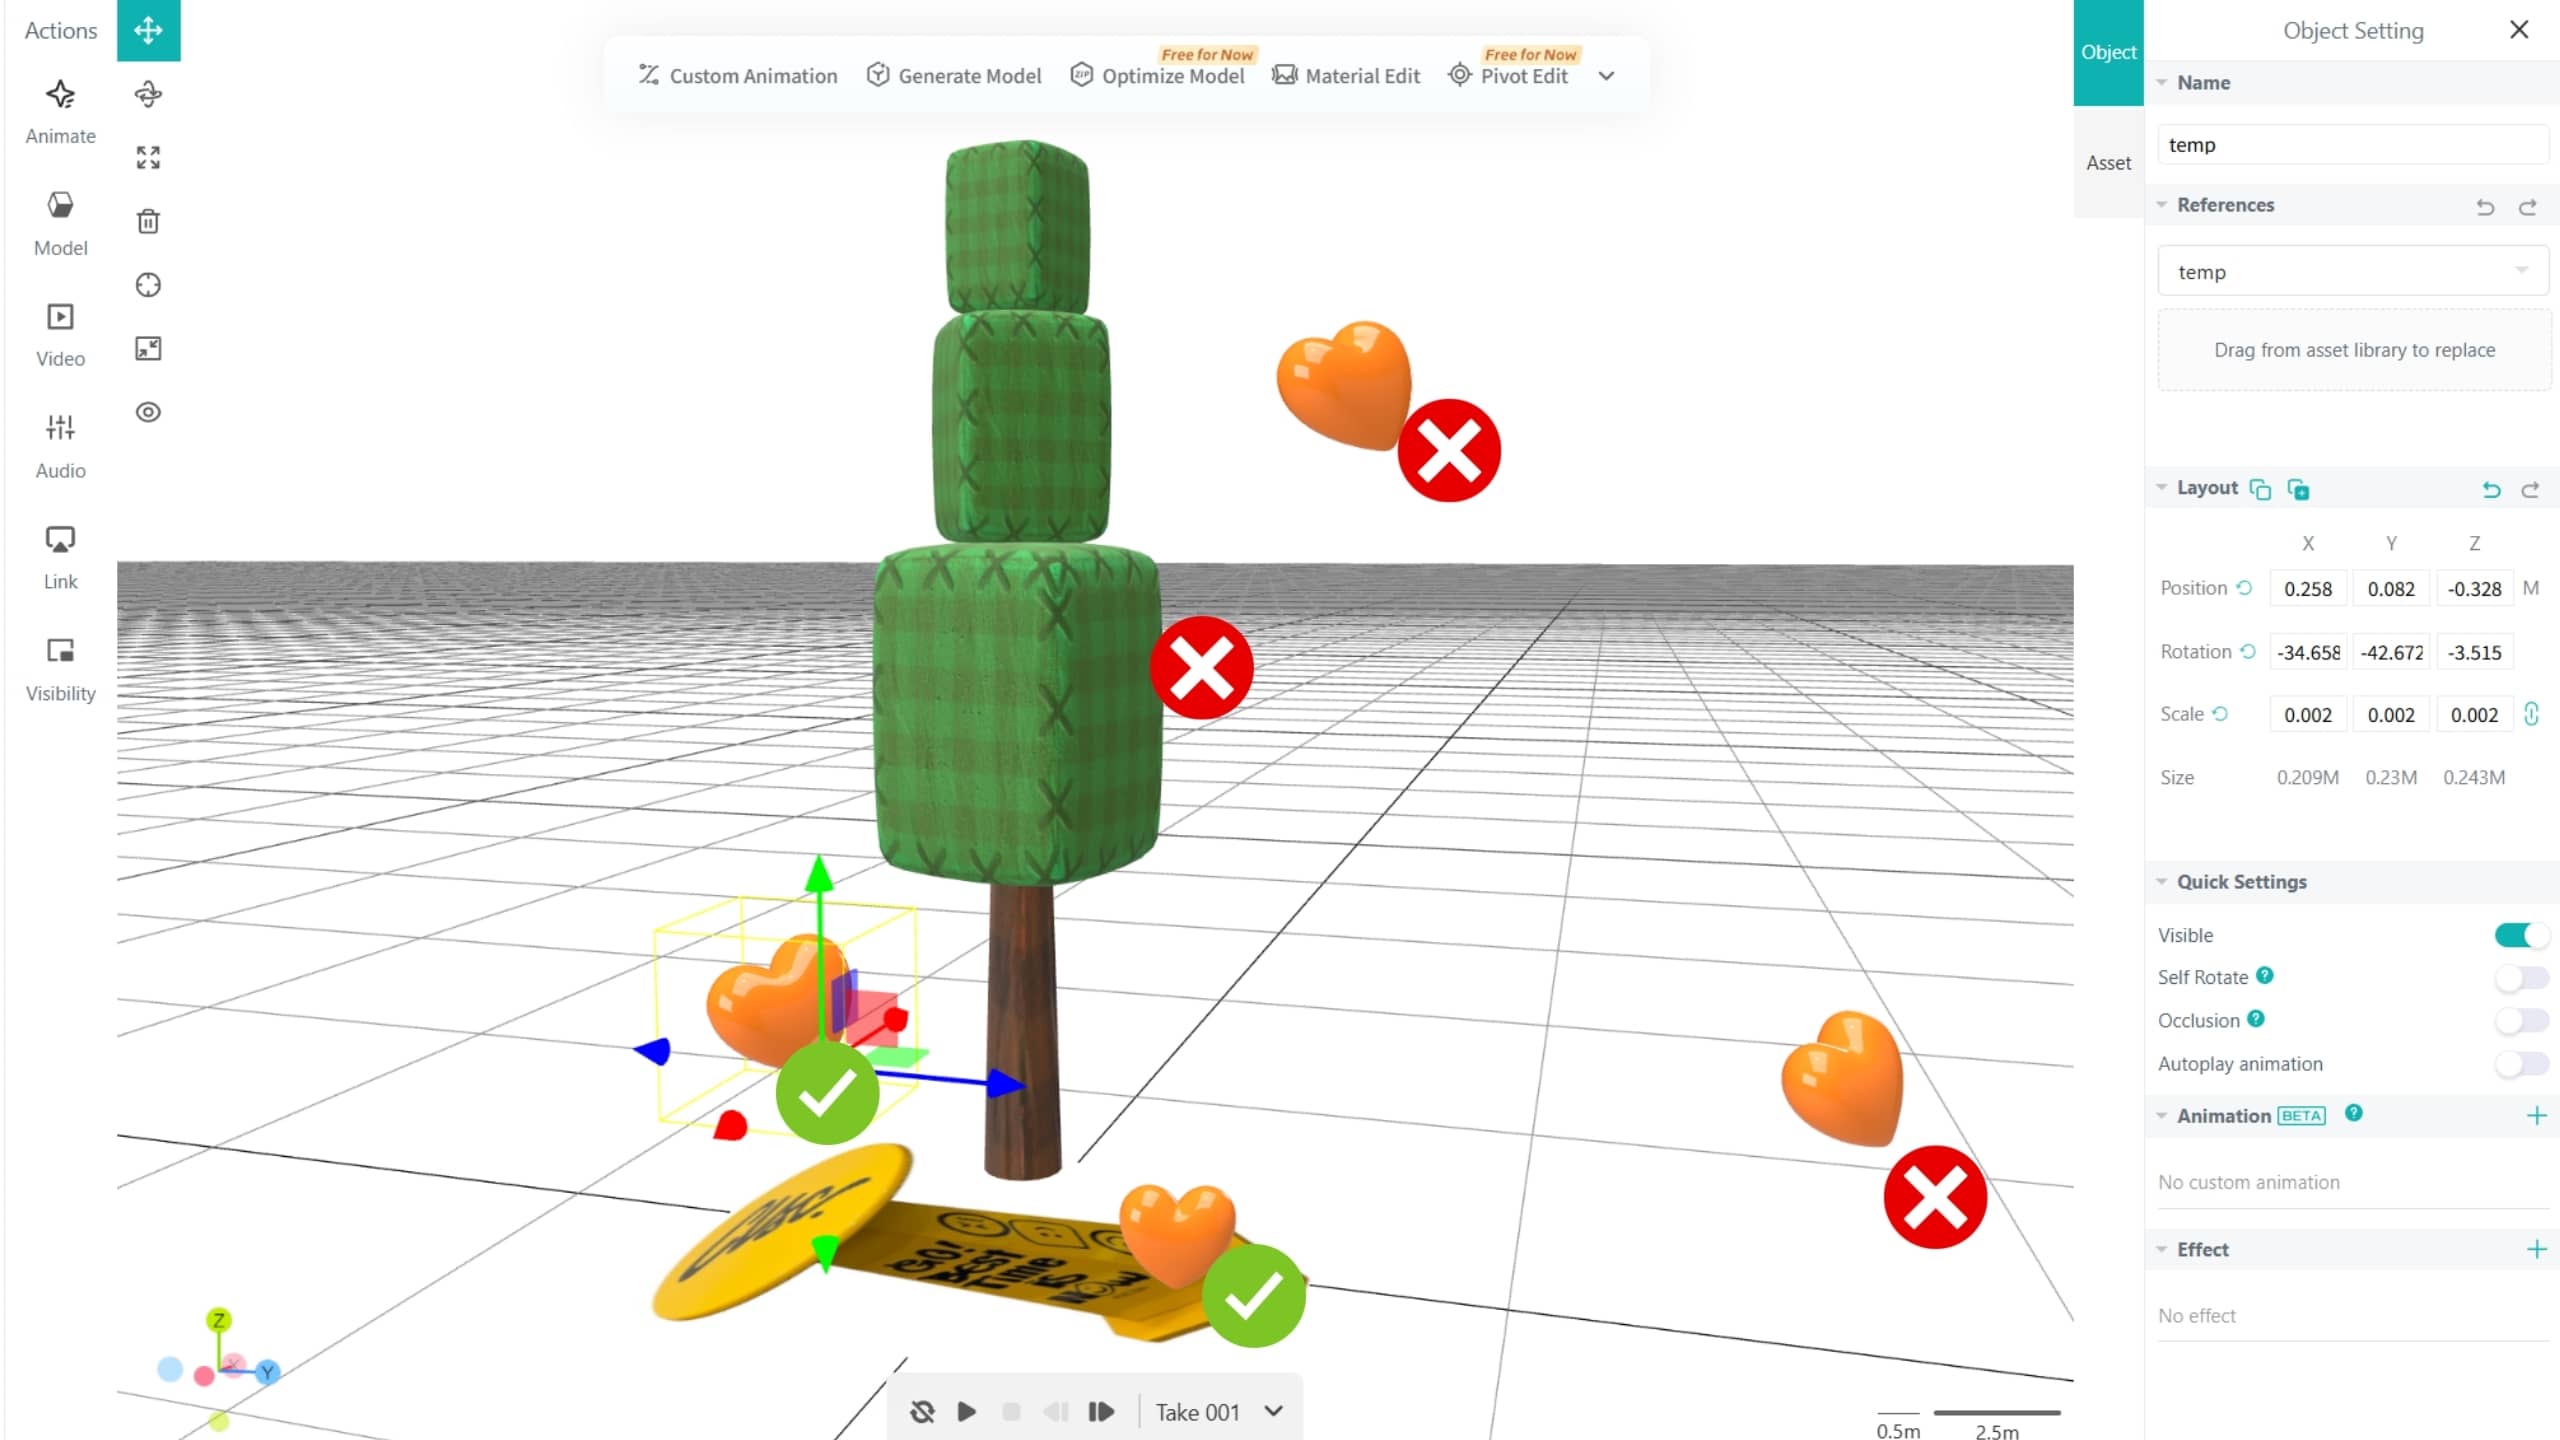
When placing AR Assets in the Scene Editor, we recommend following the real-world perspective principle where closer objects appear larger and farther objects appear smaller.
AR Assets closer to the target image can be scaled up appropriately, while distant assets can be scaled down to enhance the integration between AR content and the real environment, creating a more immersive experience.
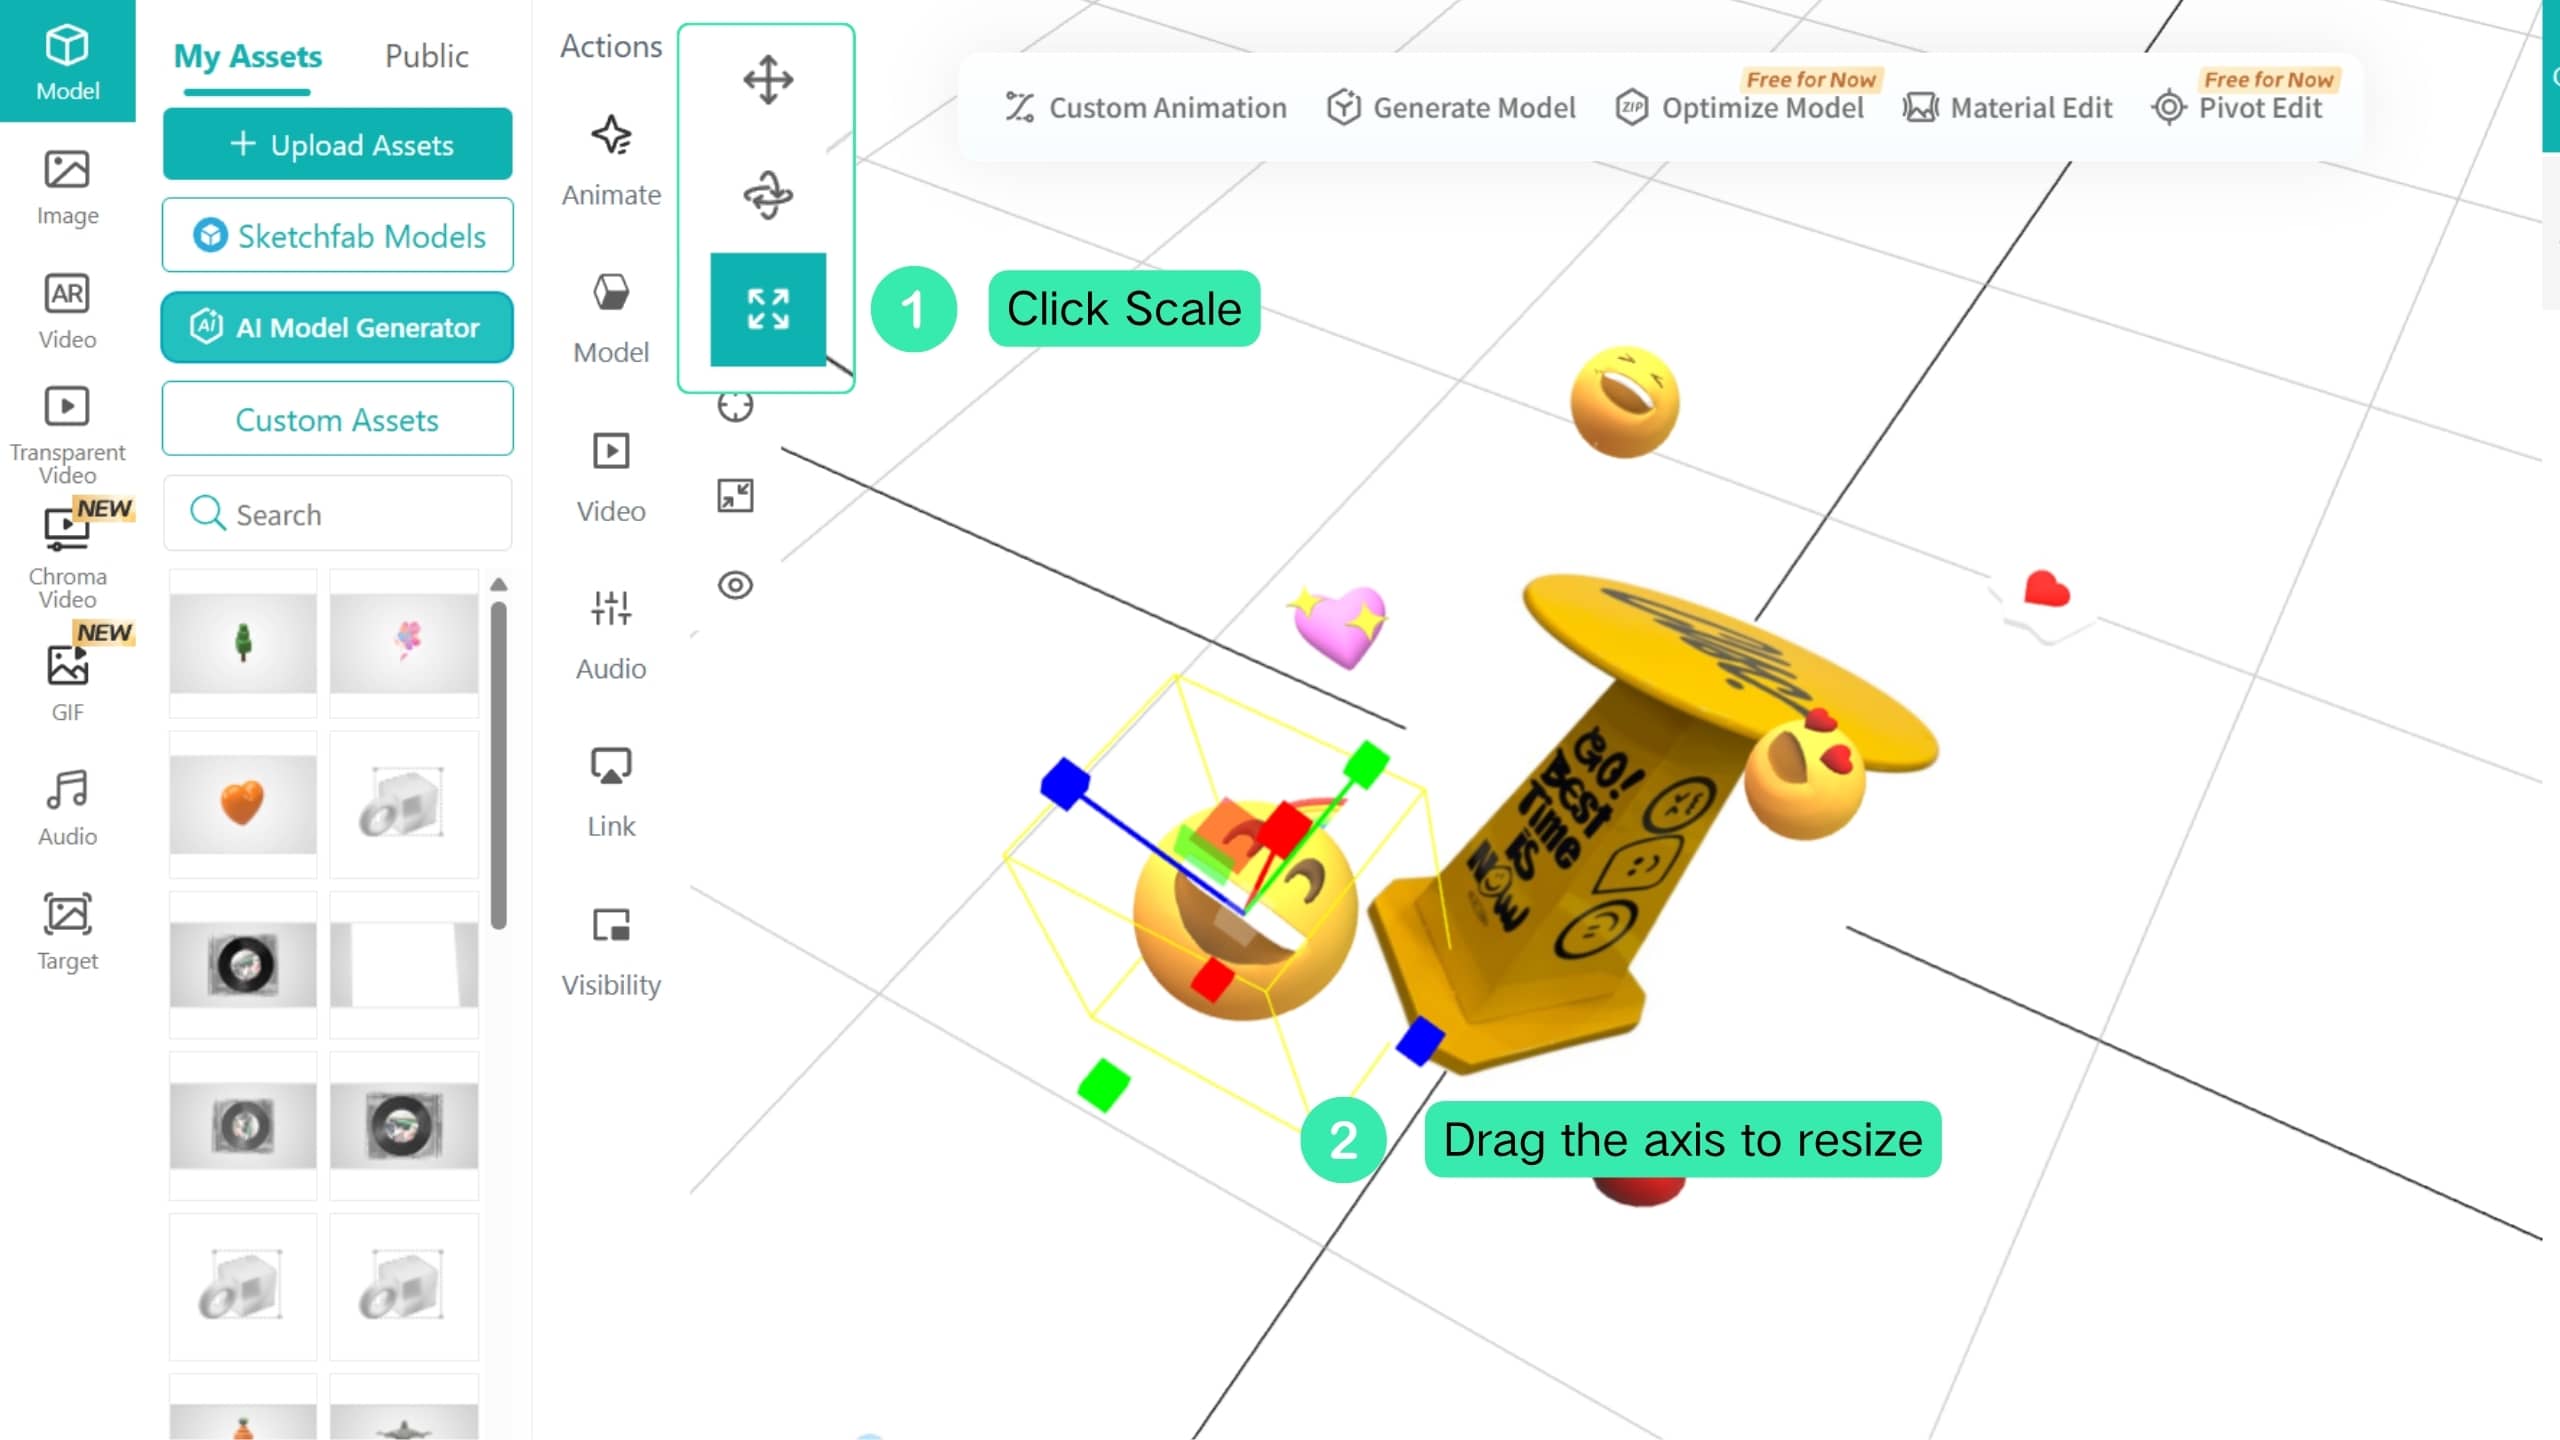
People are highly visual. Adding rich animations to AR assets can help reduce the negative impact of visual shaking.
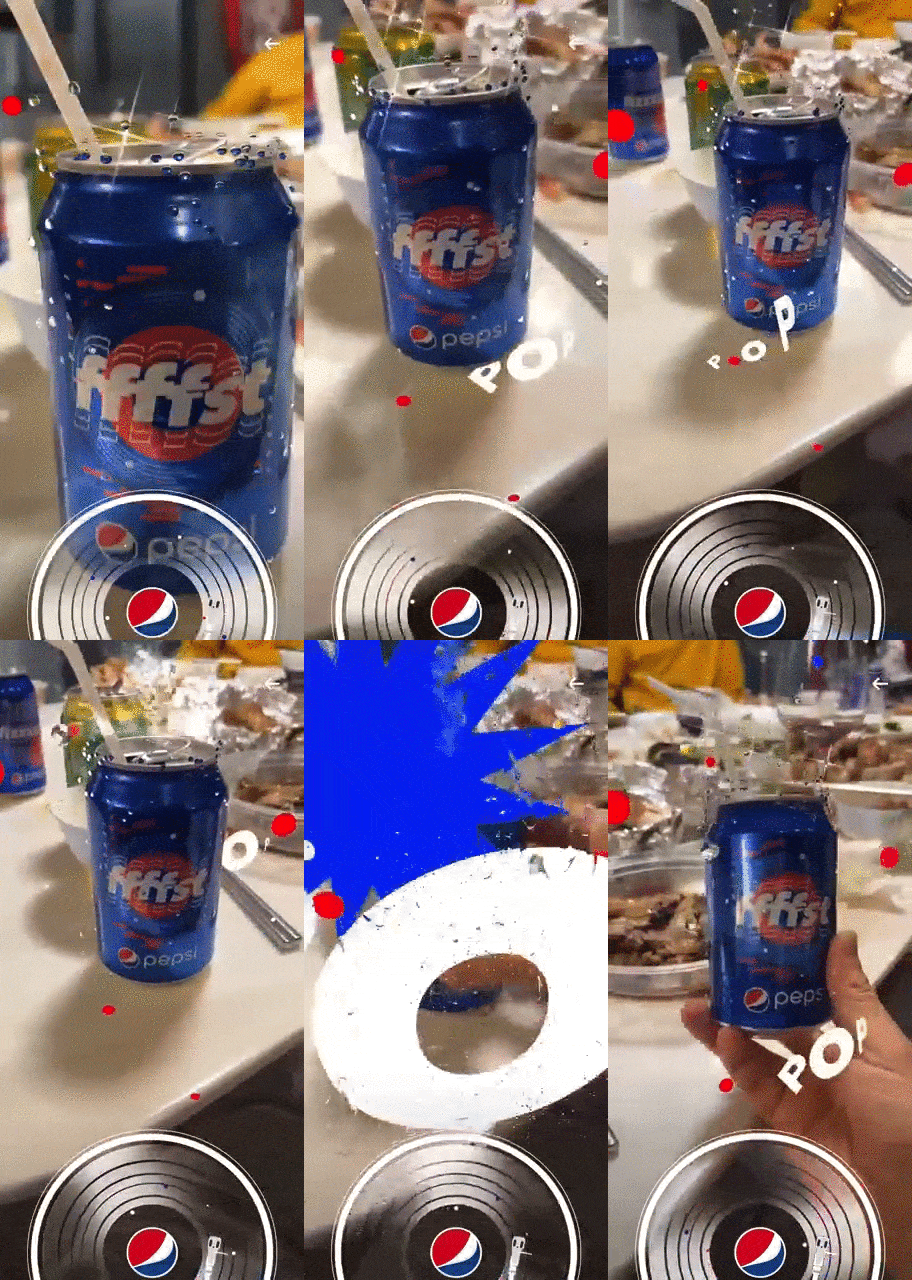
For example, in the AR tracking case below, the scene contains rich animations. Although slight tracking jitter may occur, it is difficult to notice during the actual experience.