English
Appearance
Image tracking, in full, refers to Image Detection and Tracking (i.e., an Image AR scenario).
It consists of two components:
To evaluate the quality of the experience, both factors must be considered:
When using the Collection feature (multi-scene recognition entry), the cloud-based image recognition algorithm will be used.
Therefore, the recognition images must comply with both the Image Tracking specifications and the Cloud Recognition Image specifications.
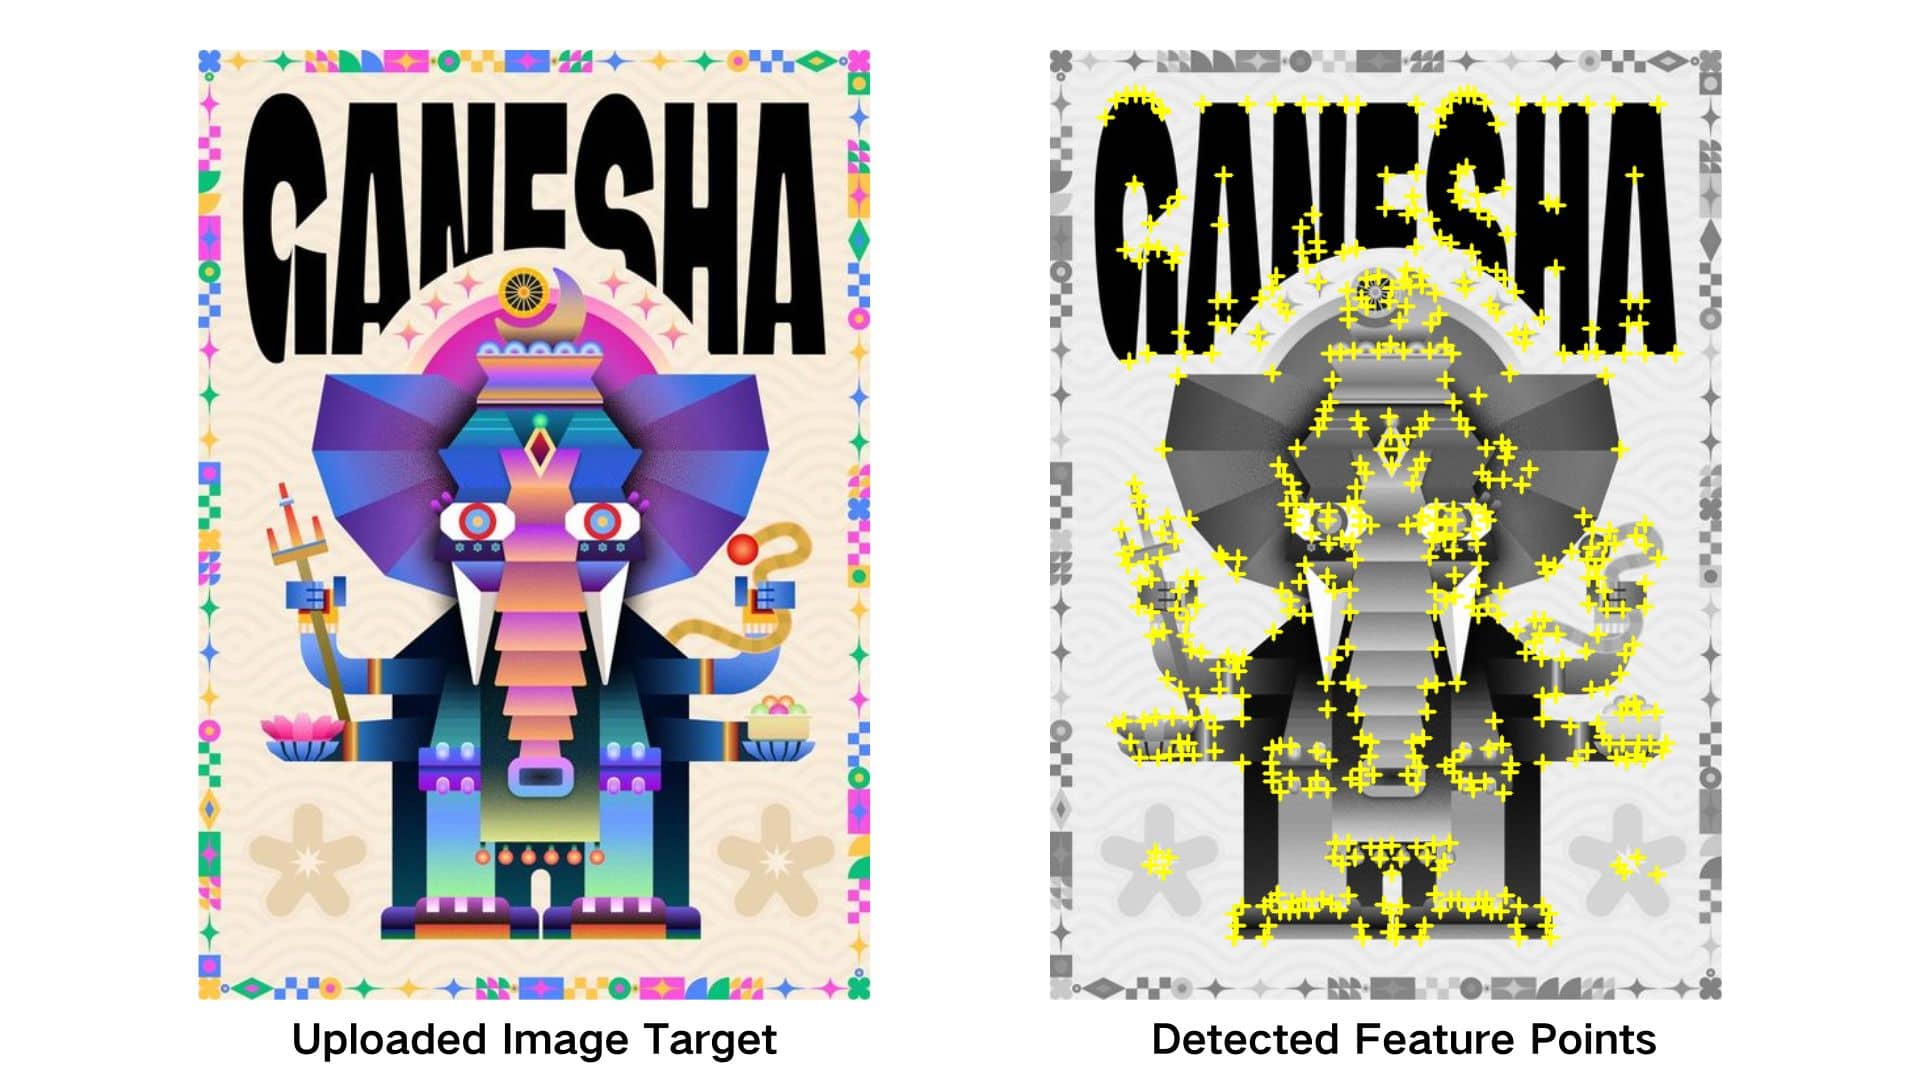
Stable image tracking relies heavily on a high-quality marker image. Image AR works by detecting feature points on the target image and anchoring AR content on top of those points. The richer and more distinctive the feature points are, the more stable the tracking will be. Below is an example illustrating how feature points are extracted.
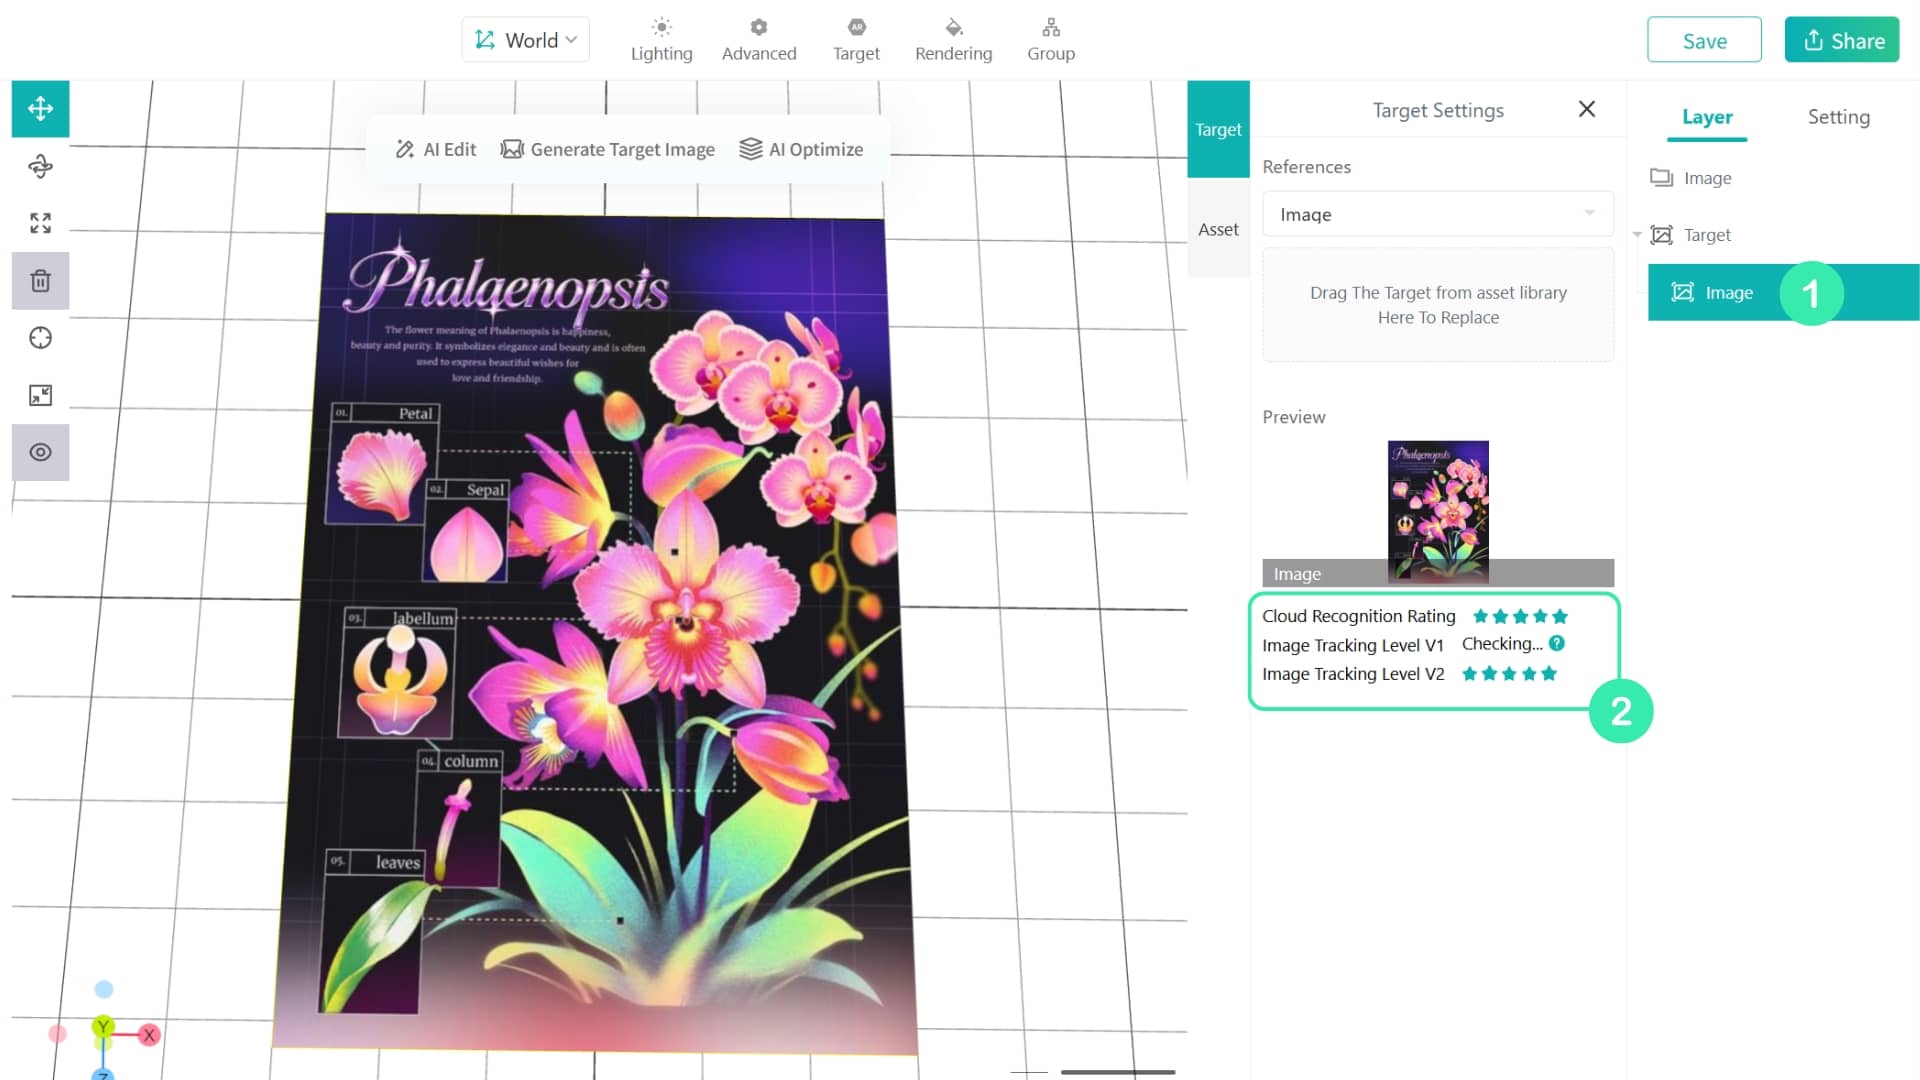
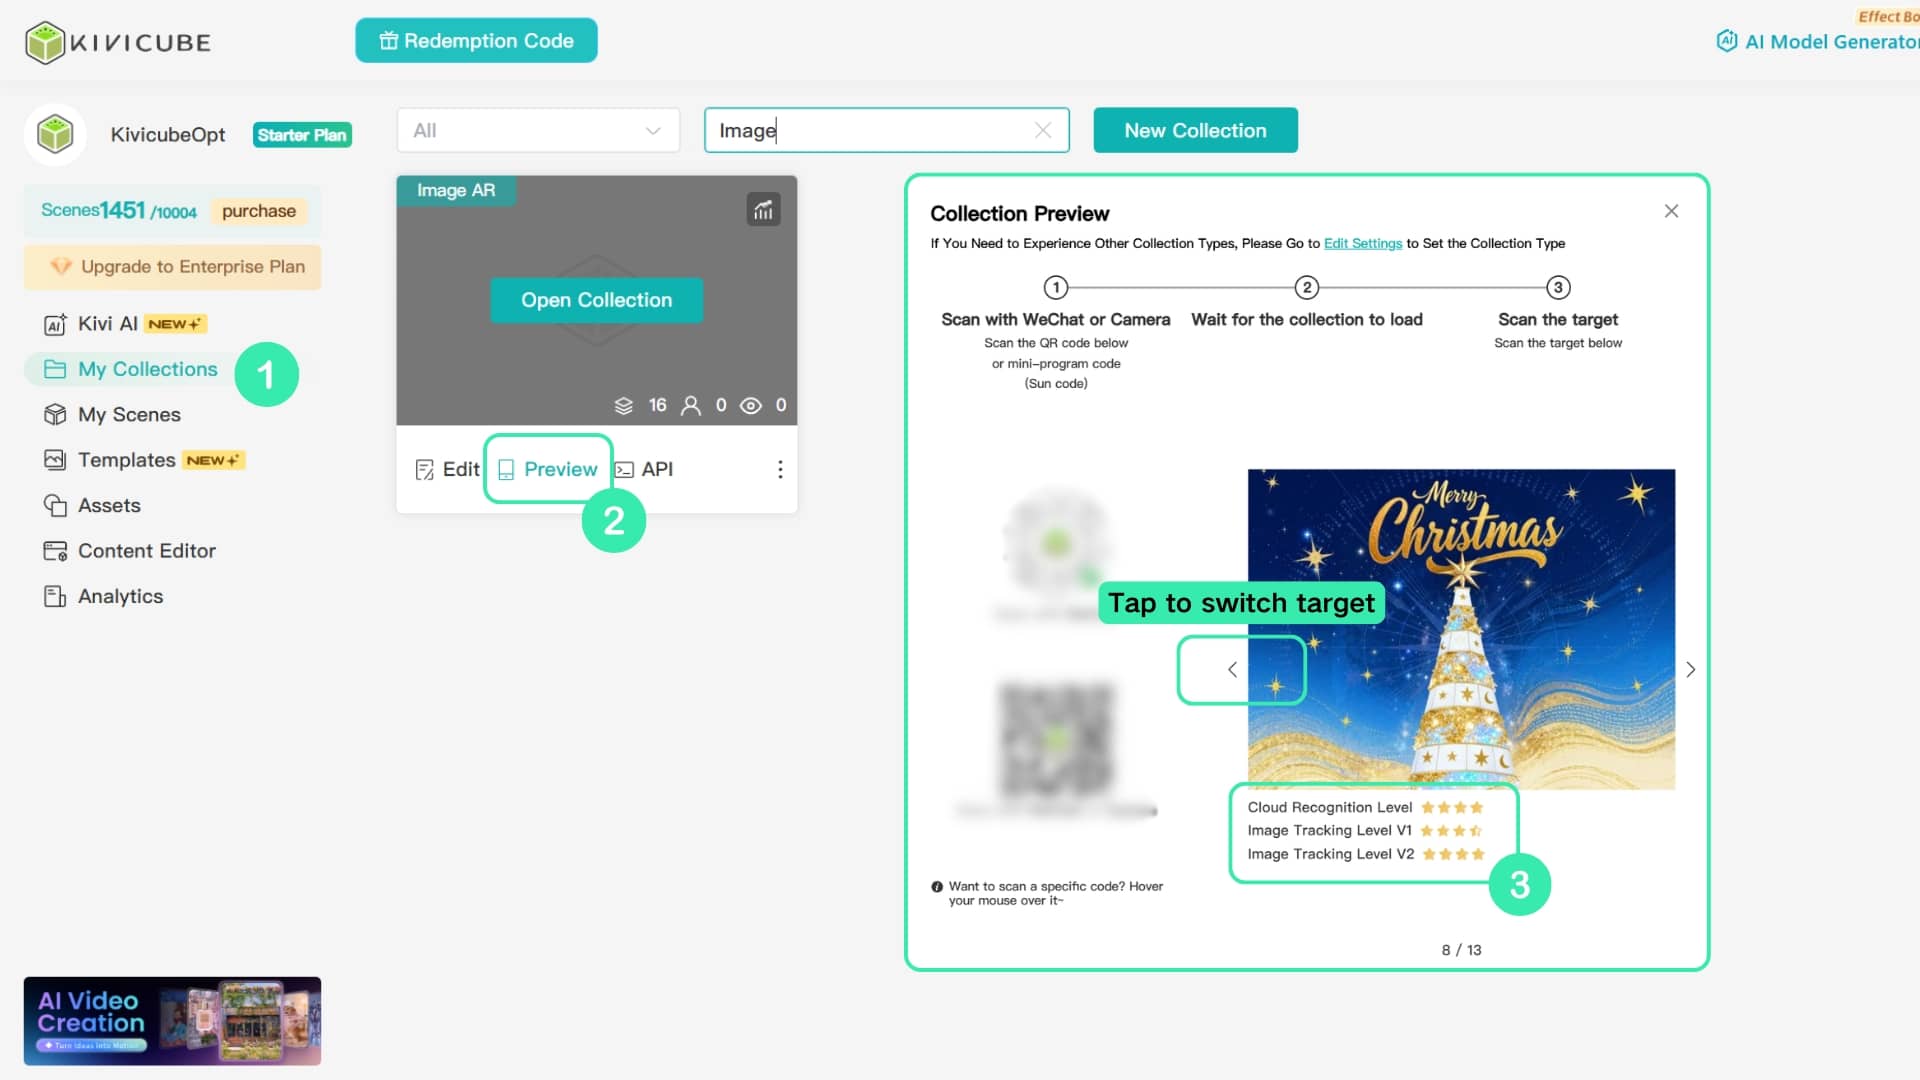
When you save an Image AR scene for the first time and preview it through scanning, Kivicube will automatically evaluate your marker image and assign it a tracking rating. You can then select the target image directly in the 3D canvas, or locate it under the Target section in the Layer panel on the right, to check its Image tracking rating.
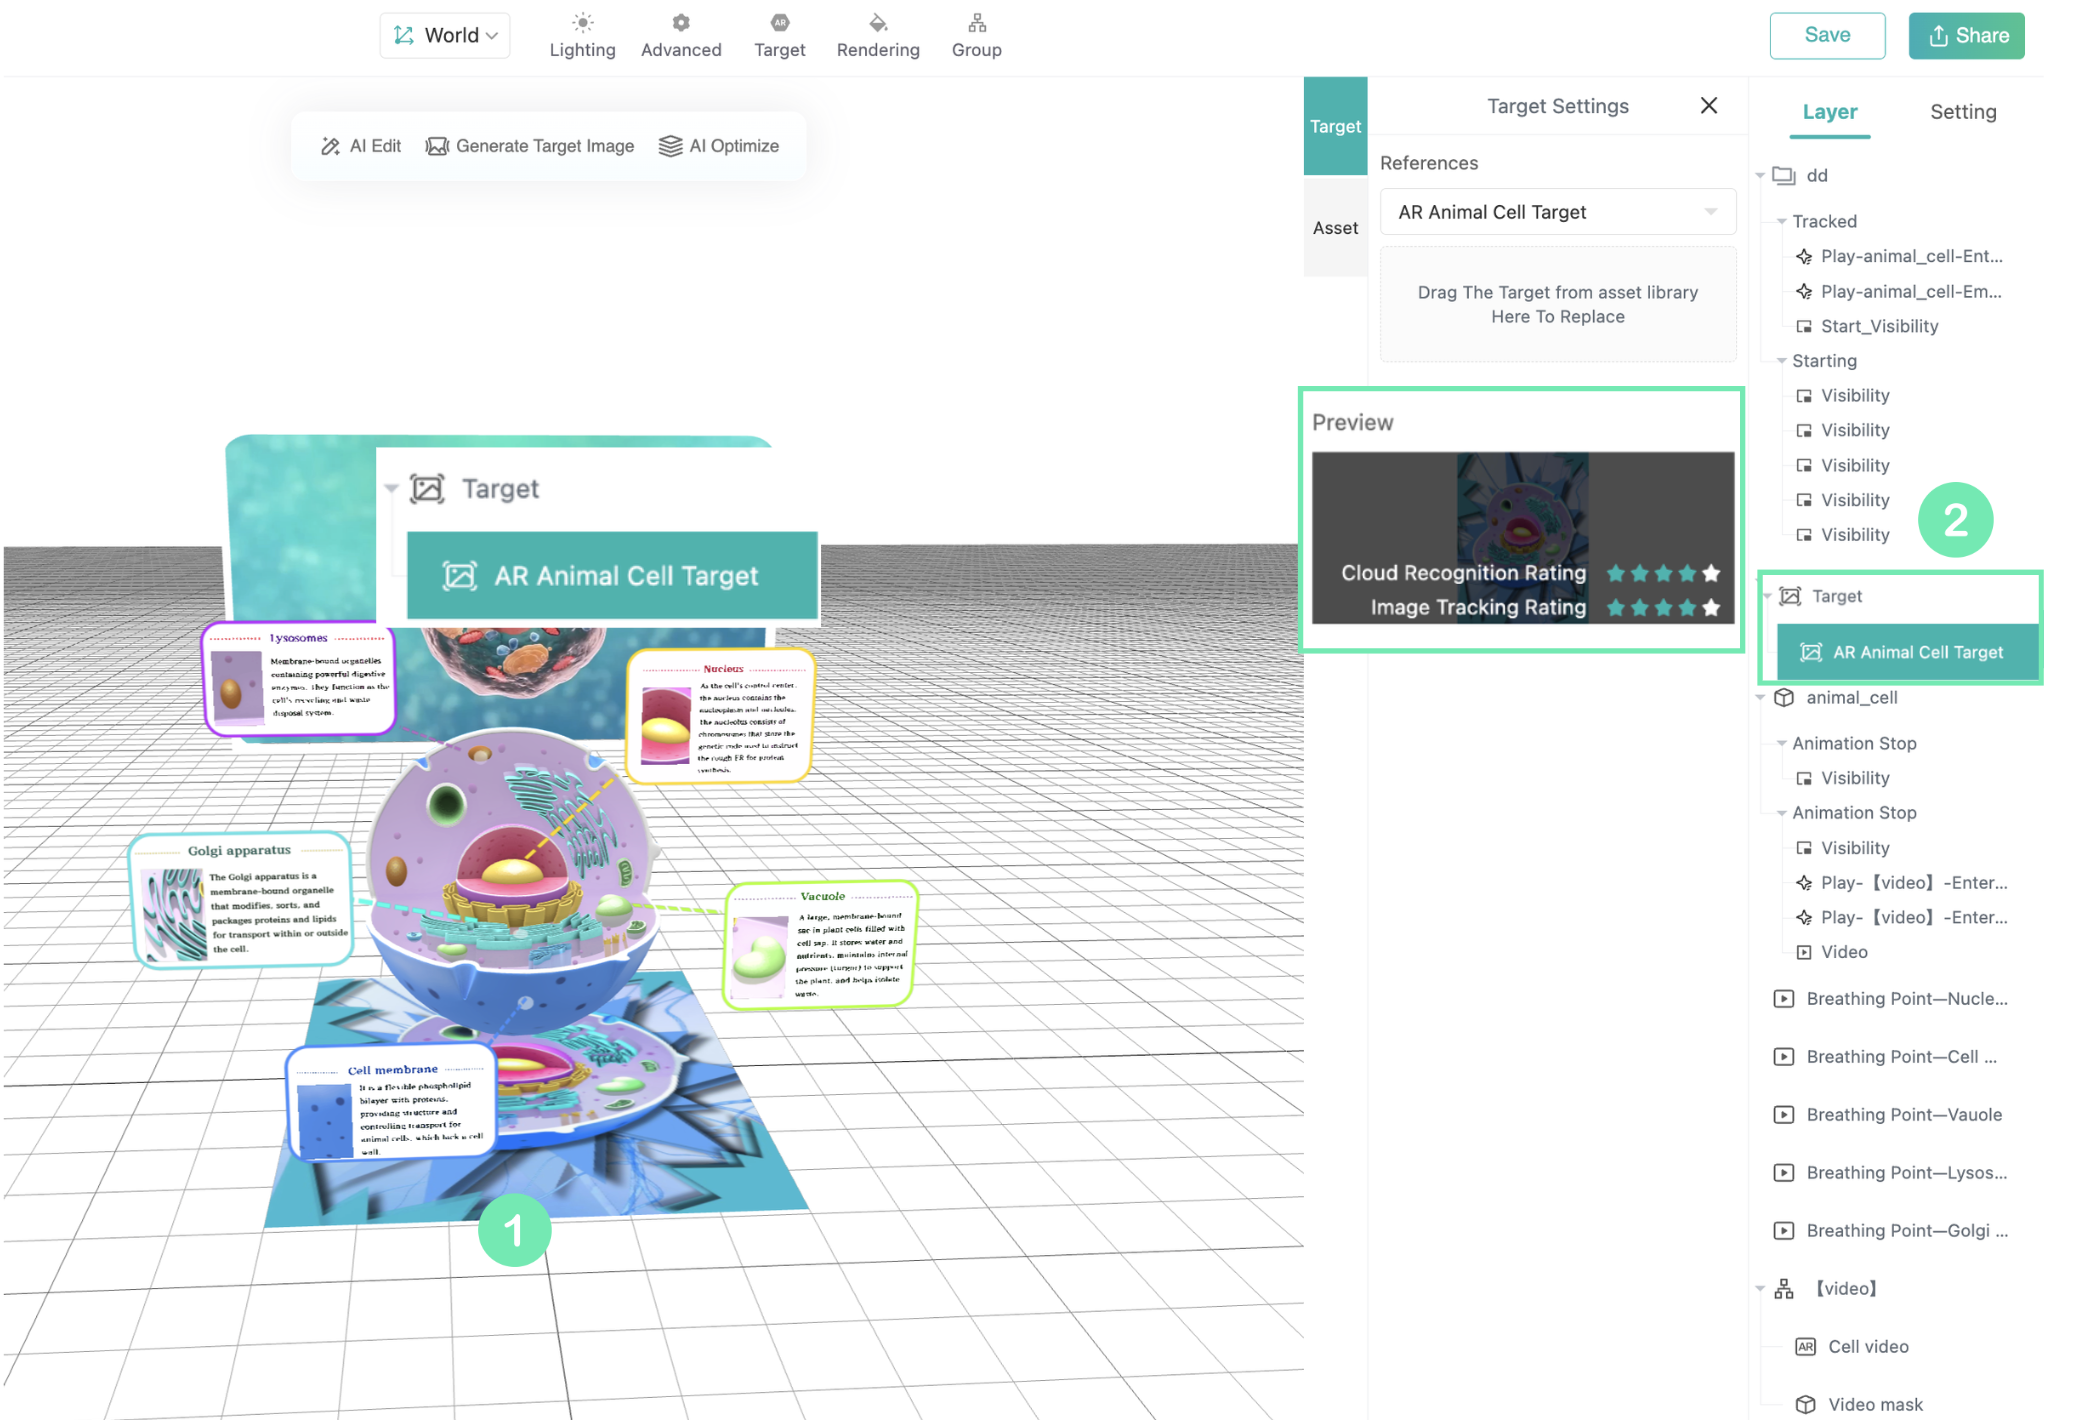
| Image Tracking Rating | Performance |
|---|---|
| 4–5 stars | Your marker image is almost perfect, tracking will only fail under severe lighting conditions, fast movements or on low-end devices |
| 3 stars | It may be able to be detected, but tracking will fail easily |
| Below 3 stars | It may not be able to be detected and tracking will fail very easily |
For a stable AR experience, we strongly recommend using images with a tracking rating of at least 4 stars.
To help you achieve better tracking performance, here are some key characteristics of high-quality marker images:
Avoid large areas of solid color. Minimalist designs or images with flat color regions do not provide enough detectable features, making it difficult for the tracking system to determine where to place AR content.
Avoid repetitive patterns. While patterns such as grids or repeated shapes can introduce features, excessive repetition makes it hard for the system to distinguish between them, which negatively impacts tracking stability.
More colors do not necessarily improve tracking. Feature points are detected based on contrast, not color variety. Simply adding more colors will not guarantee better performance.
Avoid reflective surfaces. Glare or strong reflections can interfere with feature detection, causing unstable tracking. When printing marker images, choose non-reflective materials and avoid using them under direct, strong lighting conditions.
Pro Tips:
If your AR experience is intended to be used on printed materials, we recommend using a photo of the final printed output as your marker image. The printing process can alter color, texture, and brightness compared to the original design, and using the actual print will result in more reliable tracking.
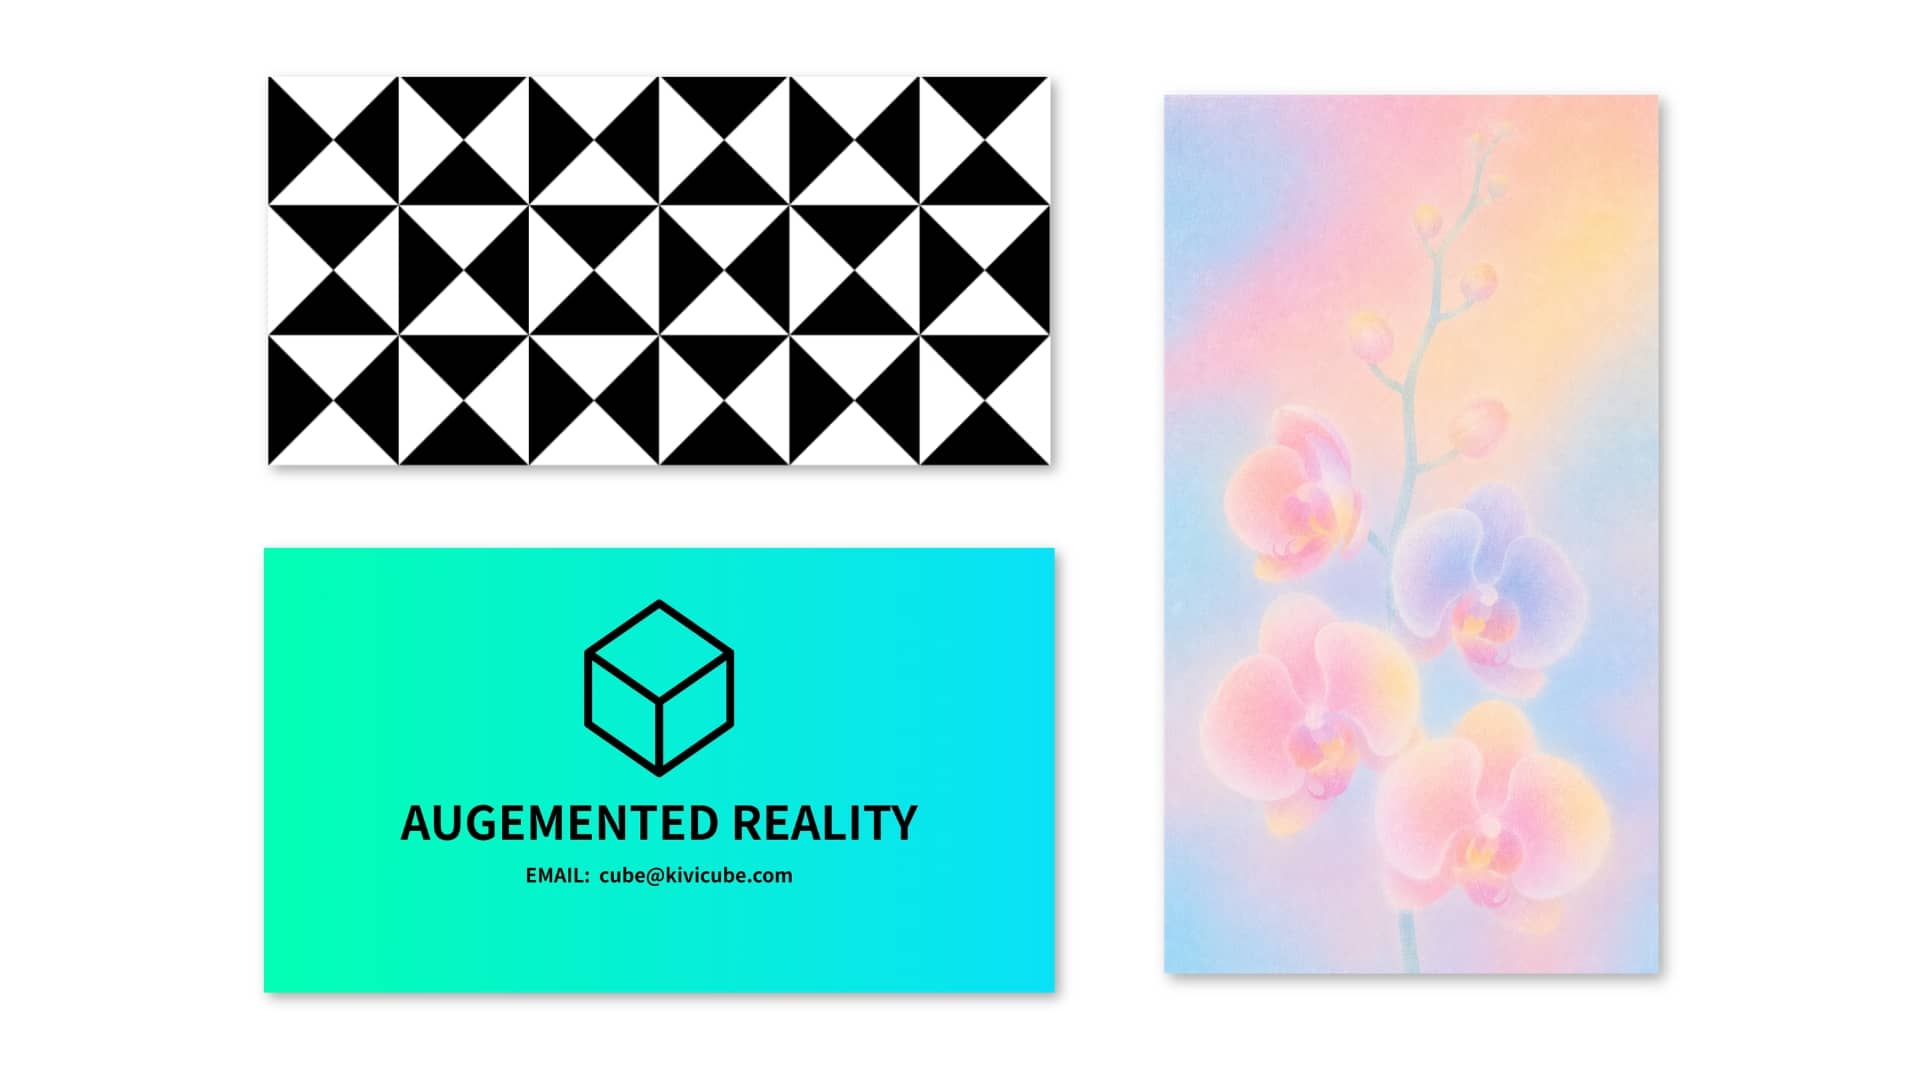
Example of good marker images
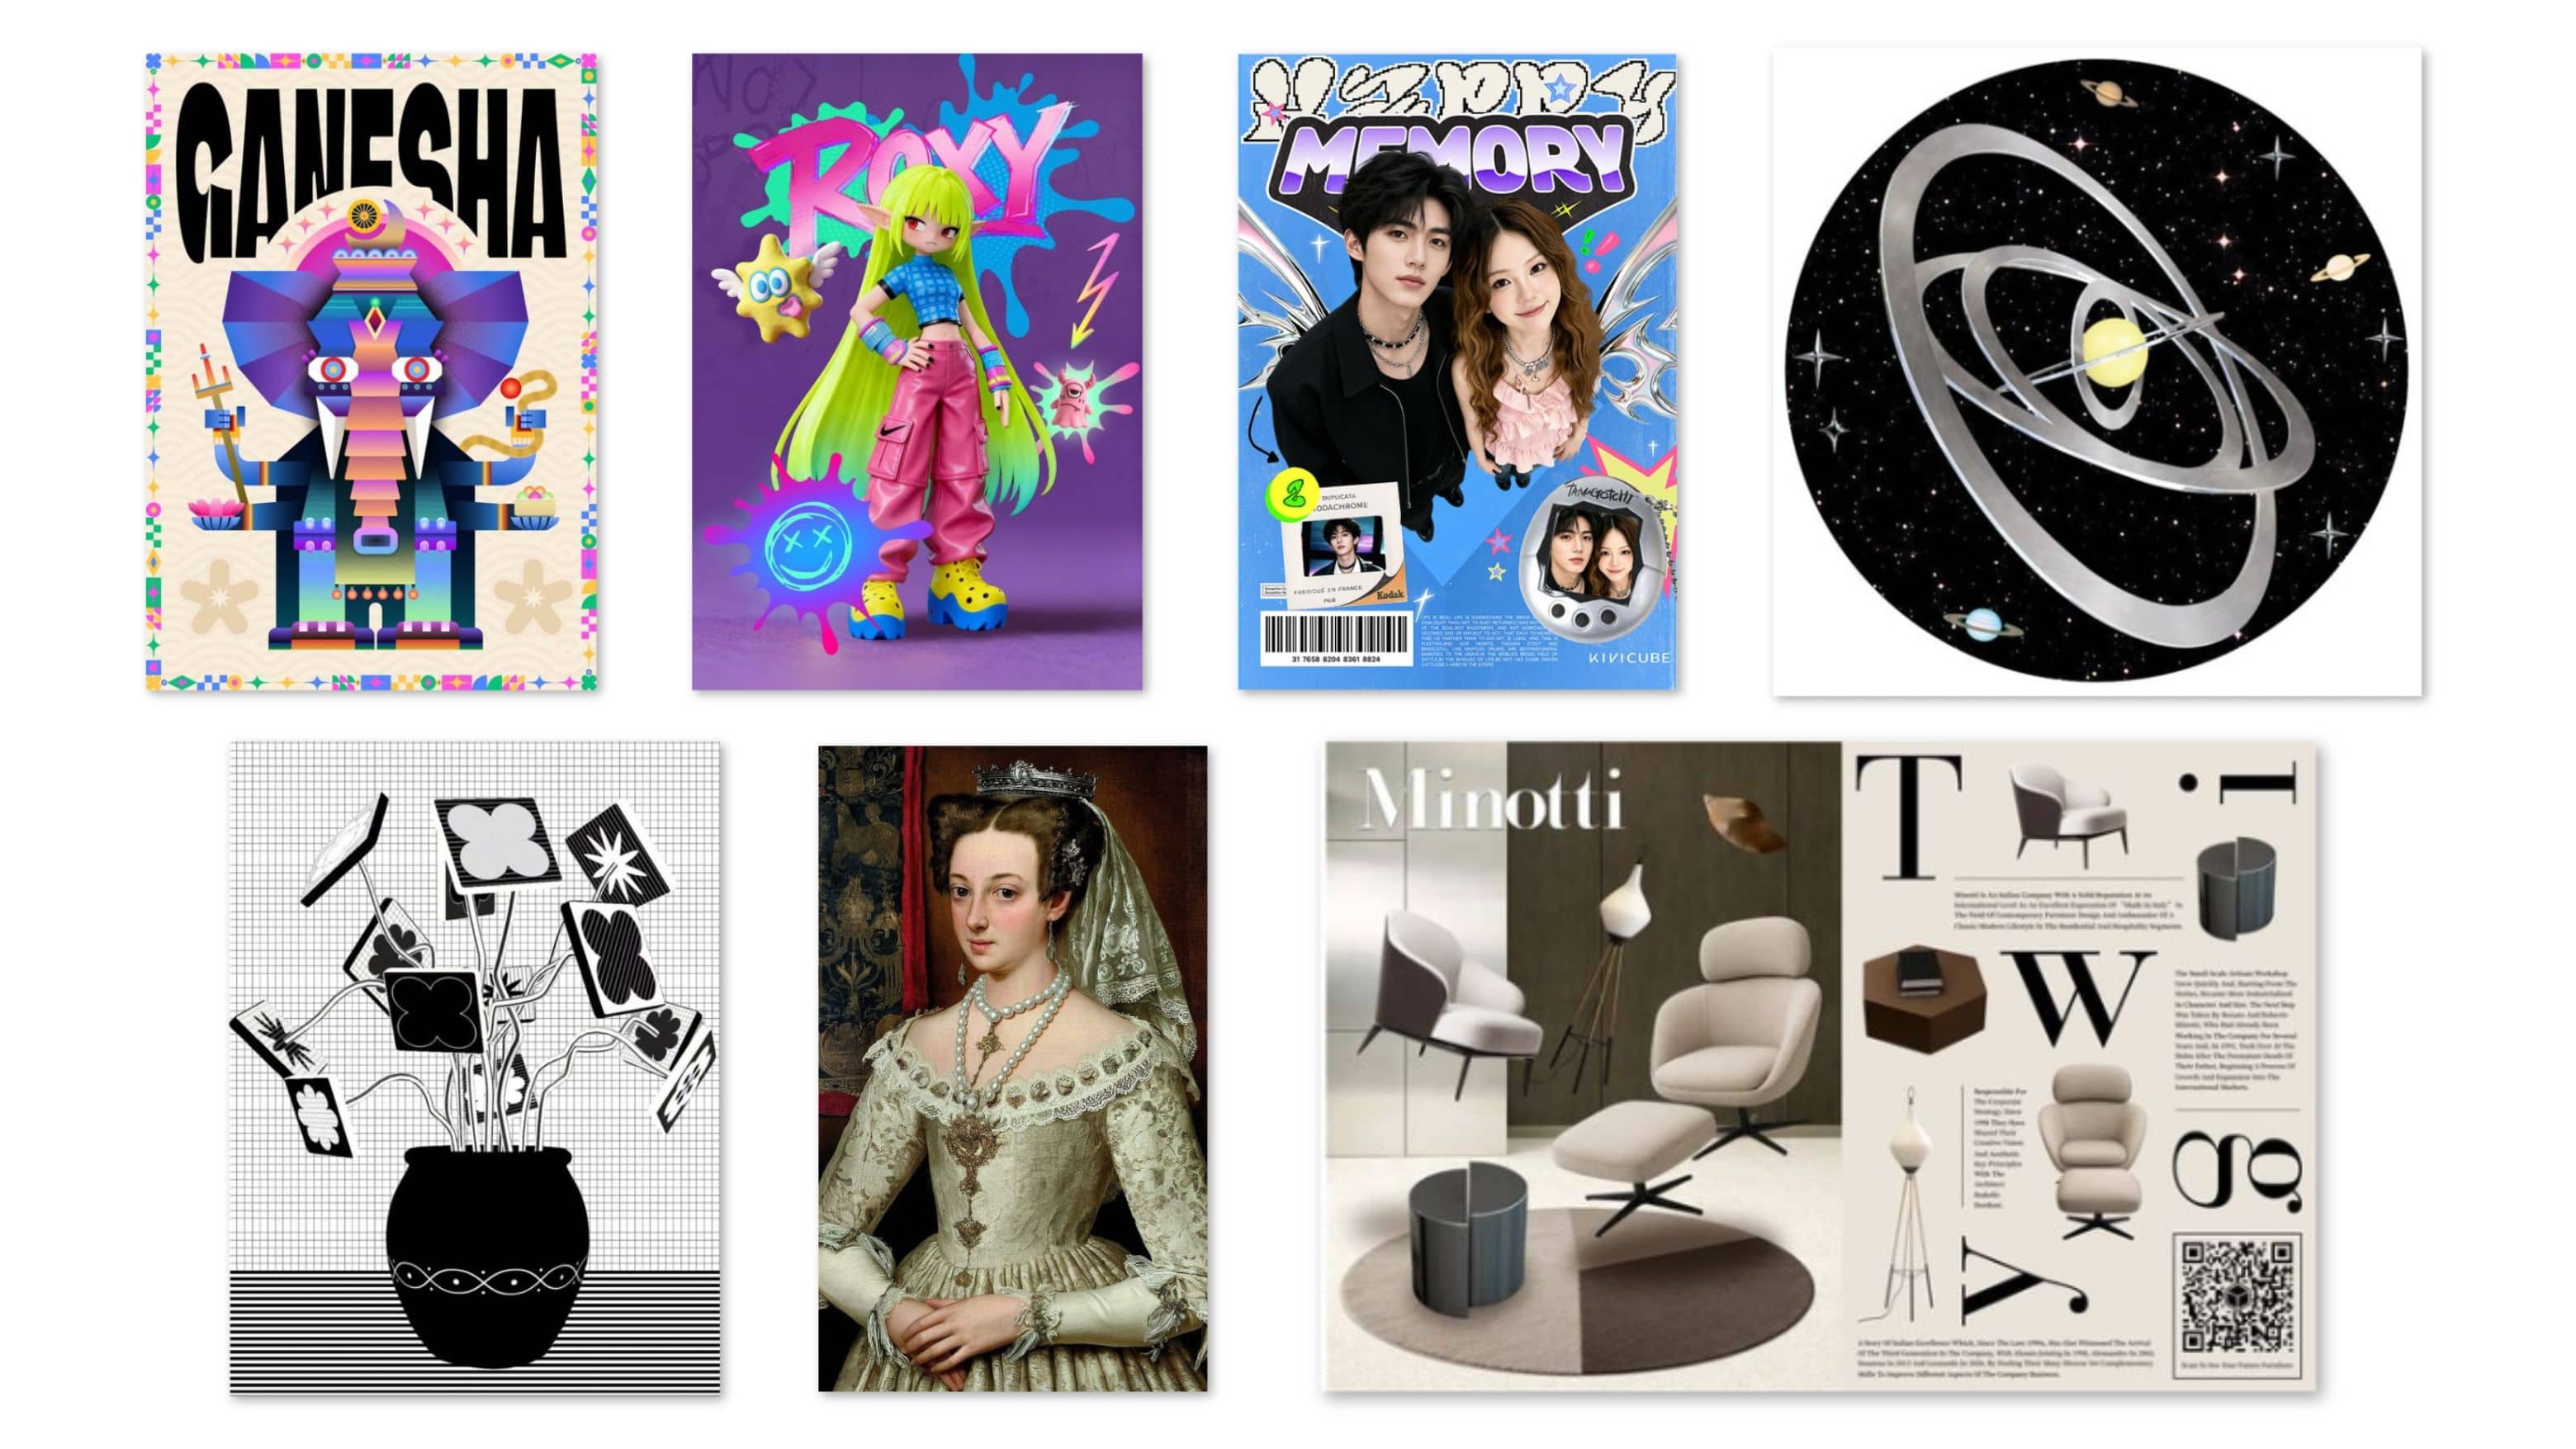
Example of bad marker images
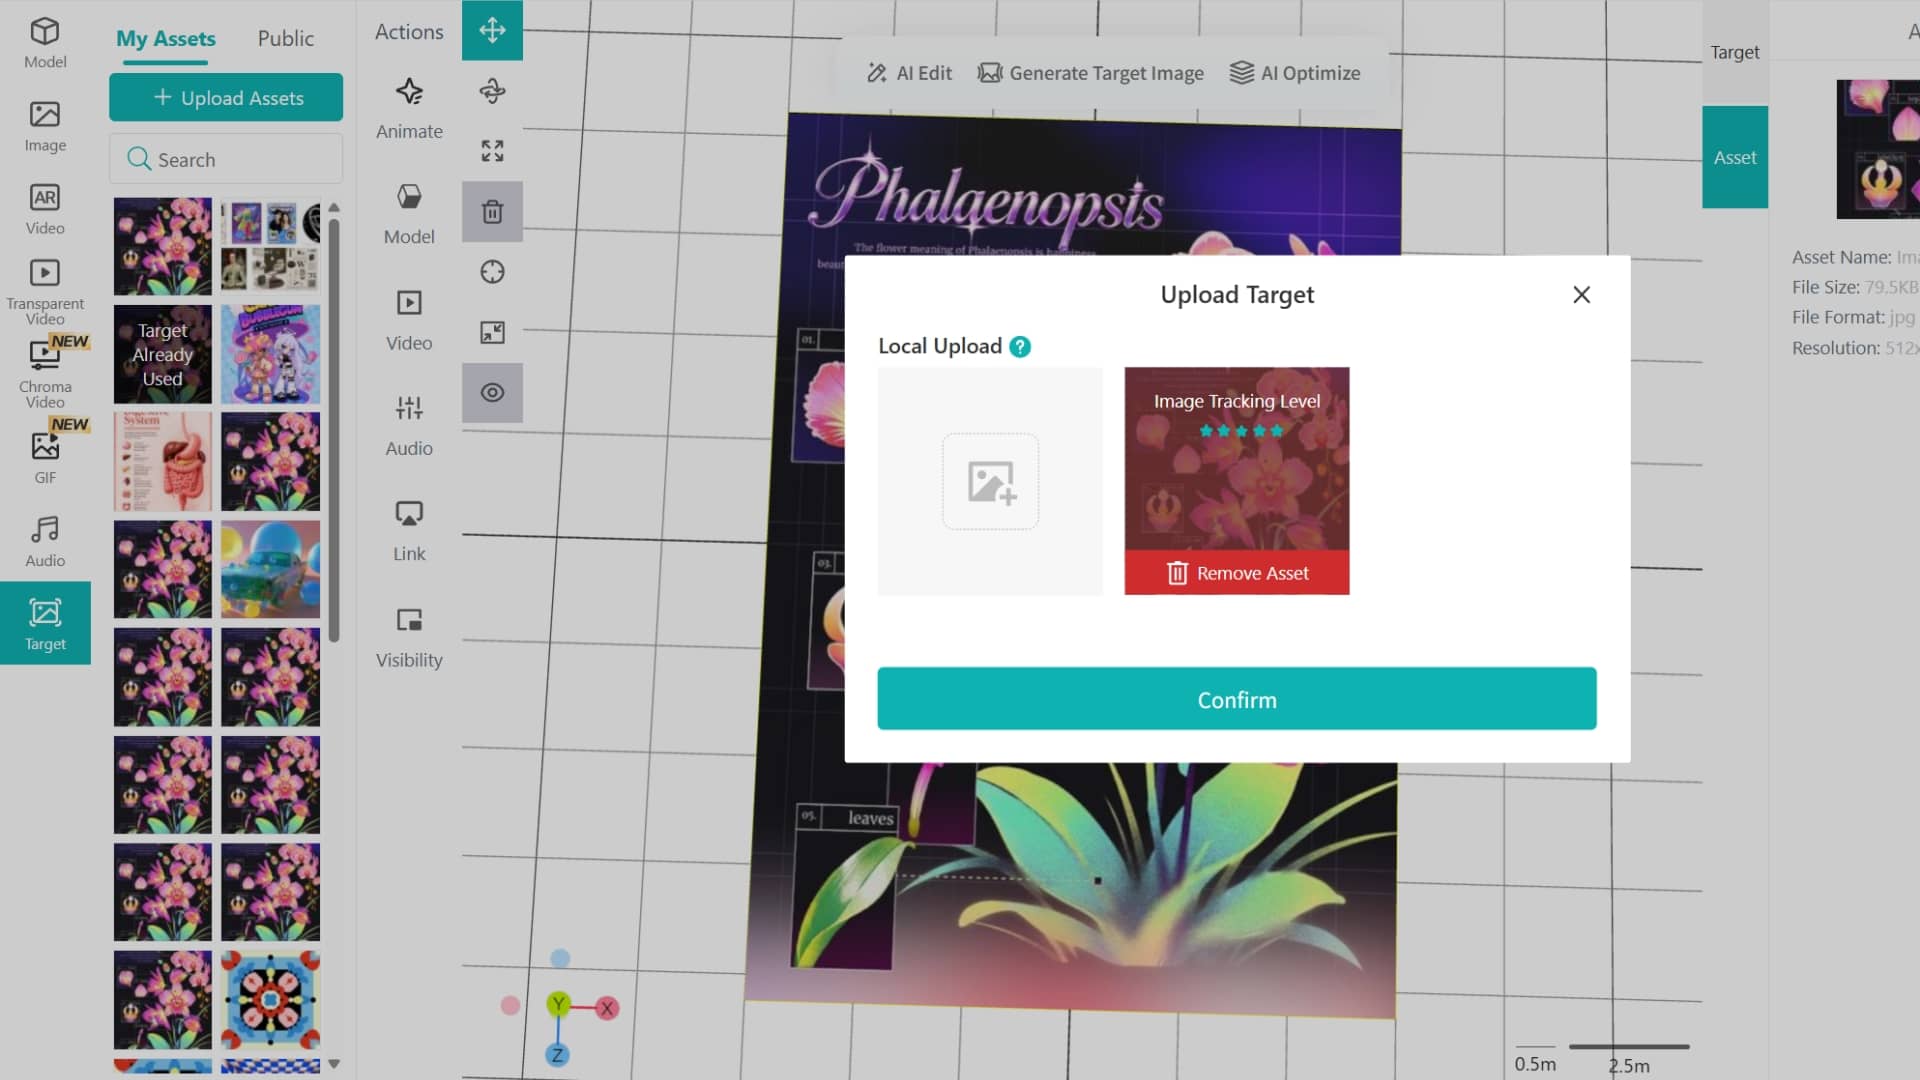
After uploading a target image in an Image AR scene, the system will automatically run a basic check and give a star rating. The star rating is only for reference. In general, a higher score means more stable recognition and tracking performance.
You can also click here to upload an image and view the target star rating independently.
You can view the rating by hovering over the target image thumbnail. If the rating is lower than 3 stars, we recommend optimizing it based on the Image AR target image guidelines.
Note
Star ratings are for reference only. Final results depend on real-world testing.
In real-world use of an Image AR scene, performance can be affected by several factors:
Light around the environment
Reflections on the image surface
How clear and different the real object is compared to the uploaded image
Whether the target image is too big or too small
Differences in phone cameras and image quality
For example, in the image below, the system detects a large number of feature points and gives a high star rating, but the real-world experience is not good.
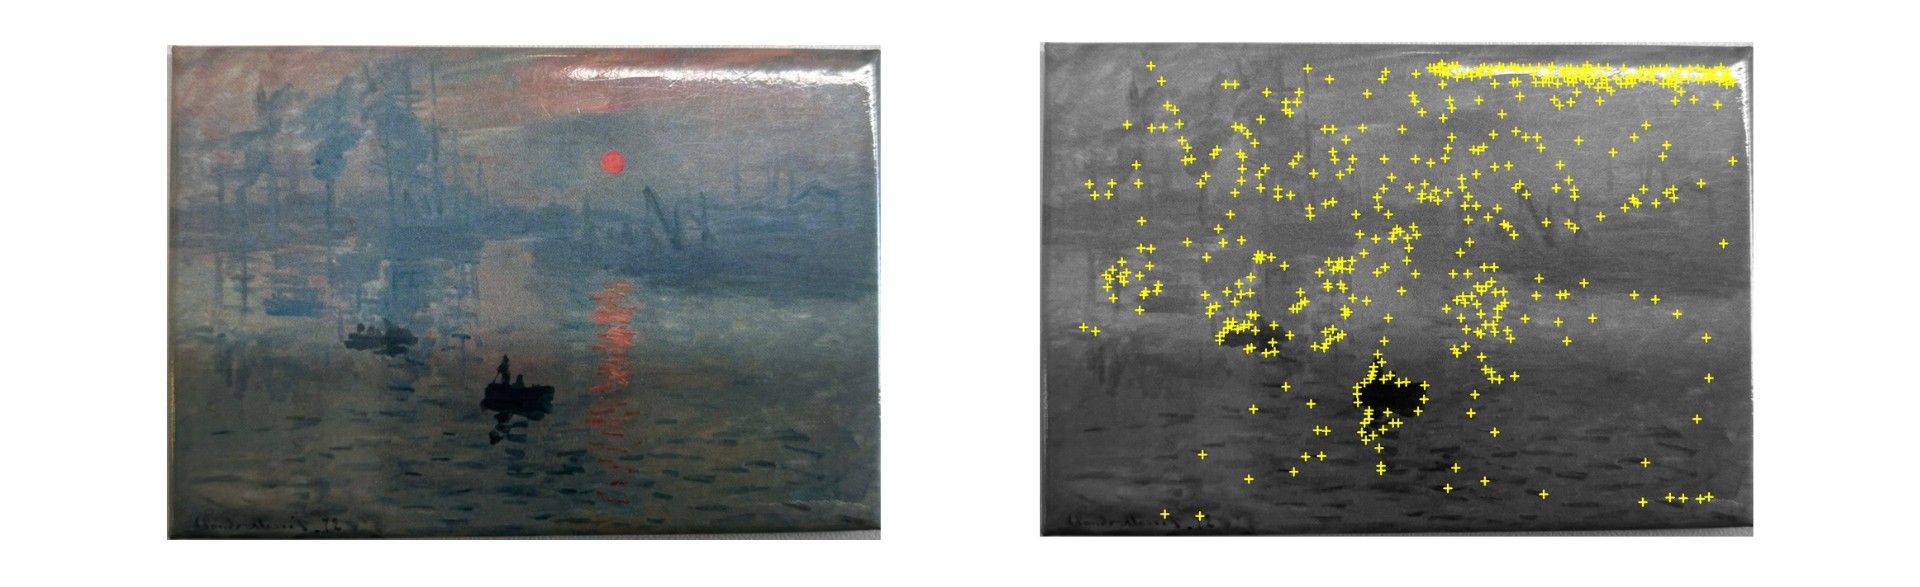
This happens because most of the yellow feature points on the right come from reflections, not real stable details in the image.
Also, the original image is blurry and has low contrast. In real use, lighting and reflections can reduce valid feature points, which may cause unstable tracking or tracking loss.
| Category | Descriptions and Examples |
|---|---|
| Valid Format | jpg, jpeg |
| Valid Color Mode | Set the image to RGB to help detect any color deviation promptly.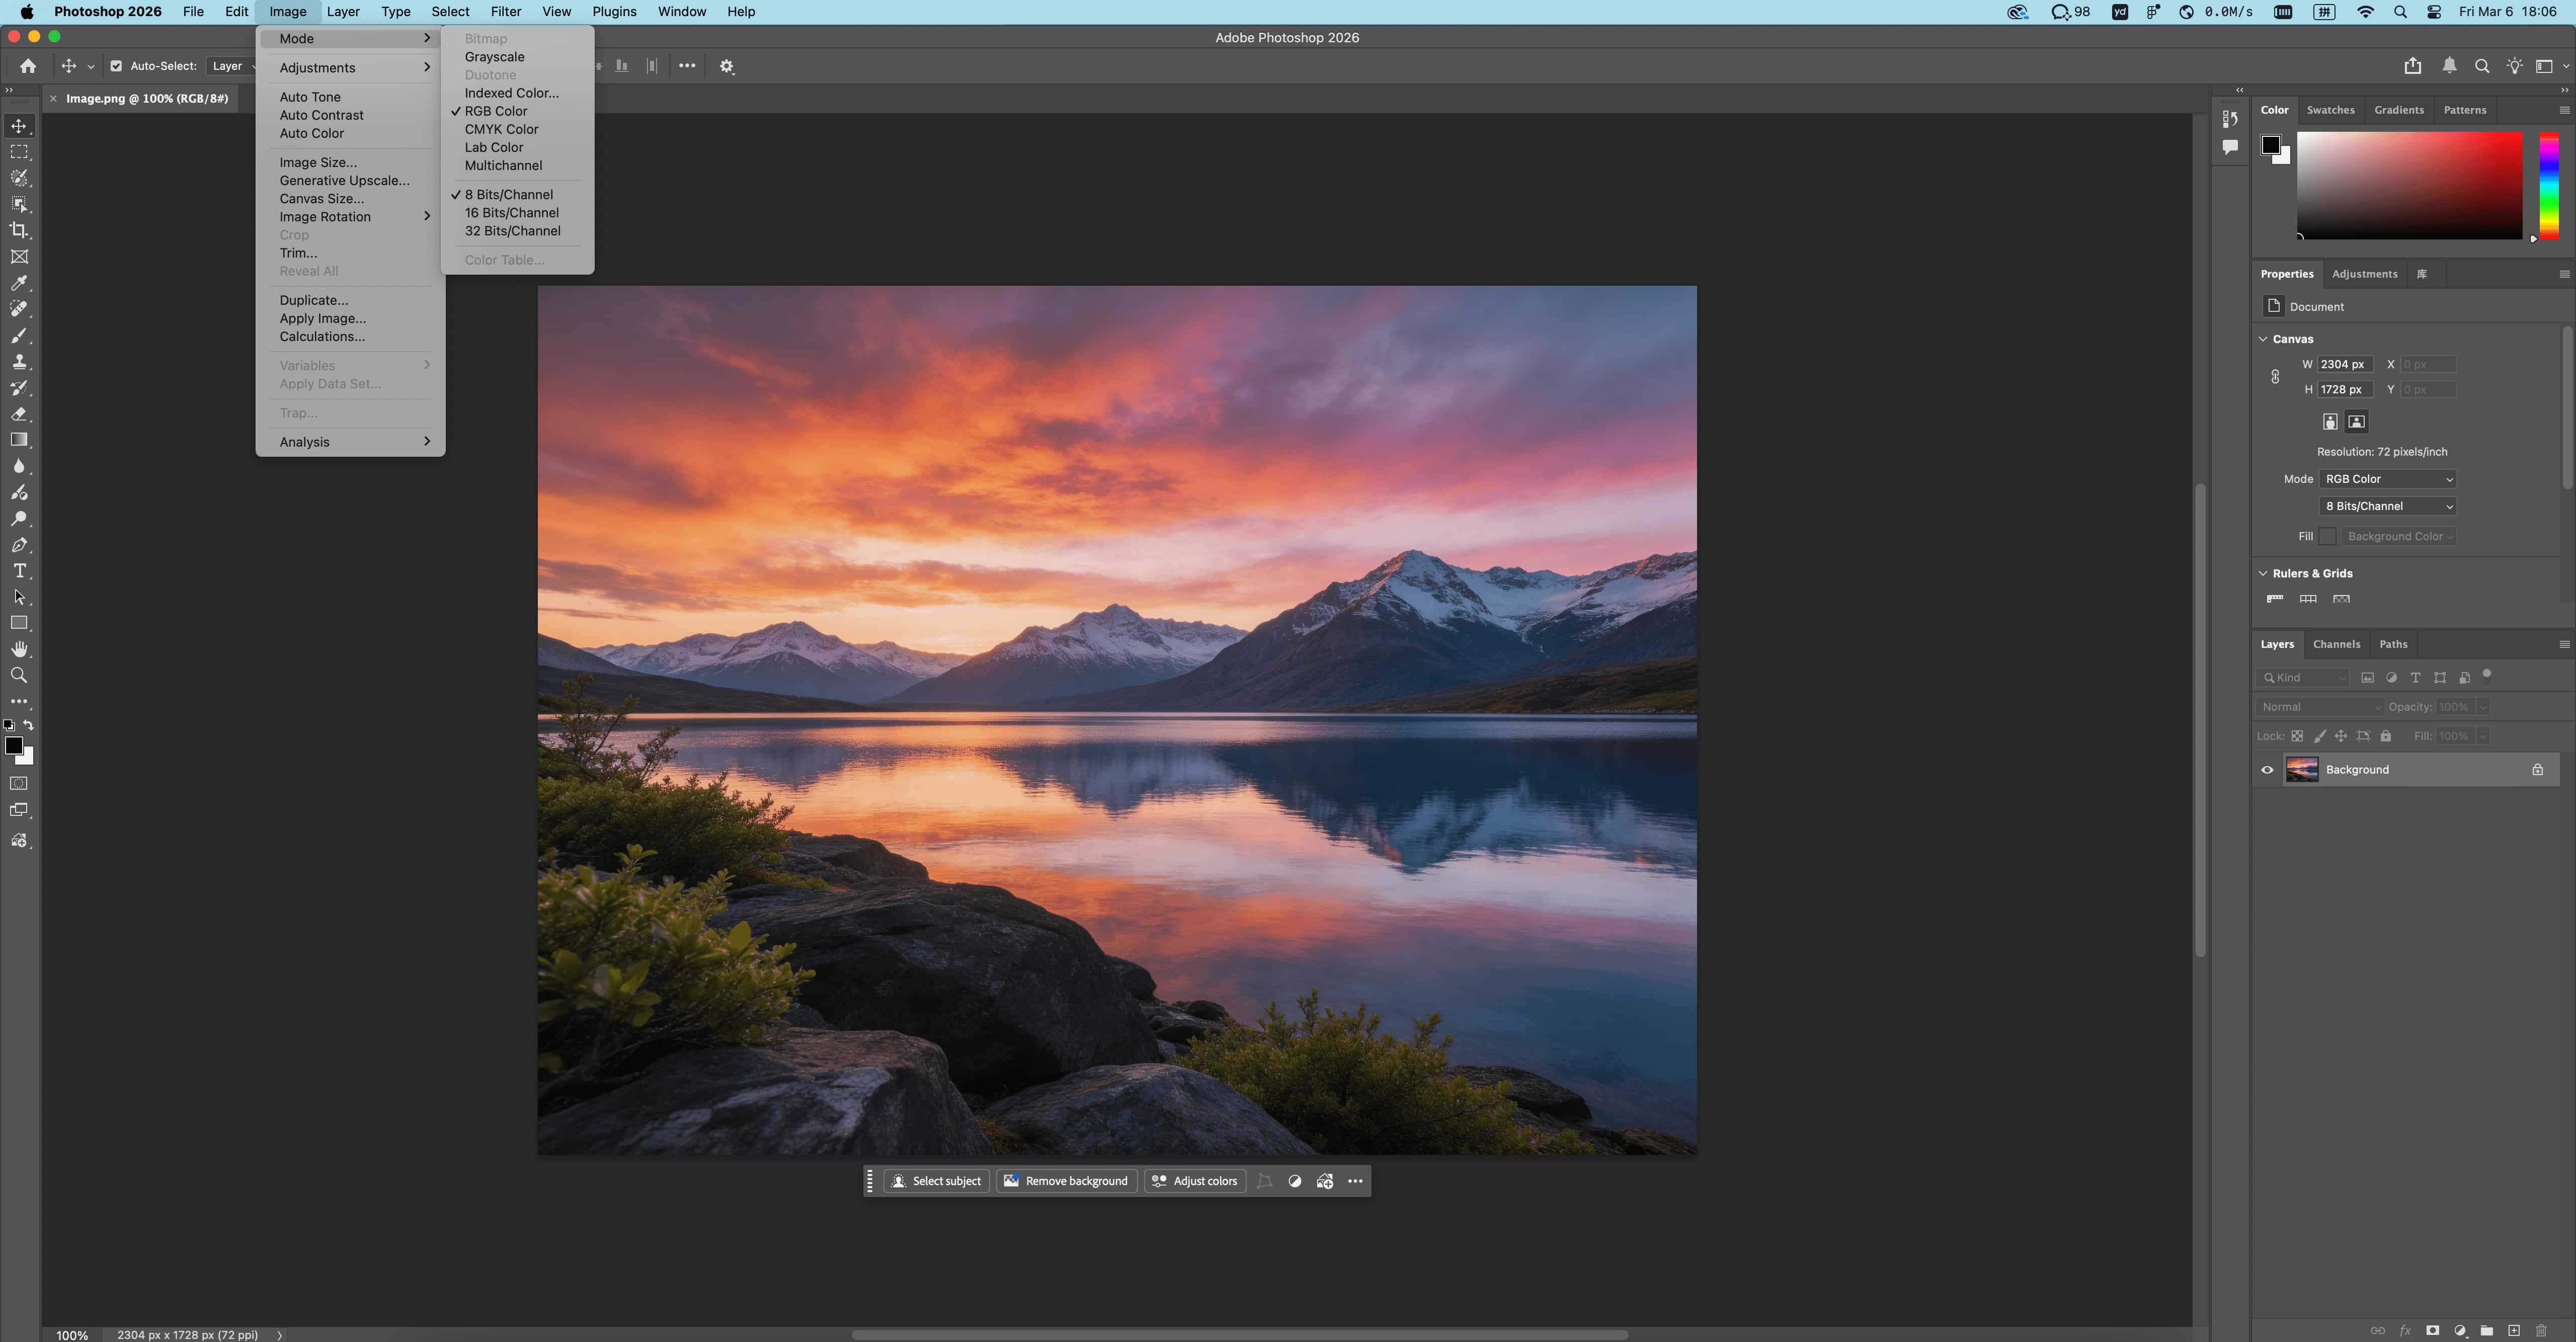 When exporting, check “Color Space → Convert to sRGB”, and verify after export to ensure no color deviation is present. |
| Recommended Image Resolution | The image resolution is recommended to be between 480×480 and 1280×1280, with around 800 being ideal.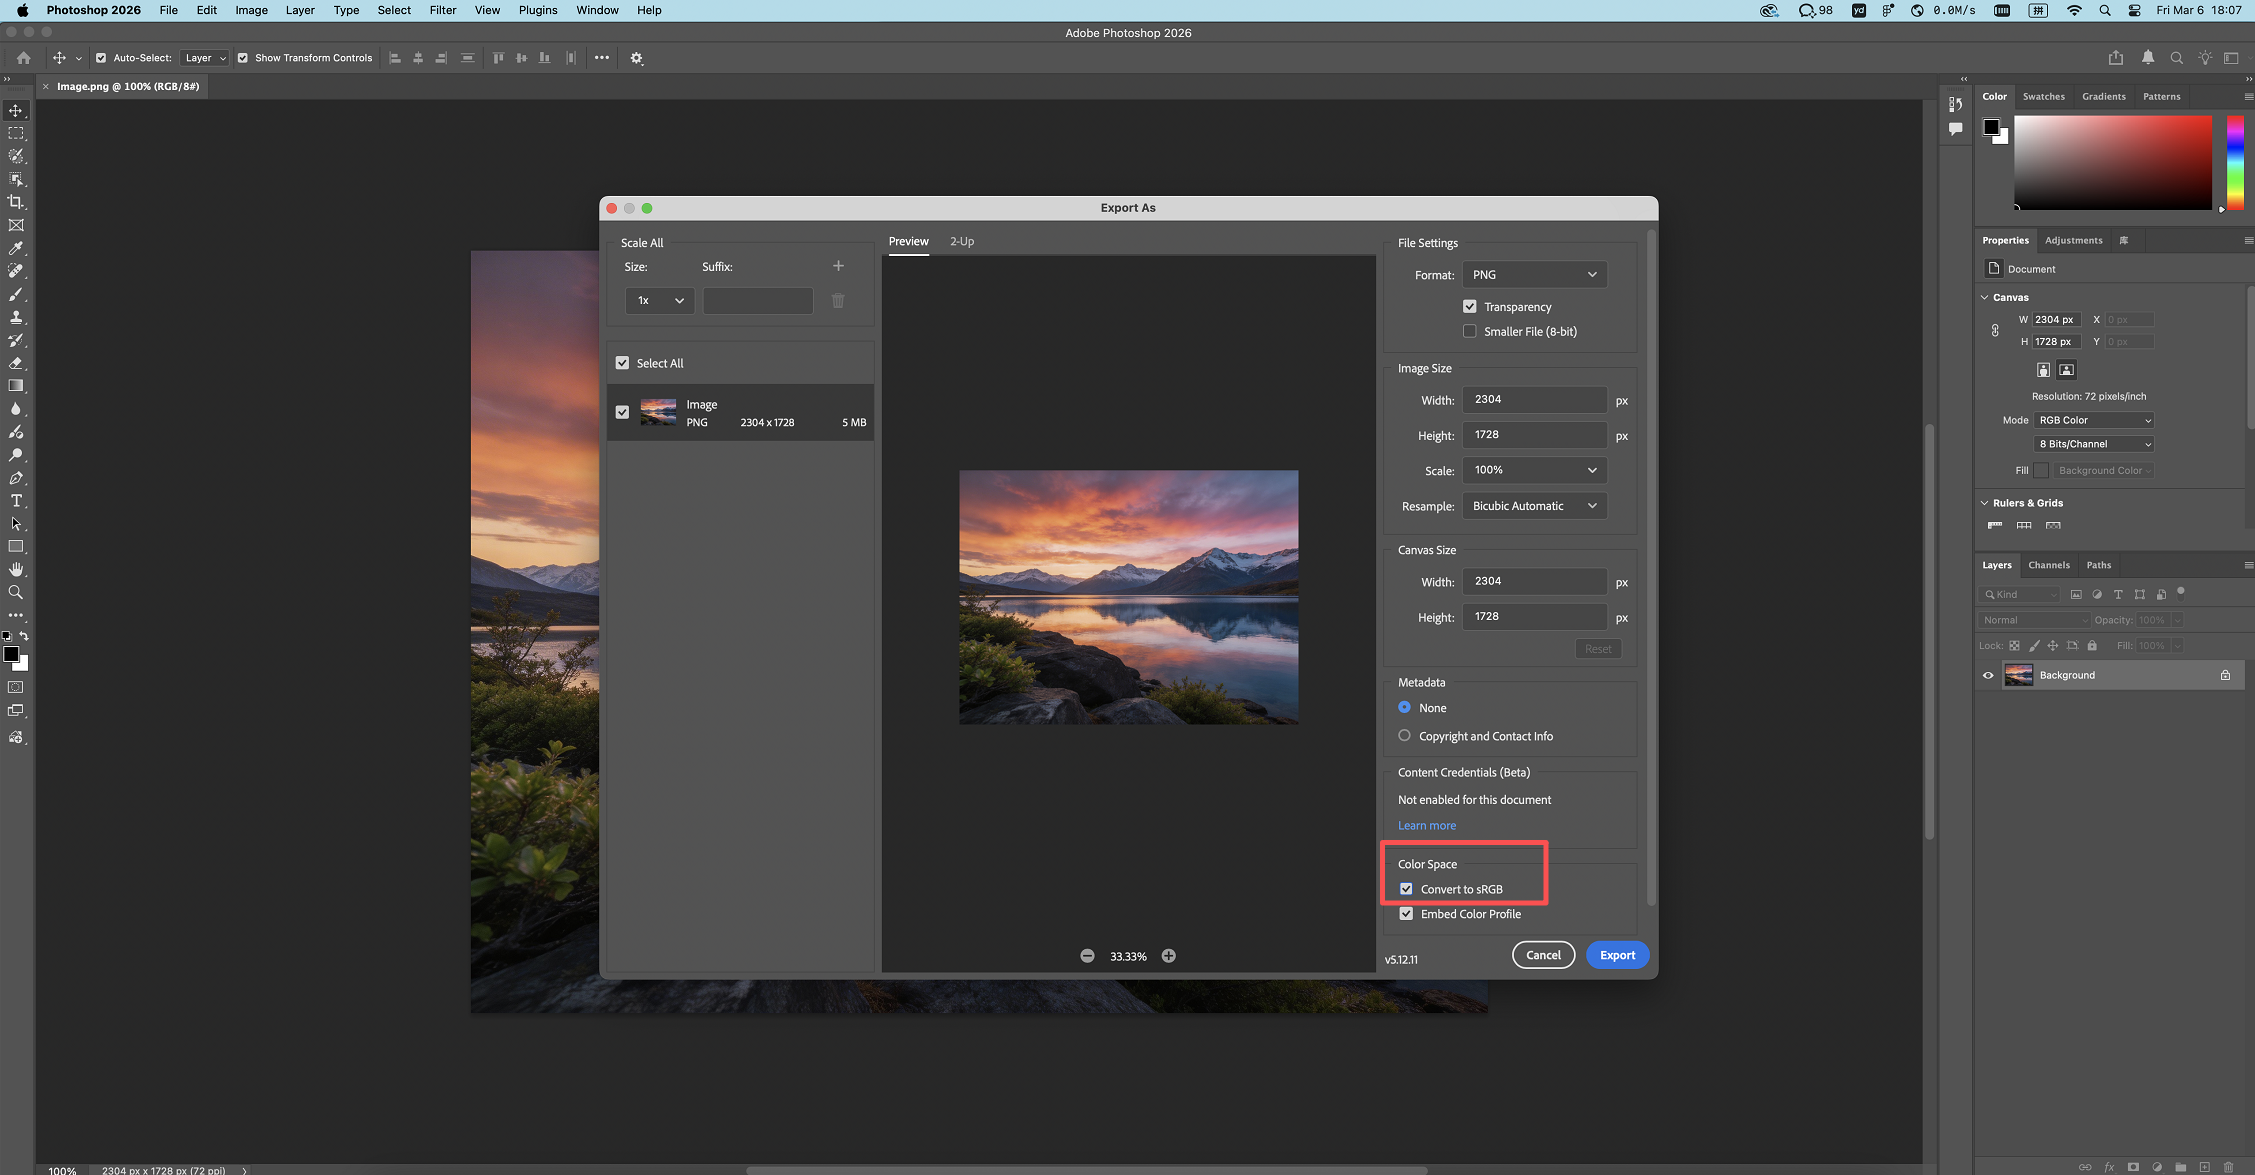 |
| Recommended Image Aspect Ratio | Landscape: 1:1 to 16:9 (Aspect Ratio 1 to 1.78) Portrait: 9:16 to 1:1 (Aspect Ratio 0.56 to 1) 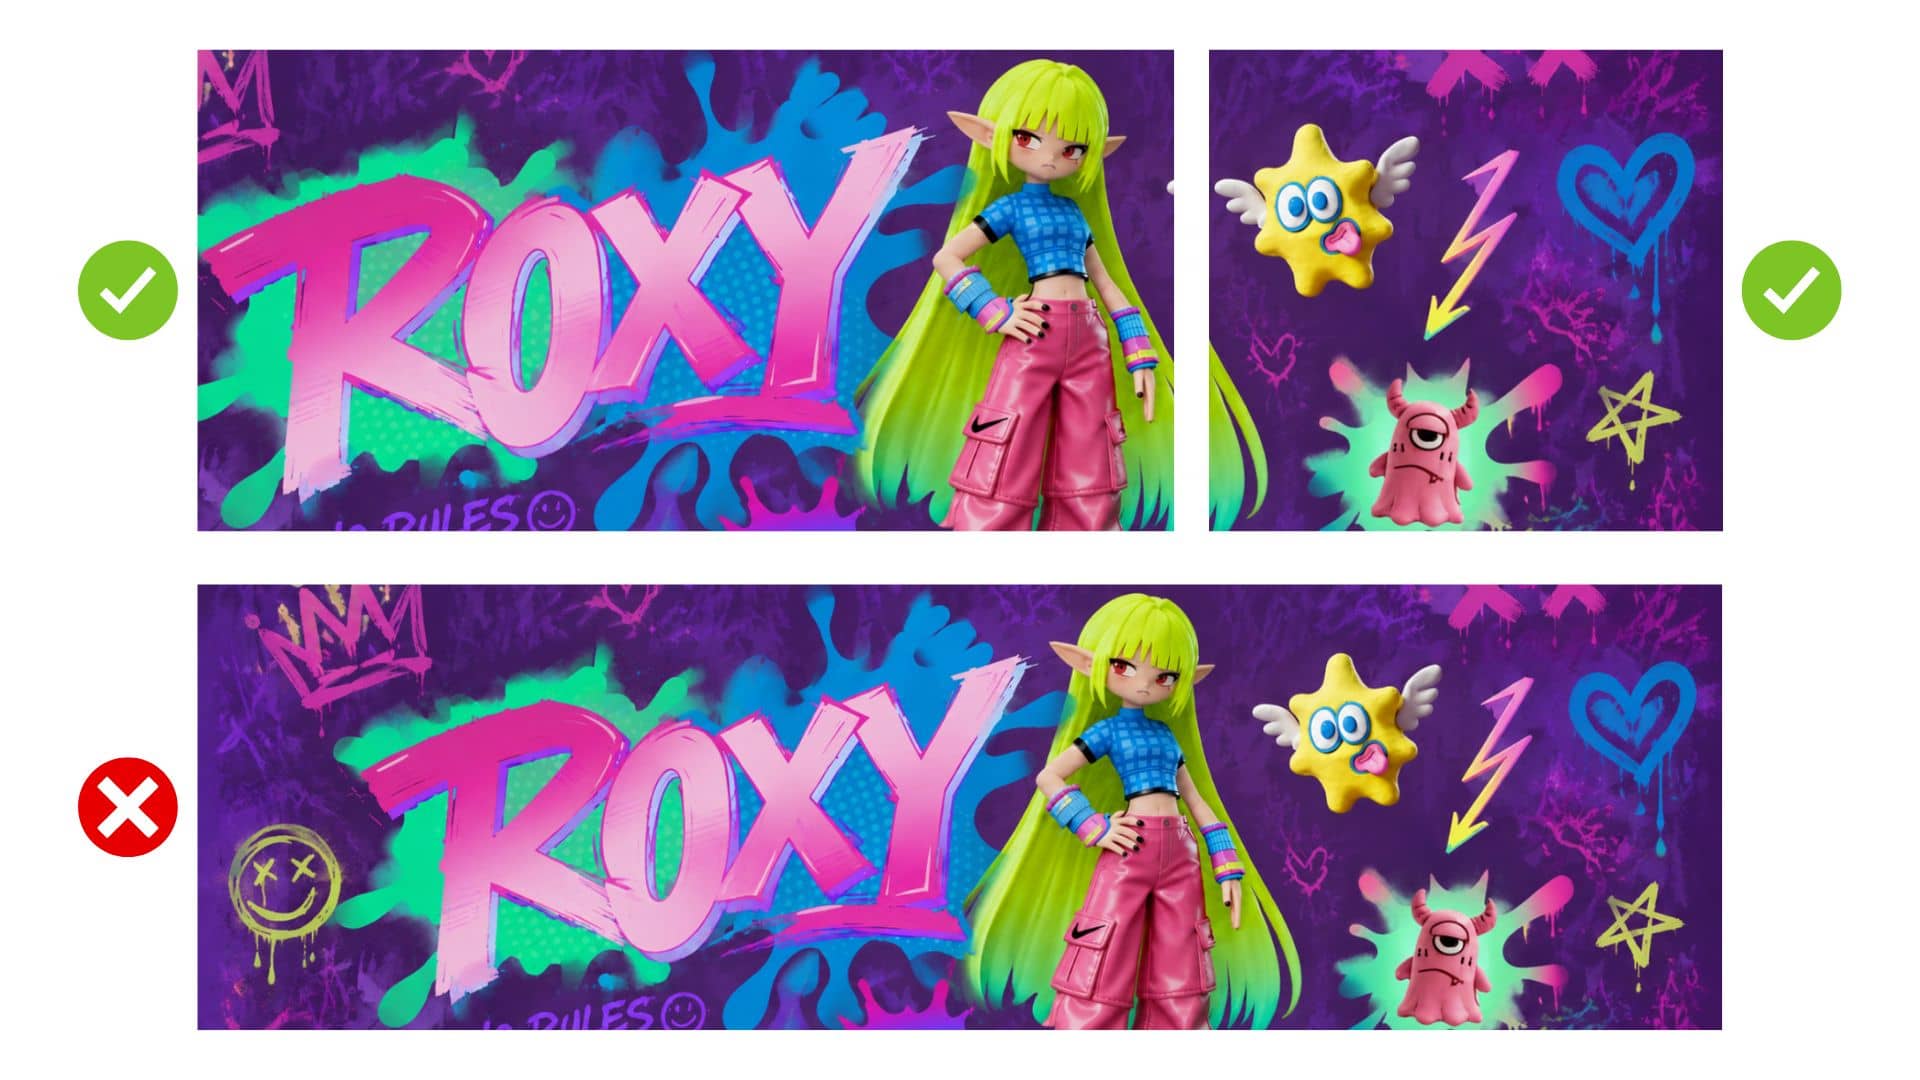 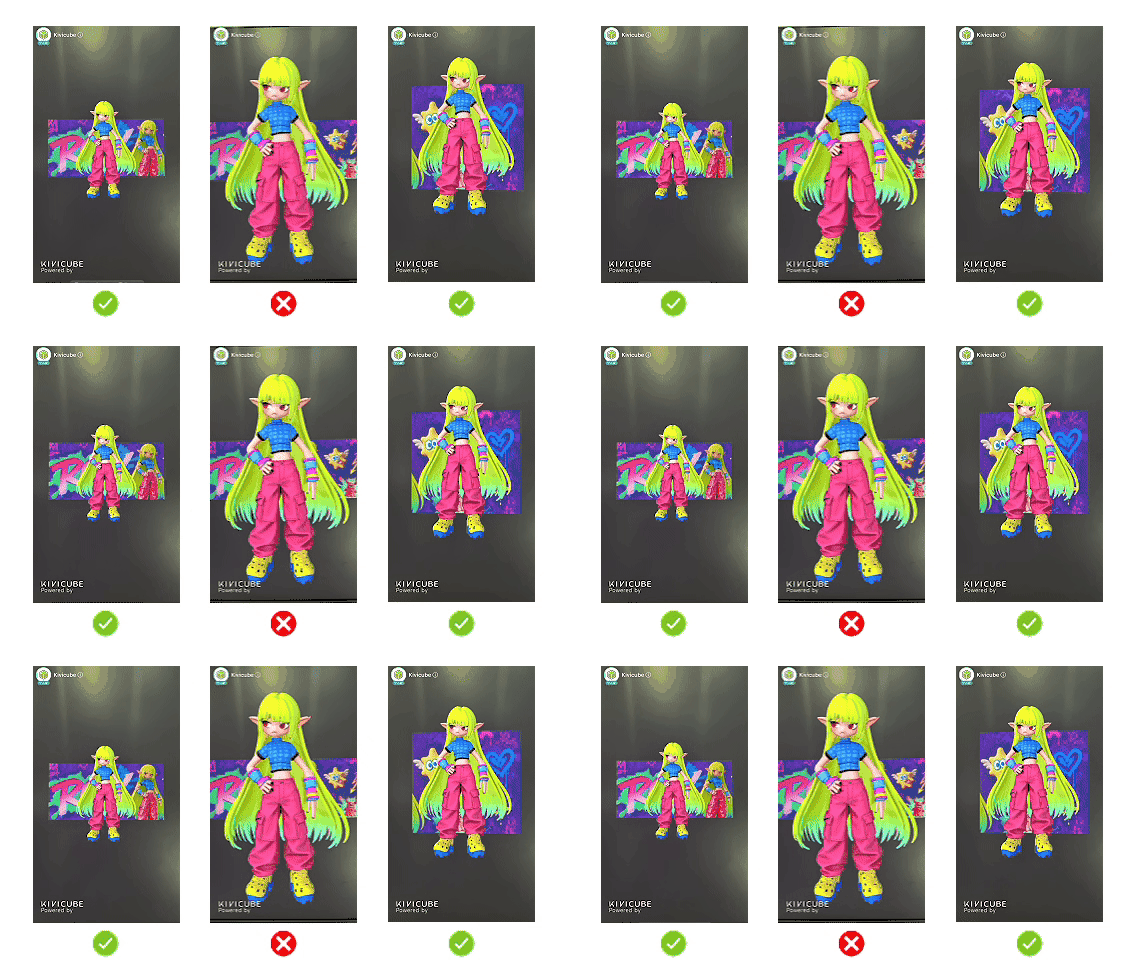 |
| Rich Detail | The following are examples of poor-quality images: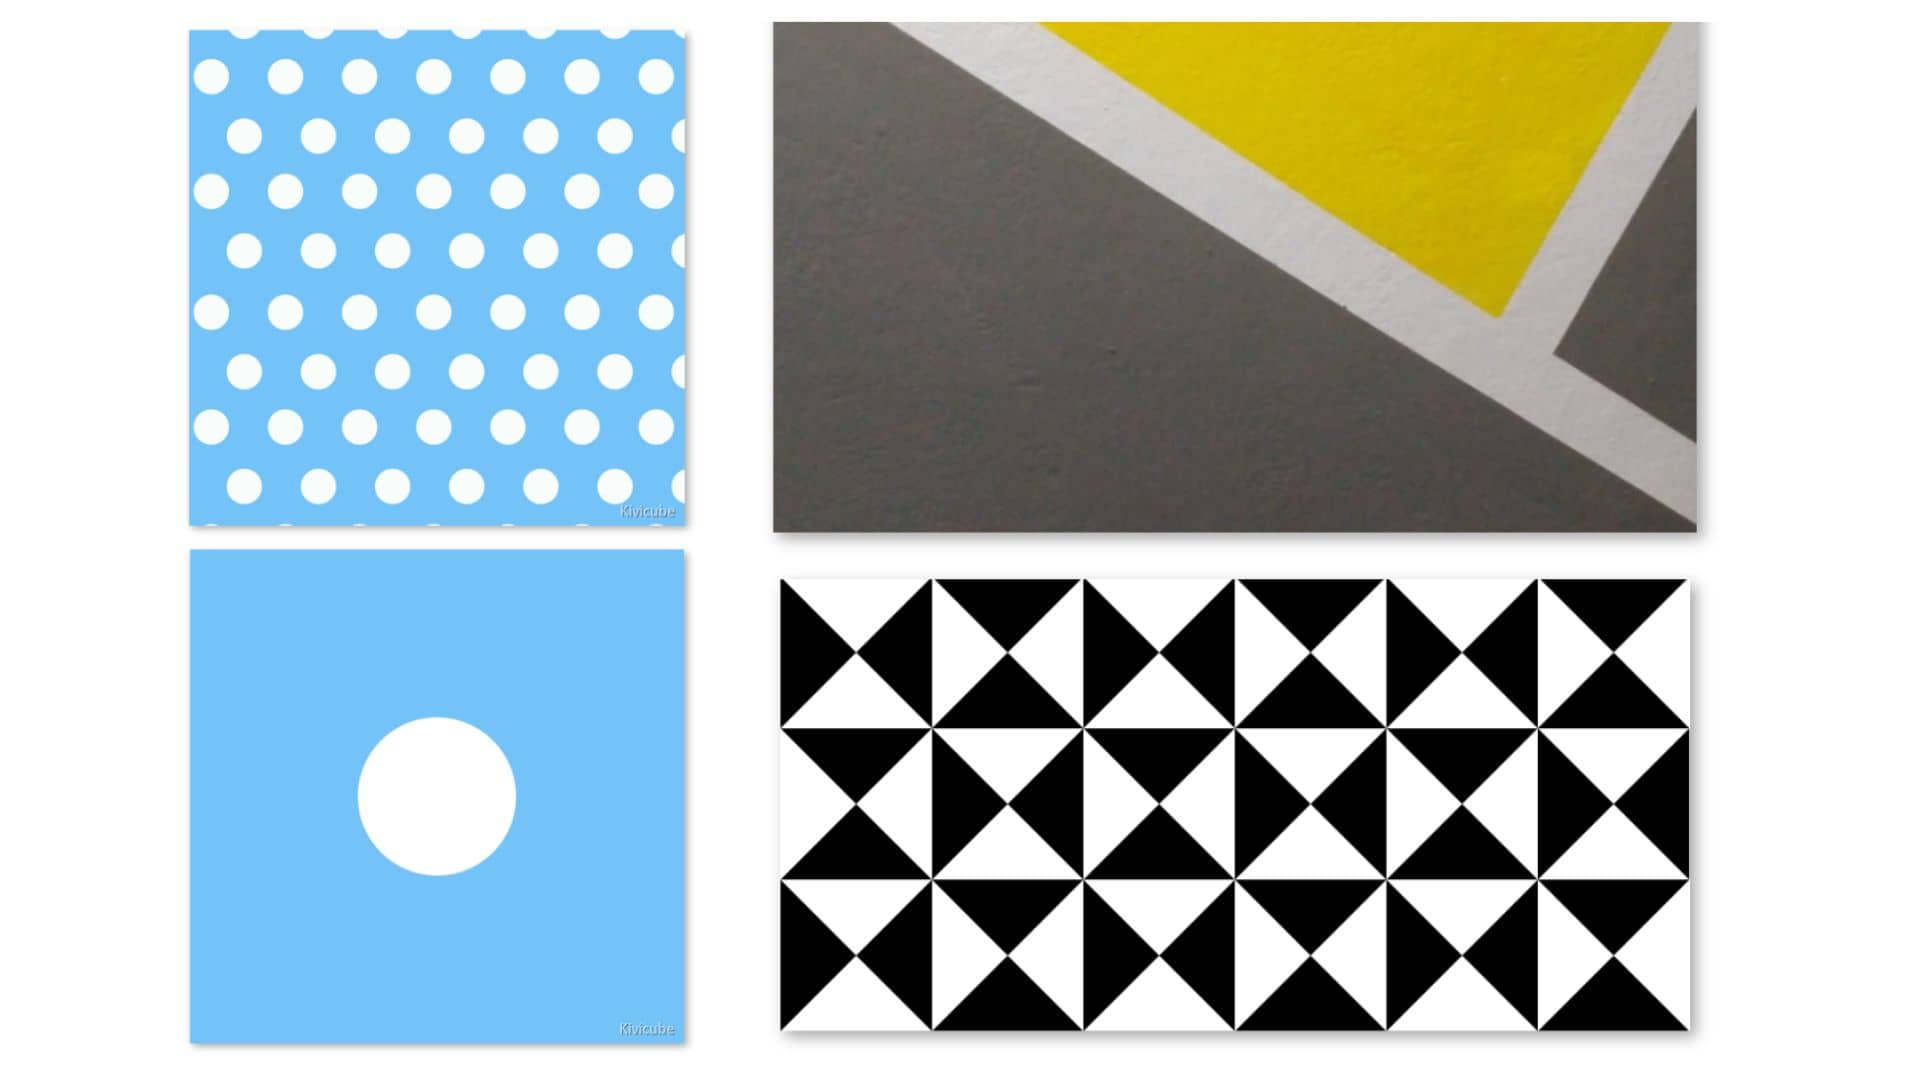 |
| Avoid extensive whitespace | Too much empty space can reduce tracking stability. Minimize blank regions and ensure the main subject is clearly emphasized: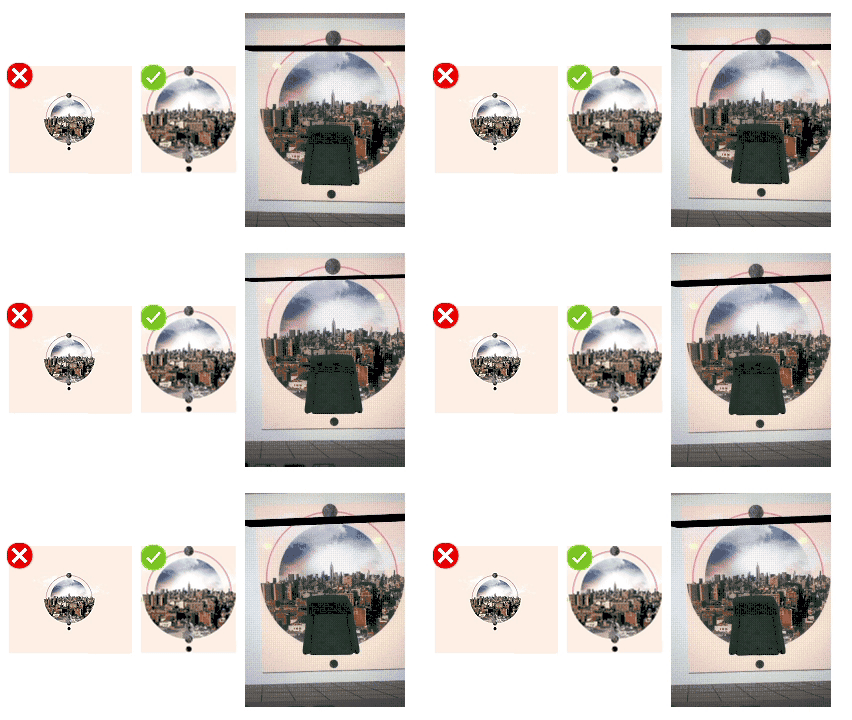 |
| Avoid repetitive patterns / Symmetrical images | Symmetrical images tend to be unstable: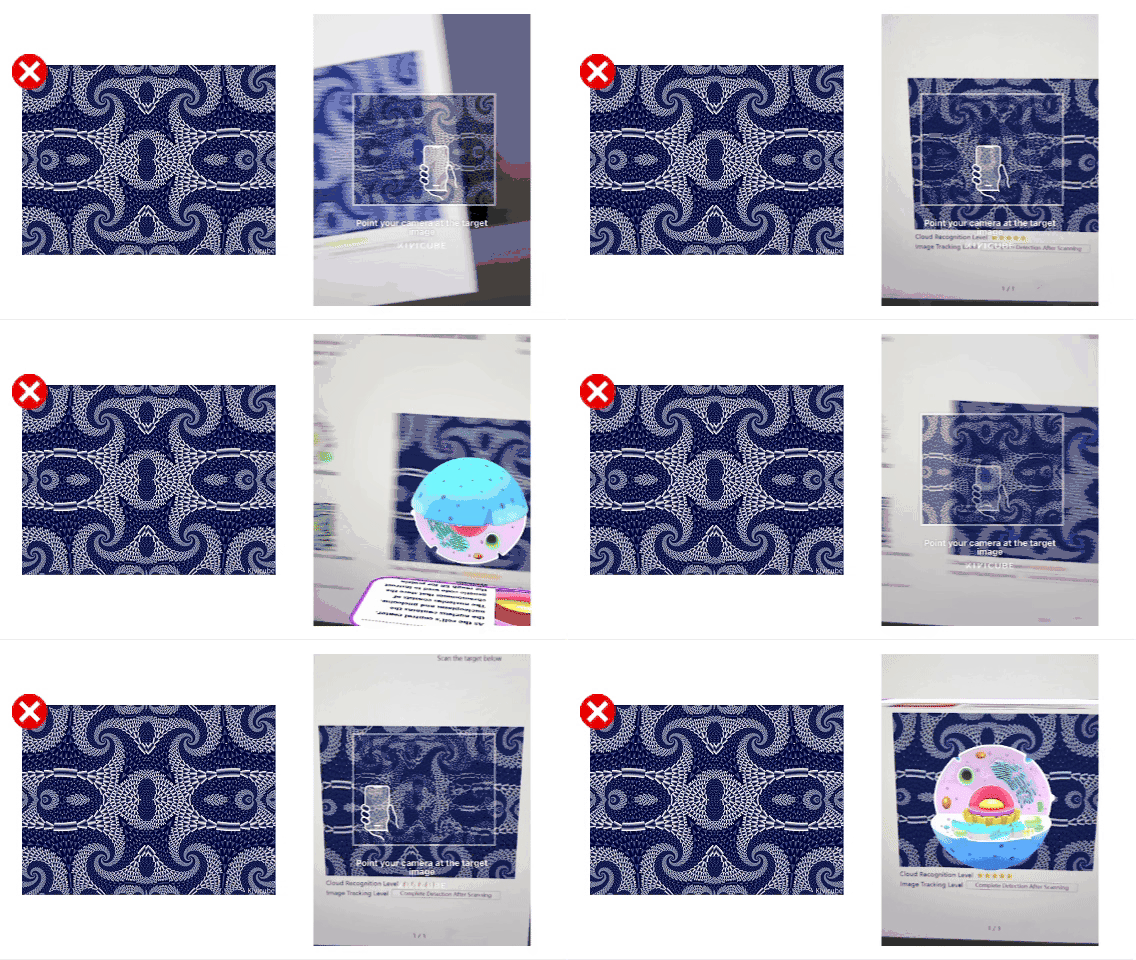 |
| Avoid repetitive patterns / Symmetrical images | For images that aren’t perfectly symmetrical, the final evaluation should be based on real tracking performance: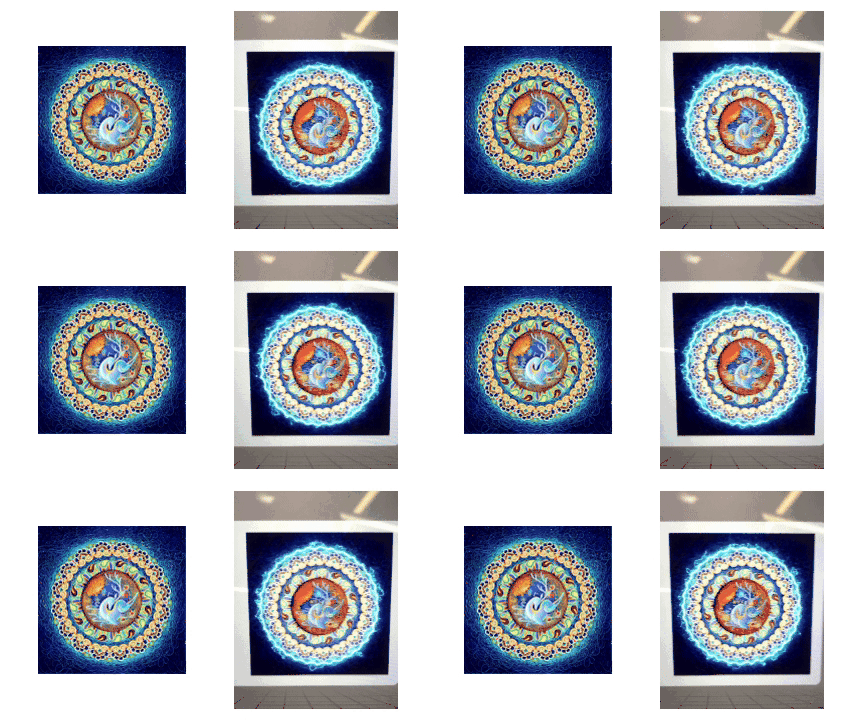 |
| Avoid repetitive patterns / Symmetrical images | Repetitive Patterns Can Lead to Detection Difficulties: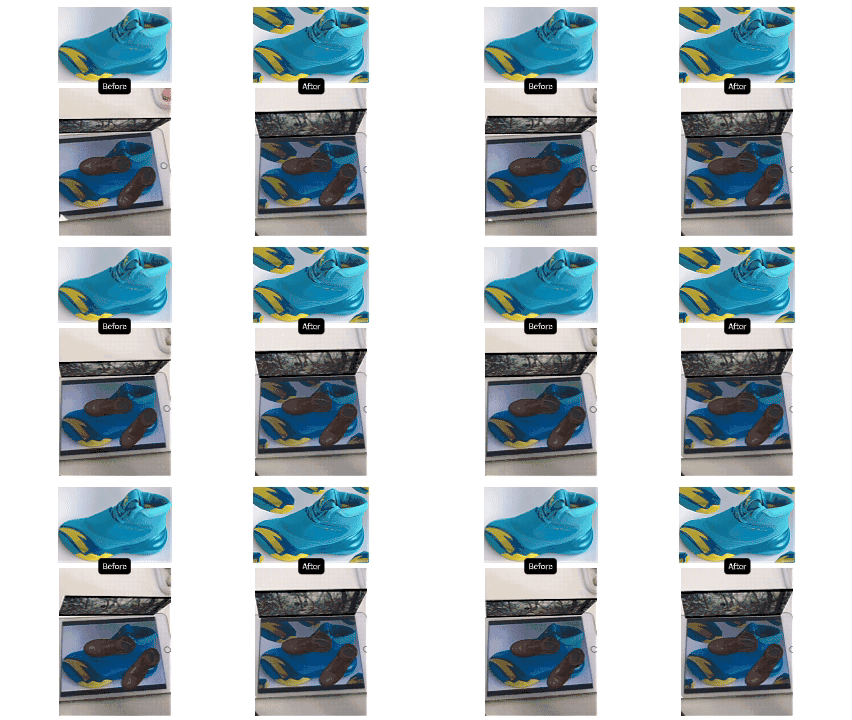 |
| Cloud Recognition VS Image Tracking | 1. Differences in Feature Point Extraction As shown below, Cloud Recognition standards tend to perform poorly on smooth or highly curved shapes, since they do not generate enough strong feature points. This may result in a low rating (e.g., 1 star). However, in practice, image tracking performance is often better than the rating suggests. 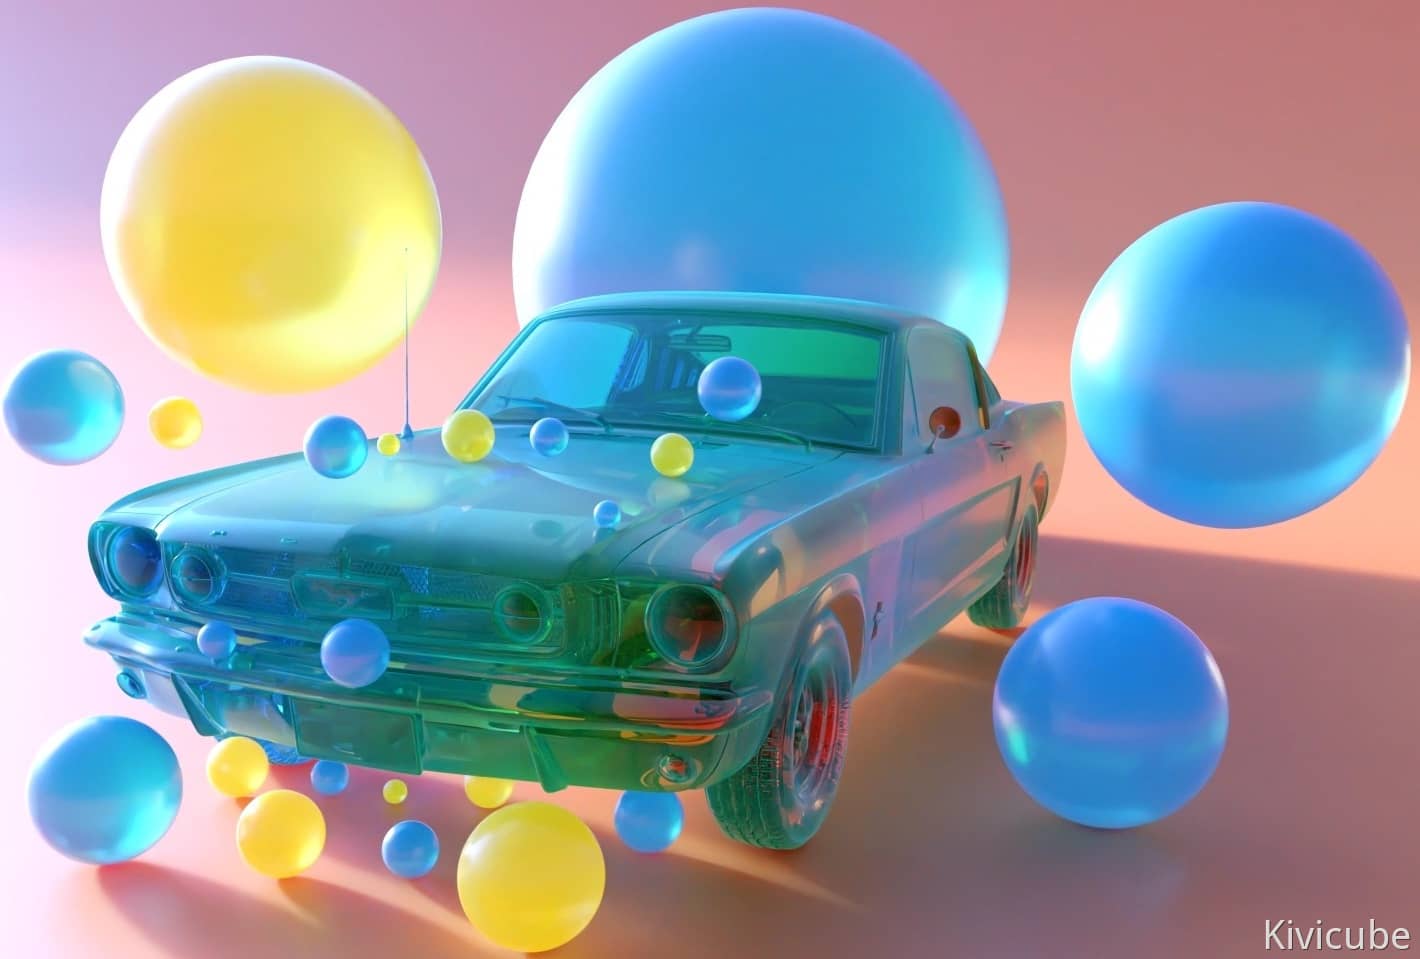 Note: We do not recommend using these types of images as primary targets. In real-world usage, some level of tracking jitter may still occur. |
| Cloud Recognition VS Image Tracking | 2. Image Tracking Is More Forgiving with Blur Compared to Cloud Recognition, image tracking is less strict when it comes to target clarity. As shown below, even if a target is slightly blurred, it can still provide stable tracking as long as it contains enough visual information and structure. 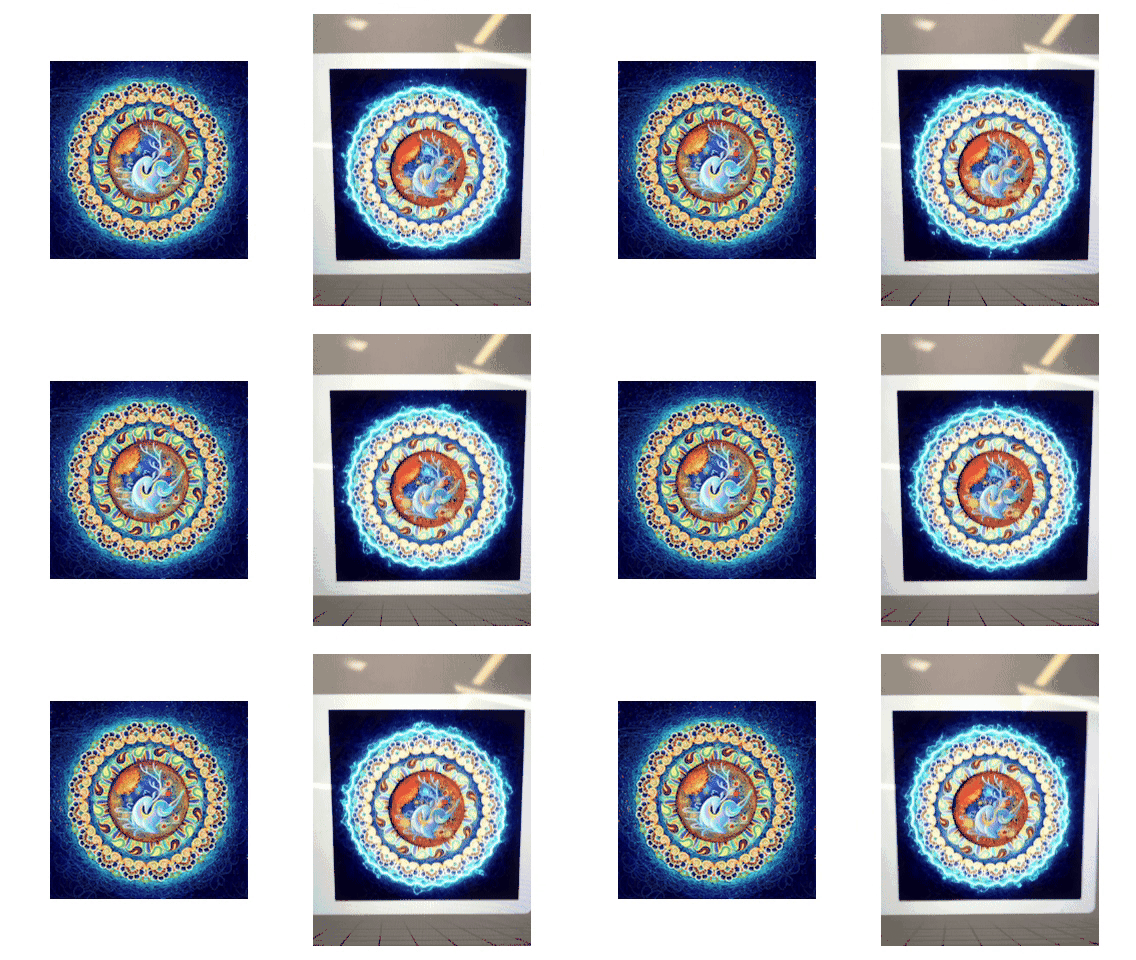 |
| Cloud Recognition VS Image Tracking | Higher Tolerance for Blur and Complexity Image tracking can remain relatively stable even with more complex or slightly blurred images. (Note: This does not mean blurred designs are recommended, only that the system can better tolerate them.) |
| Avoid Gradient Designs | Avoid using large gradient areas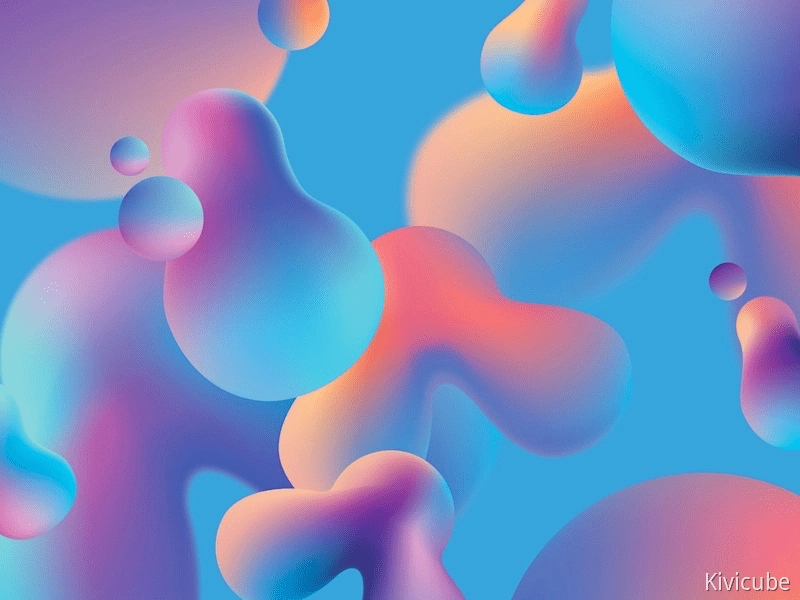 |
Recommended Practice
Before uploading an image for recognition, add a white border around it.
If the image will be printed, include a white border on the printed version as well.
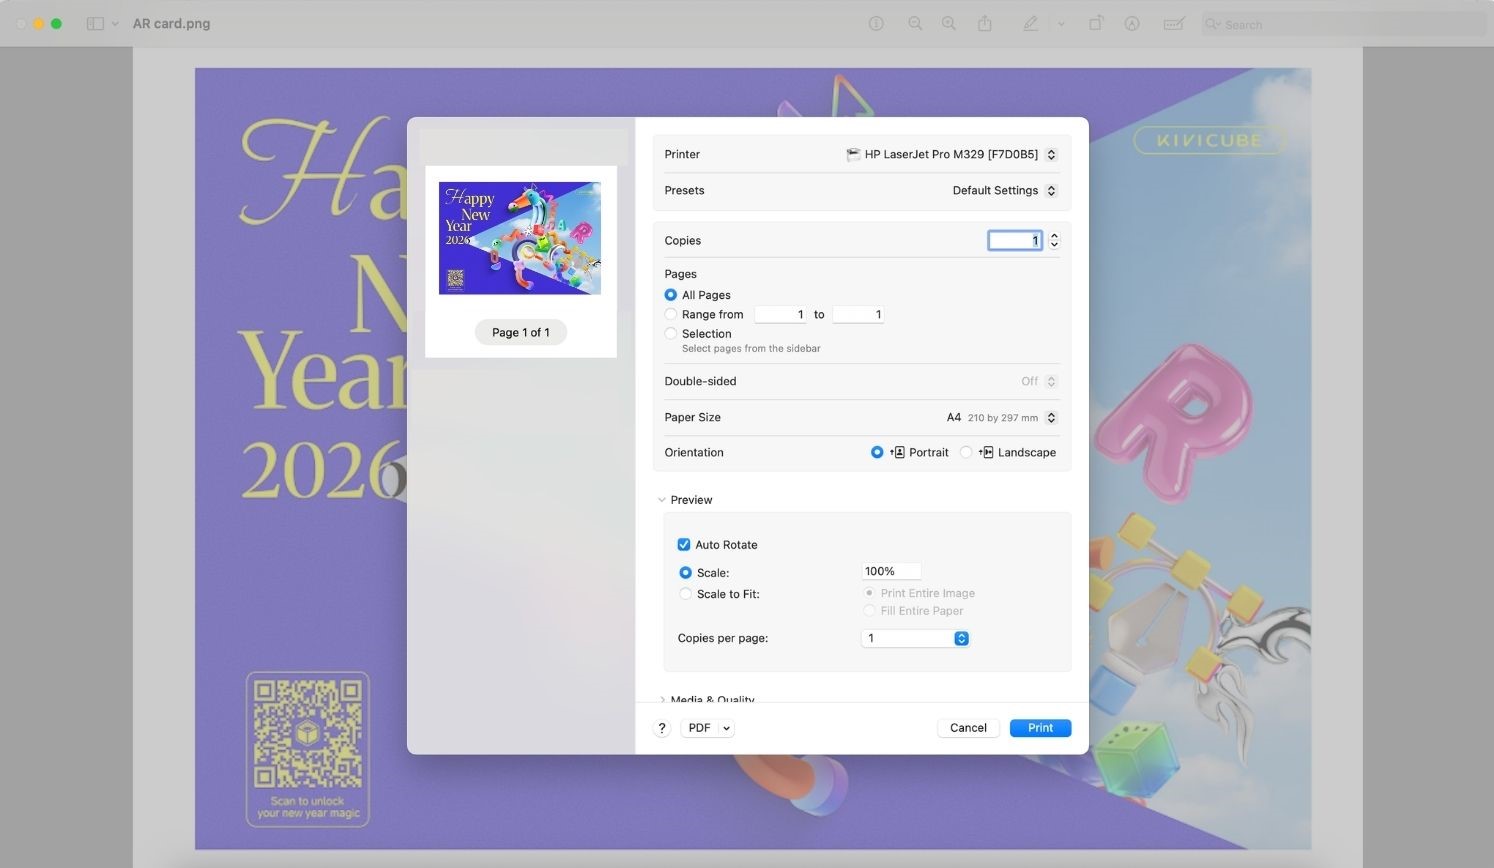
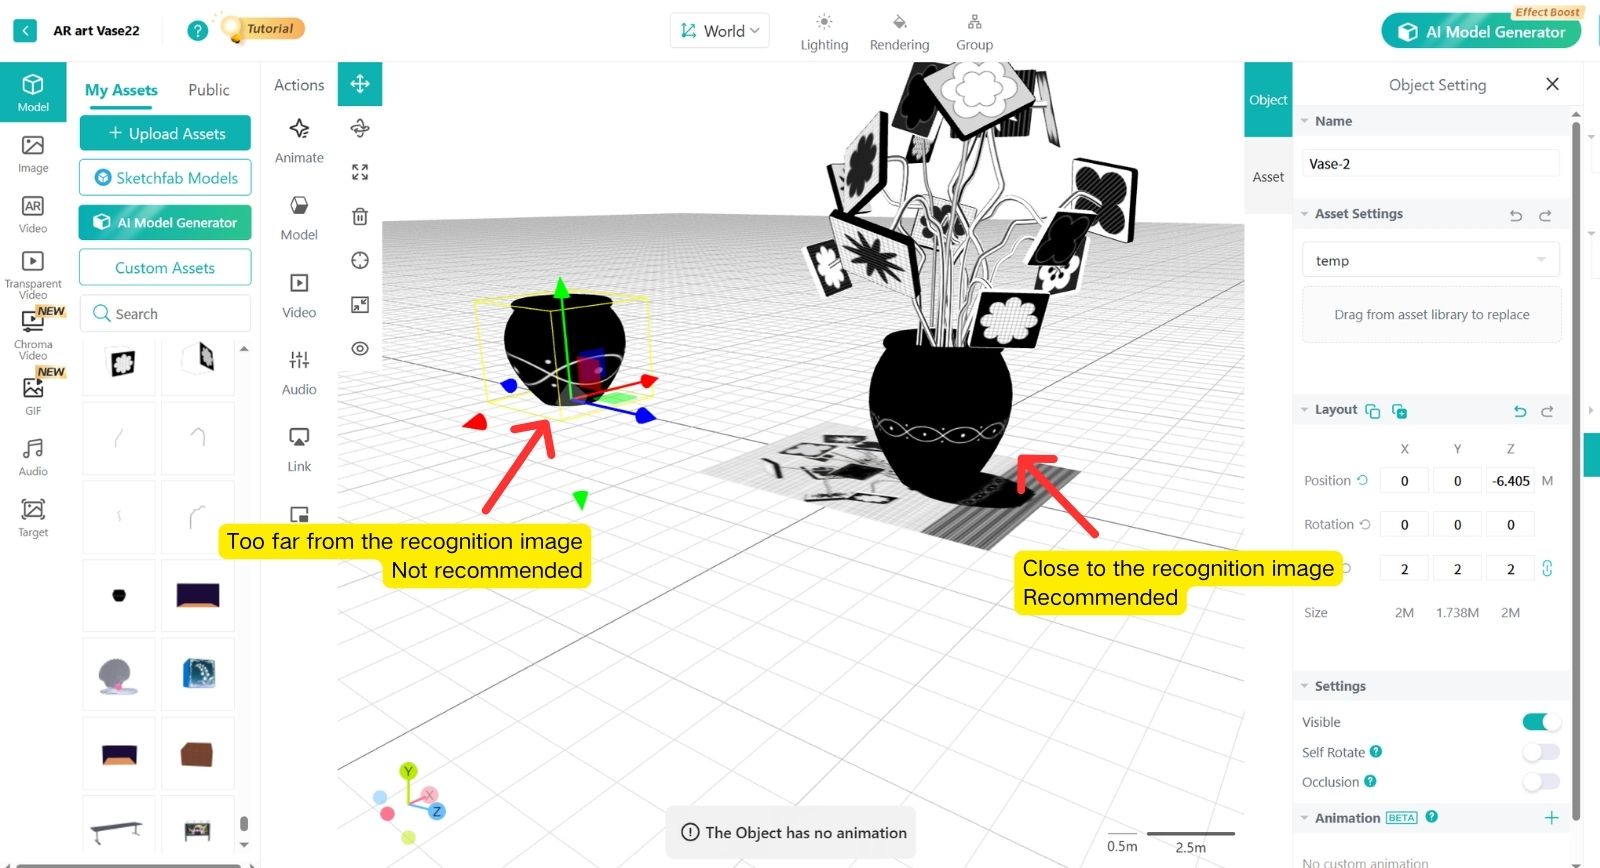
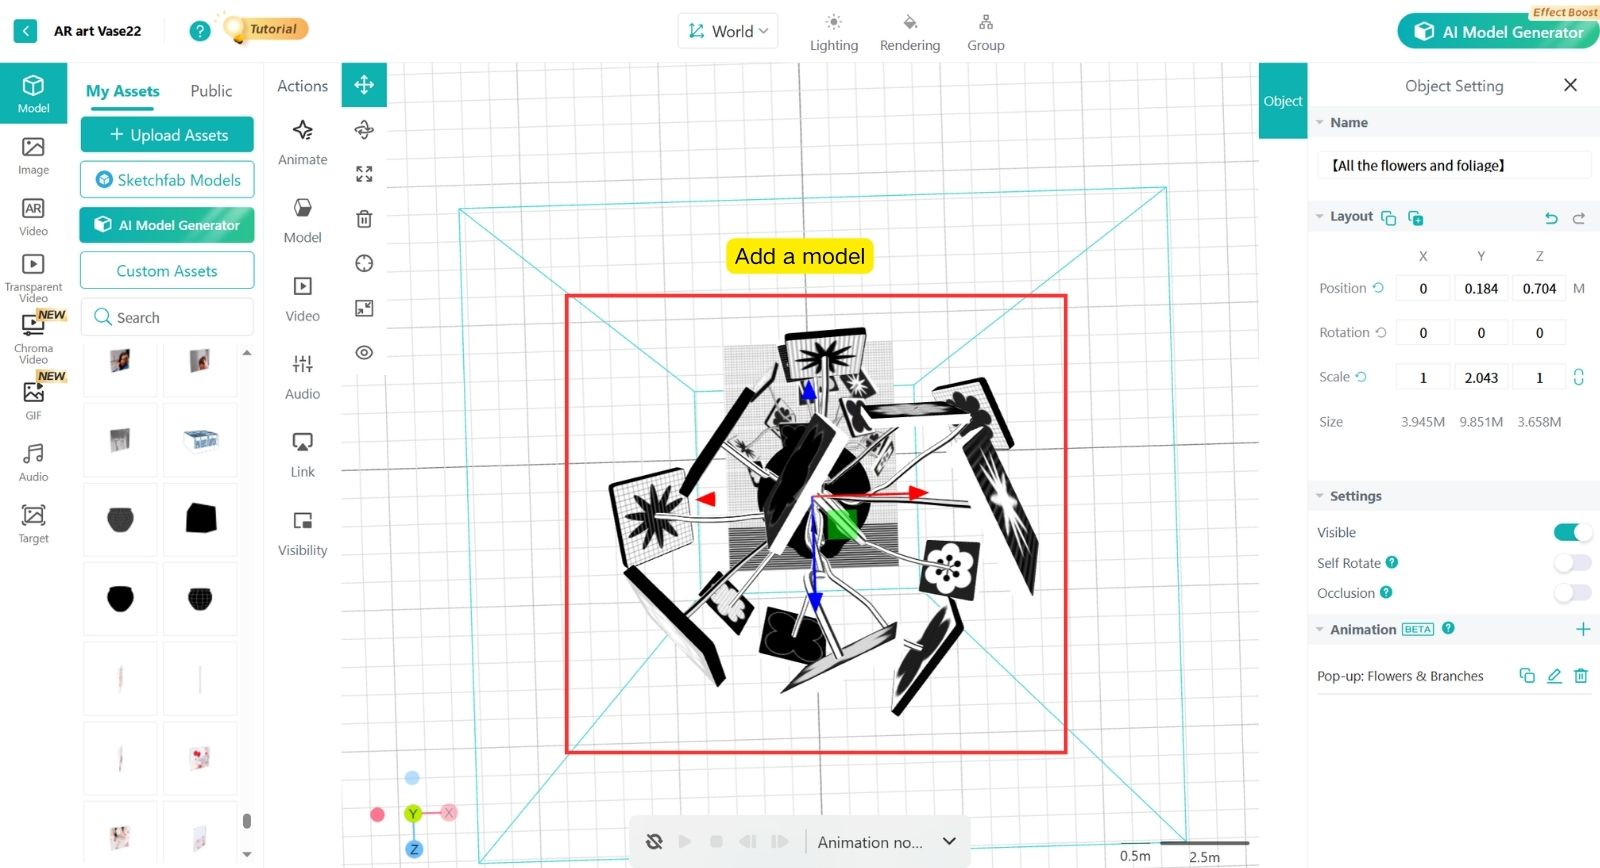
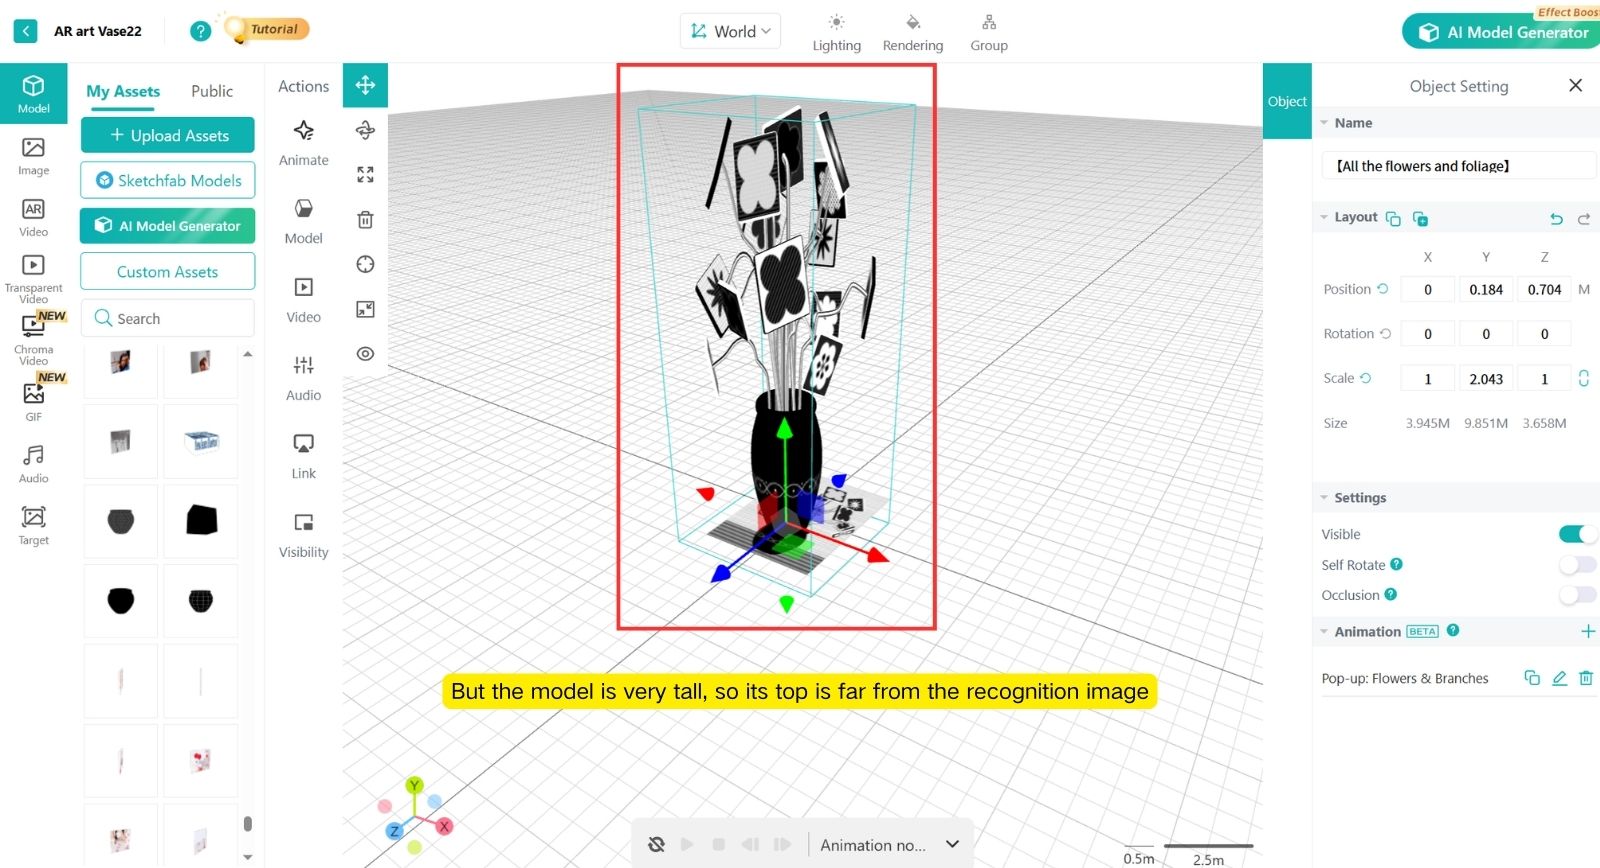
Place AR objects tightly on the Image marker
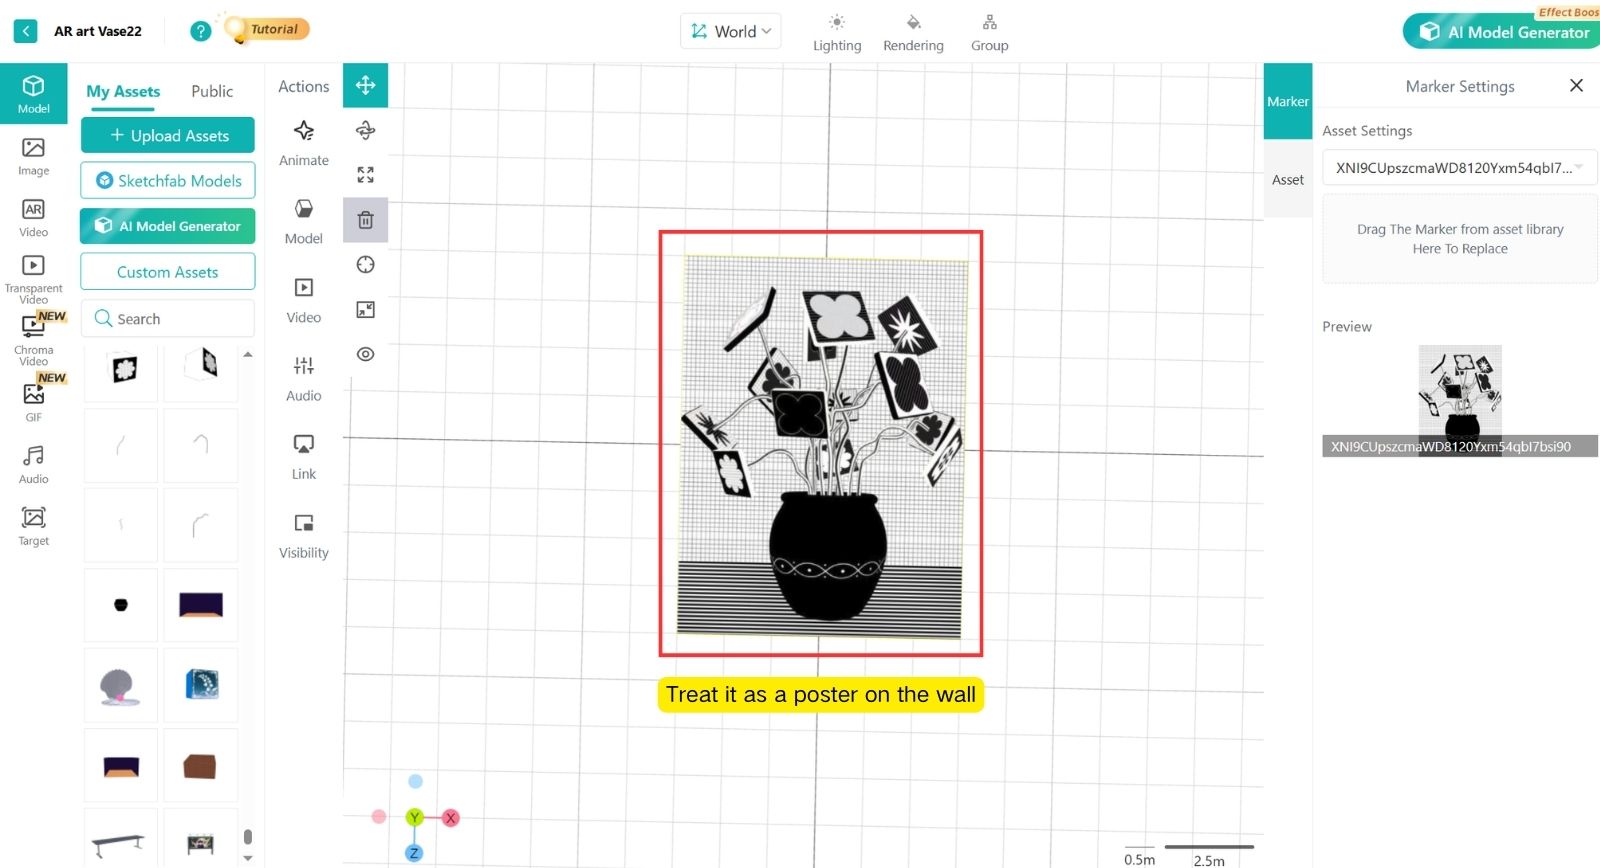
The AR scene placed on the Image marker should not be too tall.
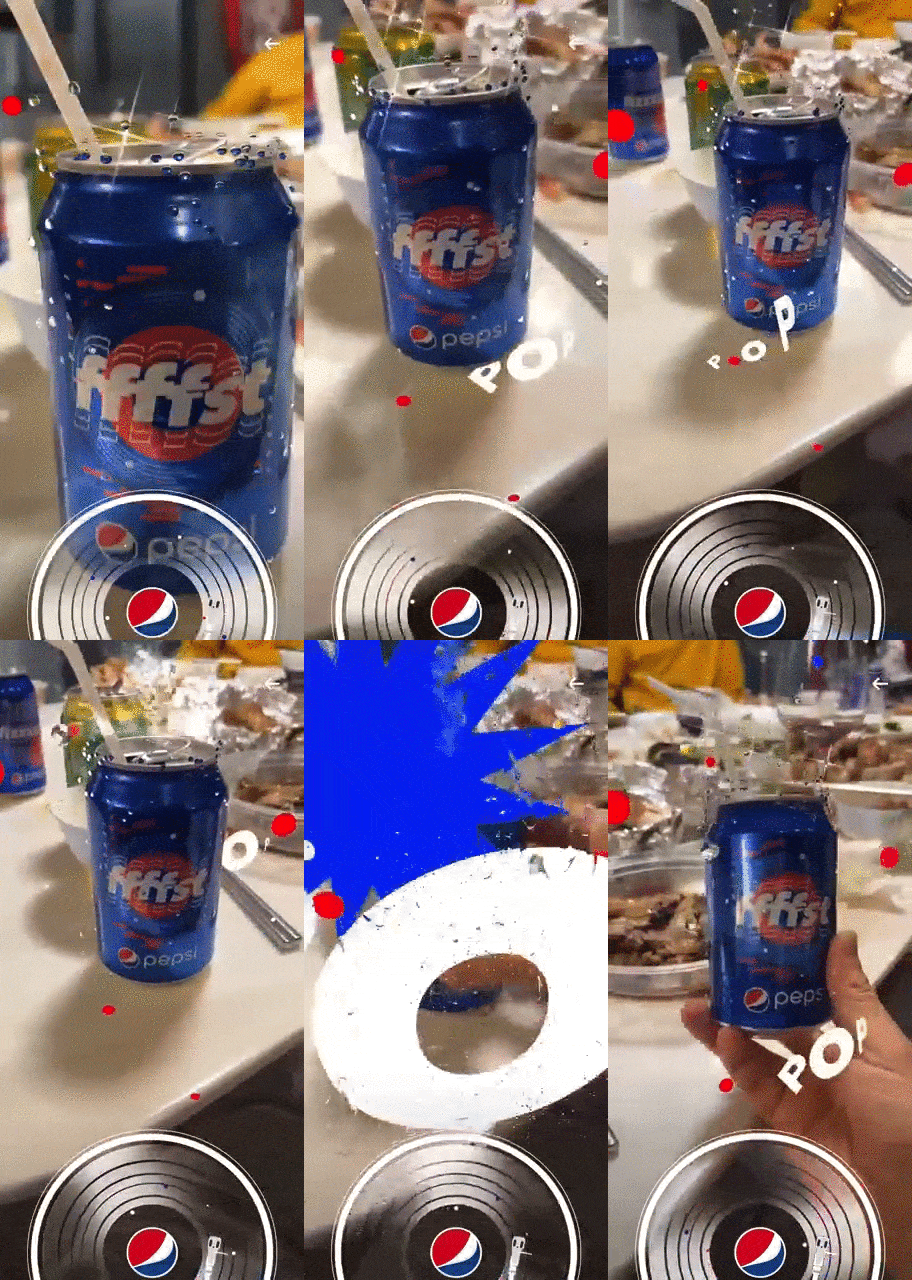
Example: Scanning a wall poster triggers an AR interaction.
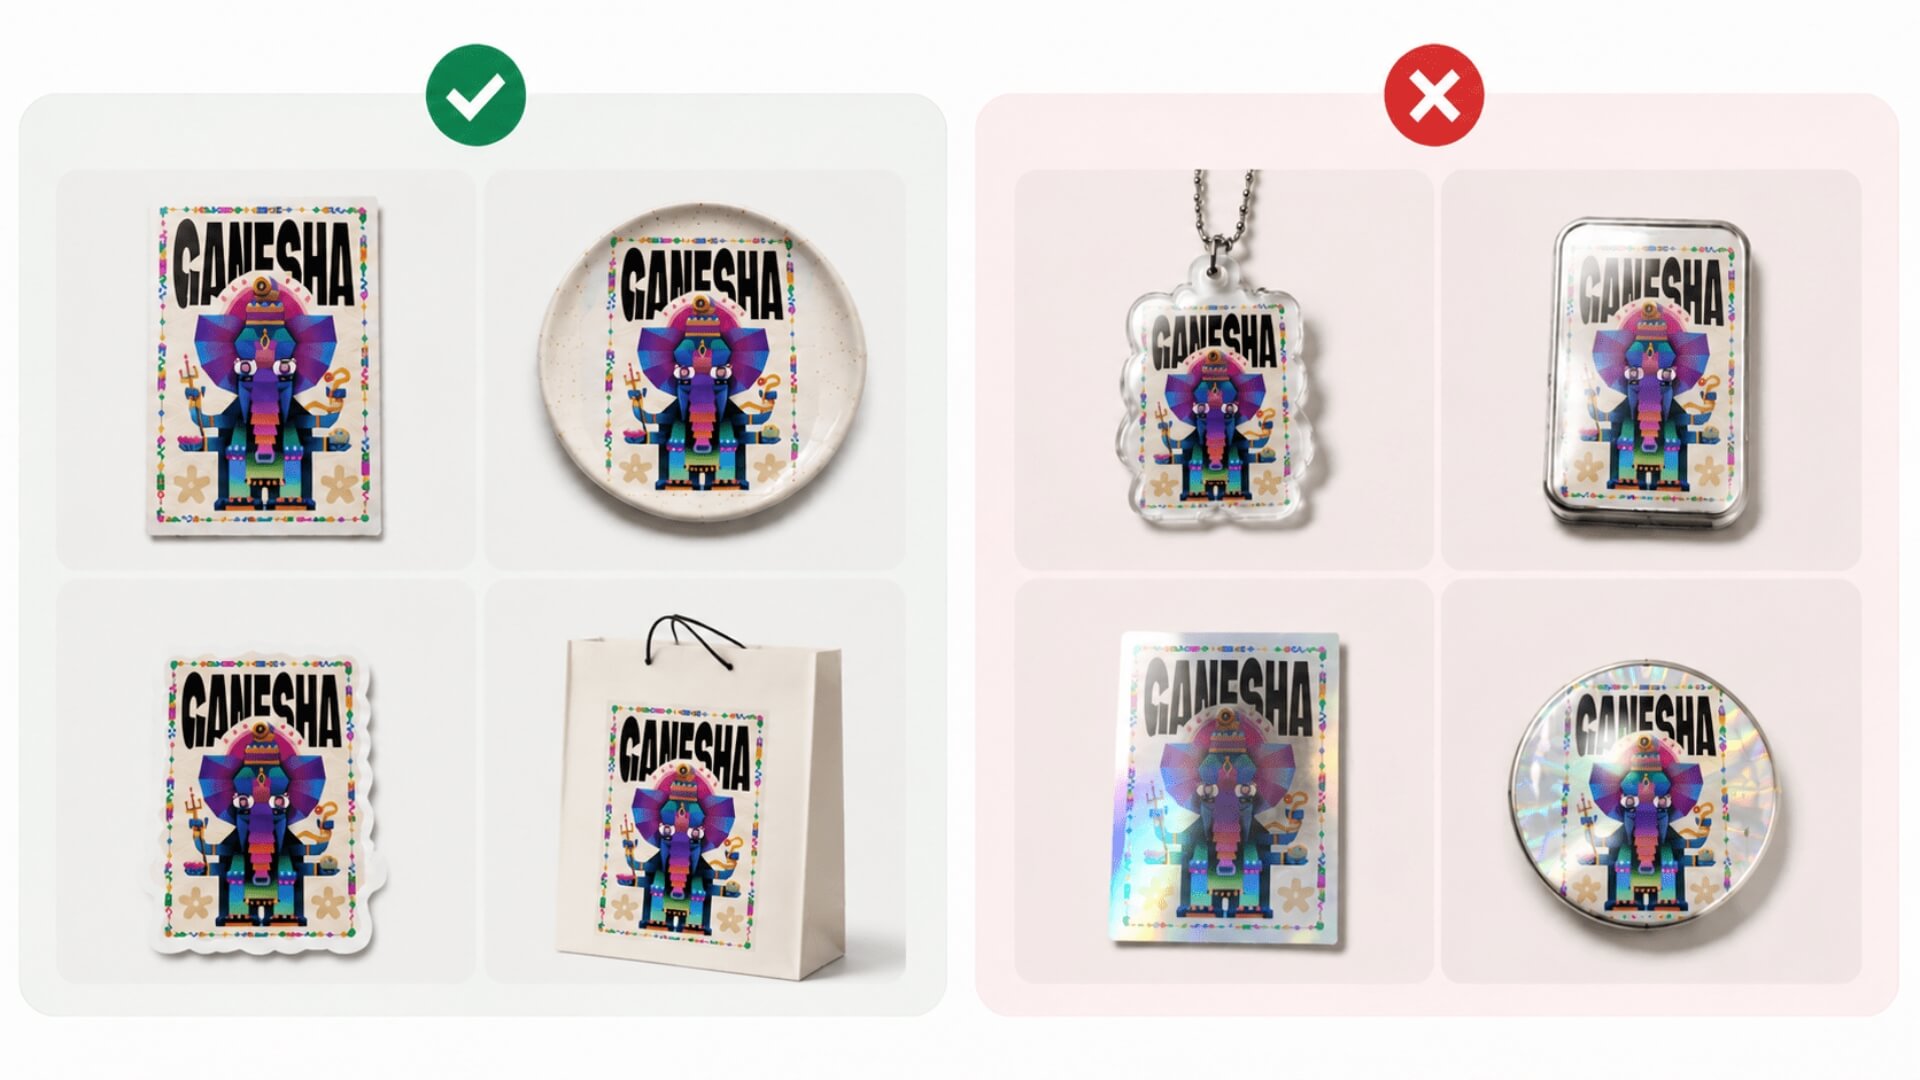
When producing physical items such as postcards, fridge magnets, or posters using the target, choose low-reflective, matte, or frosted materials to ensure better recognition performance.
Recommended: Matte paper, frosted PVC, matte acrylic, frosted metal
Avoid: Glossy metal, high-gloss acrylic, glossy laminated finishes and other highly reflective materials
Different materials may affect recognition performance under various lighting conditions. We recommend testing the physical output before final use.
For products with noticeable color differences, it is not recommended to use the original design file directly as the target.
Instead, capture the finished physical product under natural or evenly lit conditions. Take a front-facing photo and ensure the image is clear, with minimal reflections or occlusions.
After capturing the photo, crop it to keep only the main subject. Then upload the optimized product image as the target for use in the AR scene.

Using real product photos as the target can further reduce tracking instability caused by color differences.
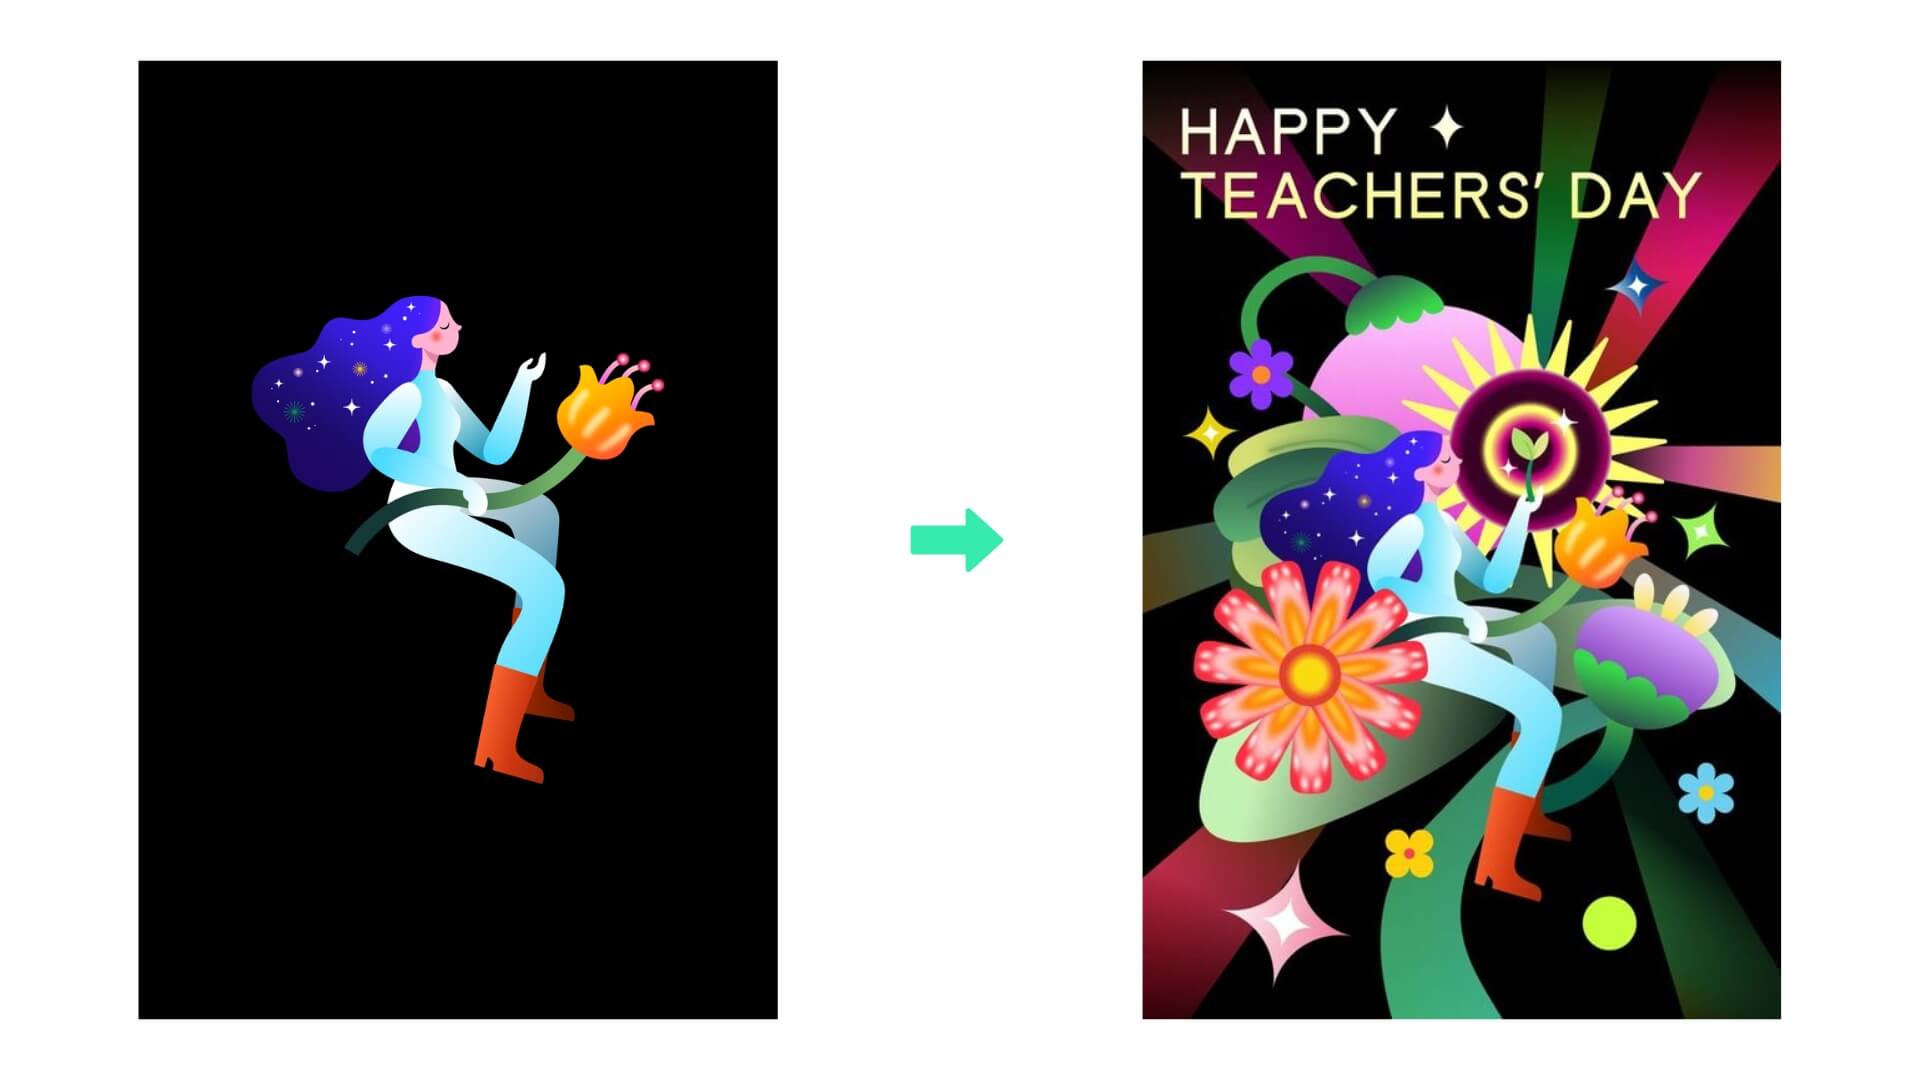
Large blank areas, solid colors, or a lack of visual features in the target may lead to poor recognition, unstable tracking, or frequent loss of tracking.
This issue can be improved in two ways:
Add elements such as lines, text, or patterns around the original image to reduce large blank or solid color areas. This helps create more visual features in the target, improving recognition clarity and tracking stability.
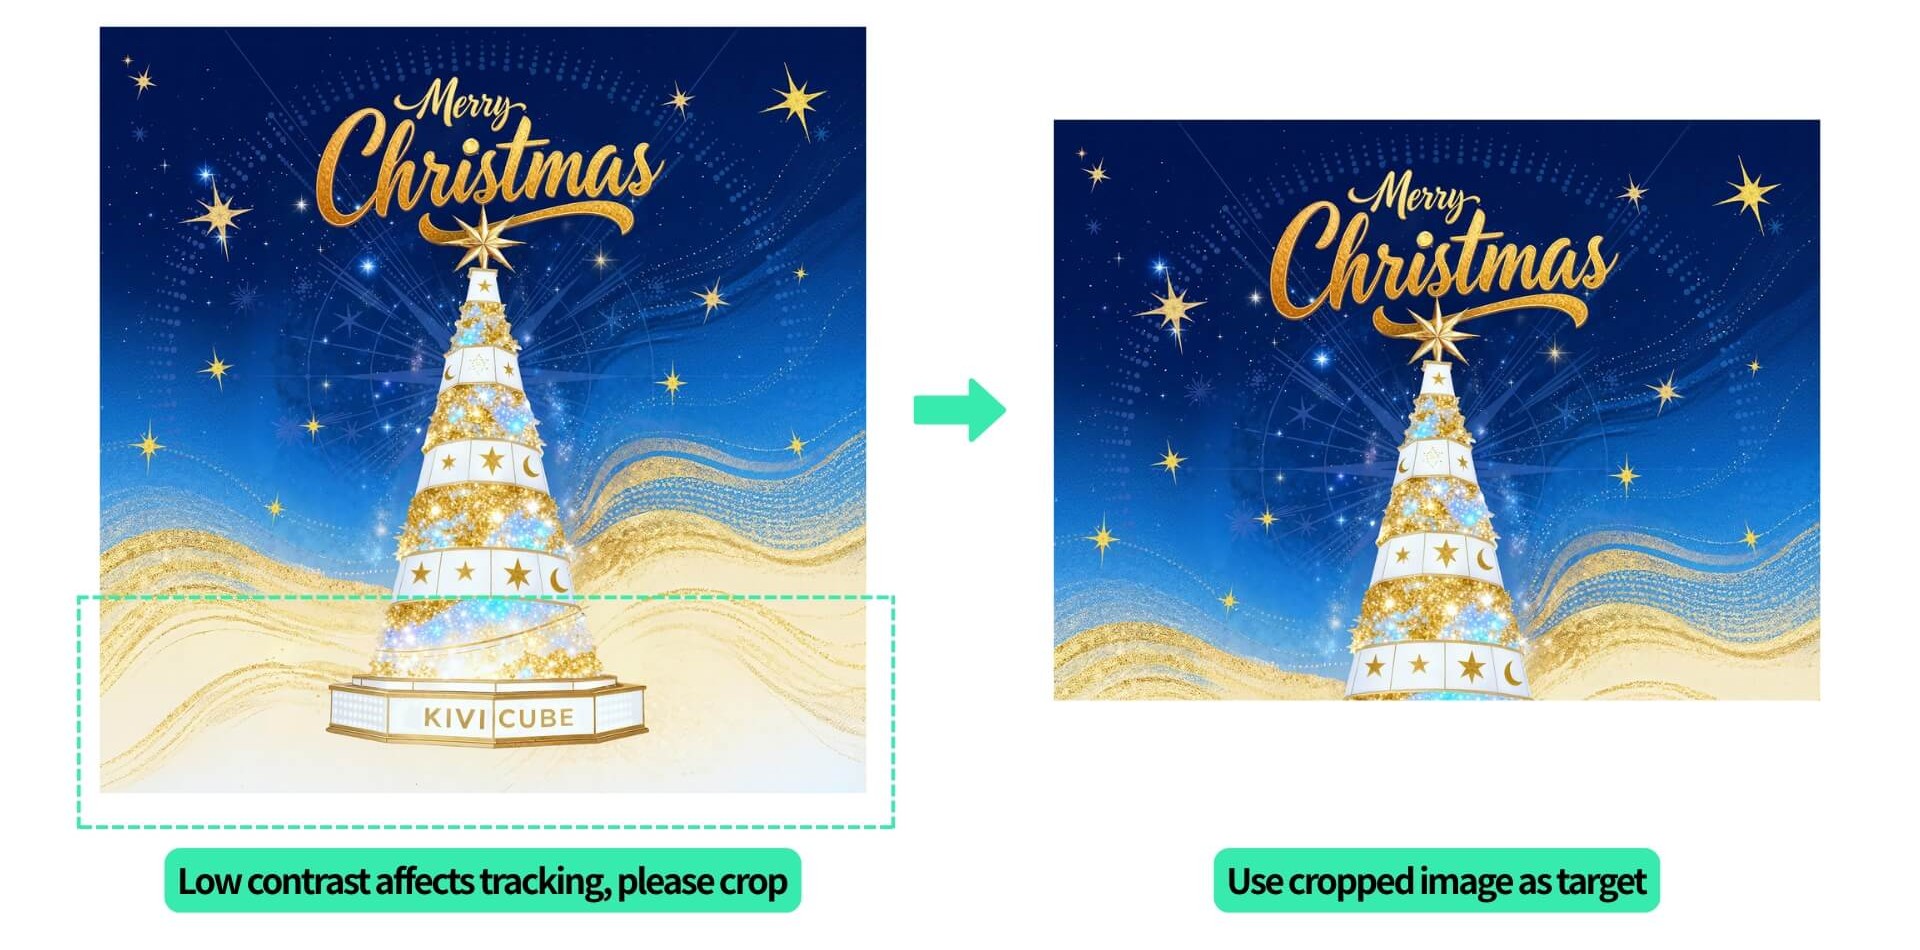
Before uploading the target, you can crop out large areas of solid color, gradients, or blurred details.This helps ensure the target contains enough visual features for stable tracking in the scene.
For example, in the sample image, the lower section has insufficient contrast and may affect stability during use. In this case, you can crop out the lower part and use the remaining image as the target for the scene.
TIP
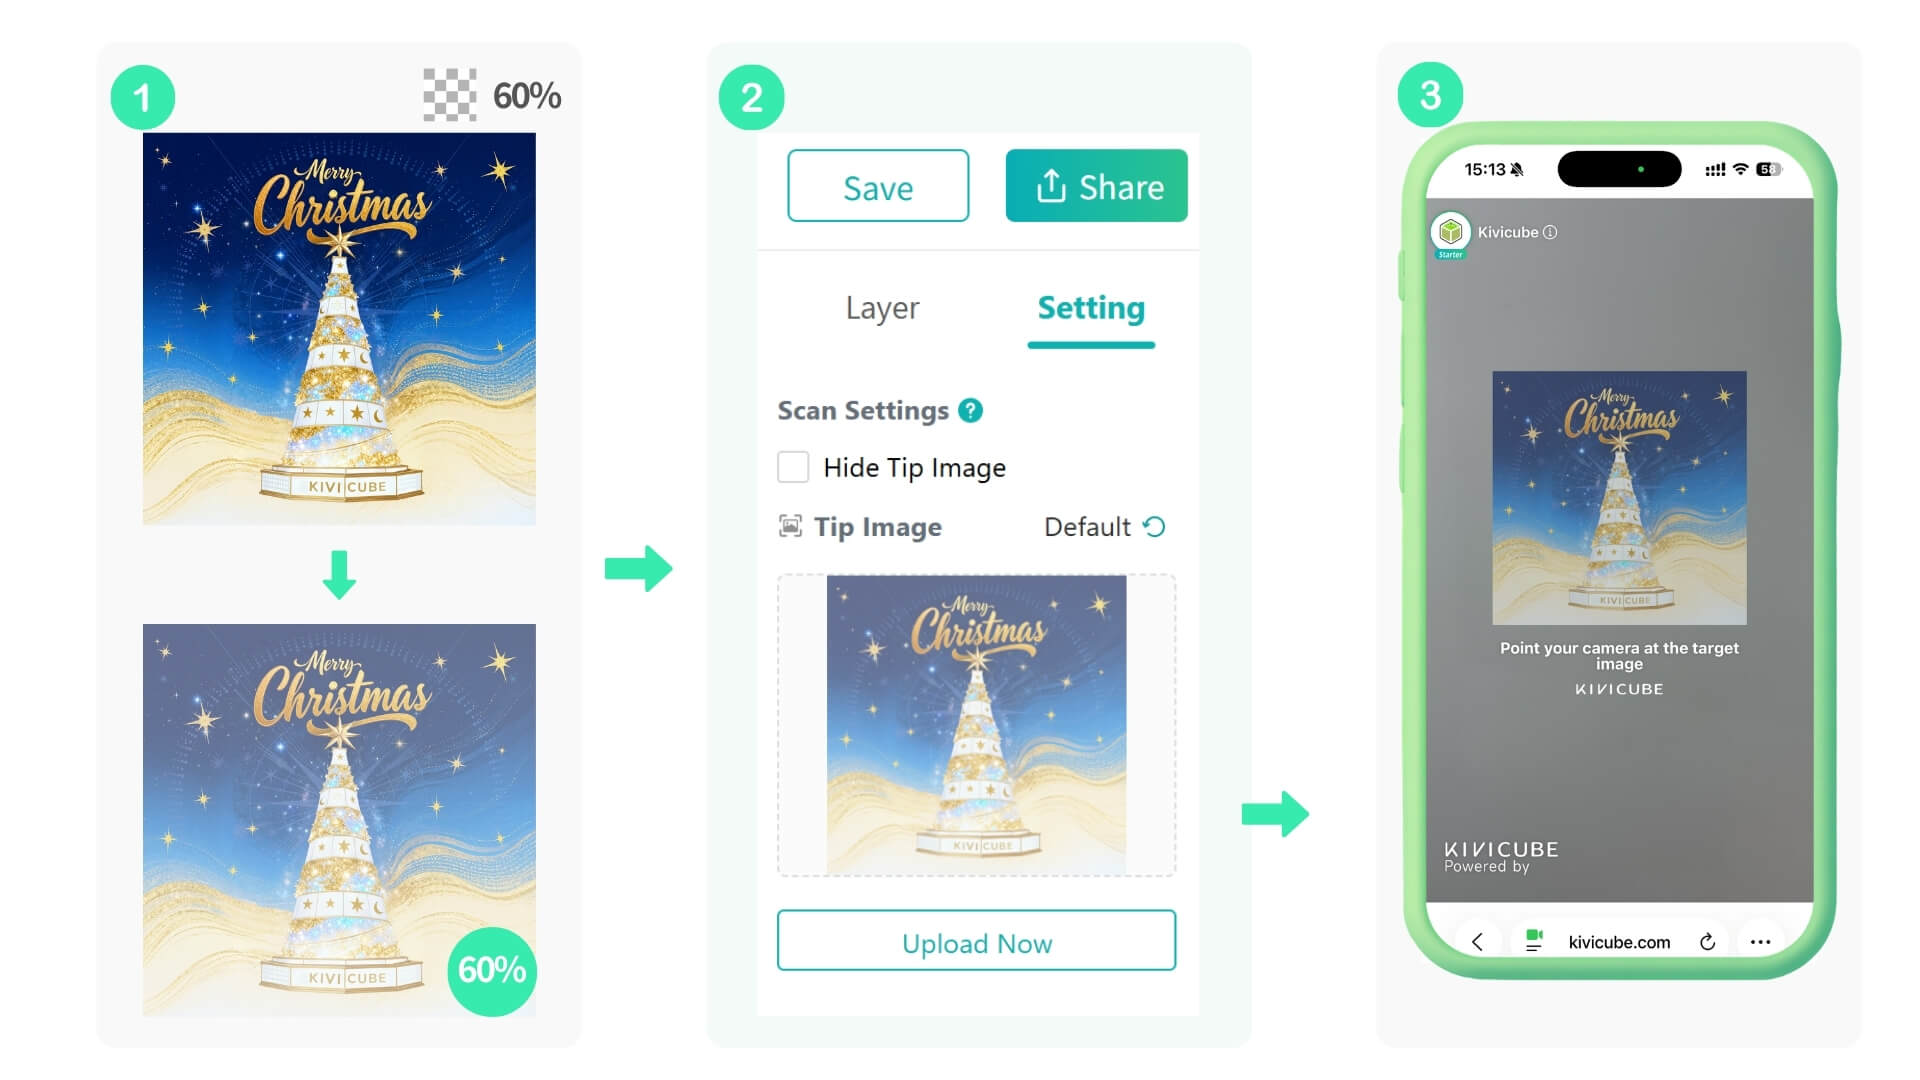
The cropped target will also be applied to the Tip Image, which may make the AR preview less visually appealing. To improve this, follow the steps below:
Export the original full target as a PNG with reduced opacity (recommended at 60%).
Then open Scene Editor, go to Scene Setting in the top-right corner, upload it to the Tip Image field, and save the settings.
If the physical target is too small overall, the camera may struggle to focus clearly. This can lead to failed recognition or unstable tracking.
The issue can be resolved in the following ways:
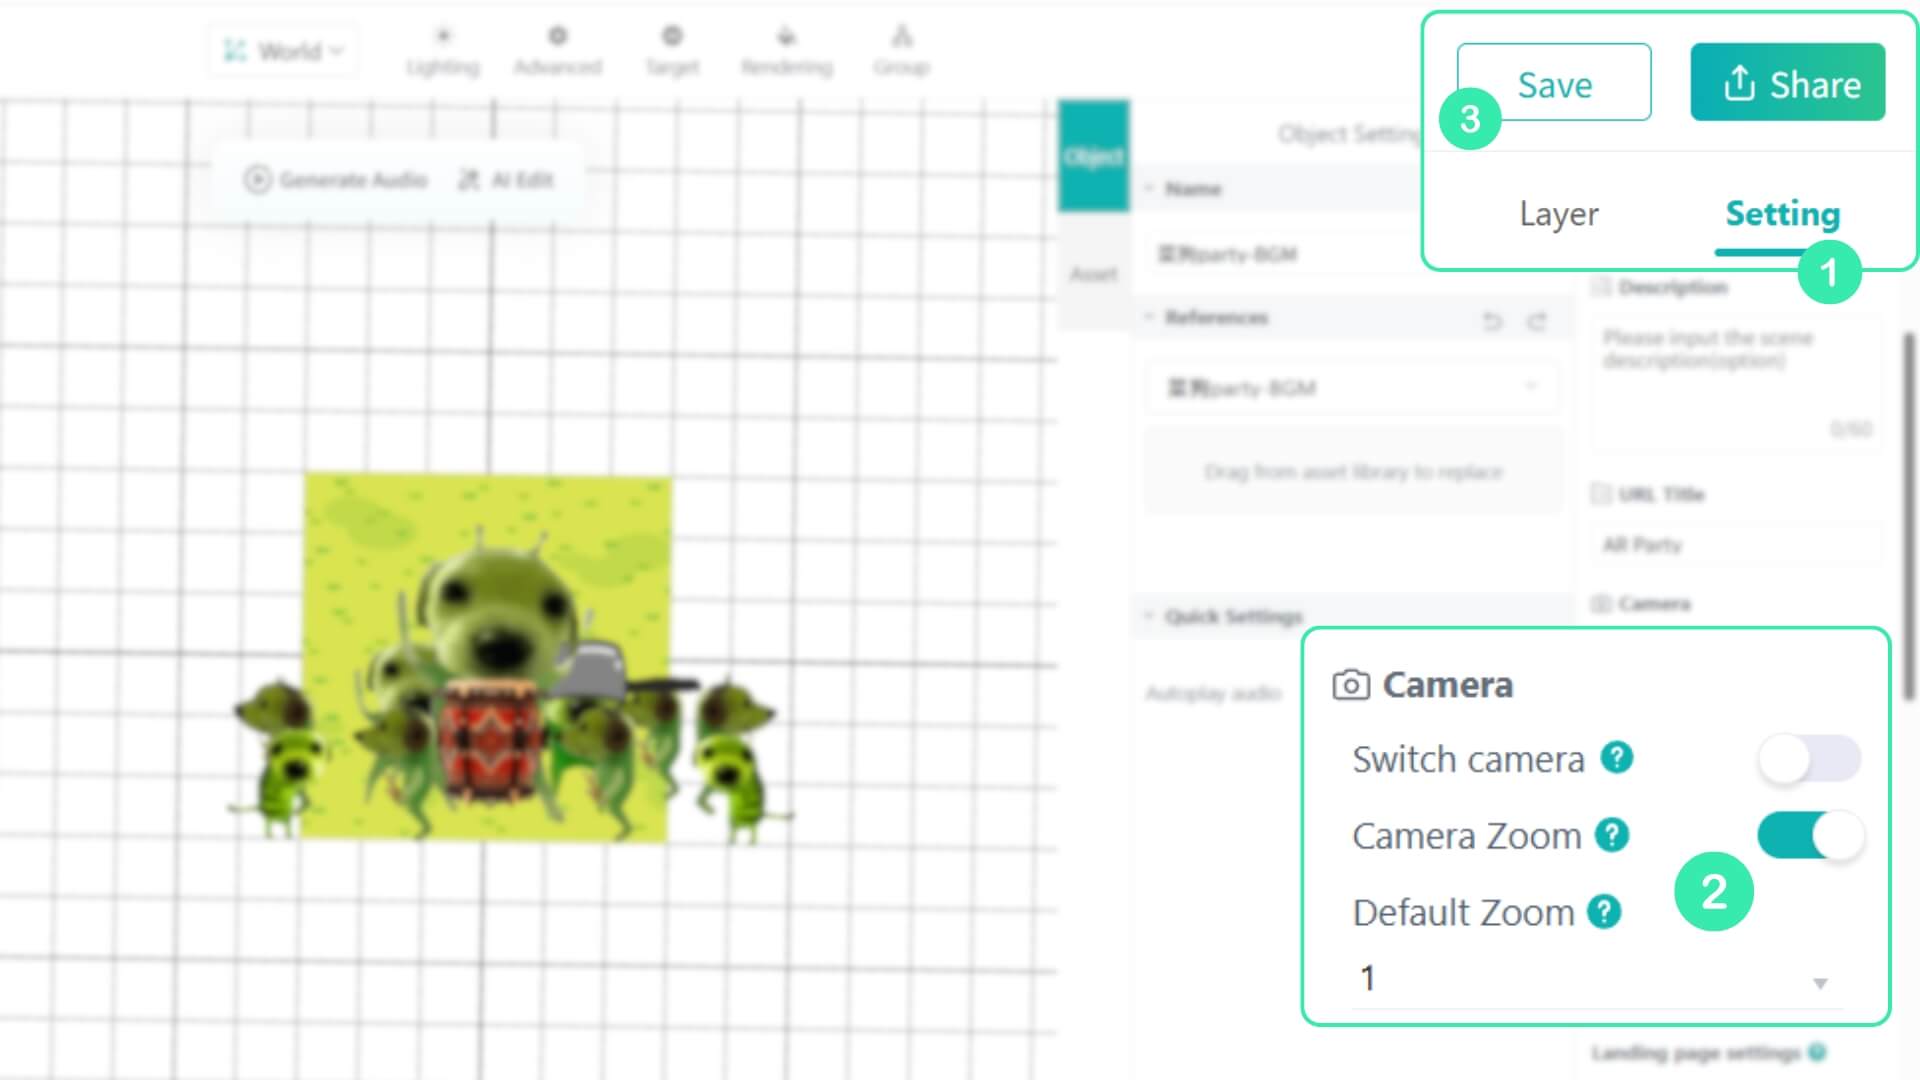
Open Scene Editor, go to the Scene Setting panel in the top-right corner, enable Camera Zoom, and save the scene.
You can also set a default zoom level. A higher zoom brings the view closer to the target and can be adjusted based on actual performance.