English
Appearance
Kivicube comes with over 600 built-in preset model animations. No skeleton binding or manual keyframing is required, so even beginners can quickly create animated 3D models. Generated models can be used directly in AR scenes or exported as GLB/OBJ files for local use.
After logging in to Kivicube, you can access the 3D model animation generation page from the Management Console or Scene Editor. You can also click here to go directly to the page.
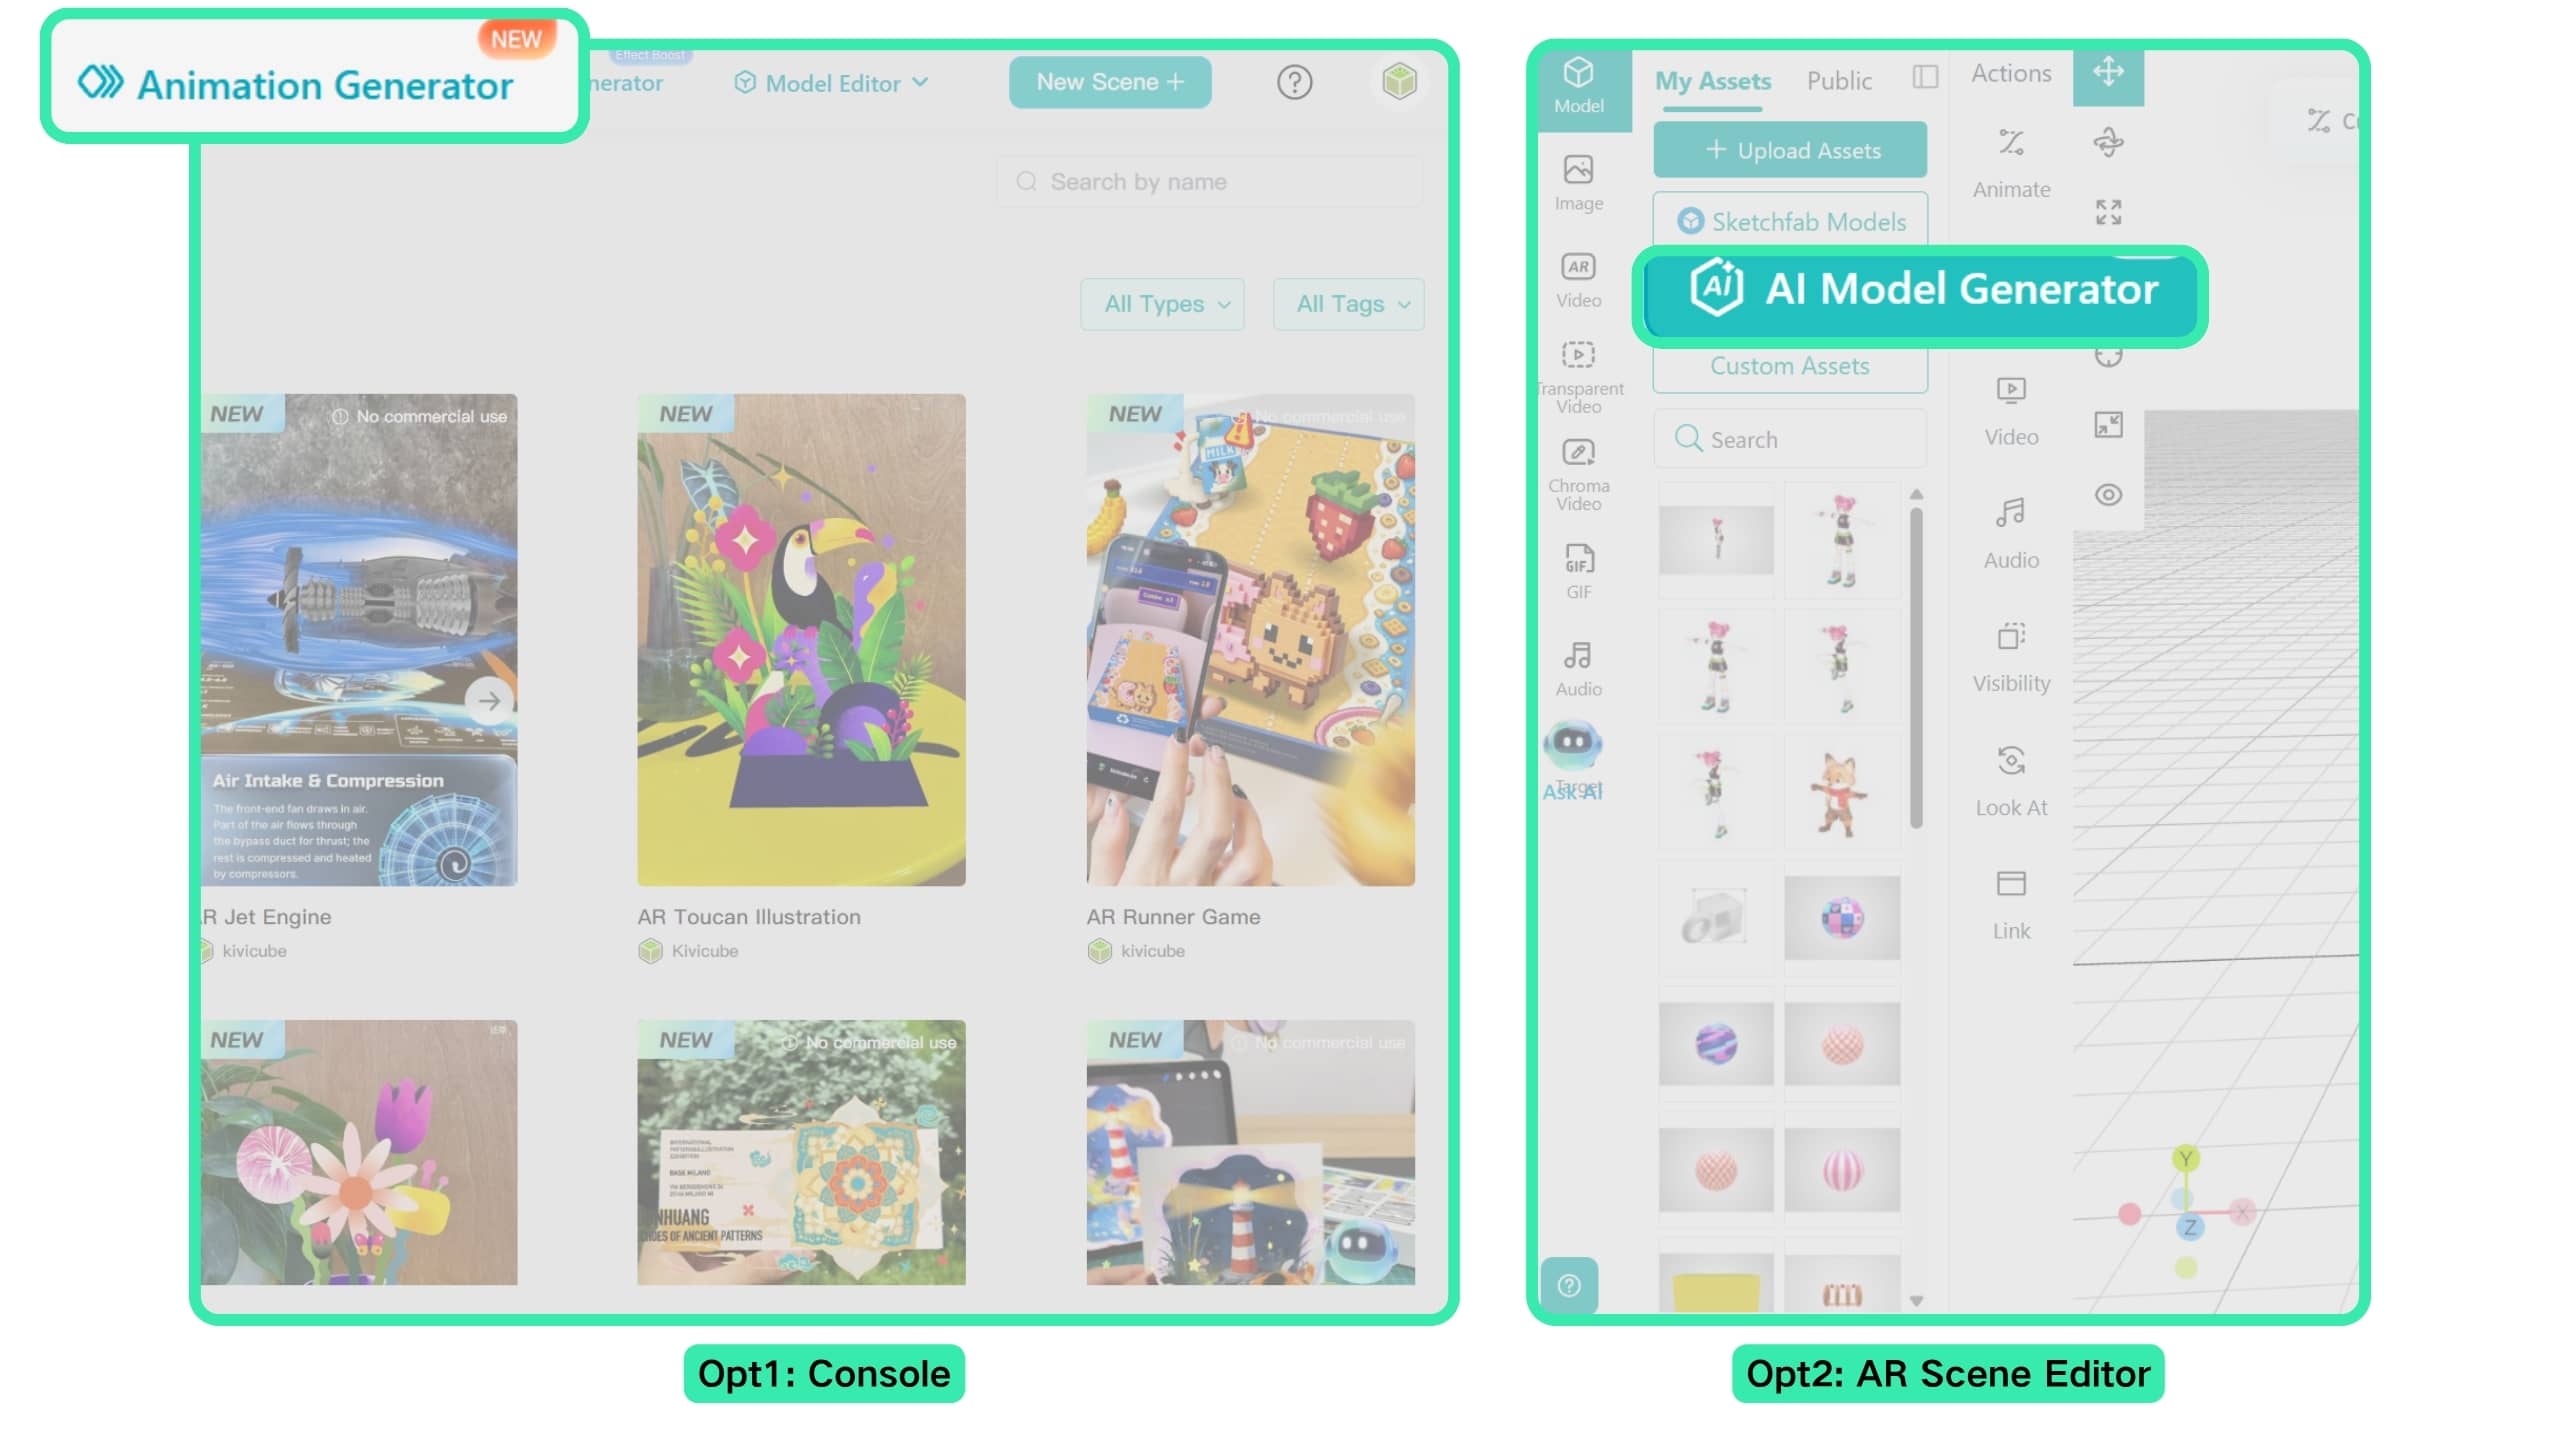
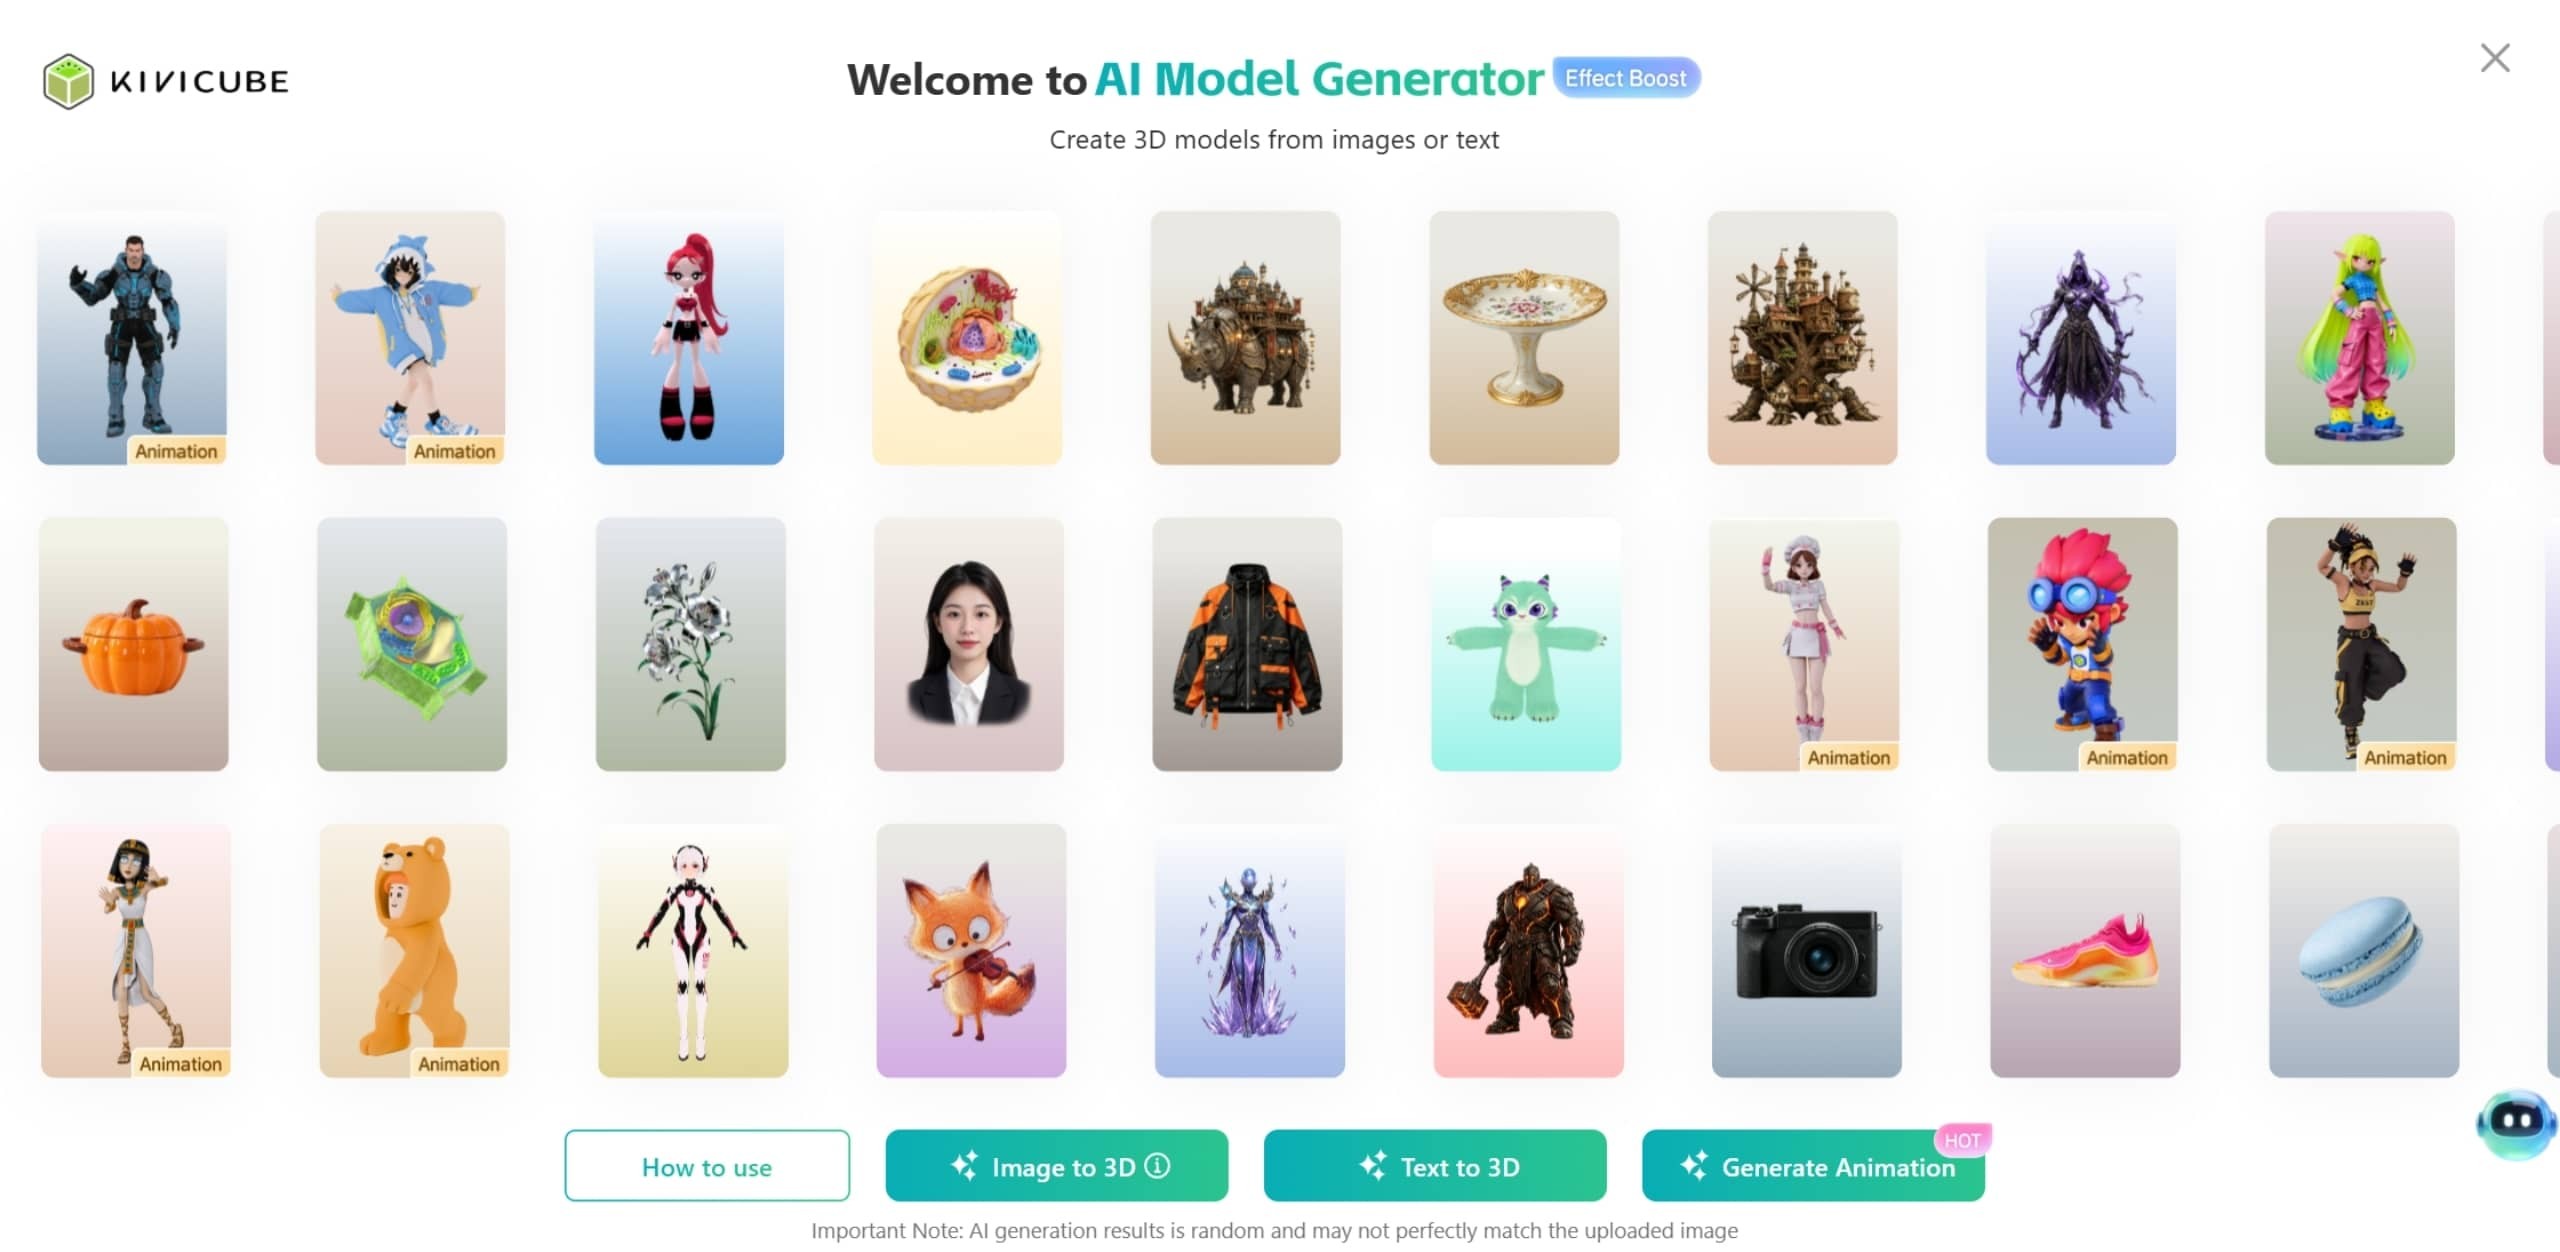
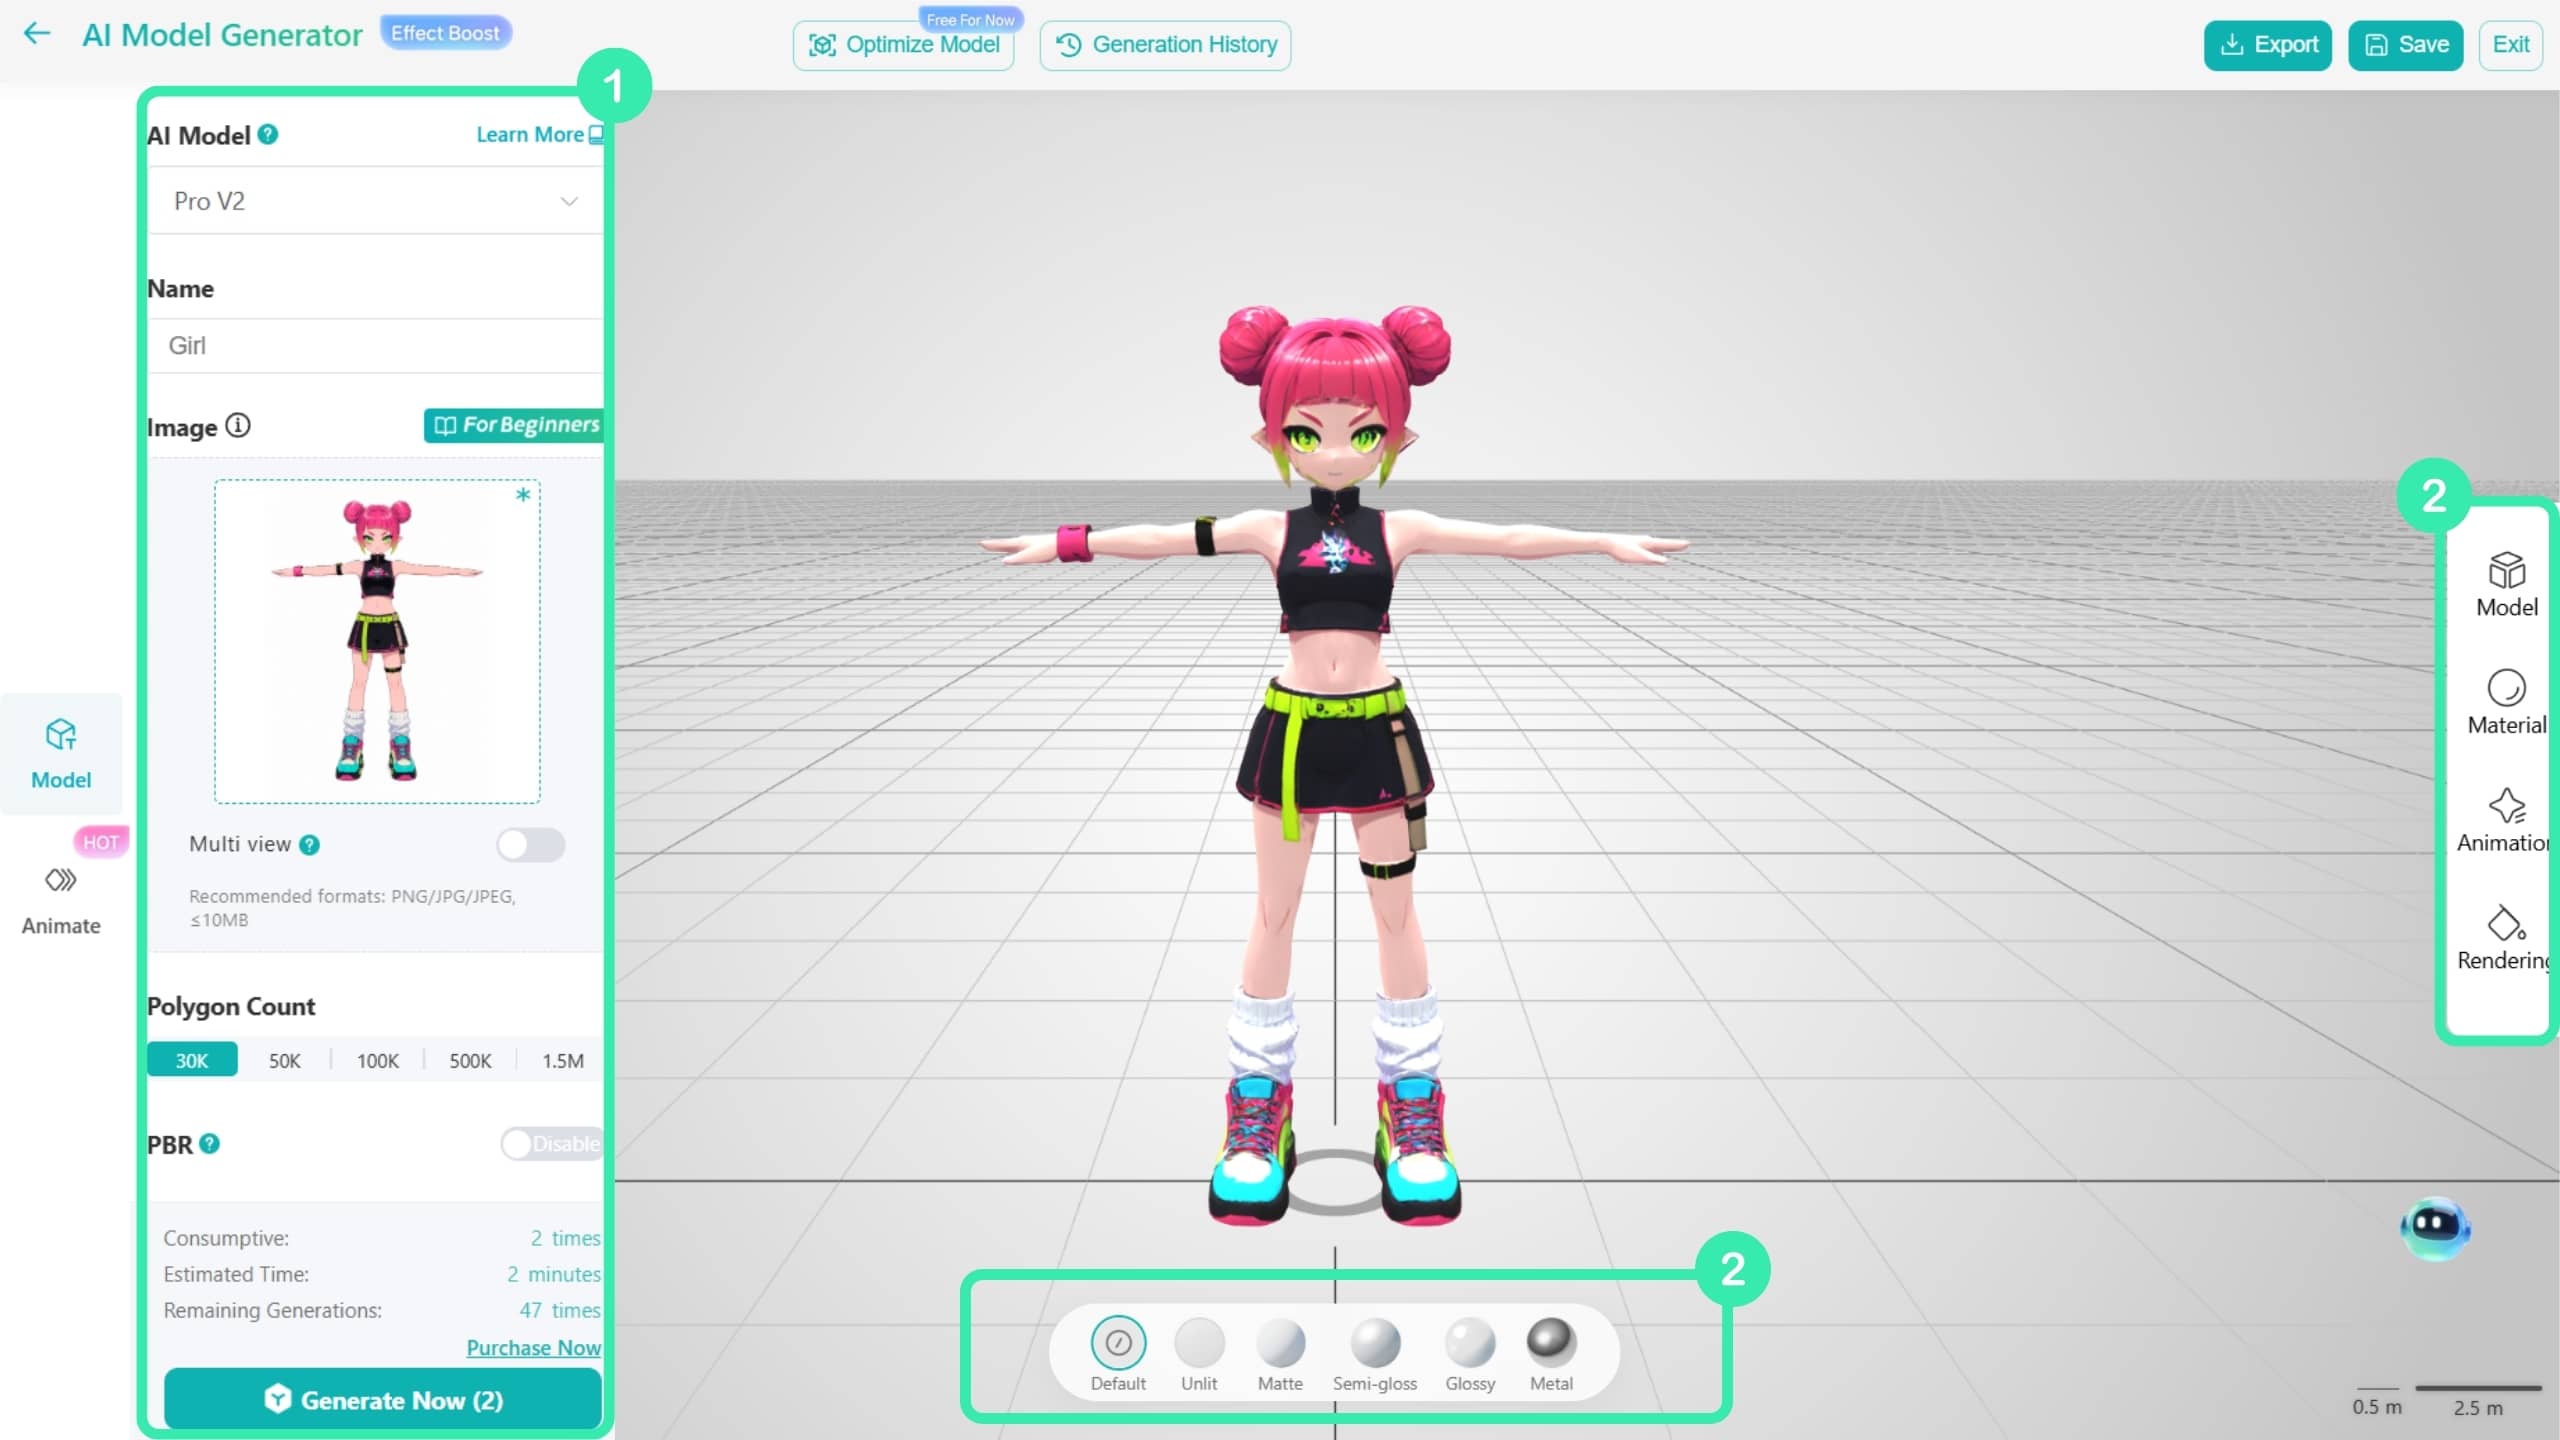
After entering the AI Model Generator, first use the Text-to-3D or Image-to-3D generator to create a 3D human model in a T-pose. This model will be used to generate animations later.
When generating a 3D model from an image, make sure the image has a plain or transparent background and a clear, well-defined subject. The subject should maintain a standard human T-pose as much as possible, with the limbs, clothing, and hair clearly separated to avoid sticking together. This helps ensure better animation results.
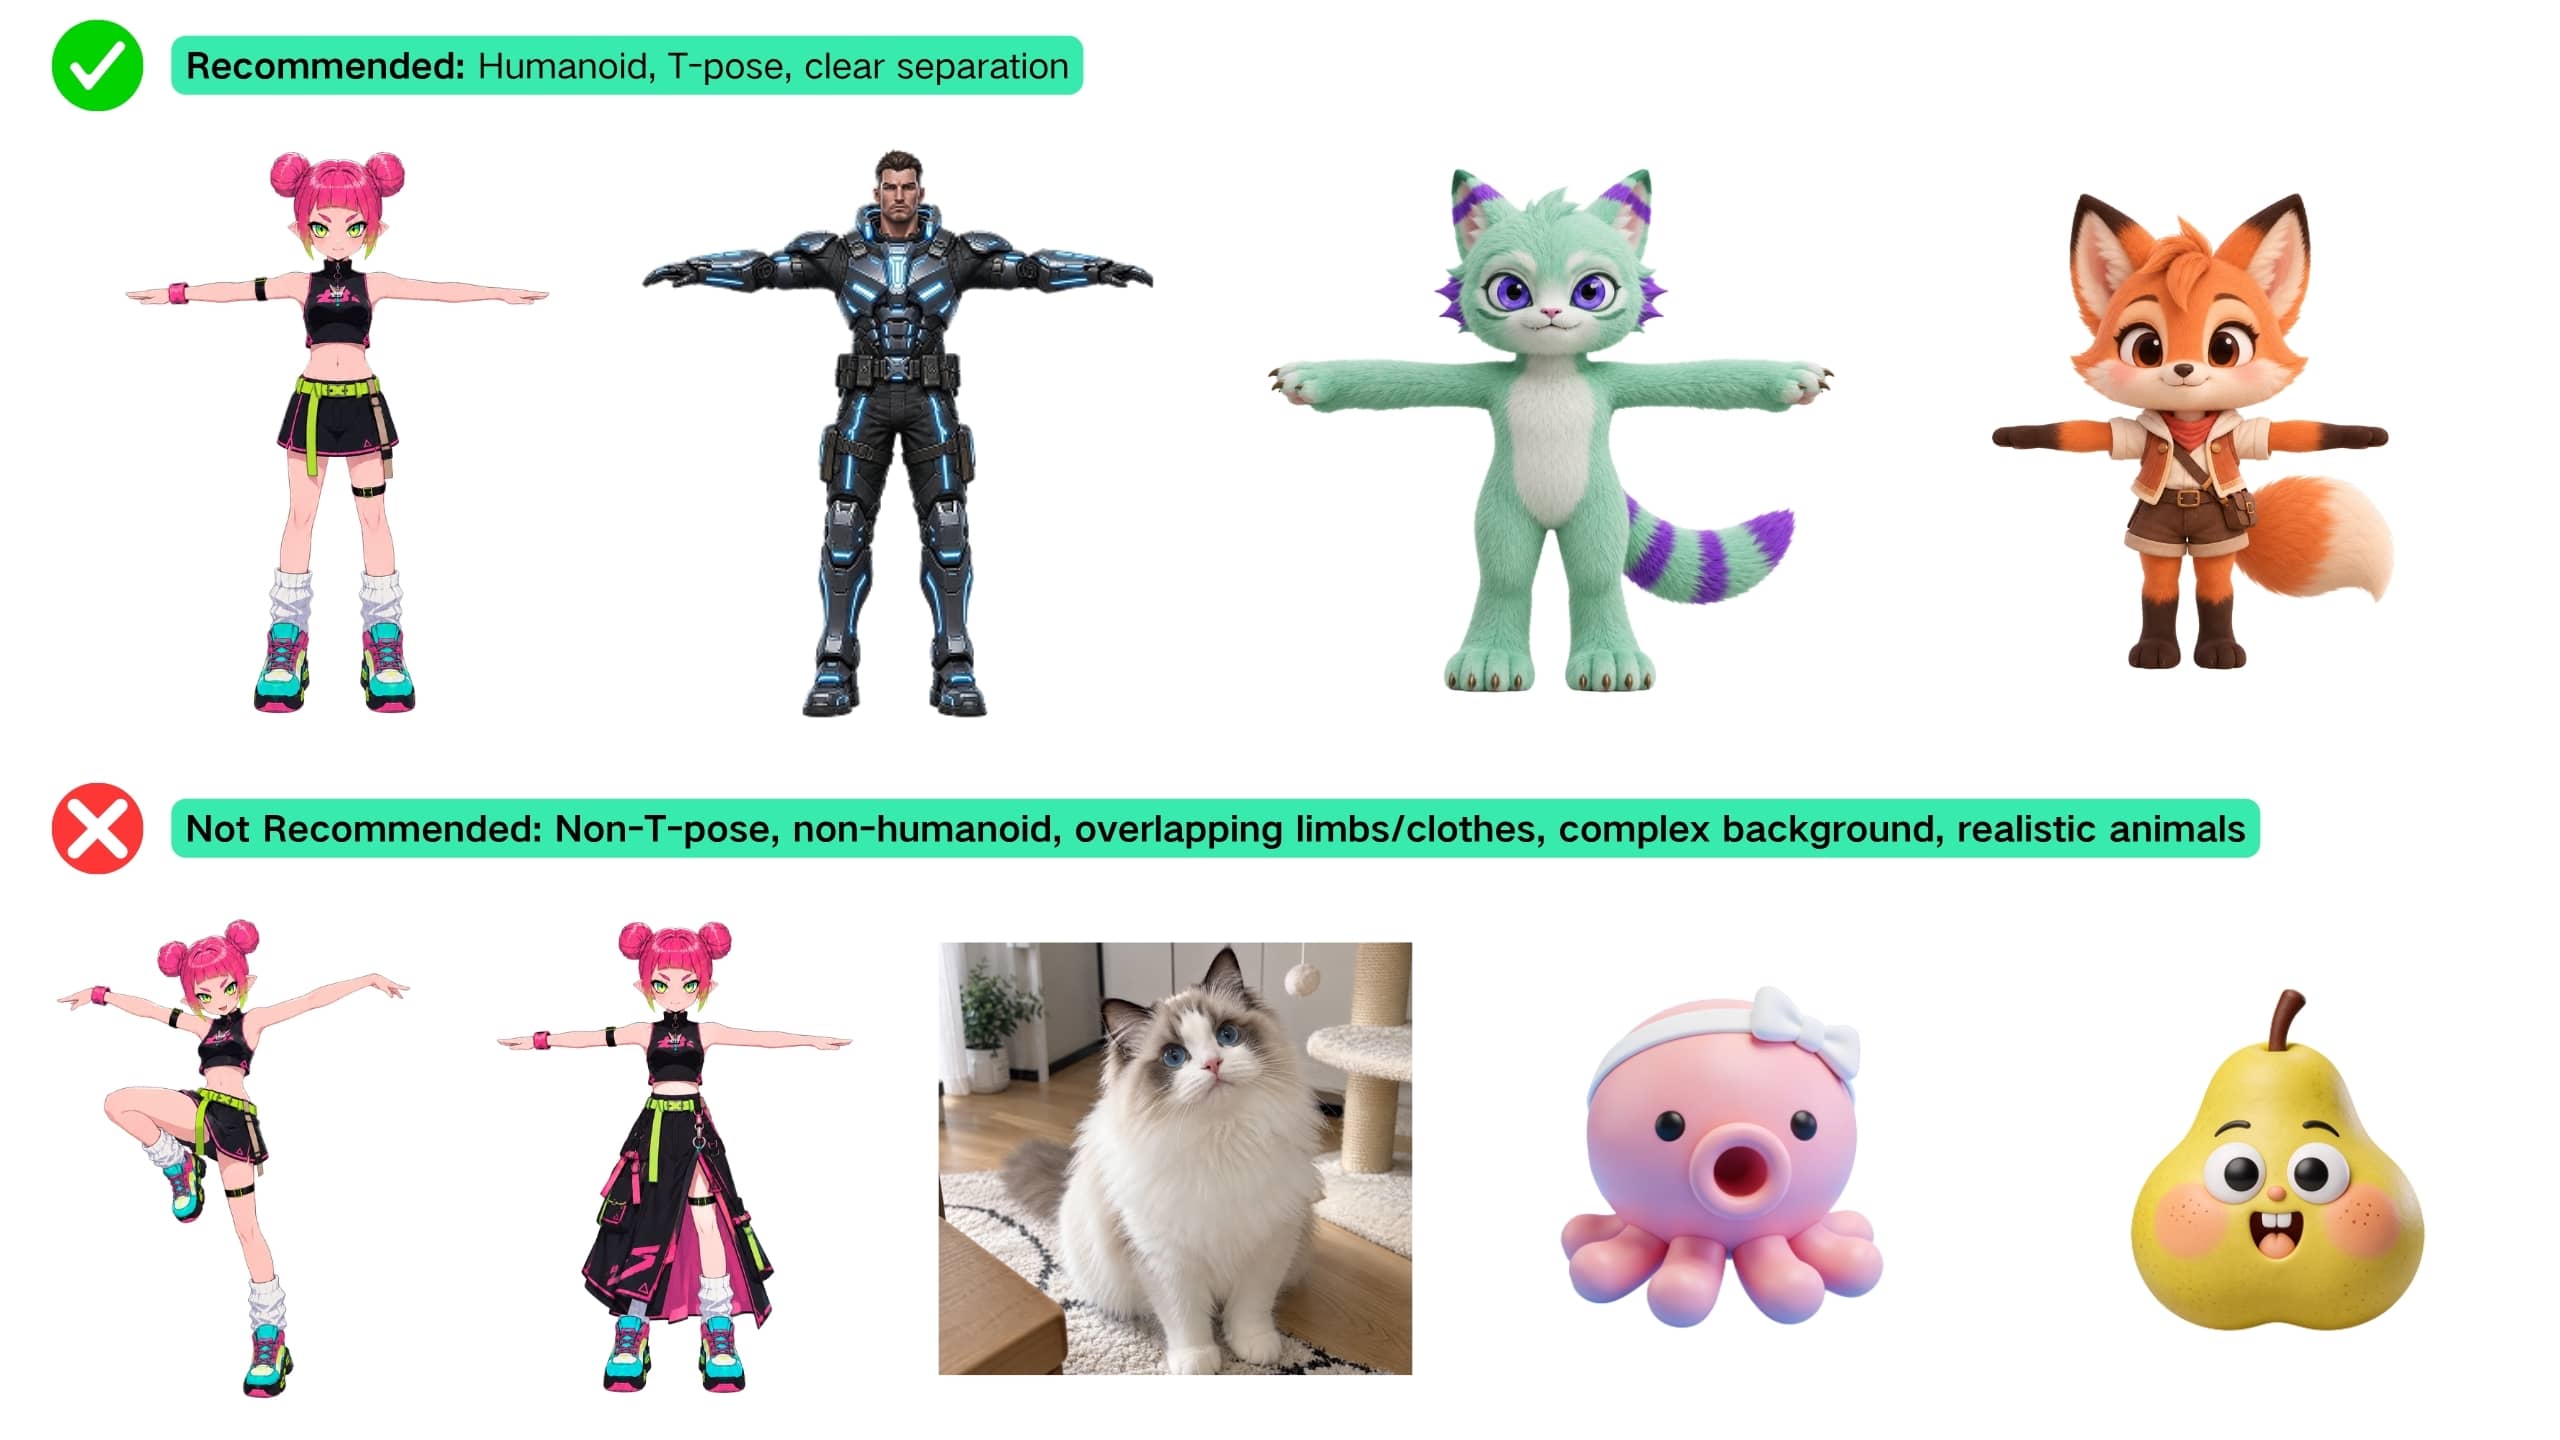
If you don’t have a T-pose reference image, you can use Kivicube’s AI image generation feature to convert your reference image into a standard T-pose before generating the 3D model.
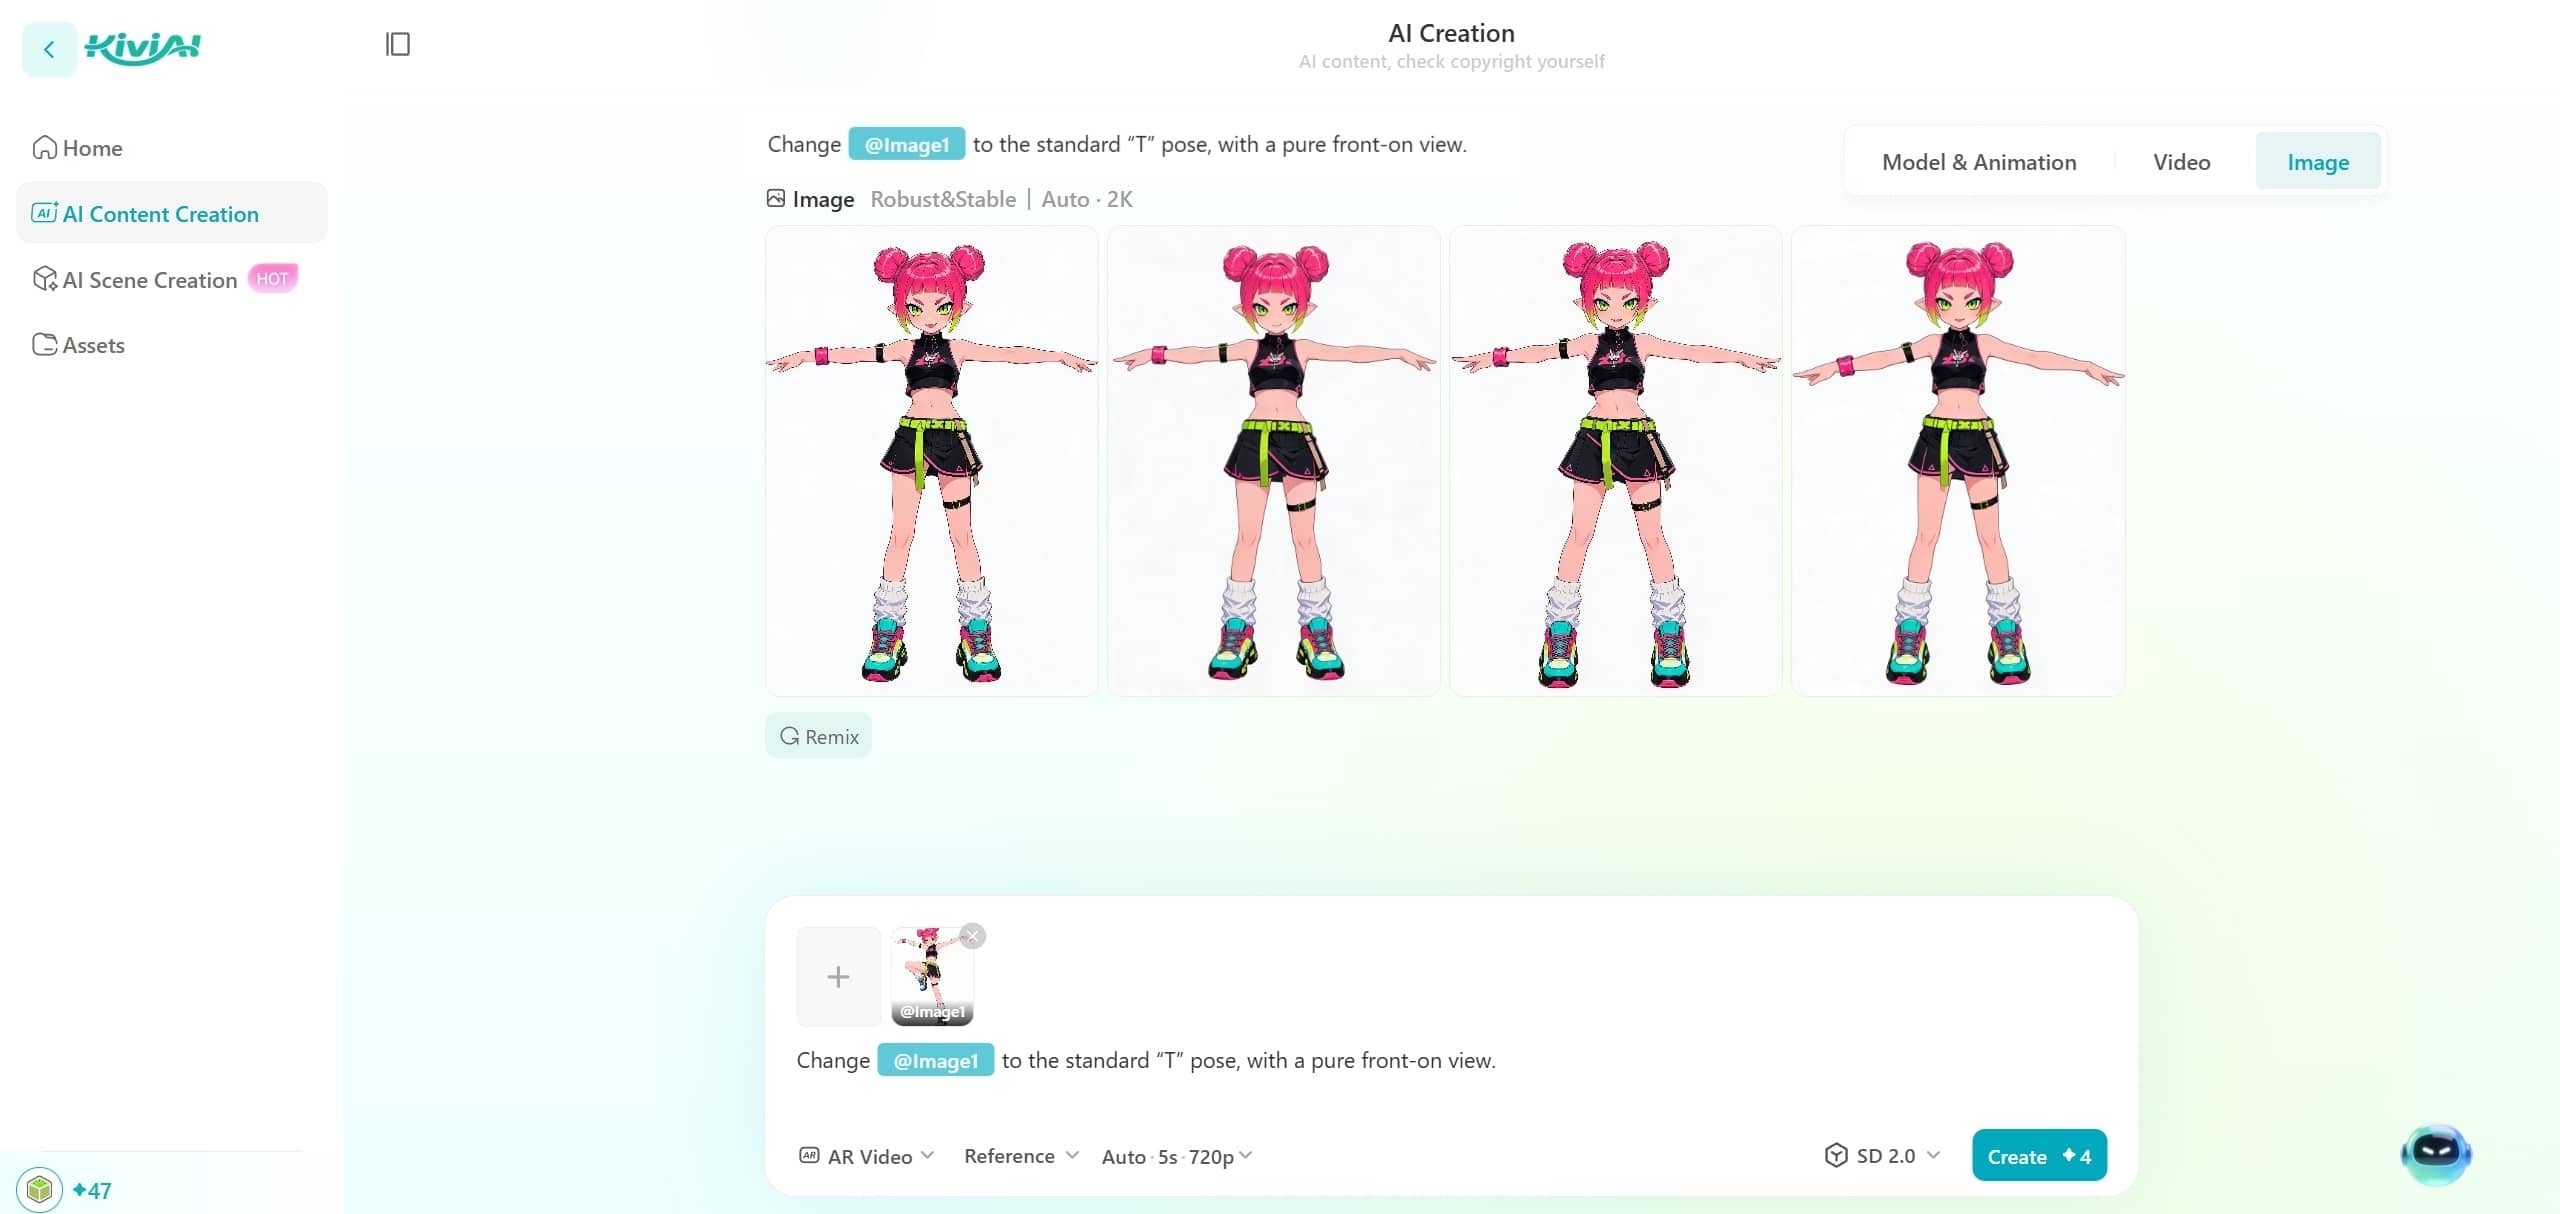
When generating a 3D model with a text prompt, you can use the following formula to structure your prompt:
[Subject] + [Style] + [Appearance] + [Clothing/Accessories] + [T-Pose] + [Full Body] + [Front View] + [Clear Structure] + [Background]
For example:
A chibi-style anthropomorphic cartoon fox in a 3D cartoon style, with a cute appearance, orange fur, a white face and white tail tip, wearing a red scarf and brown shorts, standing in a front-facing T-pose with both arms extended horizontally, with the full body visible, clearly defined limbs, a symmetrical body, and a solid-color background.
Select Image/Text to Model, enter a prompt or upload an image, and choose an **AI model **based on your needs. 30K polygons is recommended. Click Generate to create the model.
Once the model is generated, you can further adjust properties such as materials and rendering settings.
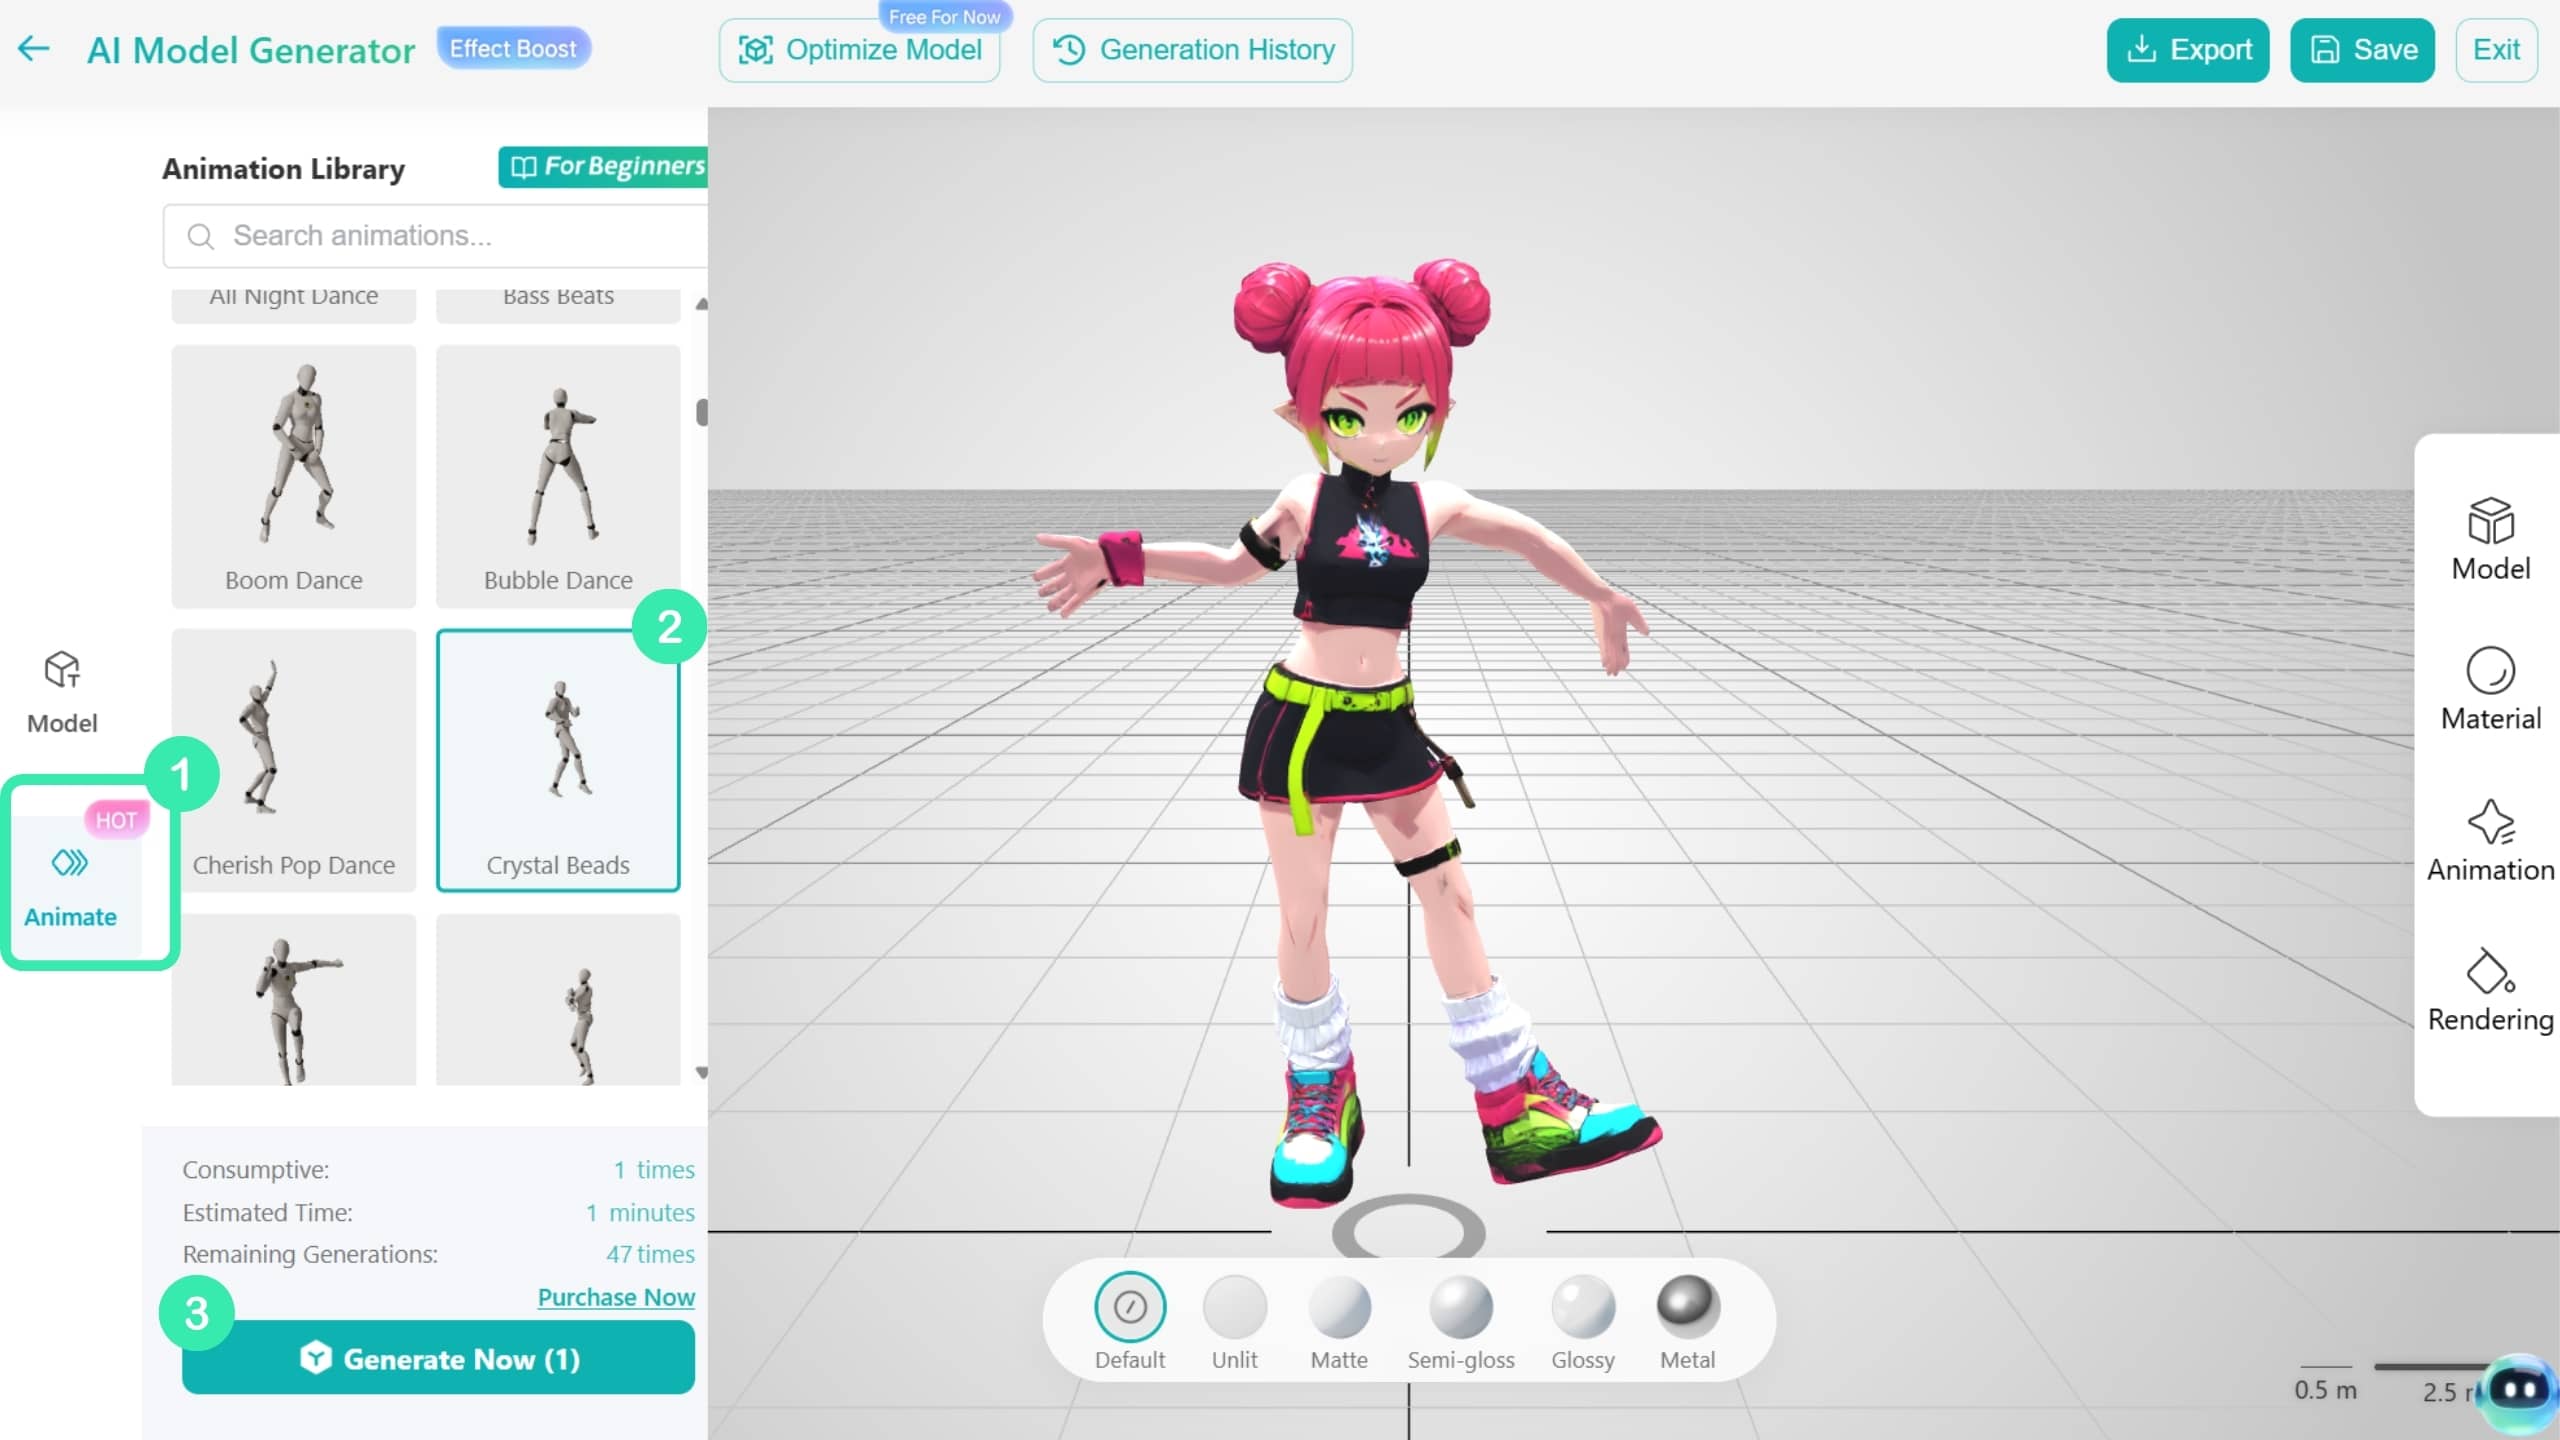
Click Animate on the left side of the AI Model Generator, select a preset animation from the Animation Library, and click Generate Now to quickly turn the static model into an animated model.
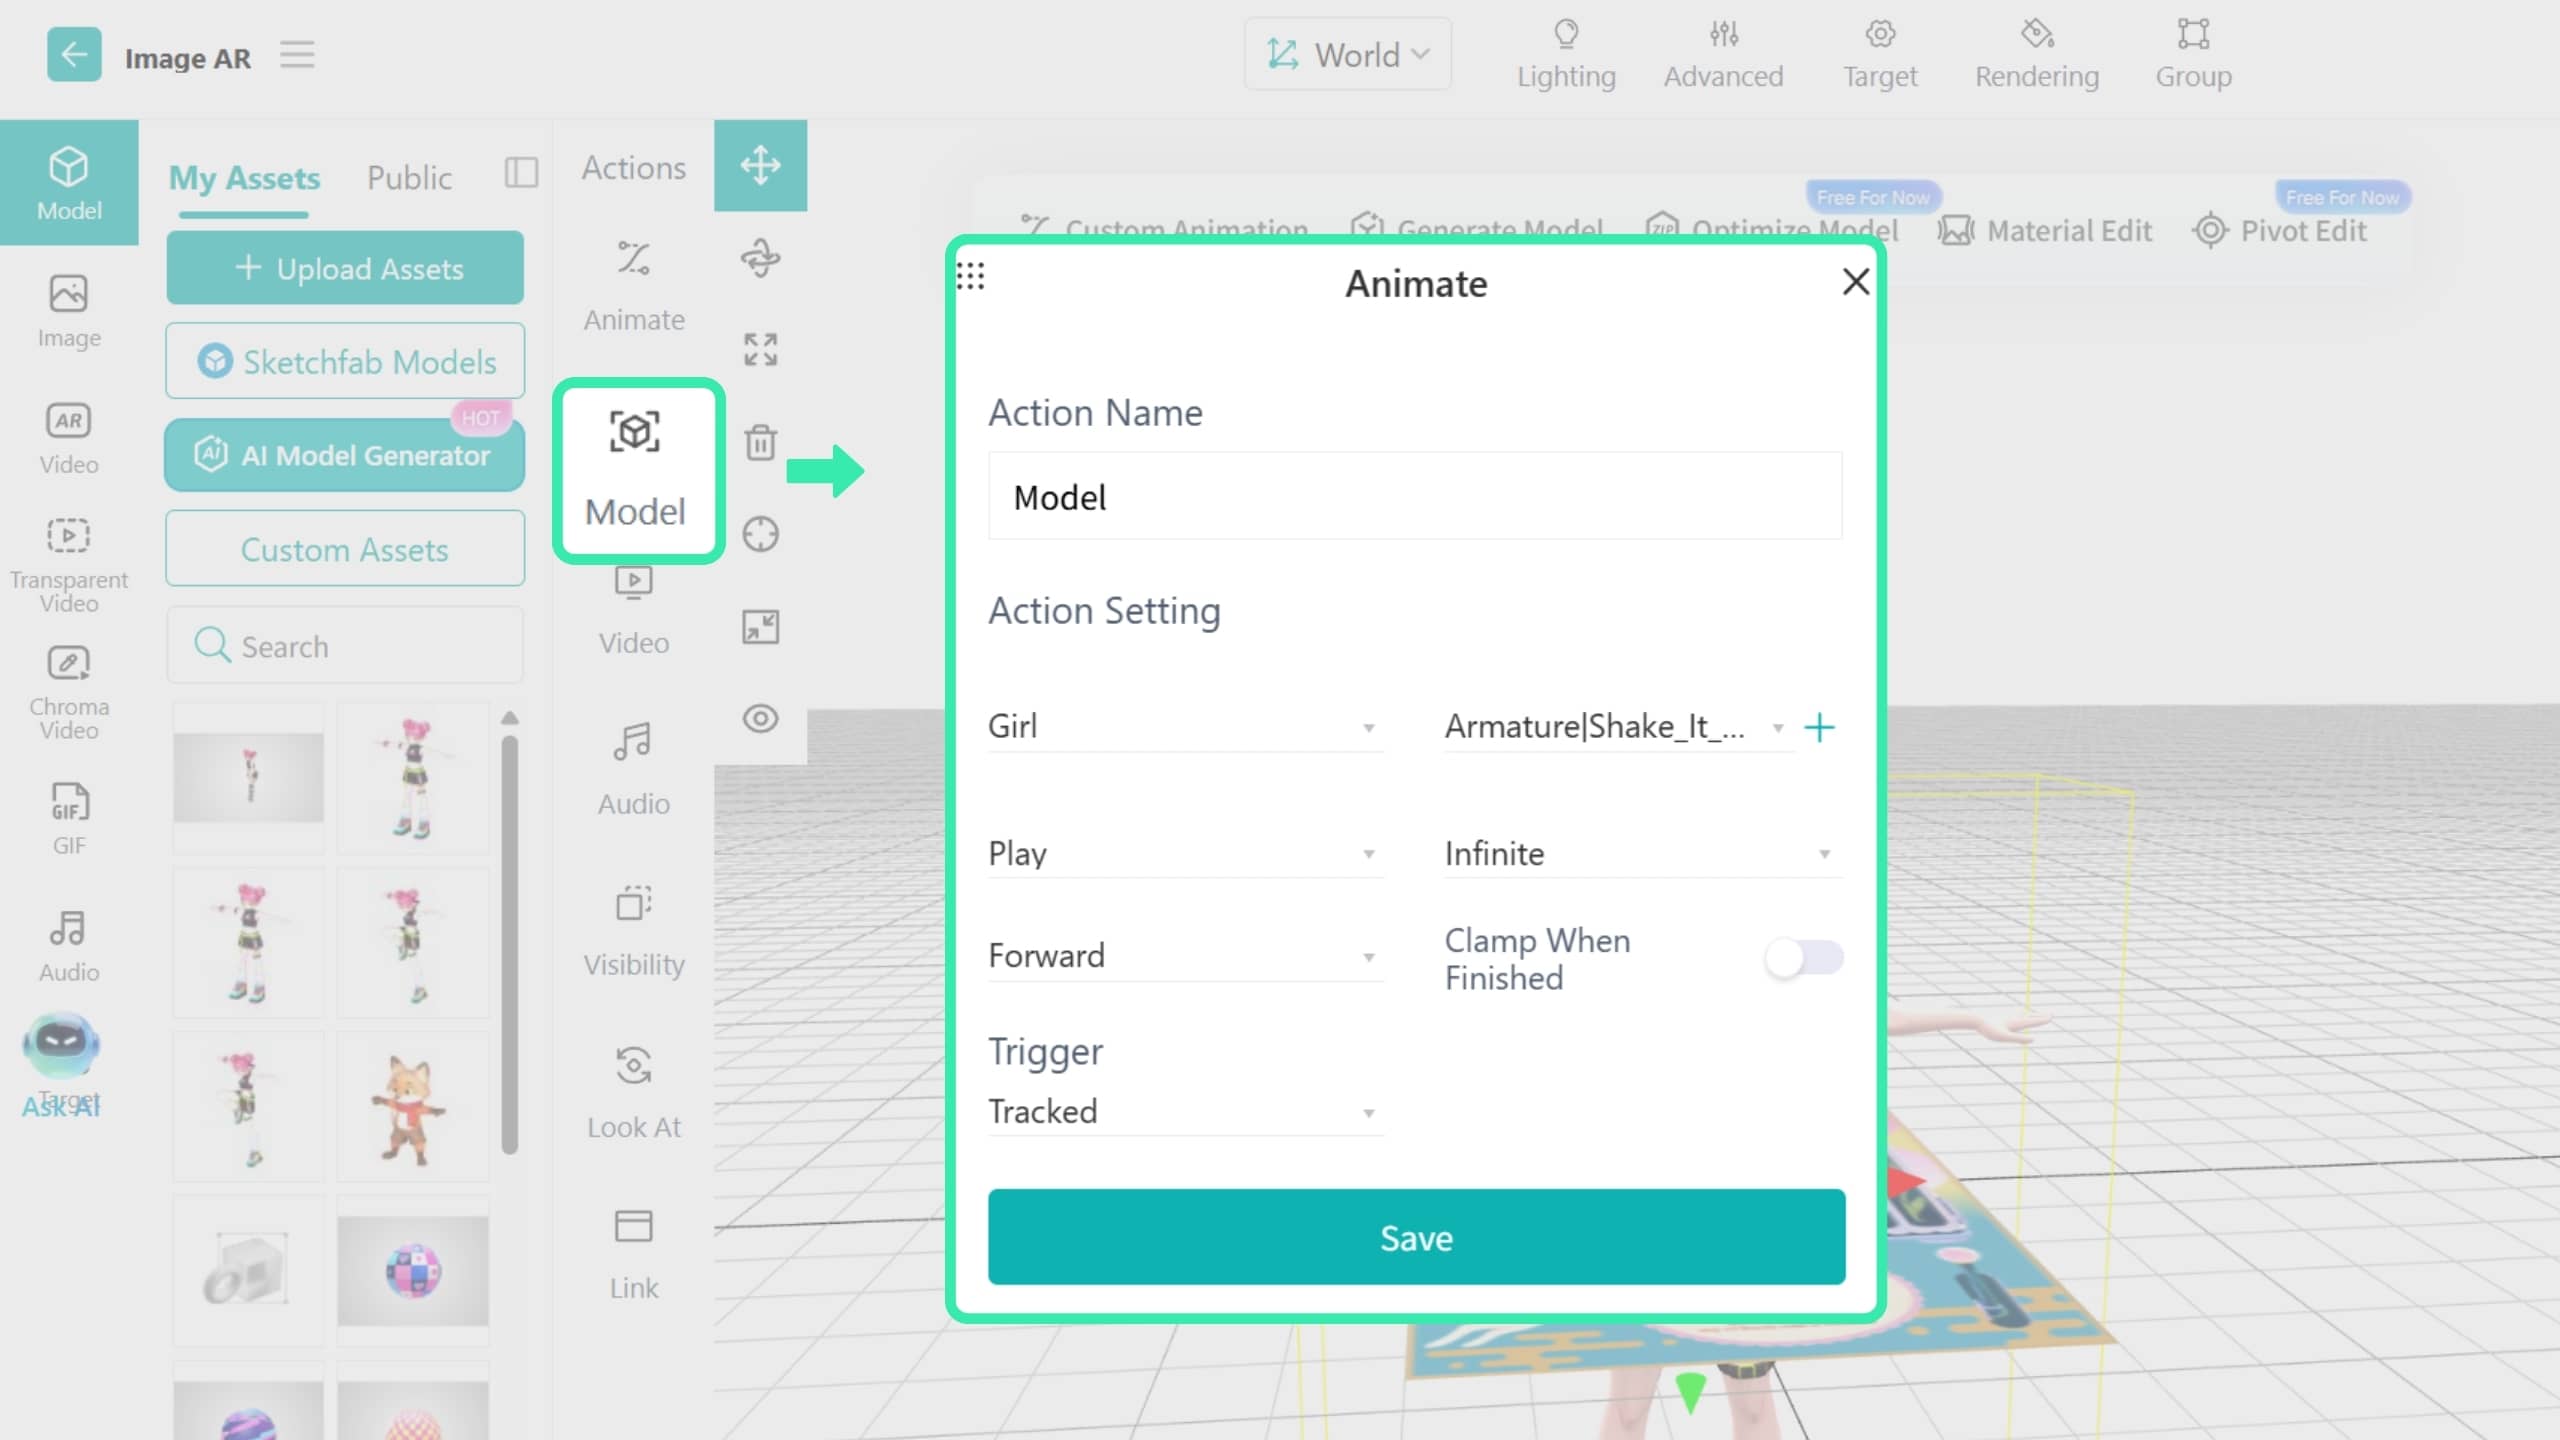
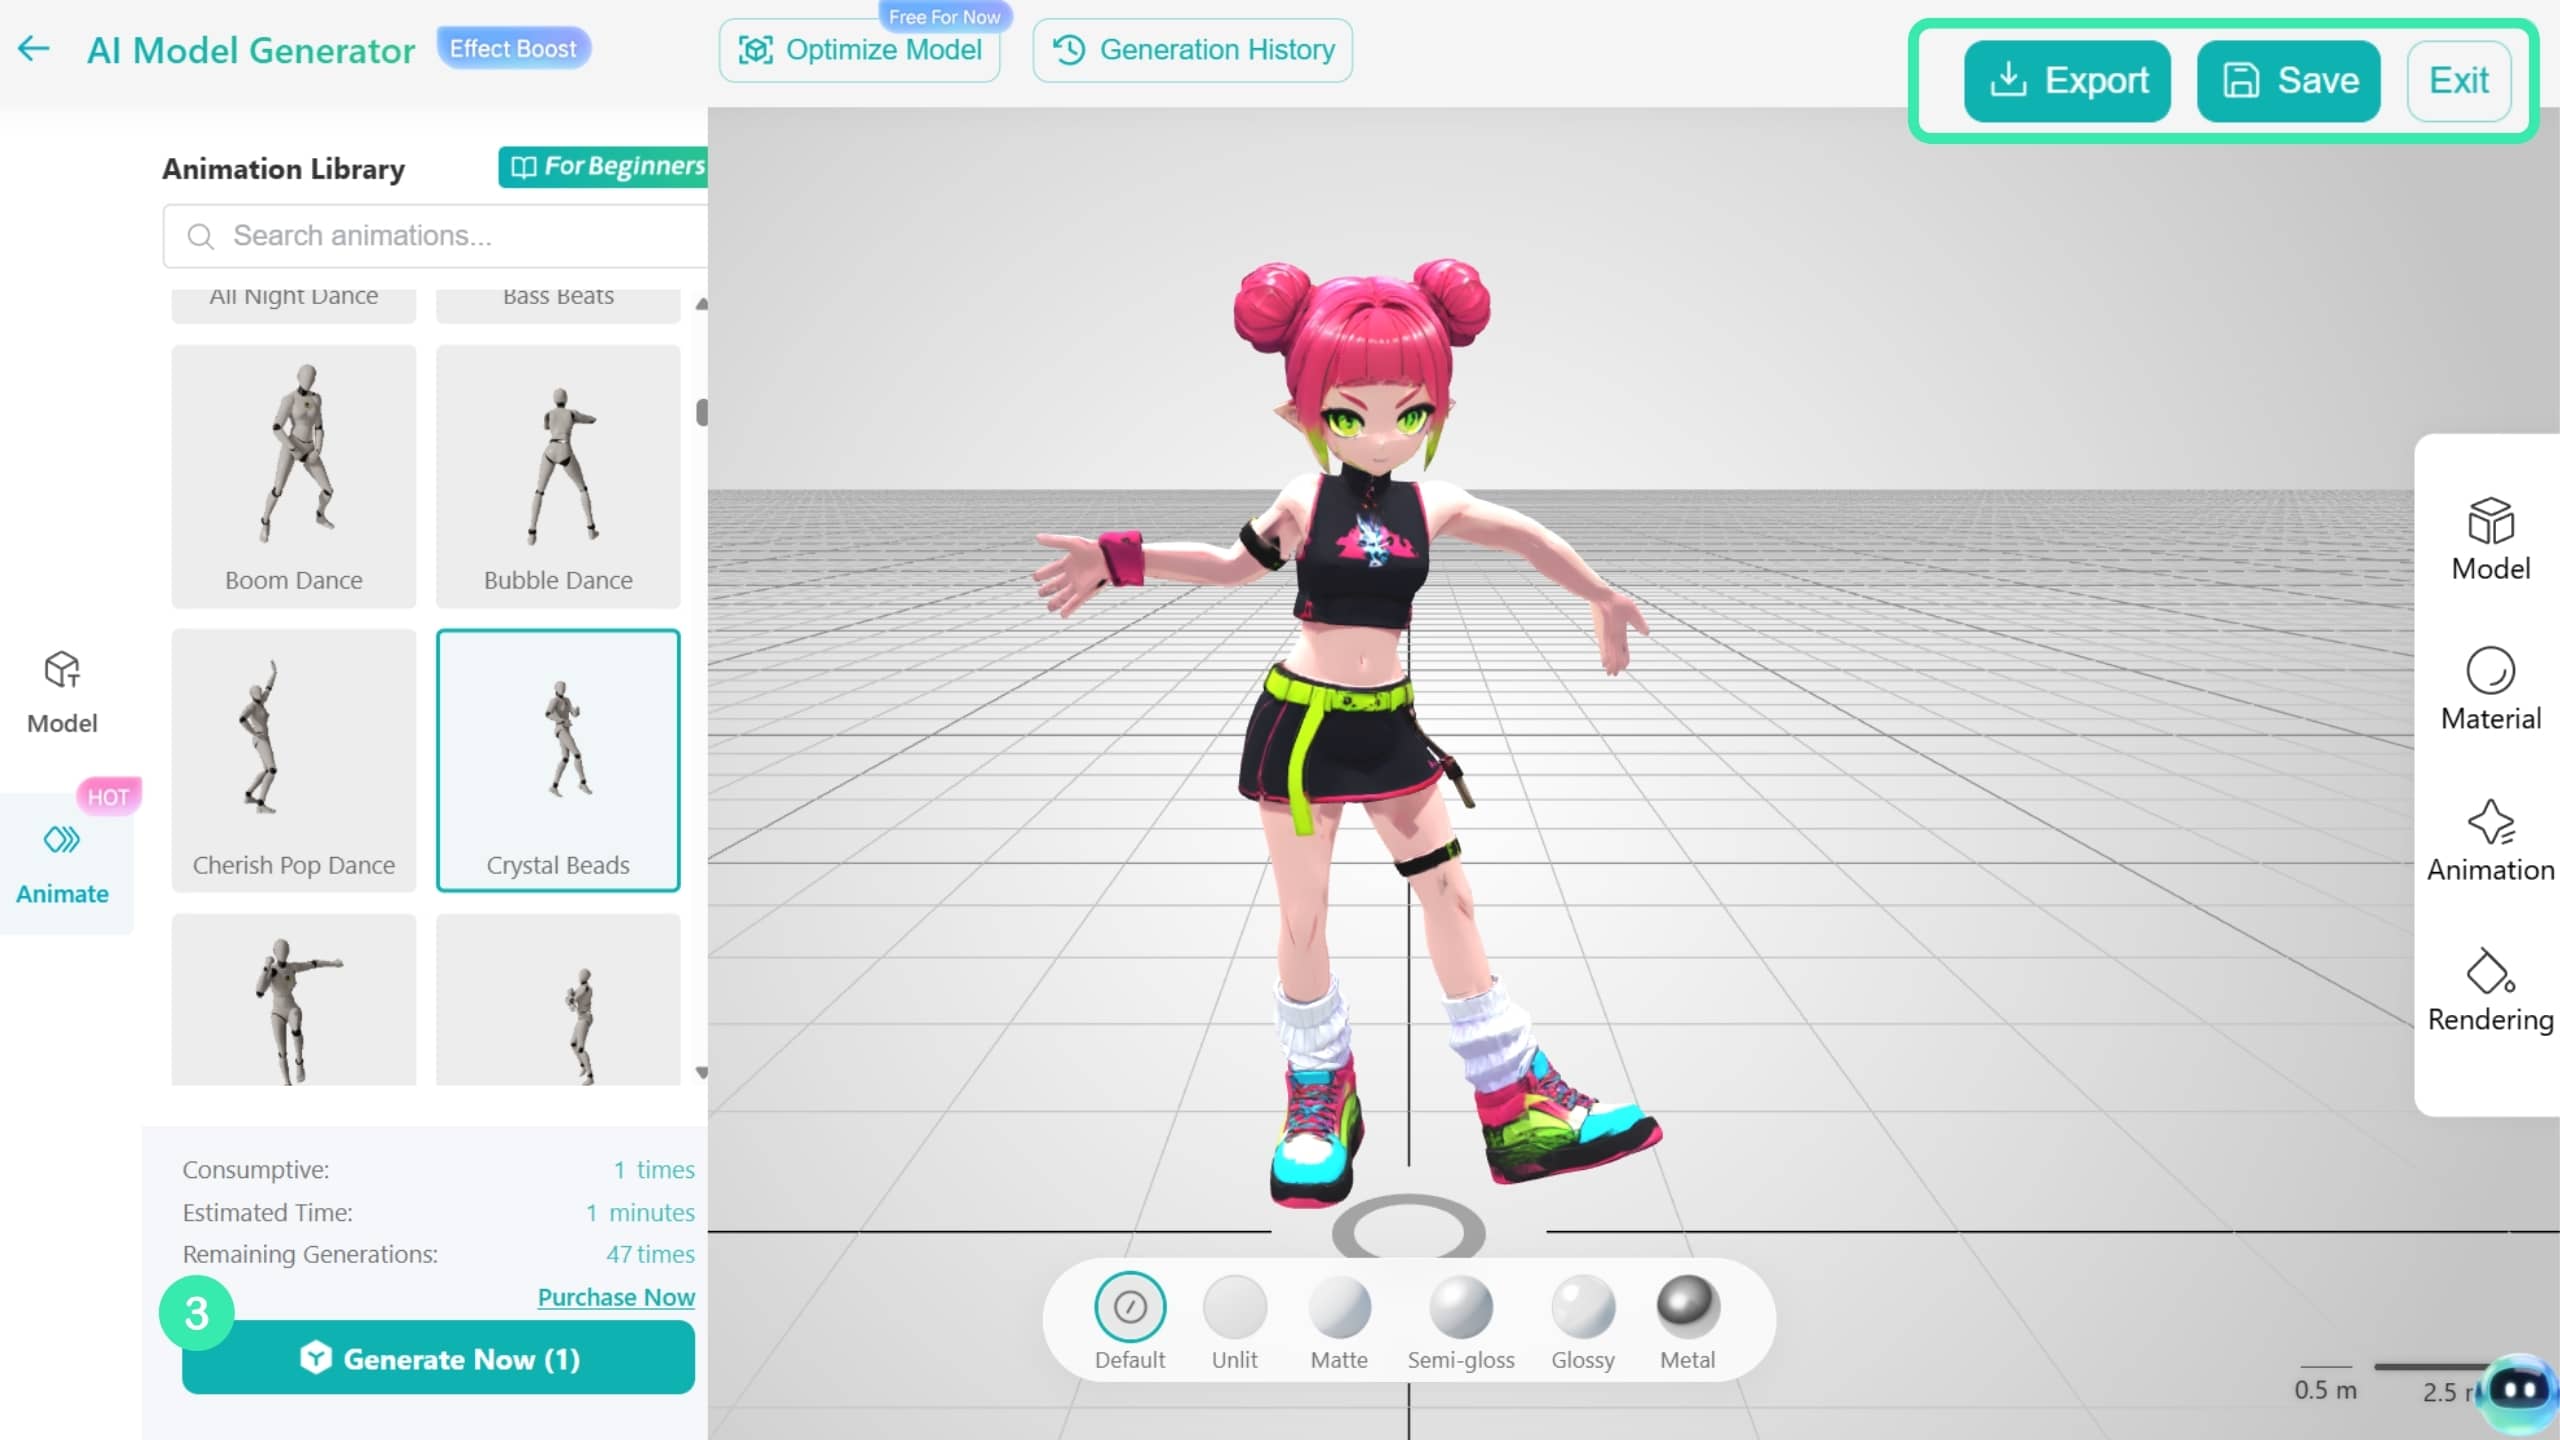
You can save the model to the Kivicube Asset Library, import it into the Scene Editor, and configure animation triggers to use it directly in AR scenes. You can also export the model as a GLB or OBJ file for local use.
Check whether the original model is in a standard T-pose. Non-standard poses may cause animation distortion or playback issues.
For example, in the video below, the same animation is applied to models in different poses. The animation plays normally on the standard T-pose model, while the non-T-pose model shows mesh clipping where the limbs overlap.
Yes. Find the previously generated model in your History, then click Generate Animation. Make sure the original model is in a standard T-pose before generating the animation.
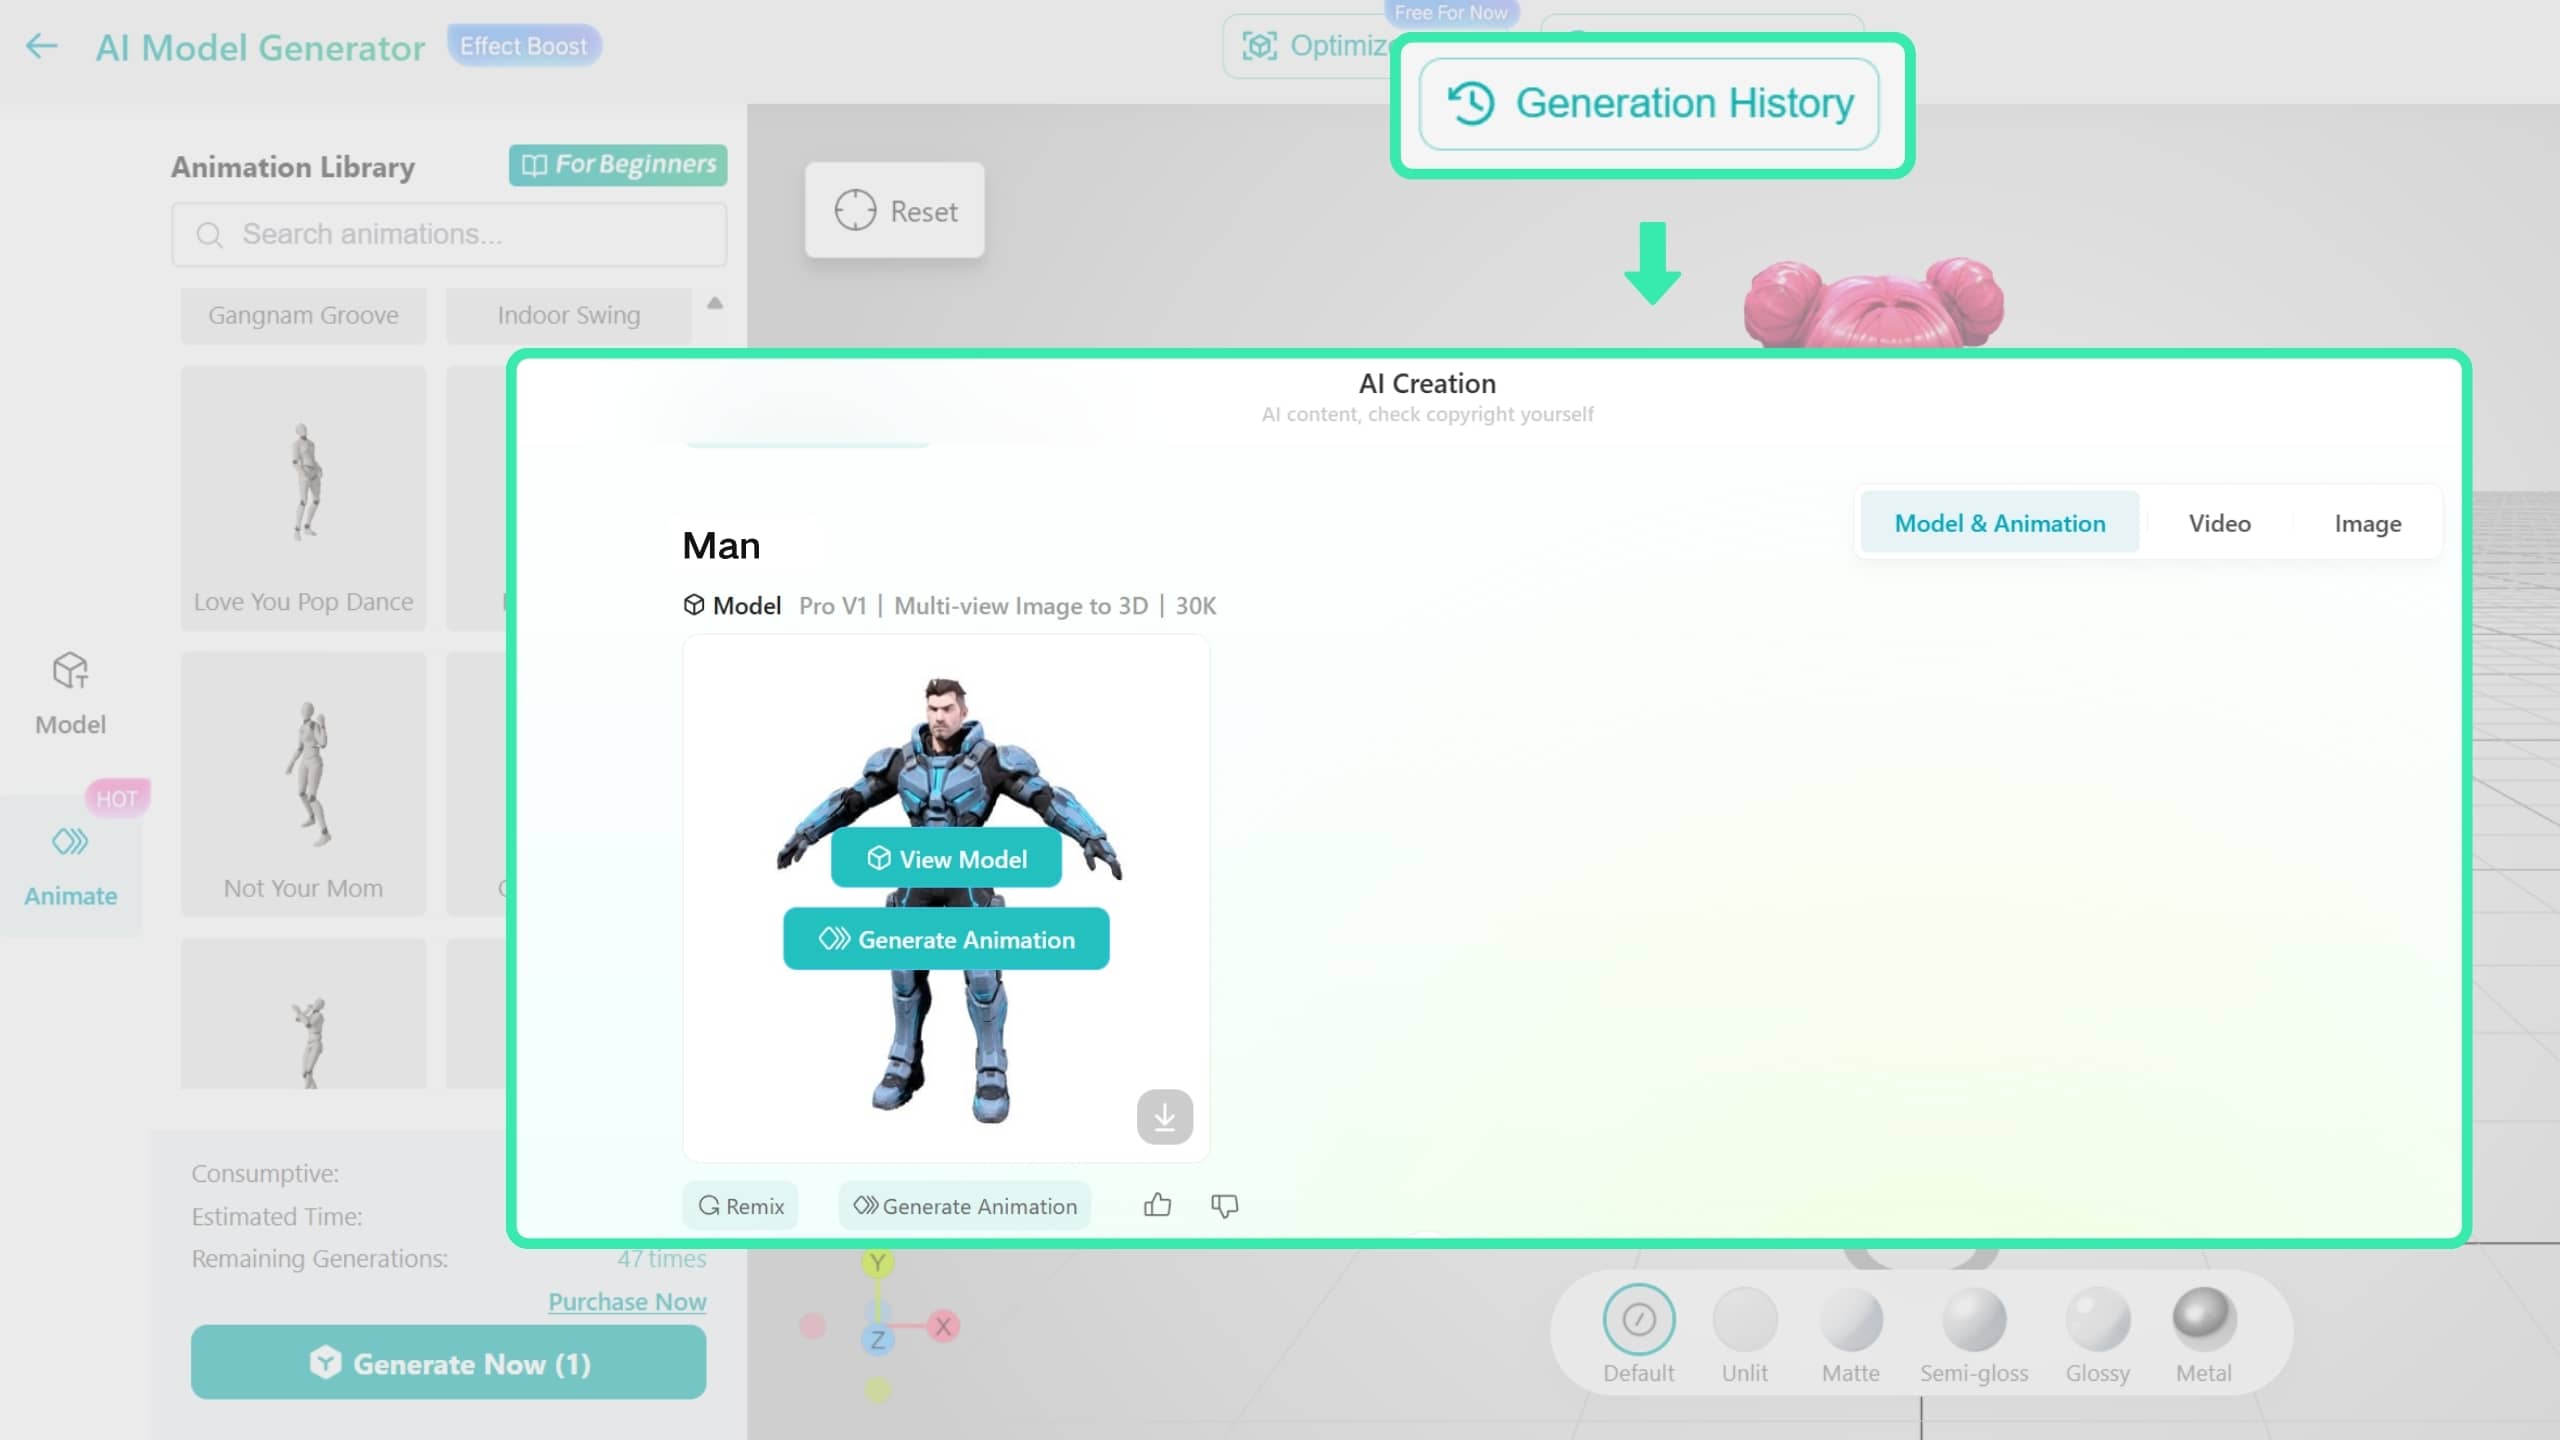
Yes. For example, you can generate four animations (A/B/C/D) for Model A in succession. This creates four model assets in the Asset Library, with each asset containing one animation. A separate generation record is also created for each animation in the History.
Model animations do not play automatically in AR experiences. You need to manually configure a trigger for the model’s animation in the Scene Editor, such as triggering it after scanning and recognition or when the model is tapped.