English
Appearance
AI video generation lets you quickly turn static images into dynamic content.
Kivicube offers a range of AI video models and supports up to 50 reference assets per generation. You can create videos from text prompts, first-frame images, first and last frames, or multiple types of input such as text, images, audio, and video.
Generated videos can be used in AR scenes, dynamic landing pages, and other creative projects. They help bring digital marketing and product showcases to life with more engaging and immersive experiences.
Kivi AI offers two ways to access the AI Video Generator. Choose the one that best fits your workflow.
Option 1: From the Homepage
On the Kivicube homepage, click Kivi AI to open the AI creation page. Then select Video to start creating videos.
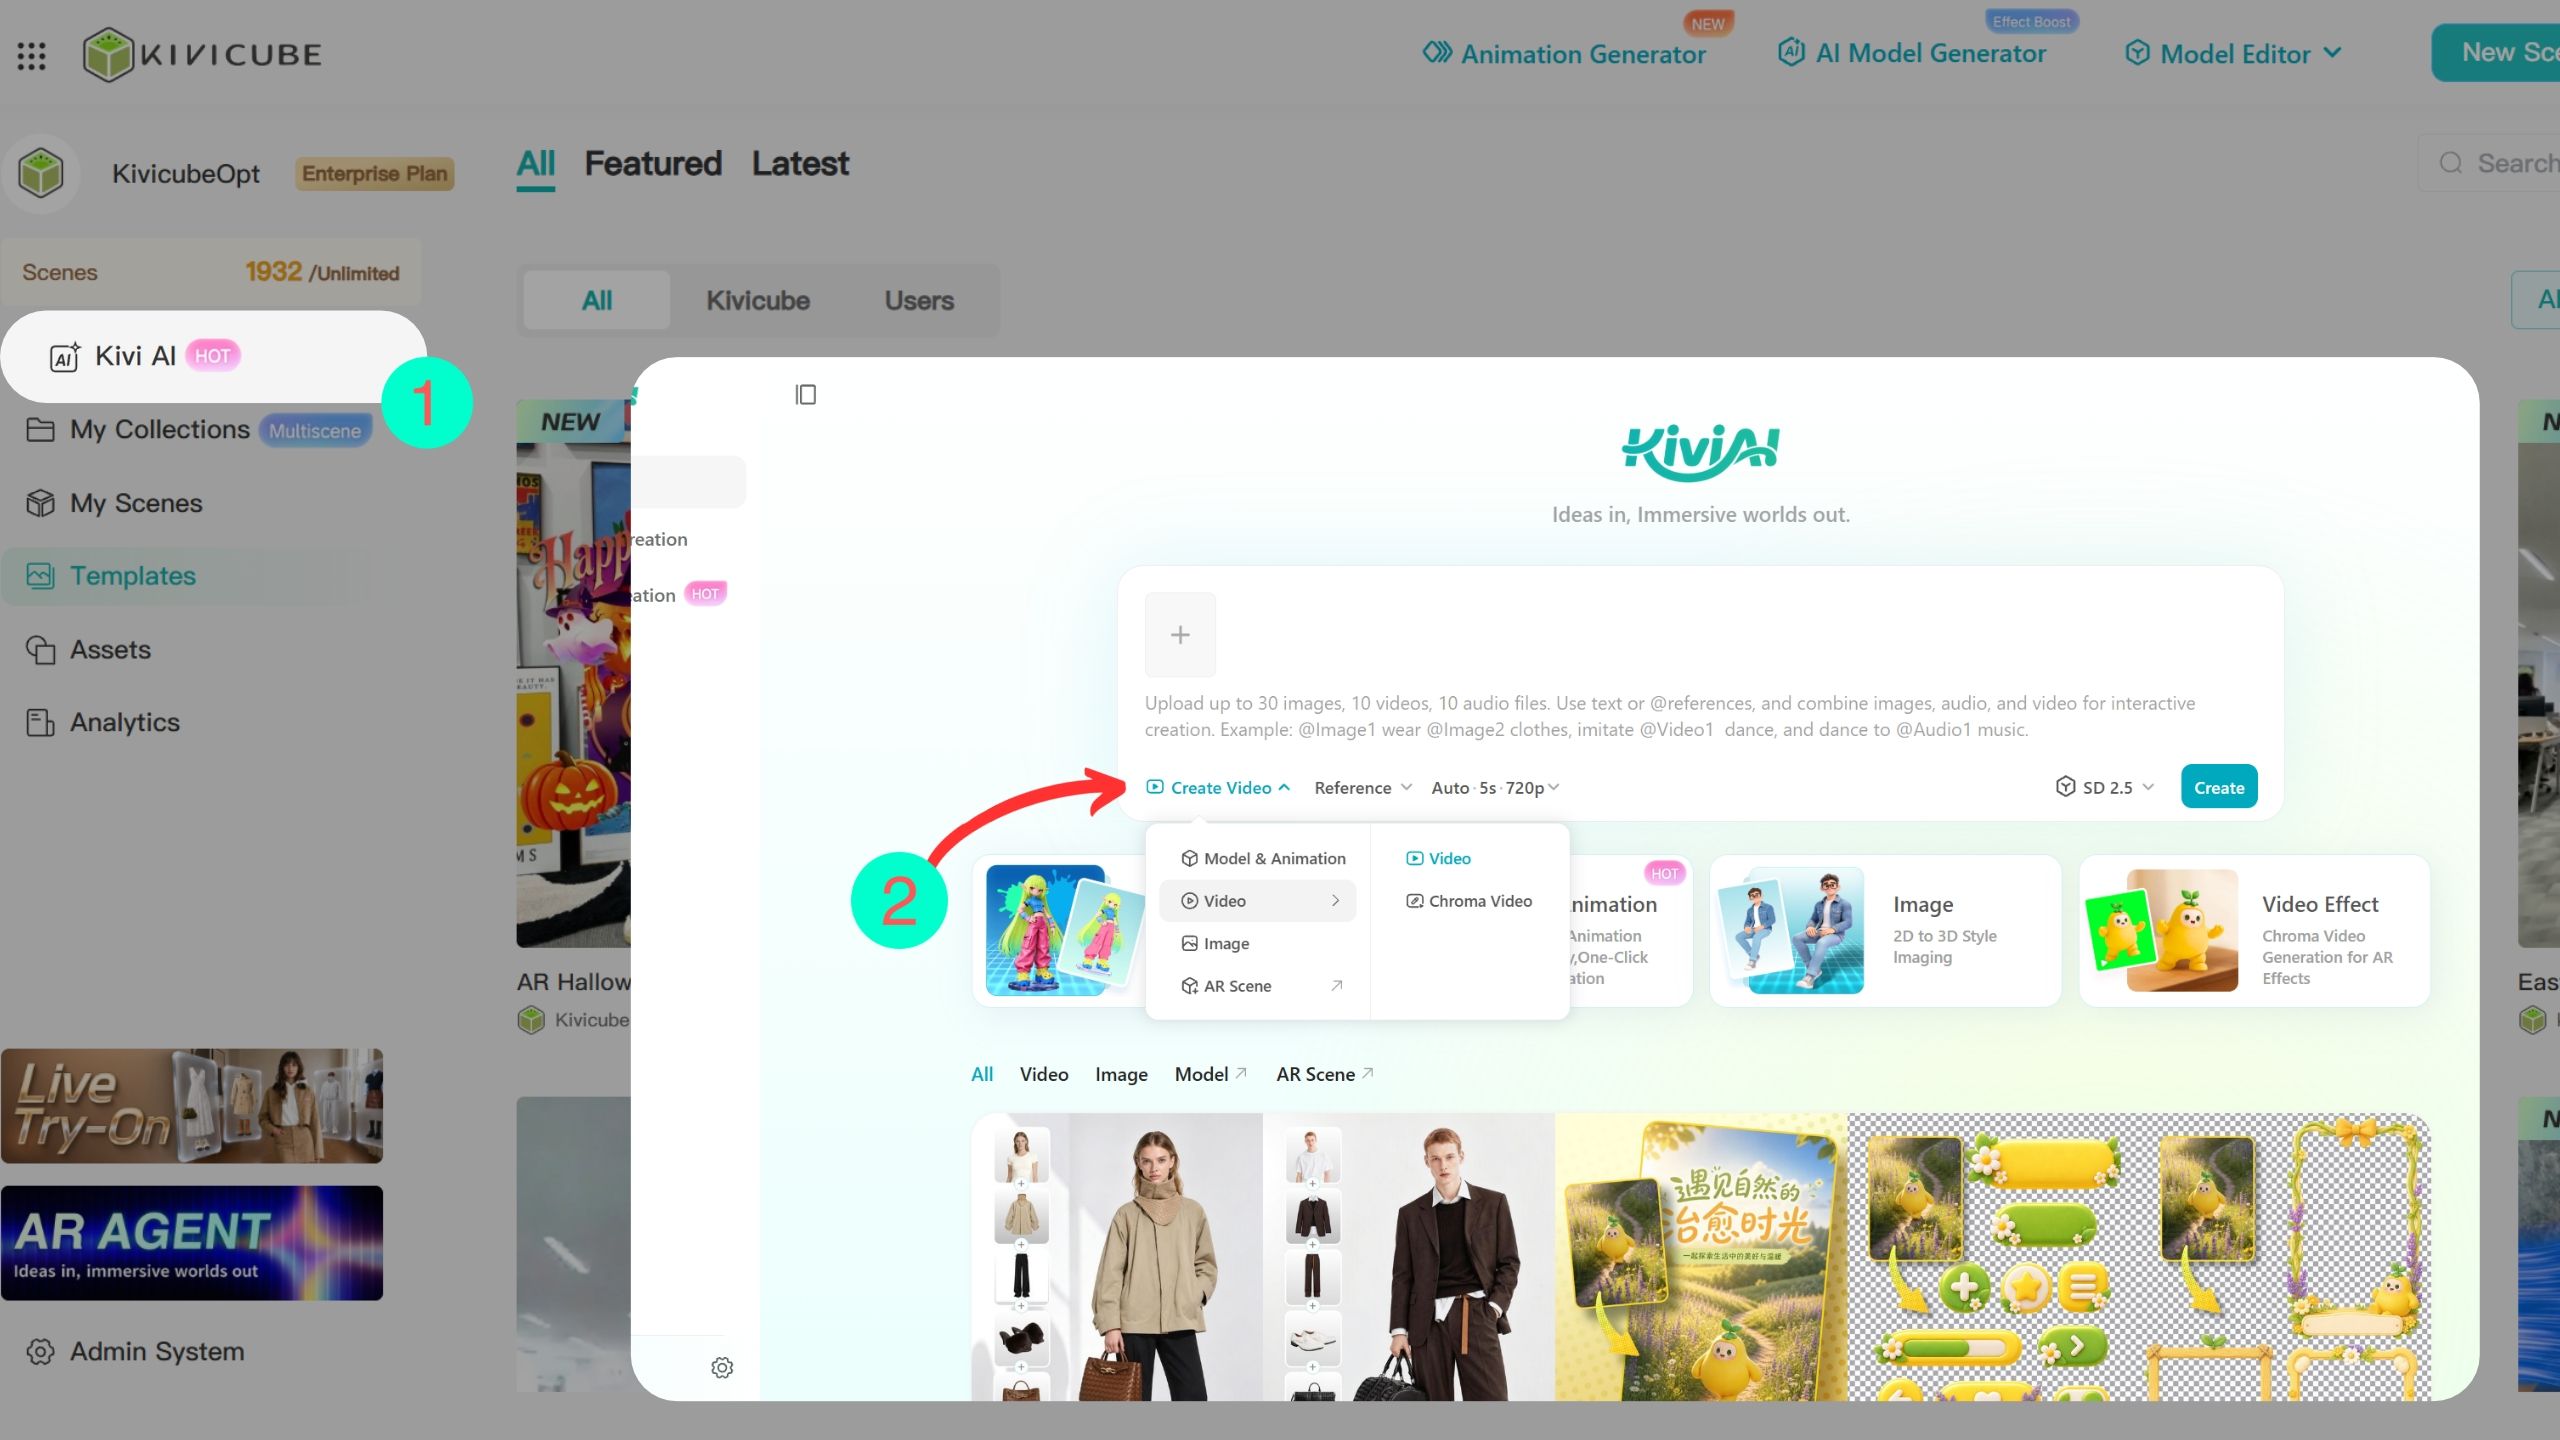
Option 2: From the Scene Editor
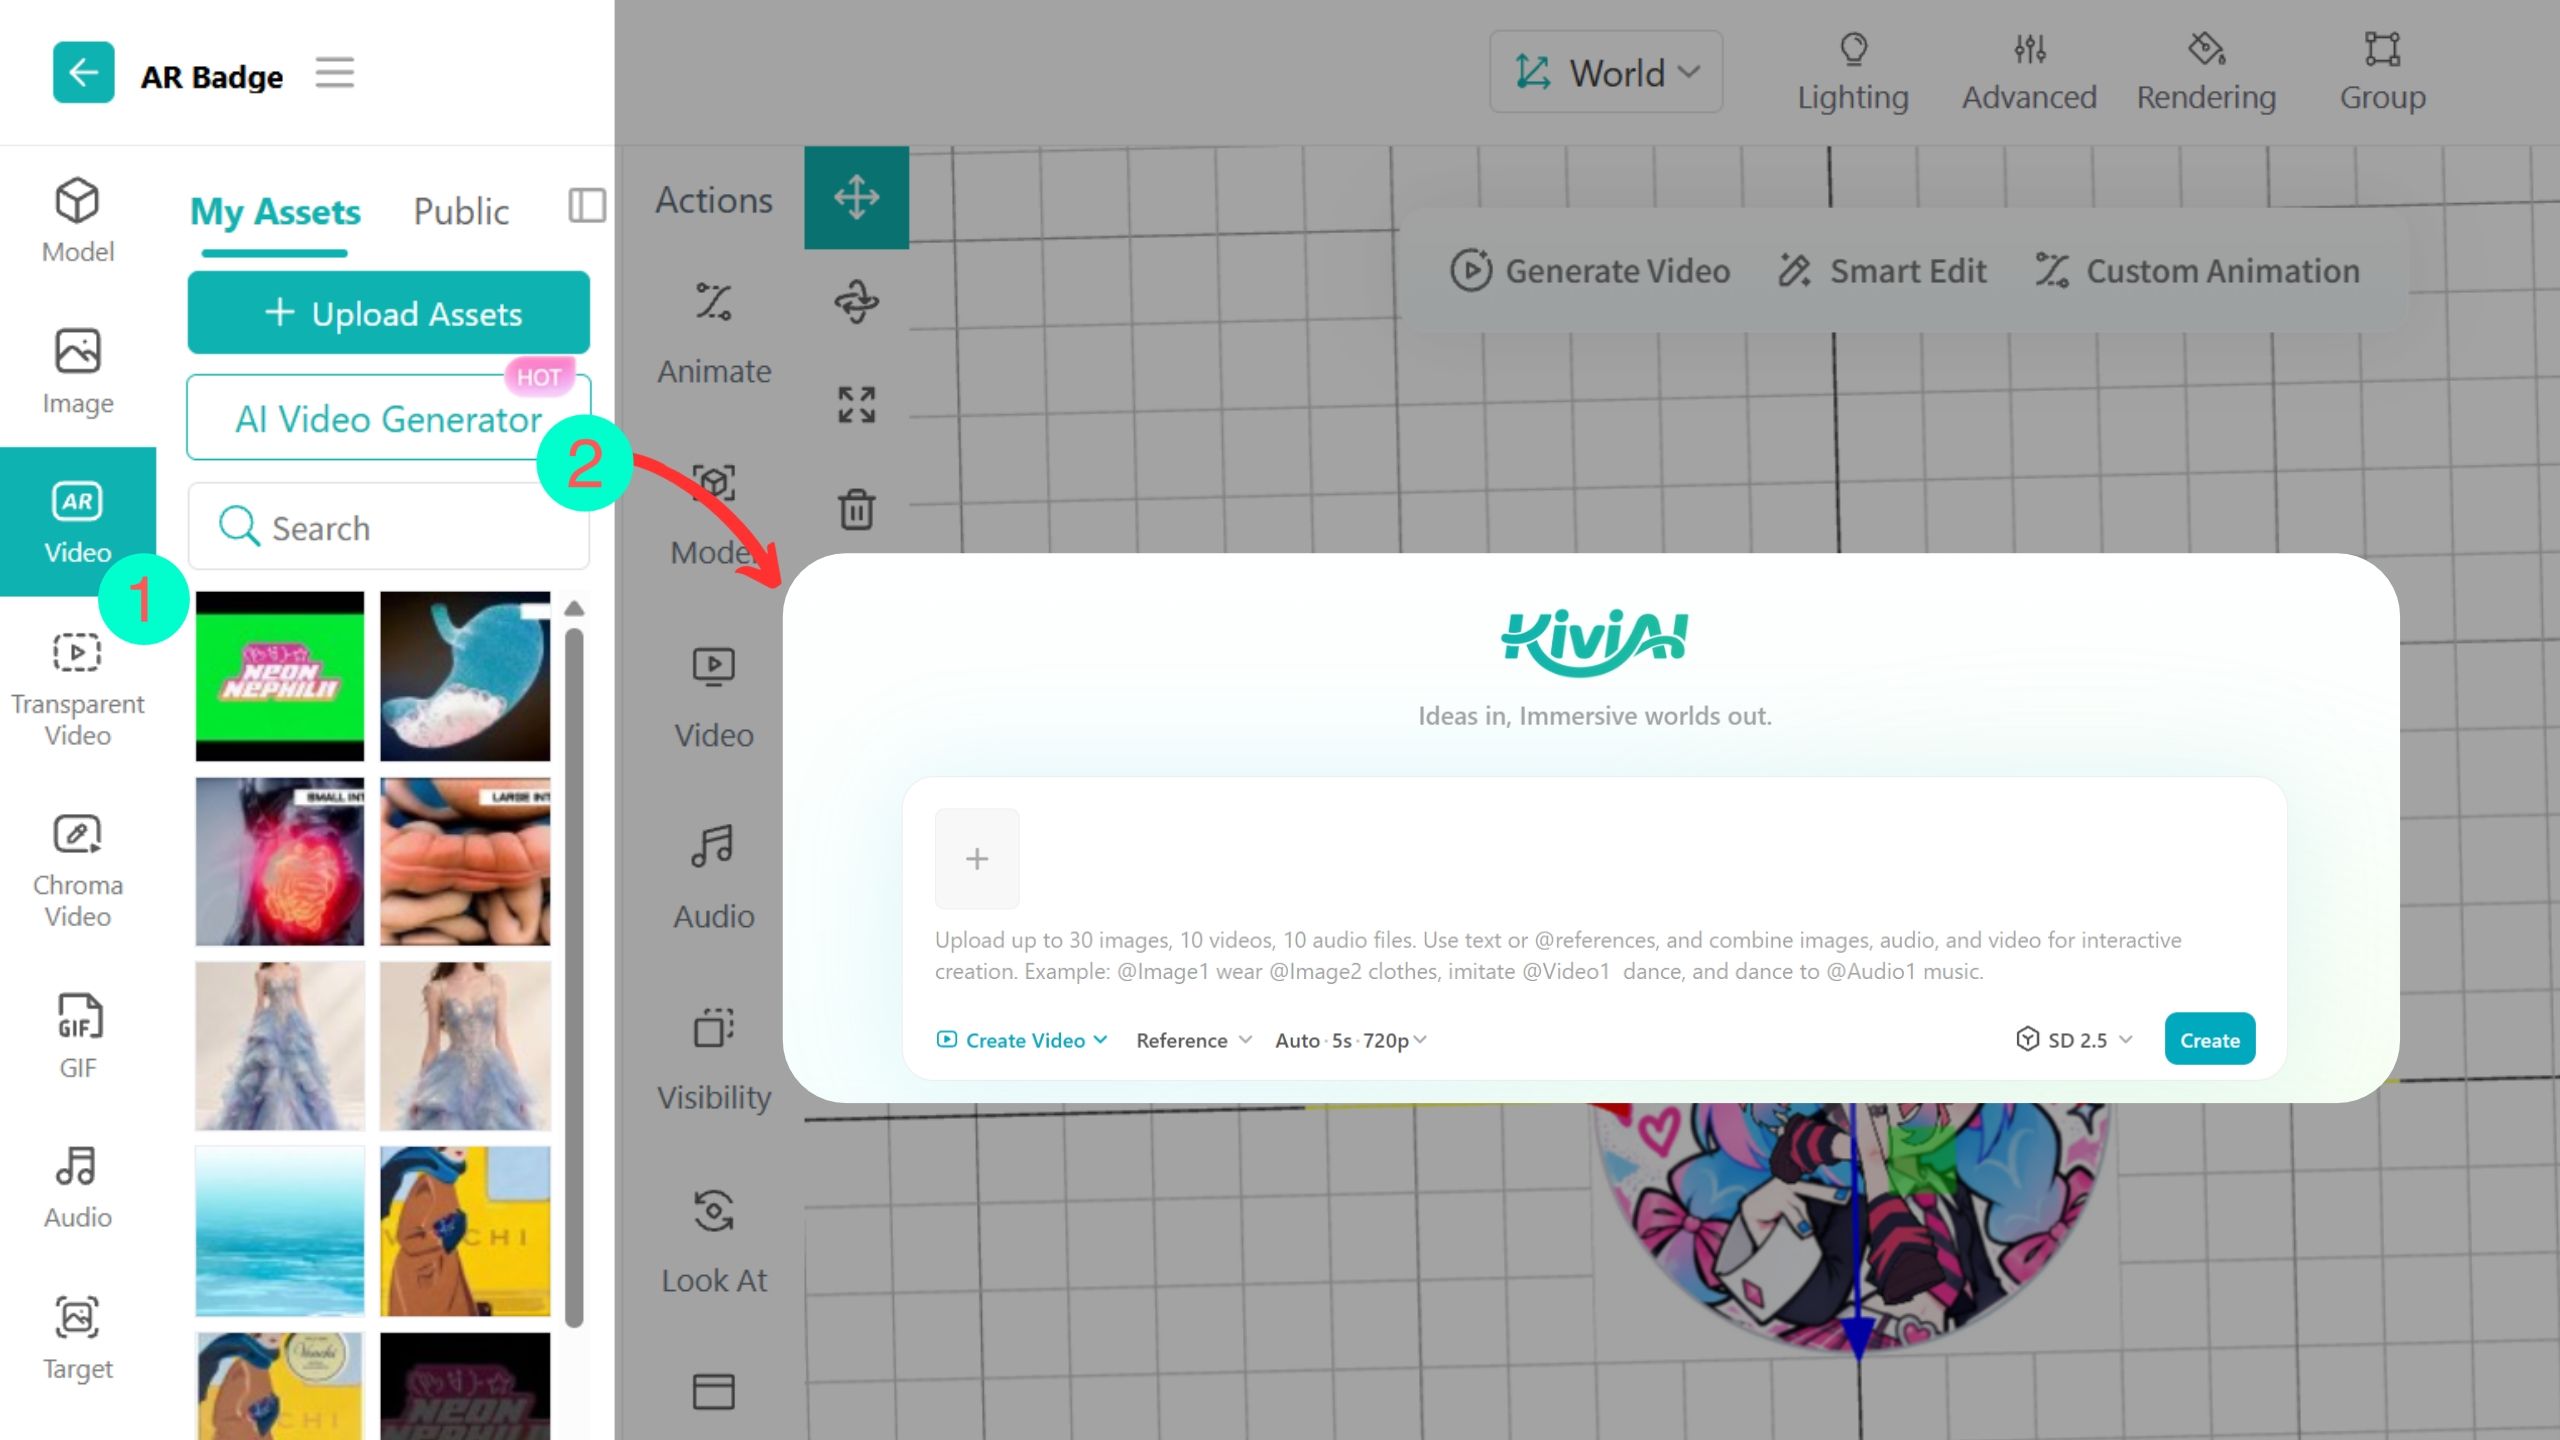
In the Scene Editor, select AR Video or Chroma Video from the left panel, then click AI Video Generation to quickly open the Kivi AI video creation page.
Kivi AI offers a range of AI video models, each with different strengths in video quality, generation speed, and use cases. Choose the model that best fits your creative needs.
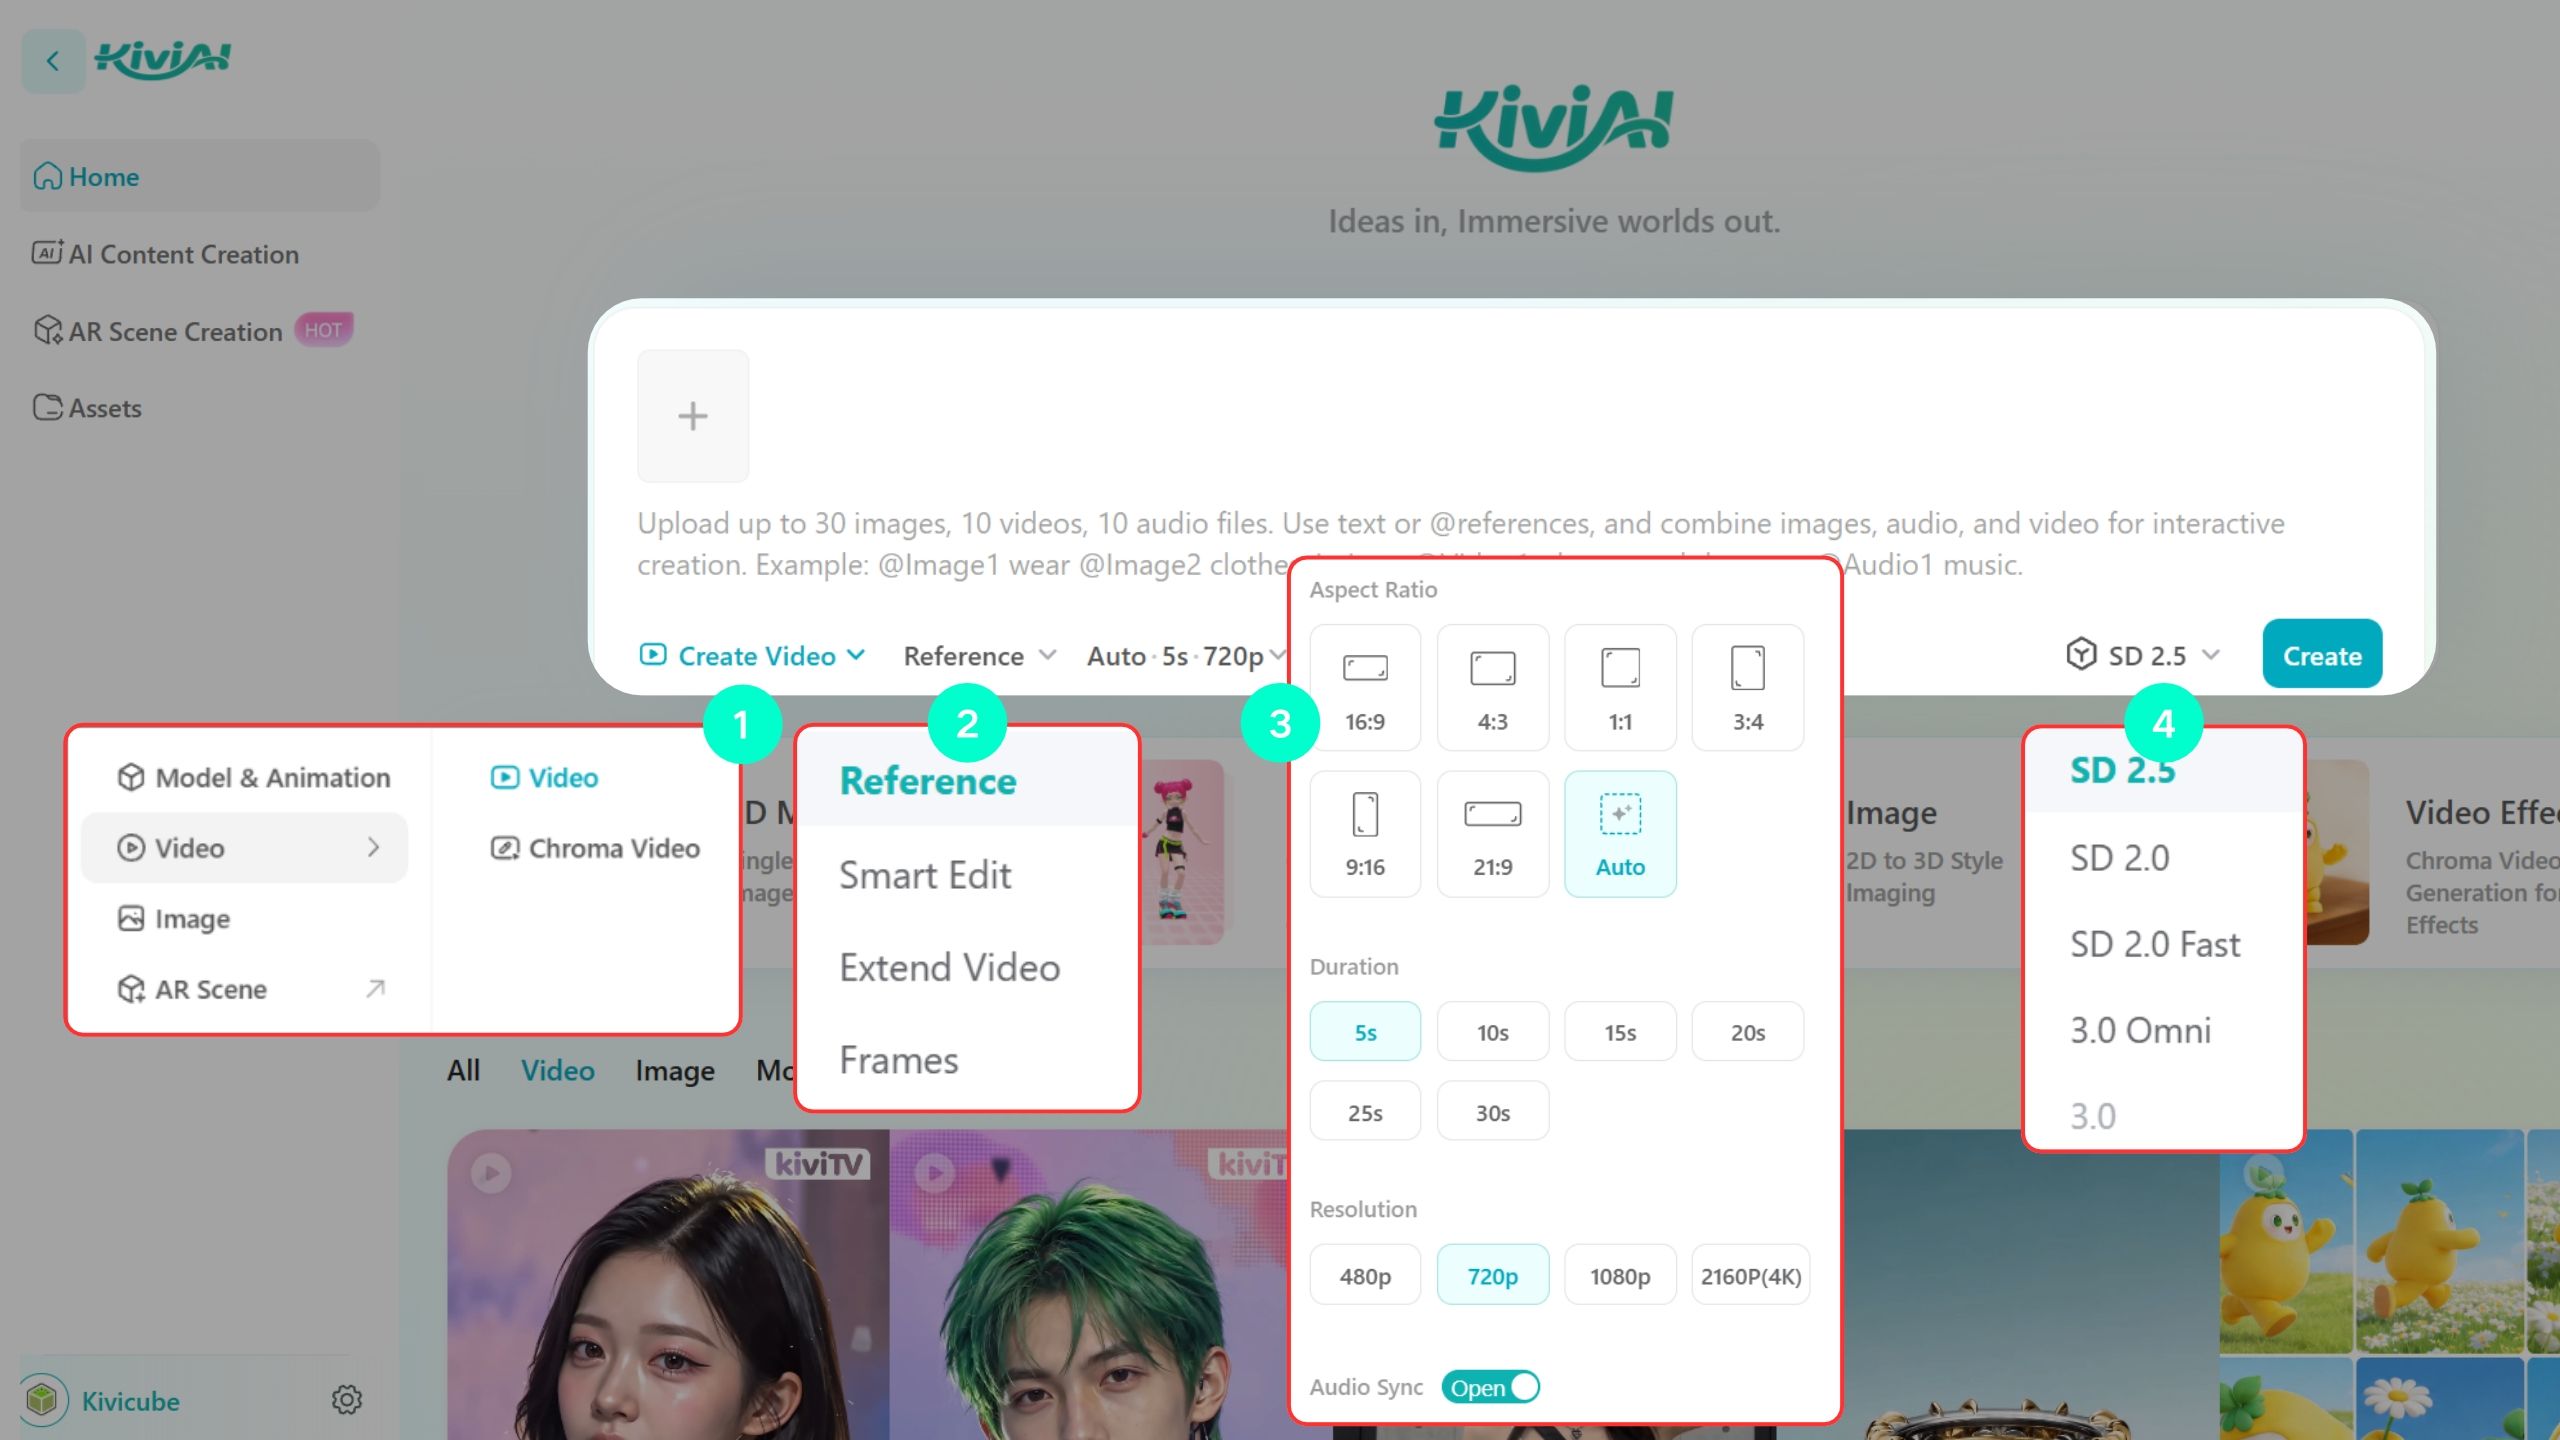
Kivi AI offers two video types: Video and Chroma Video. Click the option marked ① to choose the type that best fits your AR scene.
Video: Turn static images into regular videos to add motion and bring your AR content to life.
Chroma Video: Designed for creators who need videos with transparent backgrounds. Upload an image with a solid-color background to generate a video. Then use the one-click background removal feature in the Kivicube Scene Editor to remove the background and create a transparent video for your AR projects.
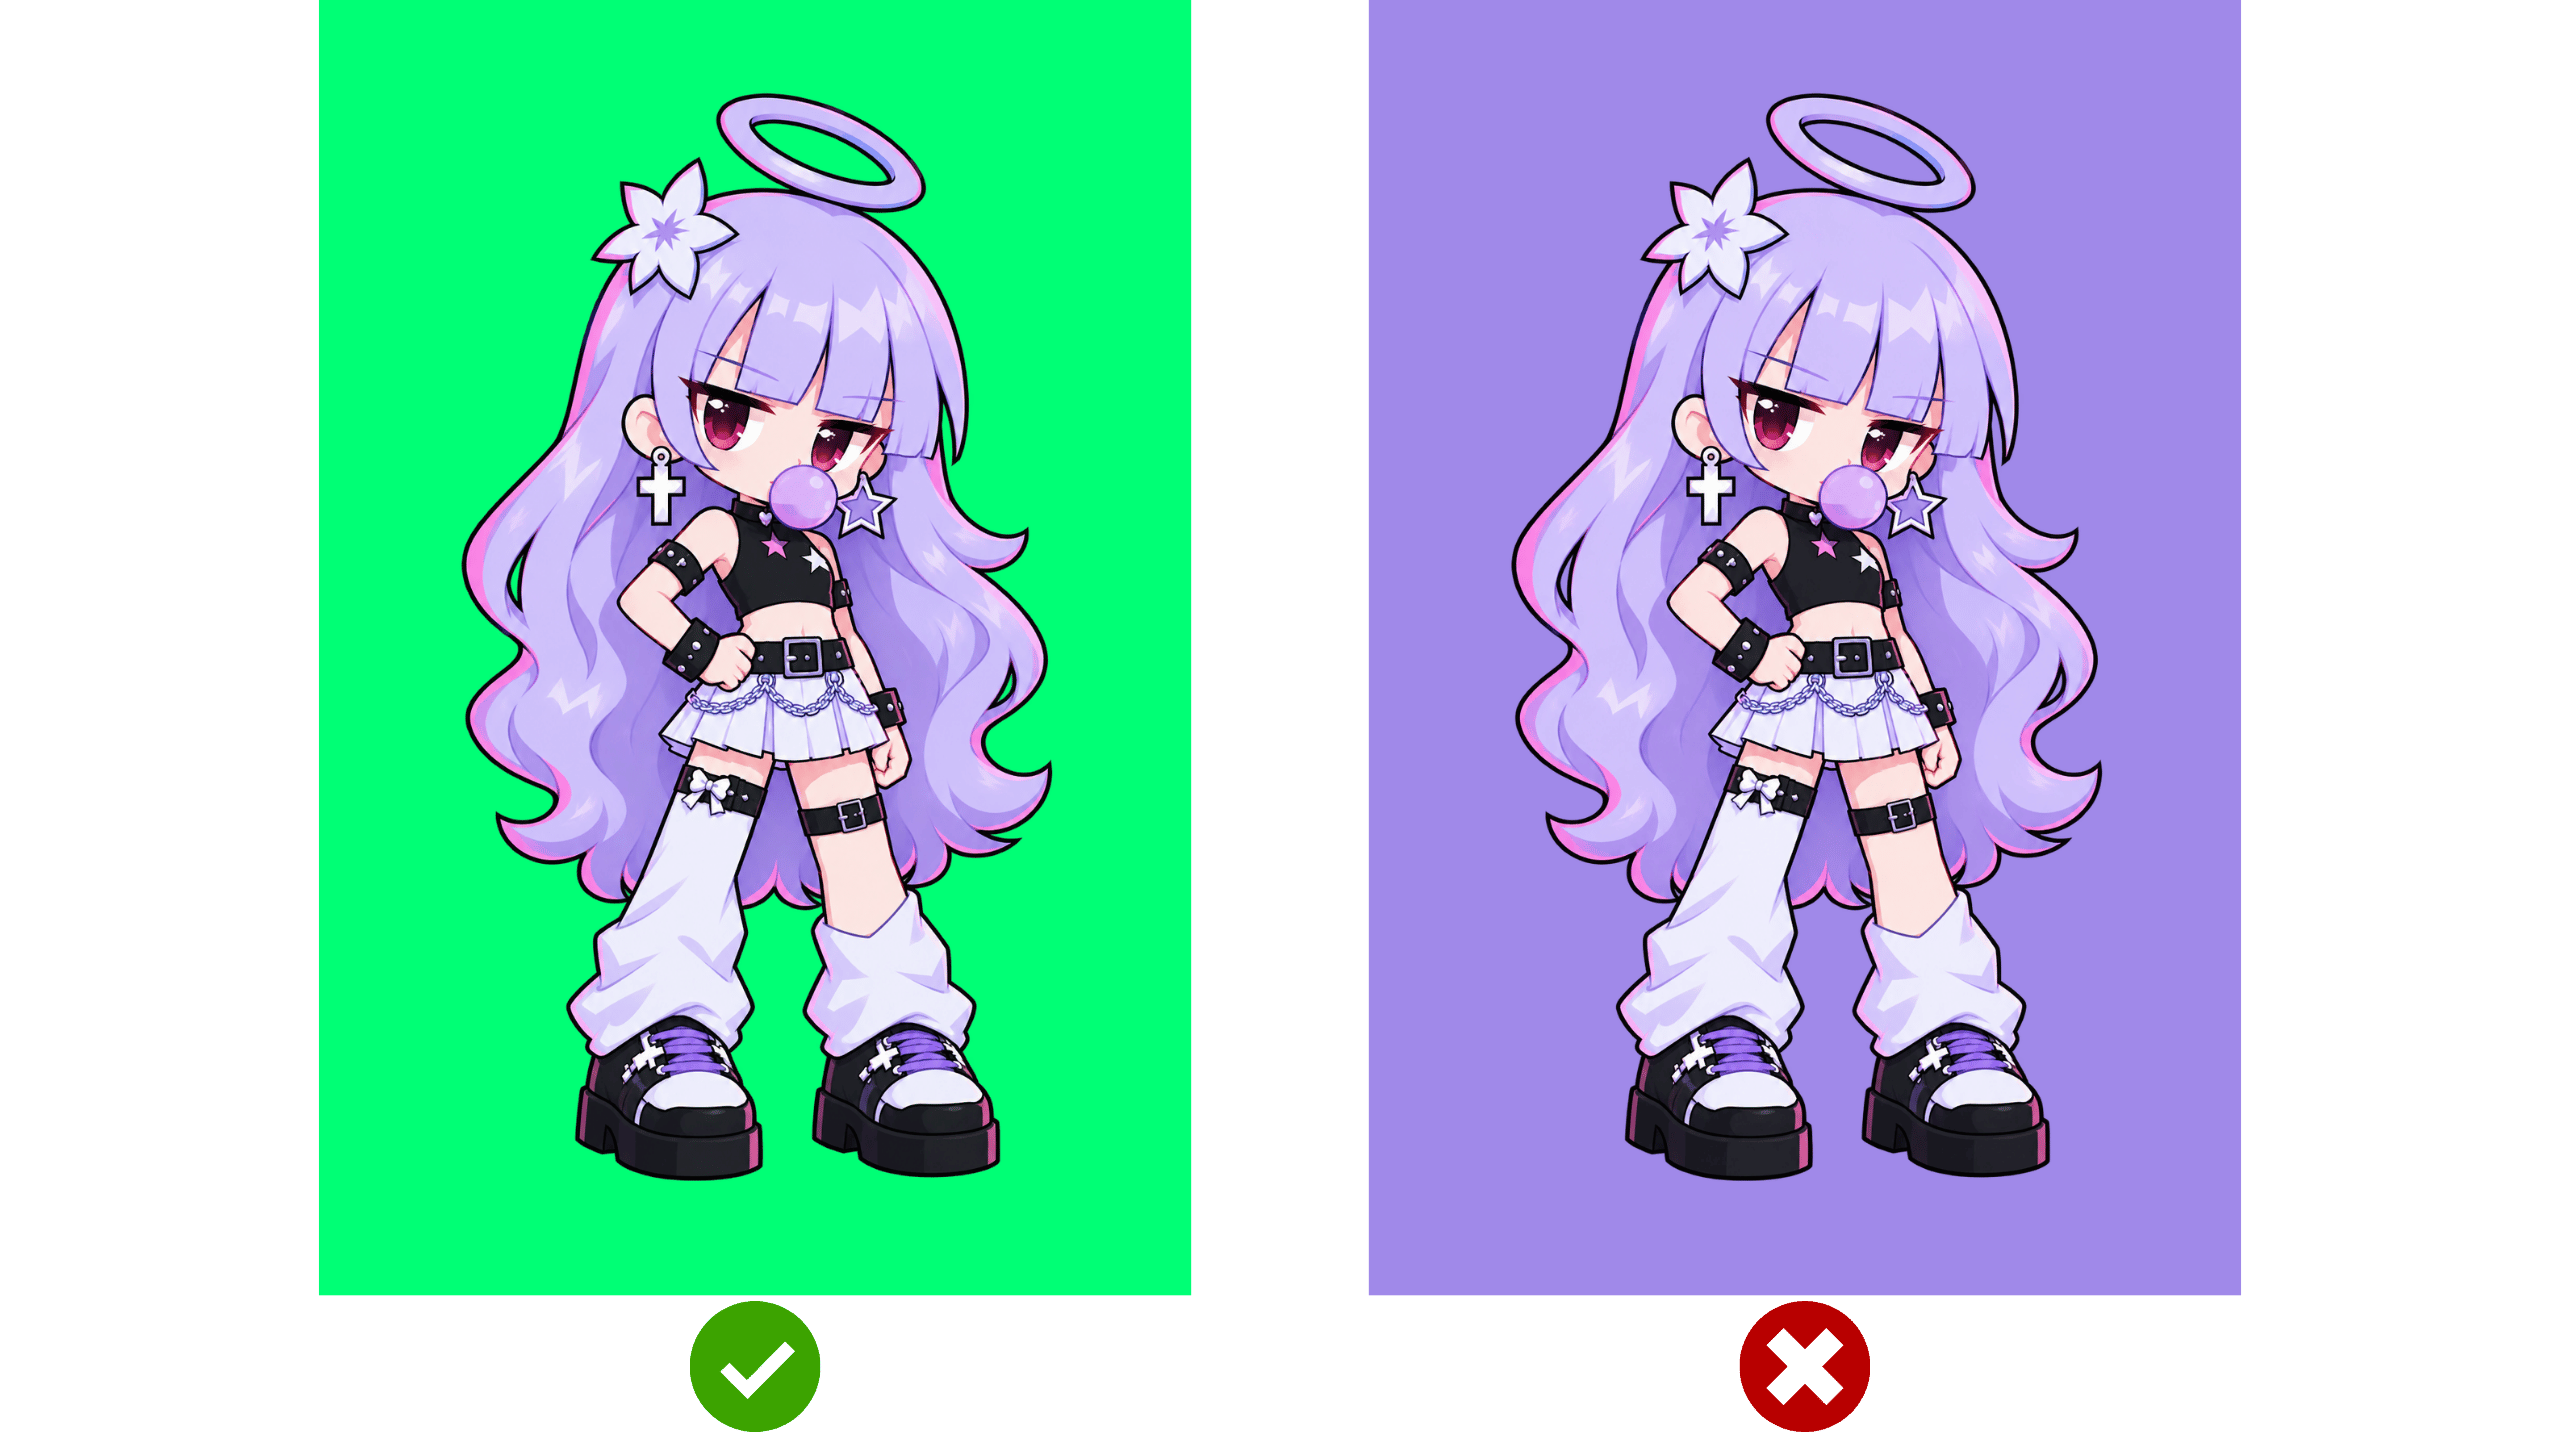
Tip
You can upload real-person photos as reference images to create AI-generated videos. Make sure you have the right to use the image or permission from the person in it.
Choose how you want to generate your video. Each mode is designed for different creative needs.
| Mode | Best For |
|---|---|
| Reference | Generate videos based on uploaded reference images and text prompts. Ideal for quickly turning static images into dynamic content. |
| Smart Edit | You can edit and adjust existing videos or images. Make sure to clearly describe what you want to change. For example: Replace the person in @Video 1 with the person in @Image 1. |
| Extend Video | Continue generating content from an existing video to make it longer and create smoother, more continuous motion. |
| Frames | Set the first and last frames of a video to generate the transition between them. Ideal for creating animations with specific starting and ending states. |
Adjust the video output settings to fit your needs.
Aspect Ratio: Set the video aspect ratio. Available options include 16:9, 4:3, 1:1, 3:4, 9:16, and 21:9. You can also select Auto to automatically choose a suitable aspect ratio.
Duration: Set how long the generated video should be. Multiple duration options are available. Longer videos generally take more time to generate.
Resolution: Choose the video output resolution: 480p, 720p, 1080p, or 2160p (4K). Higher resolutions usually provide sharper images but may also increase generation time and resource usage.
Audio Sync: When enabled, AI generates sound effects that match the actions in the video. This is useful for videos that need synchronized audio and visuals.
Tip
If video quality is important to your project, we recommend choosing a higher resolution. Kivicube automatically optimizes generated videos to ensure smooth playback during AR experiences, even at higher resolutions.
Choose the model you want to use for video generation. The Model Library offers multiple video models, each with different strengths in visual quality, generation results, and speed.
Kivi AI currently offers five video models, including SD and Omni. Choose the model that best fits your creative needs.
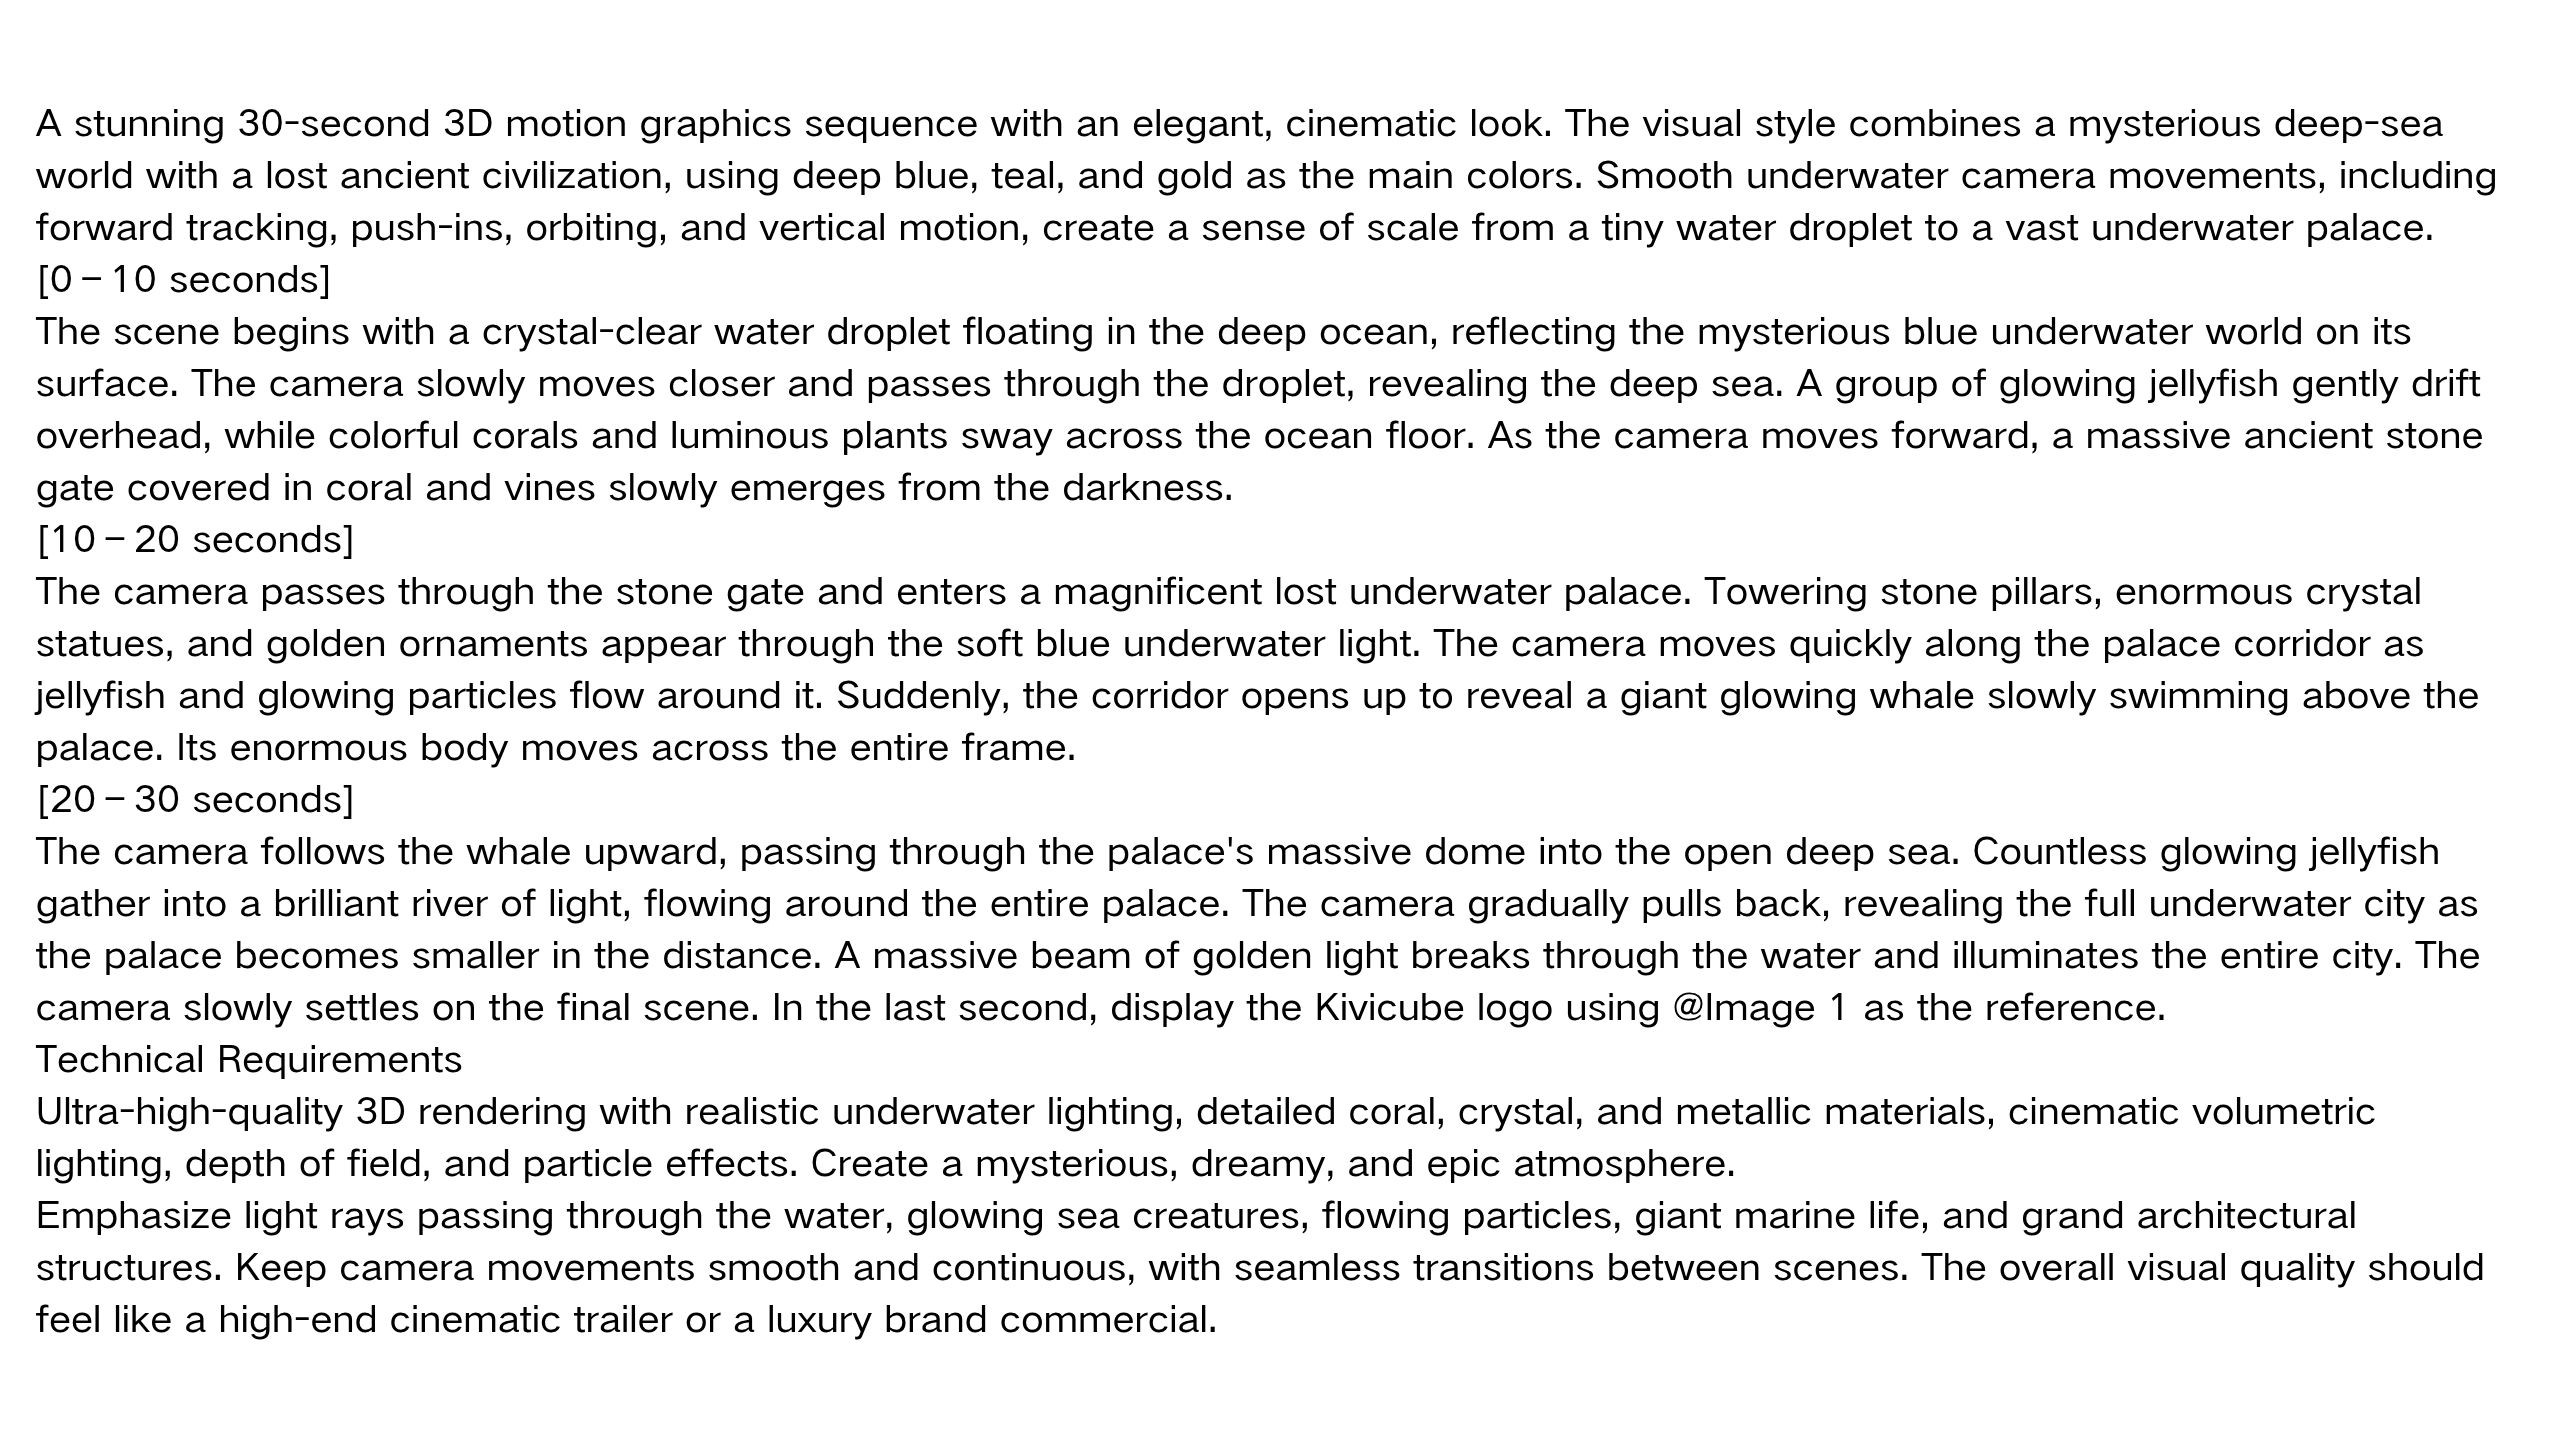
SD 2.5 extends the maximum video duration from 15 seconds in the SD 2.0 series to 30 seconds. You can now generate a continuous video of up to 30 seconds in a single generation, without having to combine multiple clips to tell a complete story.
| Input Image | Generated Video |
|---|---|
 |
Prompt:
| Input Image | Generated Video |
|---|---|
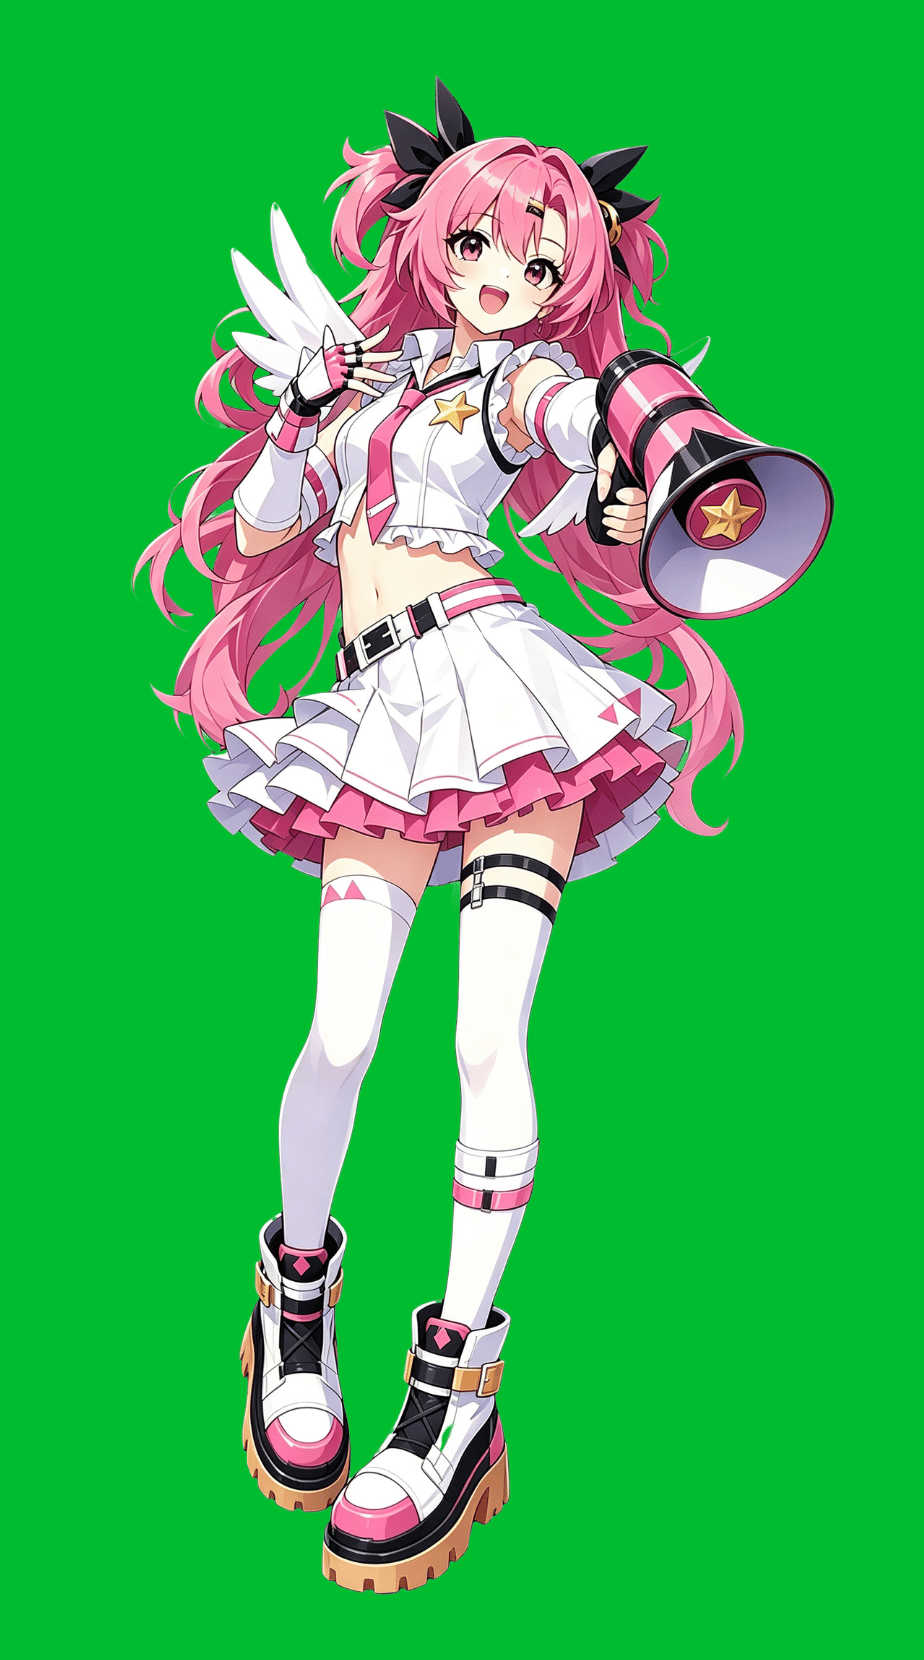 |
Prompt:
Add subtle movements to the character, similar to a Live2D animation. Keep the camera still and make sure the entire character stays in the frame without being cropped.
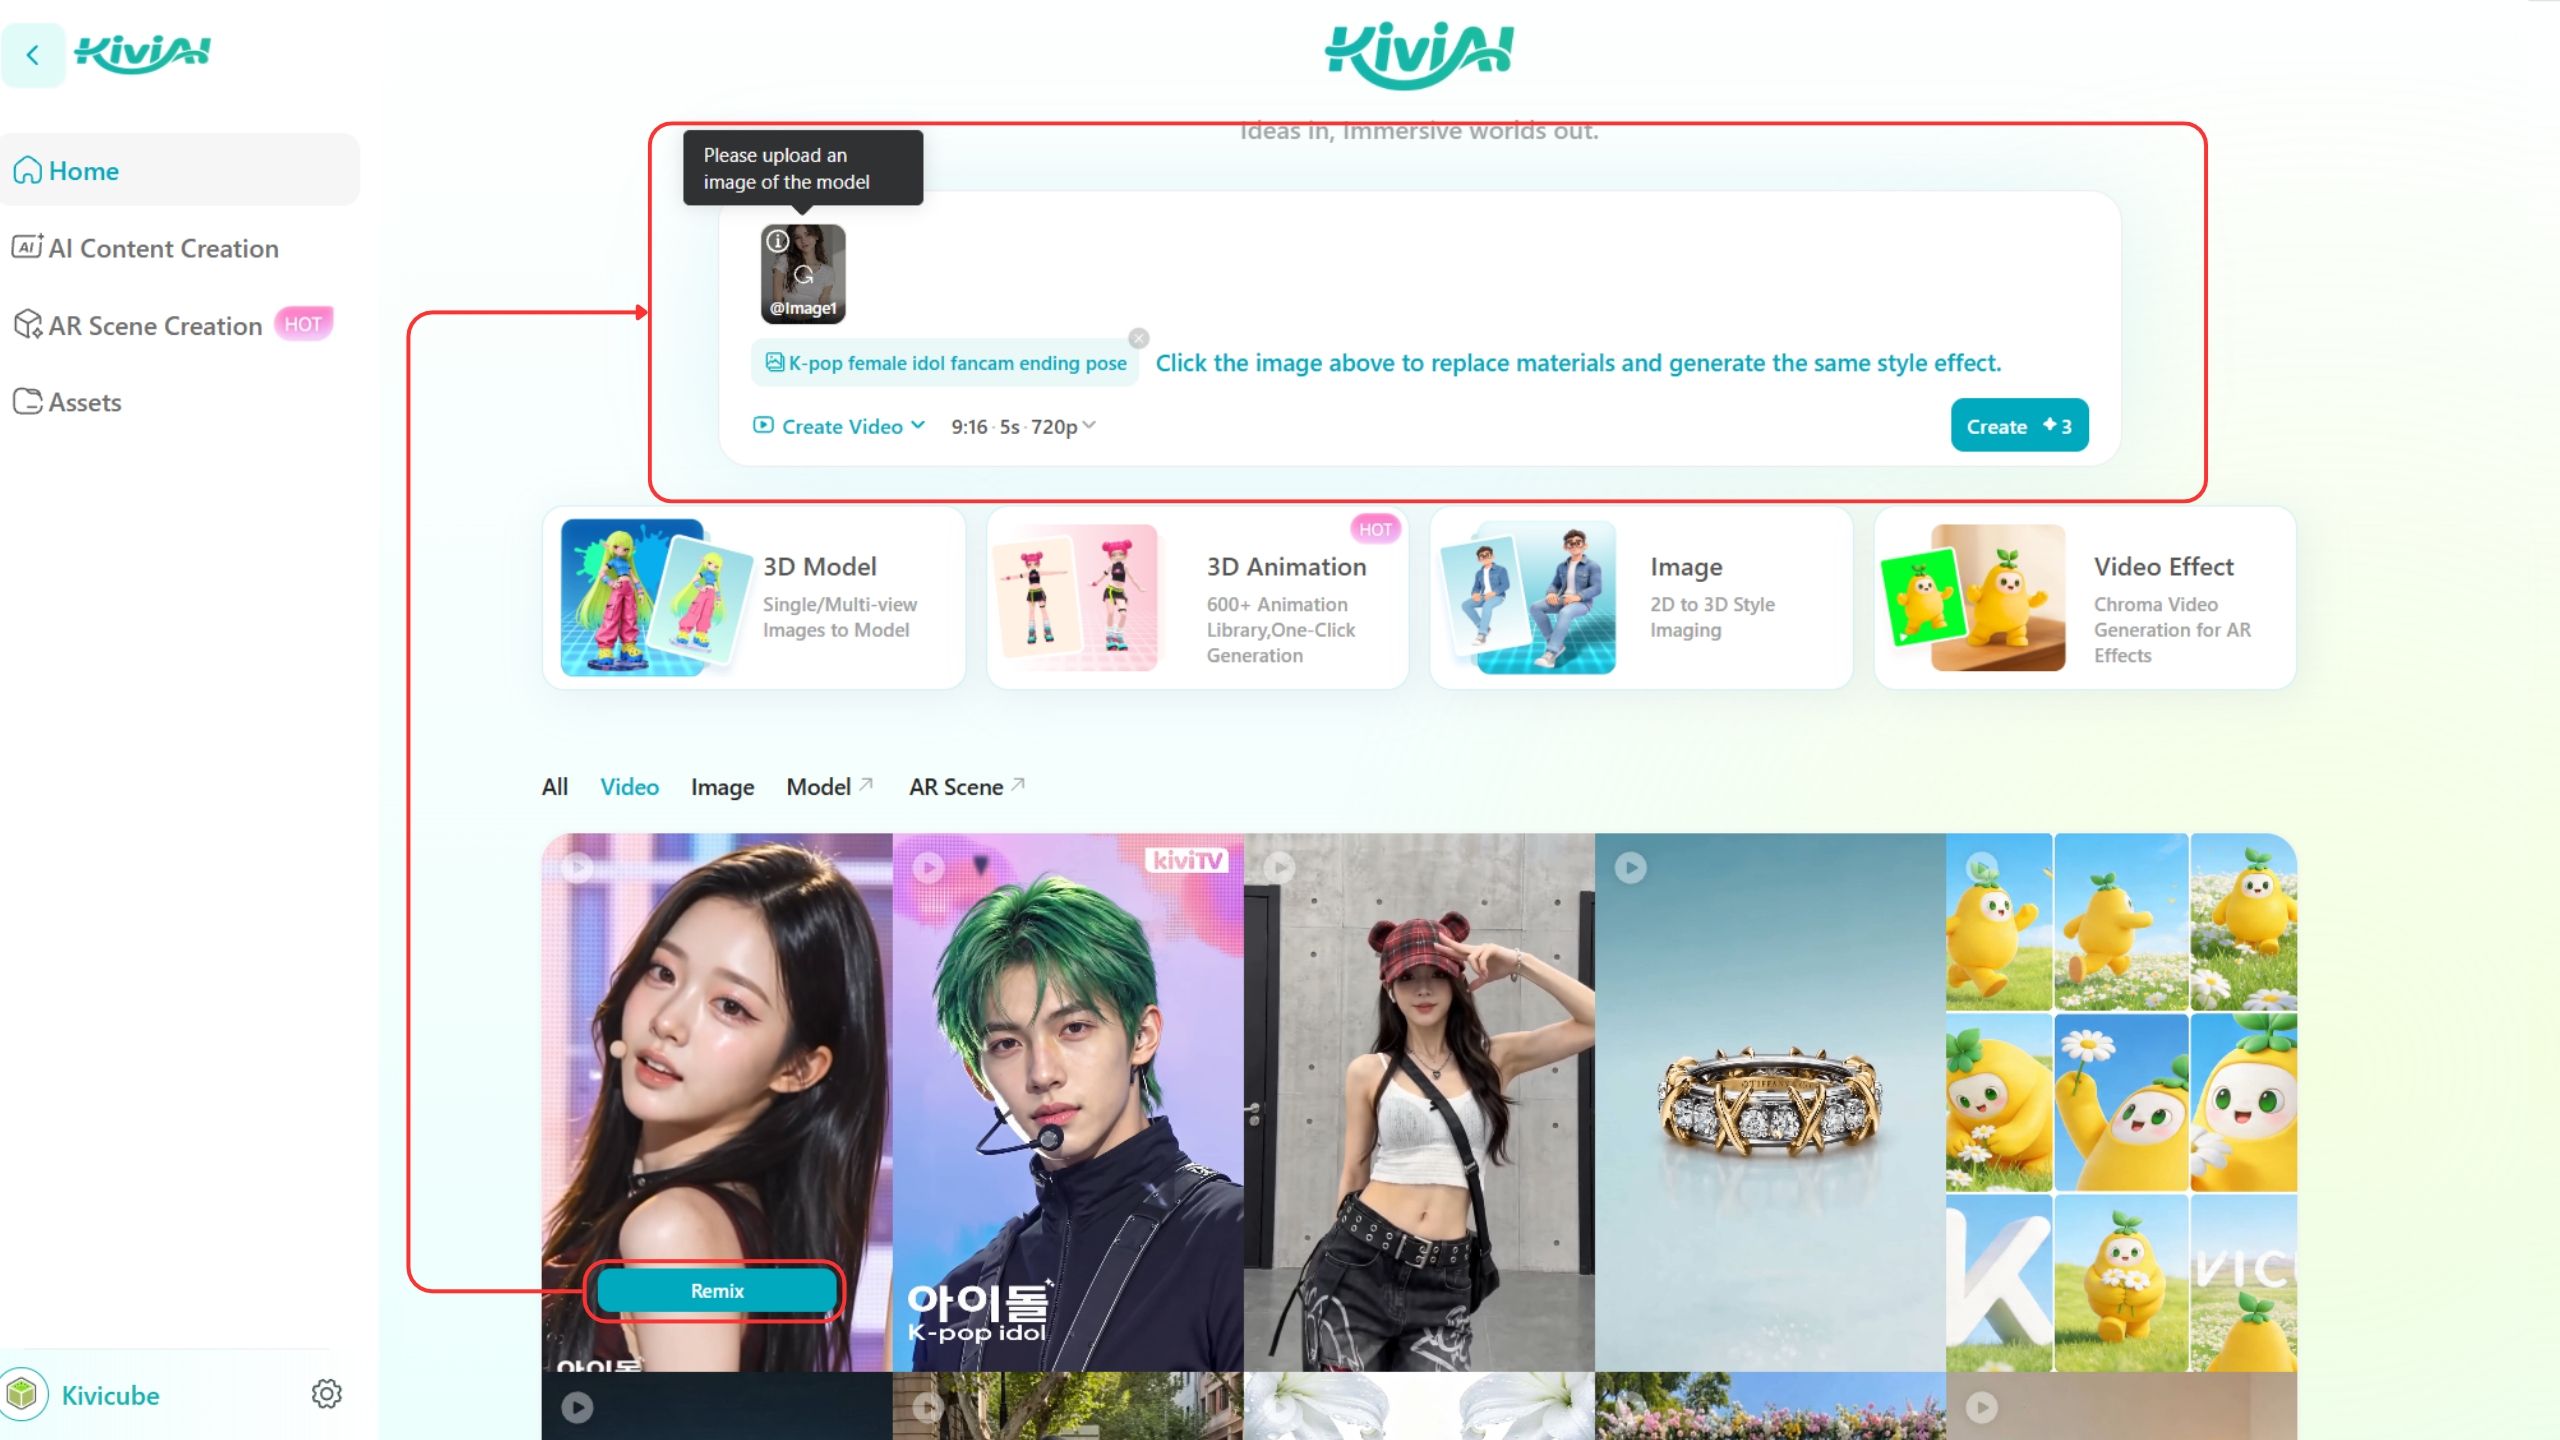
In addition to creating videos from scratch, Kivicube offers a wide range of ready-to-use video templates. Open the Video Template Library, choose a template, and replace the reference image. No prompts are needed. You can quickly generate high-quality videos for marketing, product showcases, idol performances, and more. It's an easy way to explore different creative possibilities.
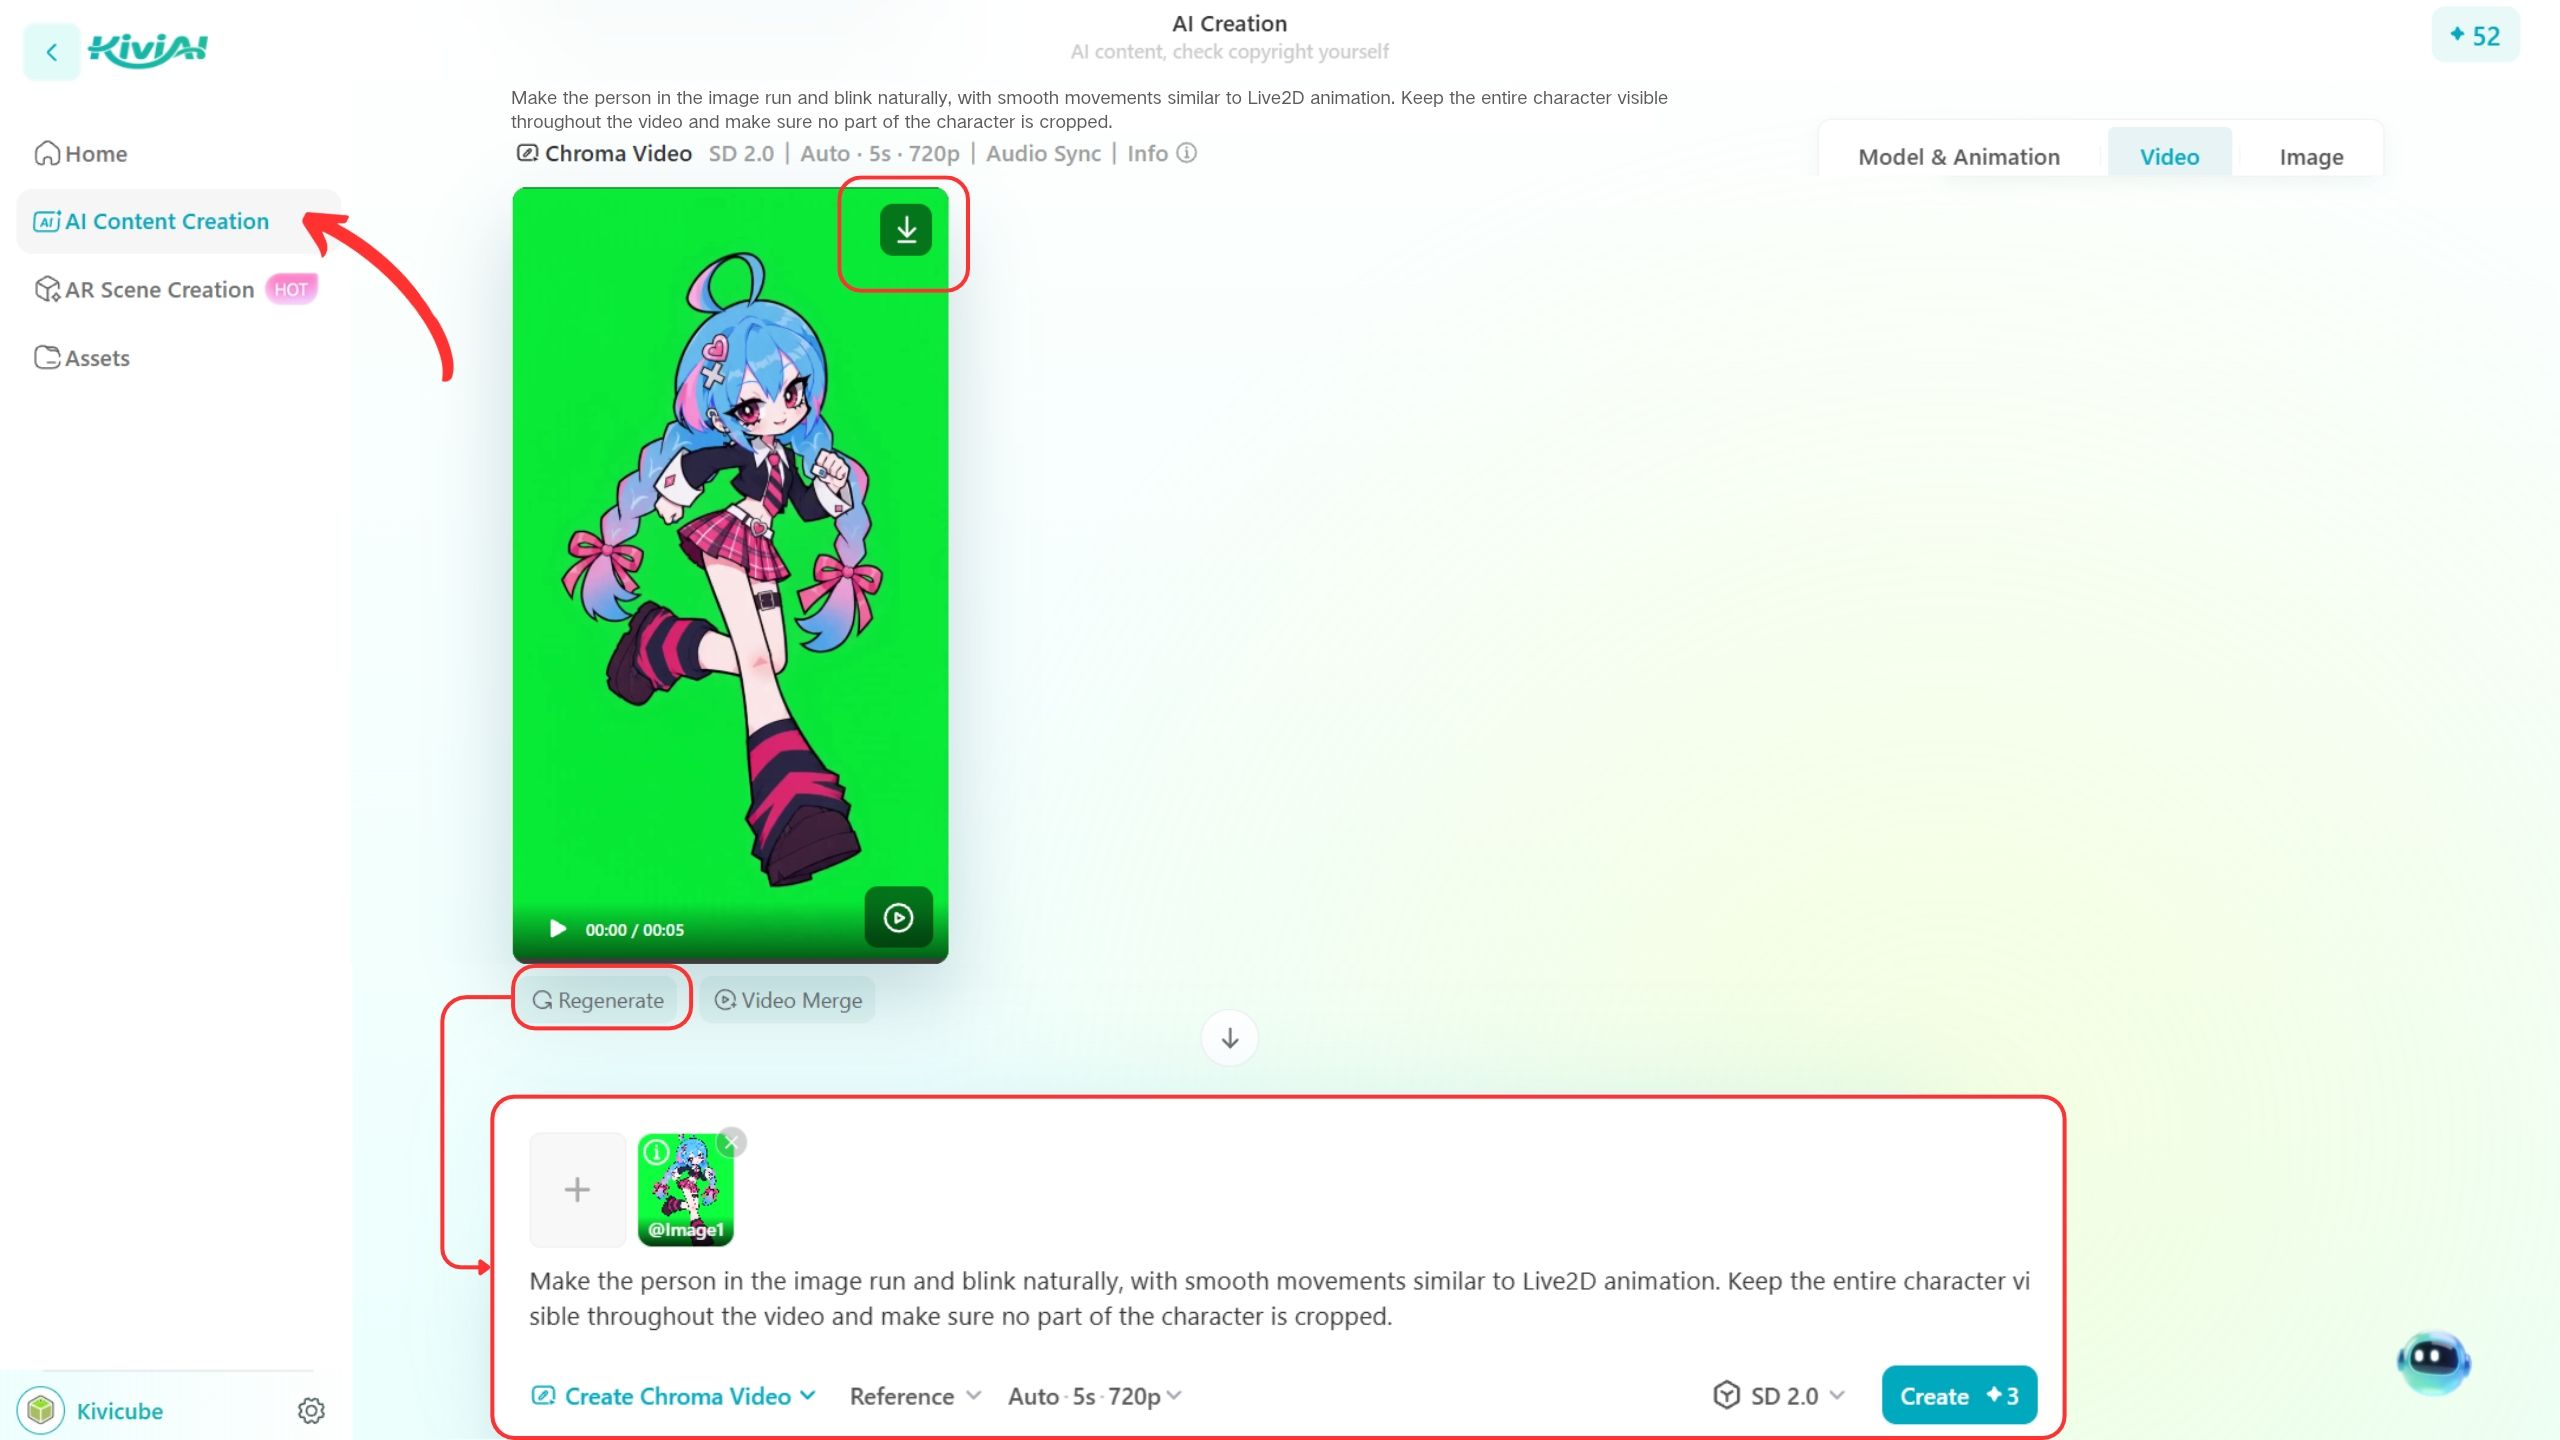
All generated videos are automatically saved to your generation's history. You can view or download them at any time, or generate a new video using the same reference image and prompt.
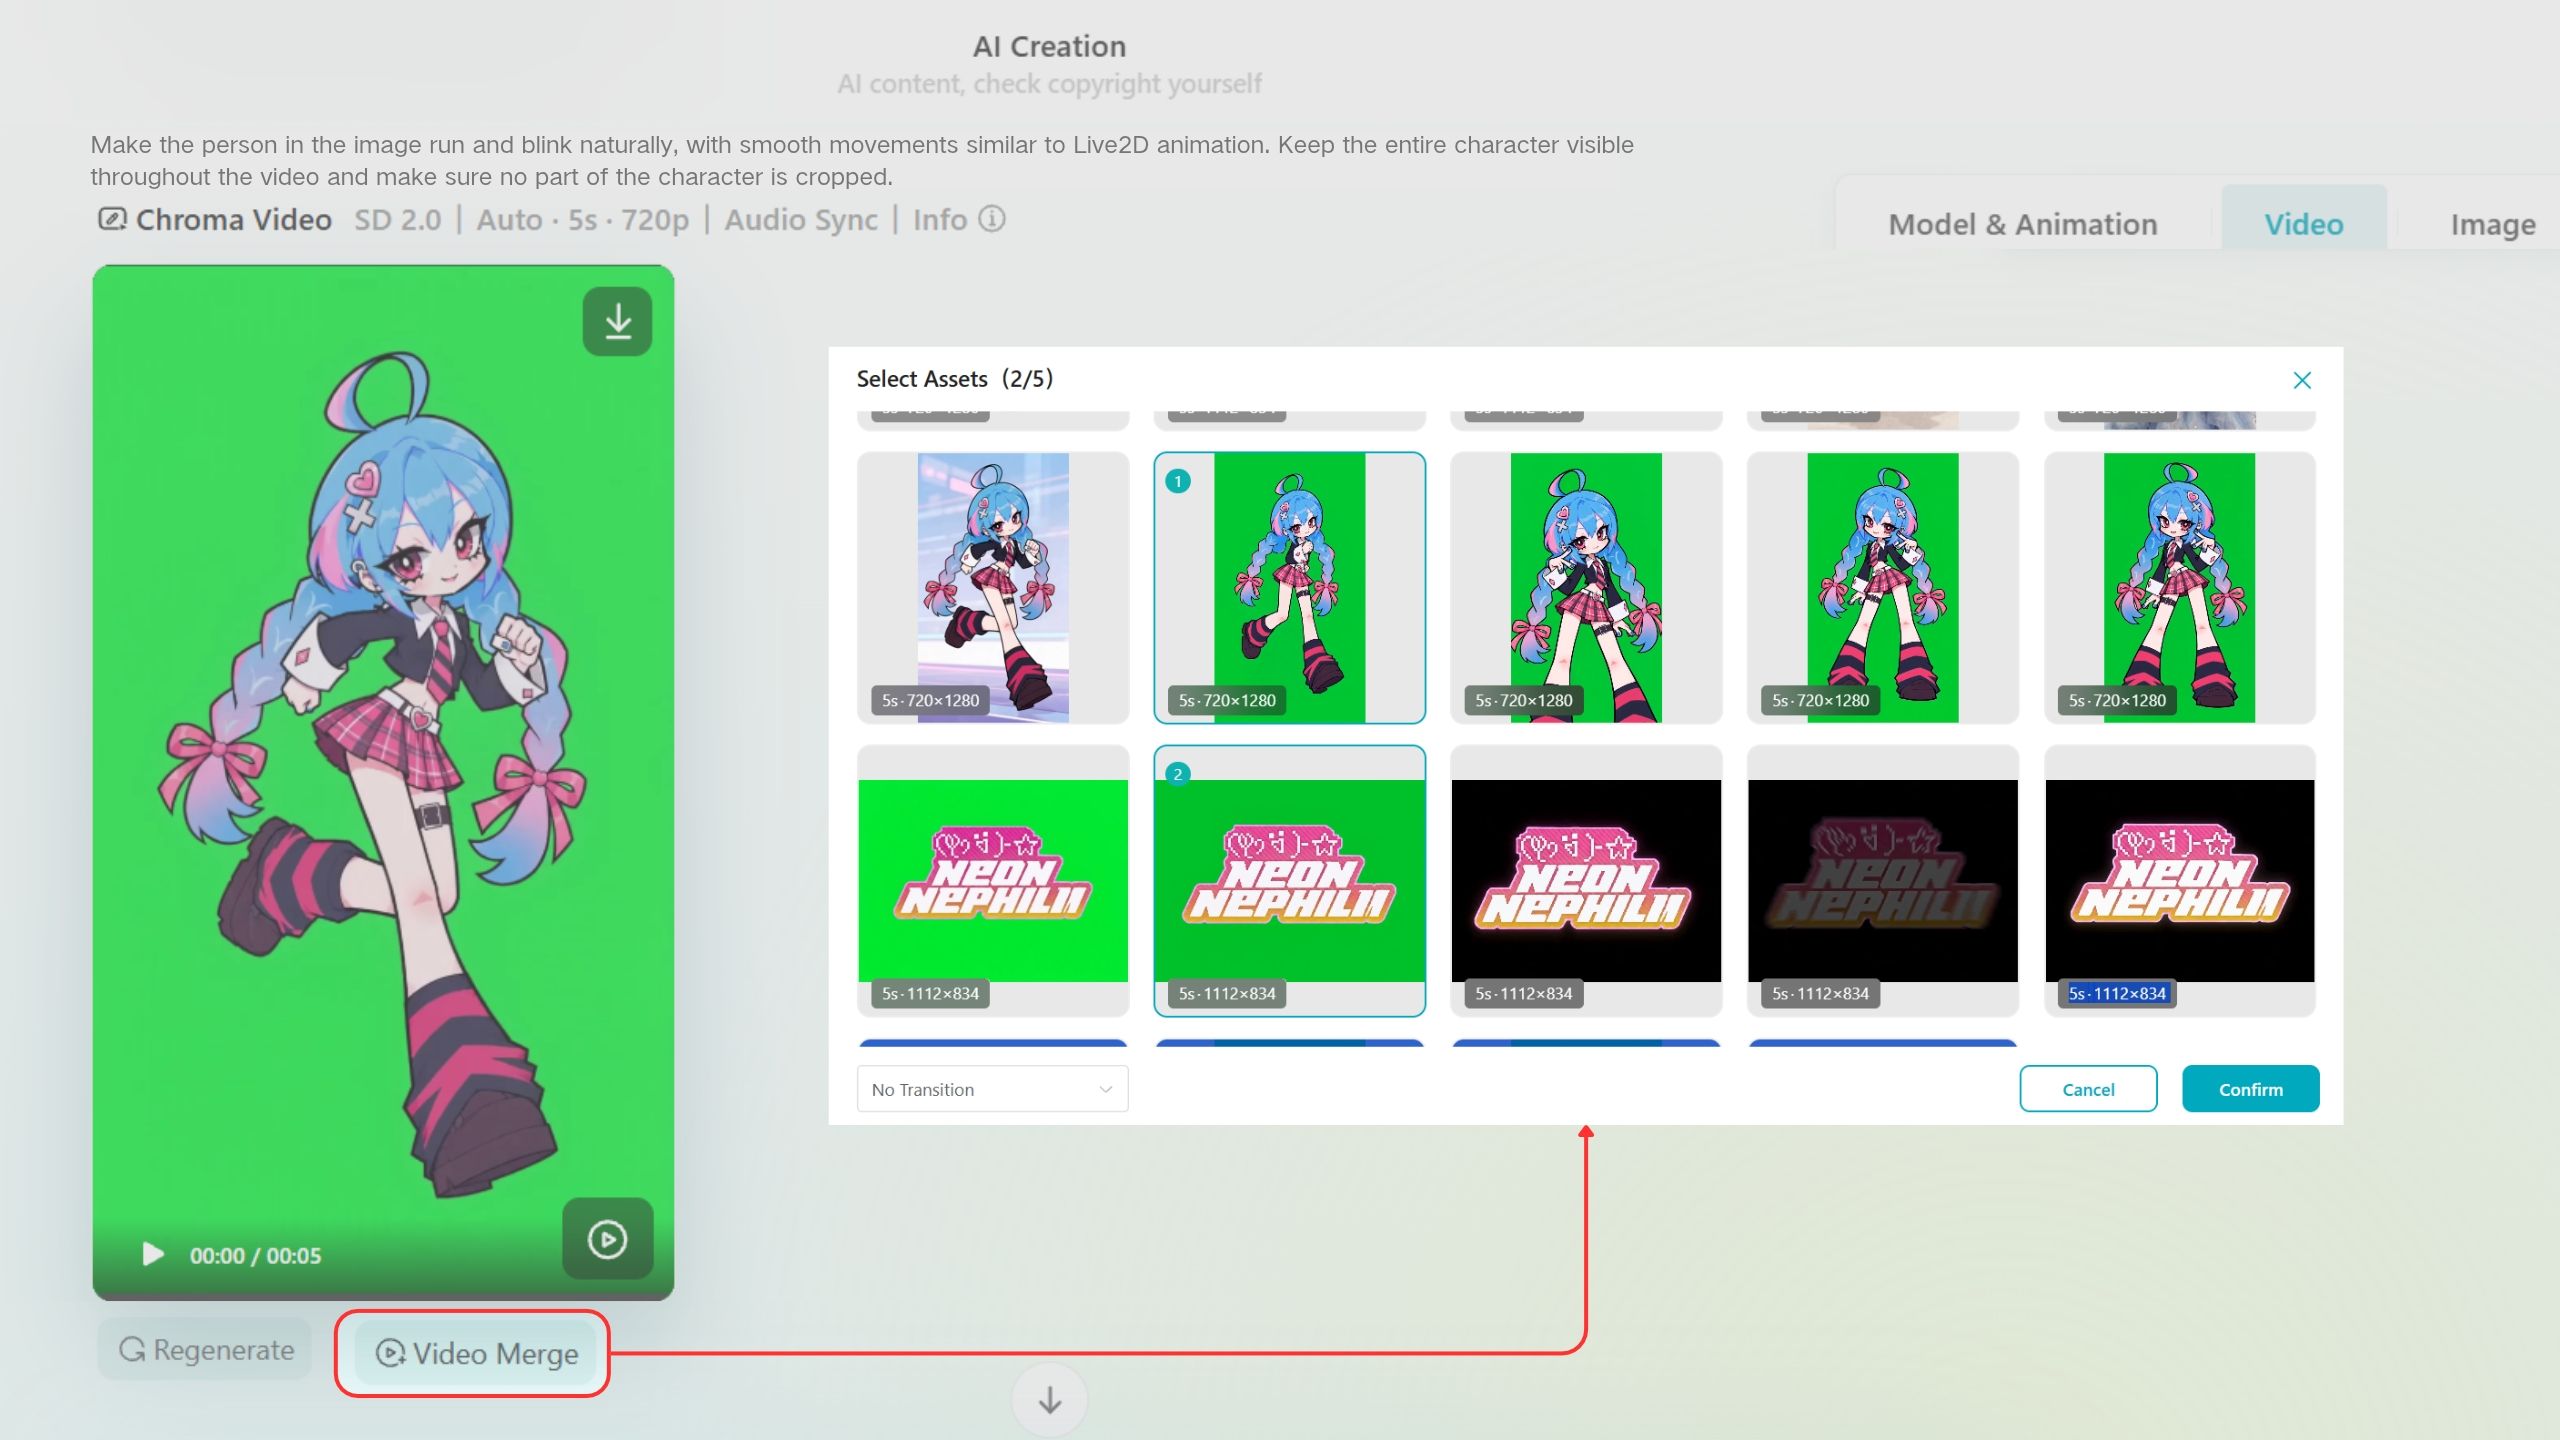
You can also select up to 5 generated videos and combine them into a single video. Add transition effects as needed to create smooth transitions between clips.
Generated videos are automatically saved under AR Video or Chroma Video in the Scene Editor, depending on the video type selected during generation.
Open the Scene Editor and select the corresponding video category. Then drag the generated video onto the 3D canvas to add it to your AR scene.
Note
If you generate a Chroma Video, click Edit and remove the background before dragging it onto the 3D canvas. This will give your video a transparent background.
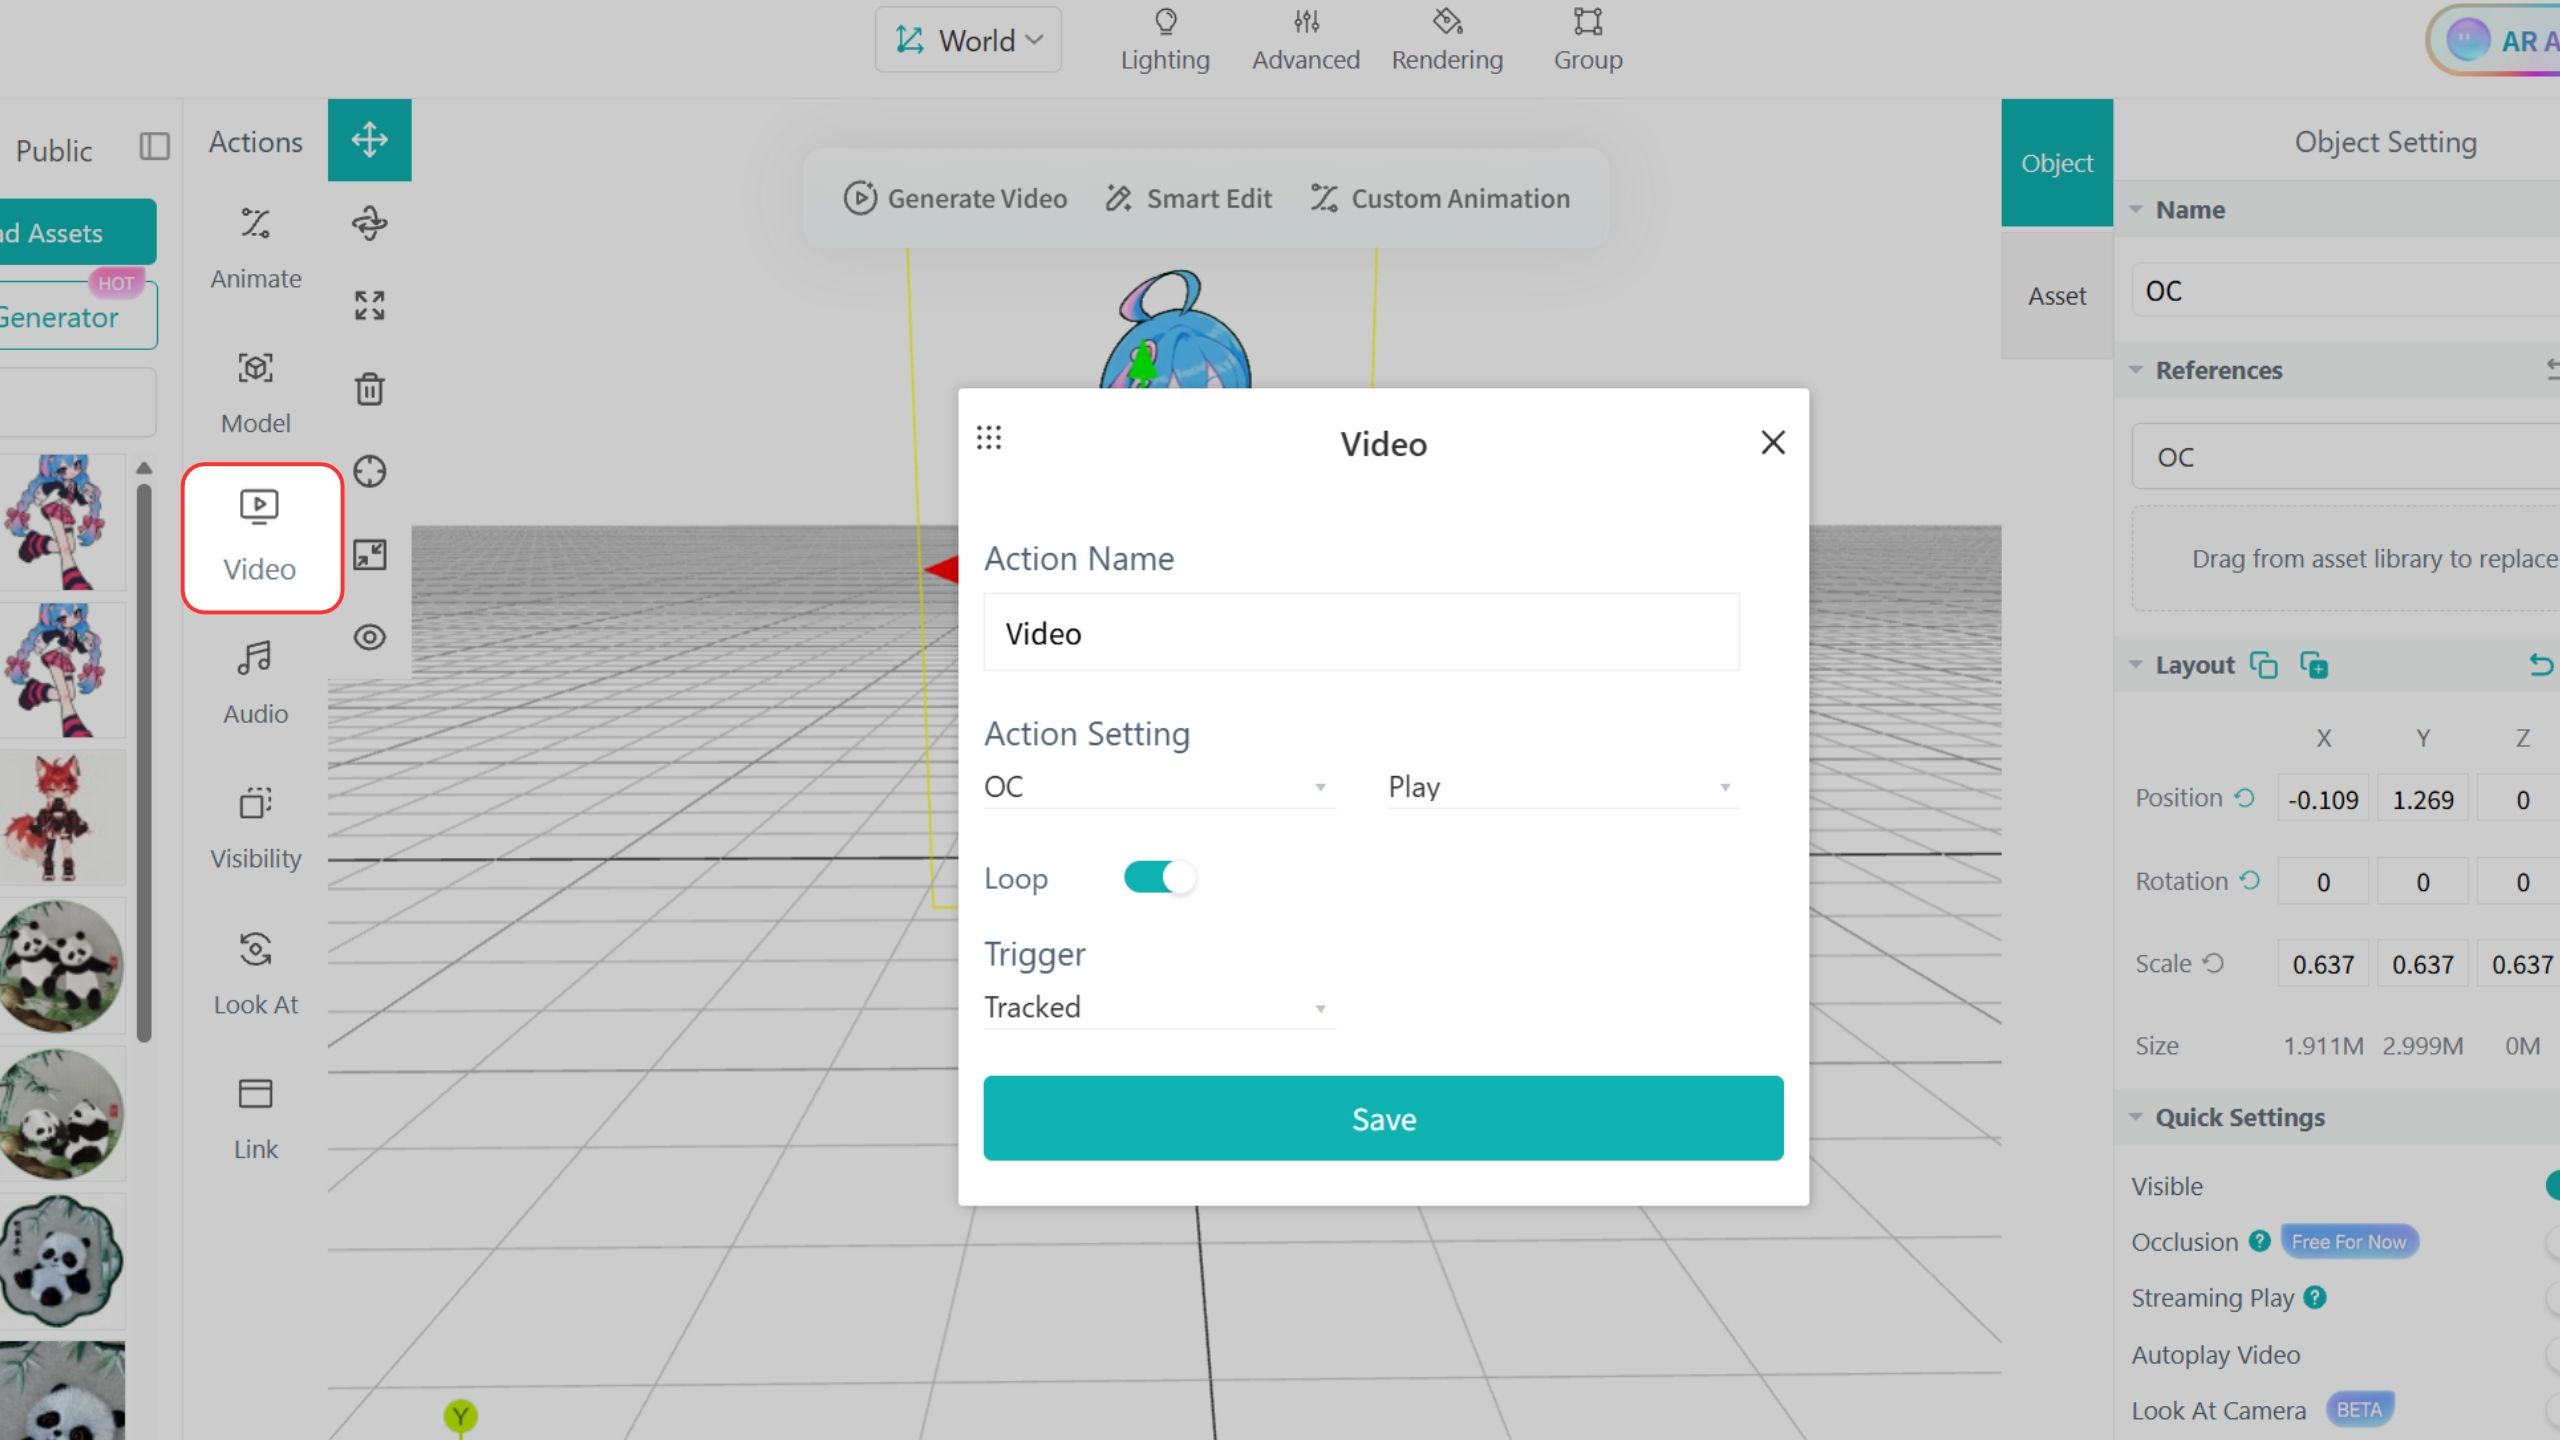
Videos do not play automatically during AR experiences by default. Go to Video Controls to set the playback behavior and trigger conditions for your video.
By combining AI-generated videos with simple scene editing, you can easily create an AR badge with eye-catching 3D depth and dynamic animations!
When creating a video from scratch, we recommend adding a prompt to describe the actions, scenes, camera movements, or visual effects you want. If you're not sure what to write, you can check the prompt examples or use a video template to get started.
The results may vary depending on the reference image, prompt, and selected video model. Try describing the subject's actions, movements, and visual effects more clearly. Avoid vague or conflicting instructions. You can also try a different reference image or adjust your prompt and generate the video again.
AR Video is designed for displaying videos with their original backgrounds. Chroma Video lets you remove a solid-color background, so the video subject can appear with a transparent background in your AR scene. It's ideal for adding people, characters, and visual effects to AR content.
The two modes differ mainly in video quality and resource usage. High Performance focuses on higher-quality results and is ideal for projects that require better visual quality. Cost-Effective uses fewer resources and is a good choice for everyday creation and testing.
Generation time depends on factors such as the selected model, generation mode, and current system load. Check the generation progress for the latest status.
Yes. Find the video in your generation's history and use the same reference image and prompt to generate it again. You can also change the prompt or upload a different reference image to explore other results.
Yes. All generated videos are automatically saved to your generation's history. You can view or download them at any time, or select existing videos to combine them into a single video.
Videos do not play automatically in AR scenes by default. Go to Video Controls to set the playback behavior and trigger conditions.
Chroma Videos need background removal before they can have a transparent background. Before dragging the video onto the 3D canvas, click the ... menu on its thumbnail, select Edit, and remove the background. Then add the processed video to your scene.