English
Appearance
Whether you have 3D modeling experience or not, you can easily get 3D models in Kivicube and import them into the Content Editor.
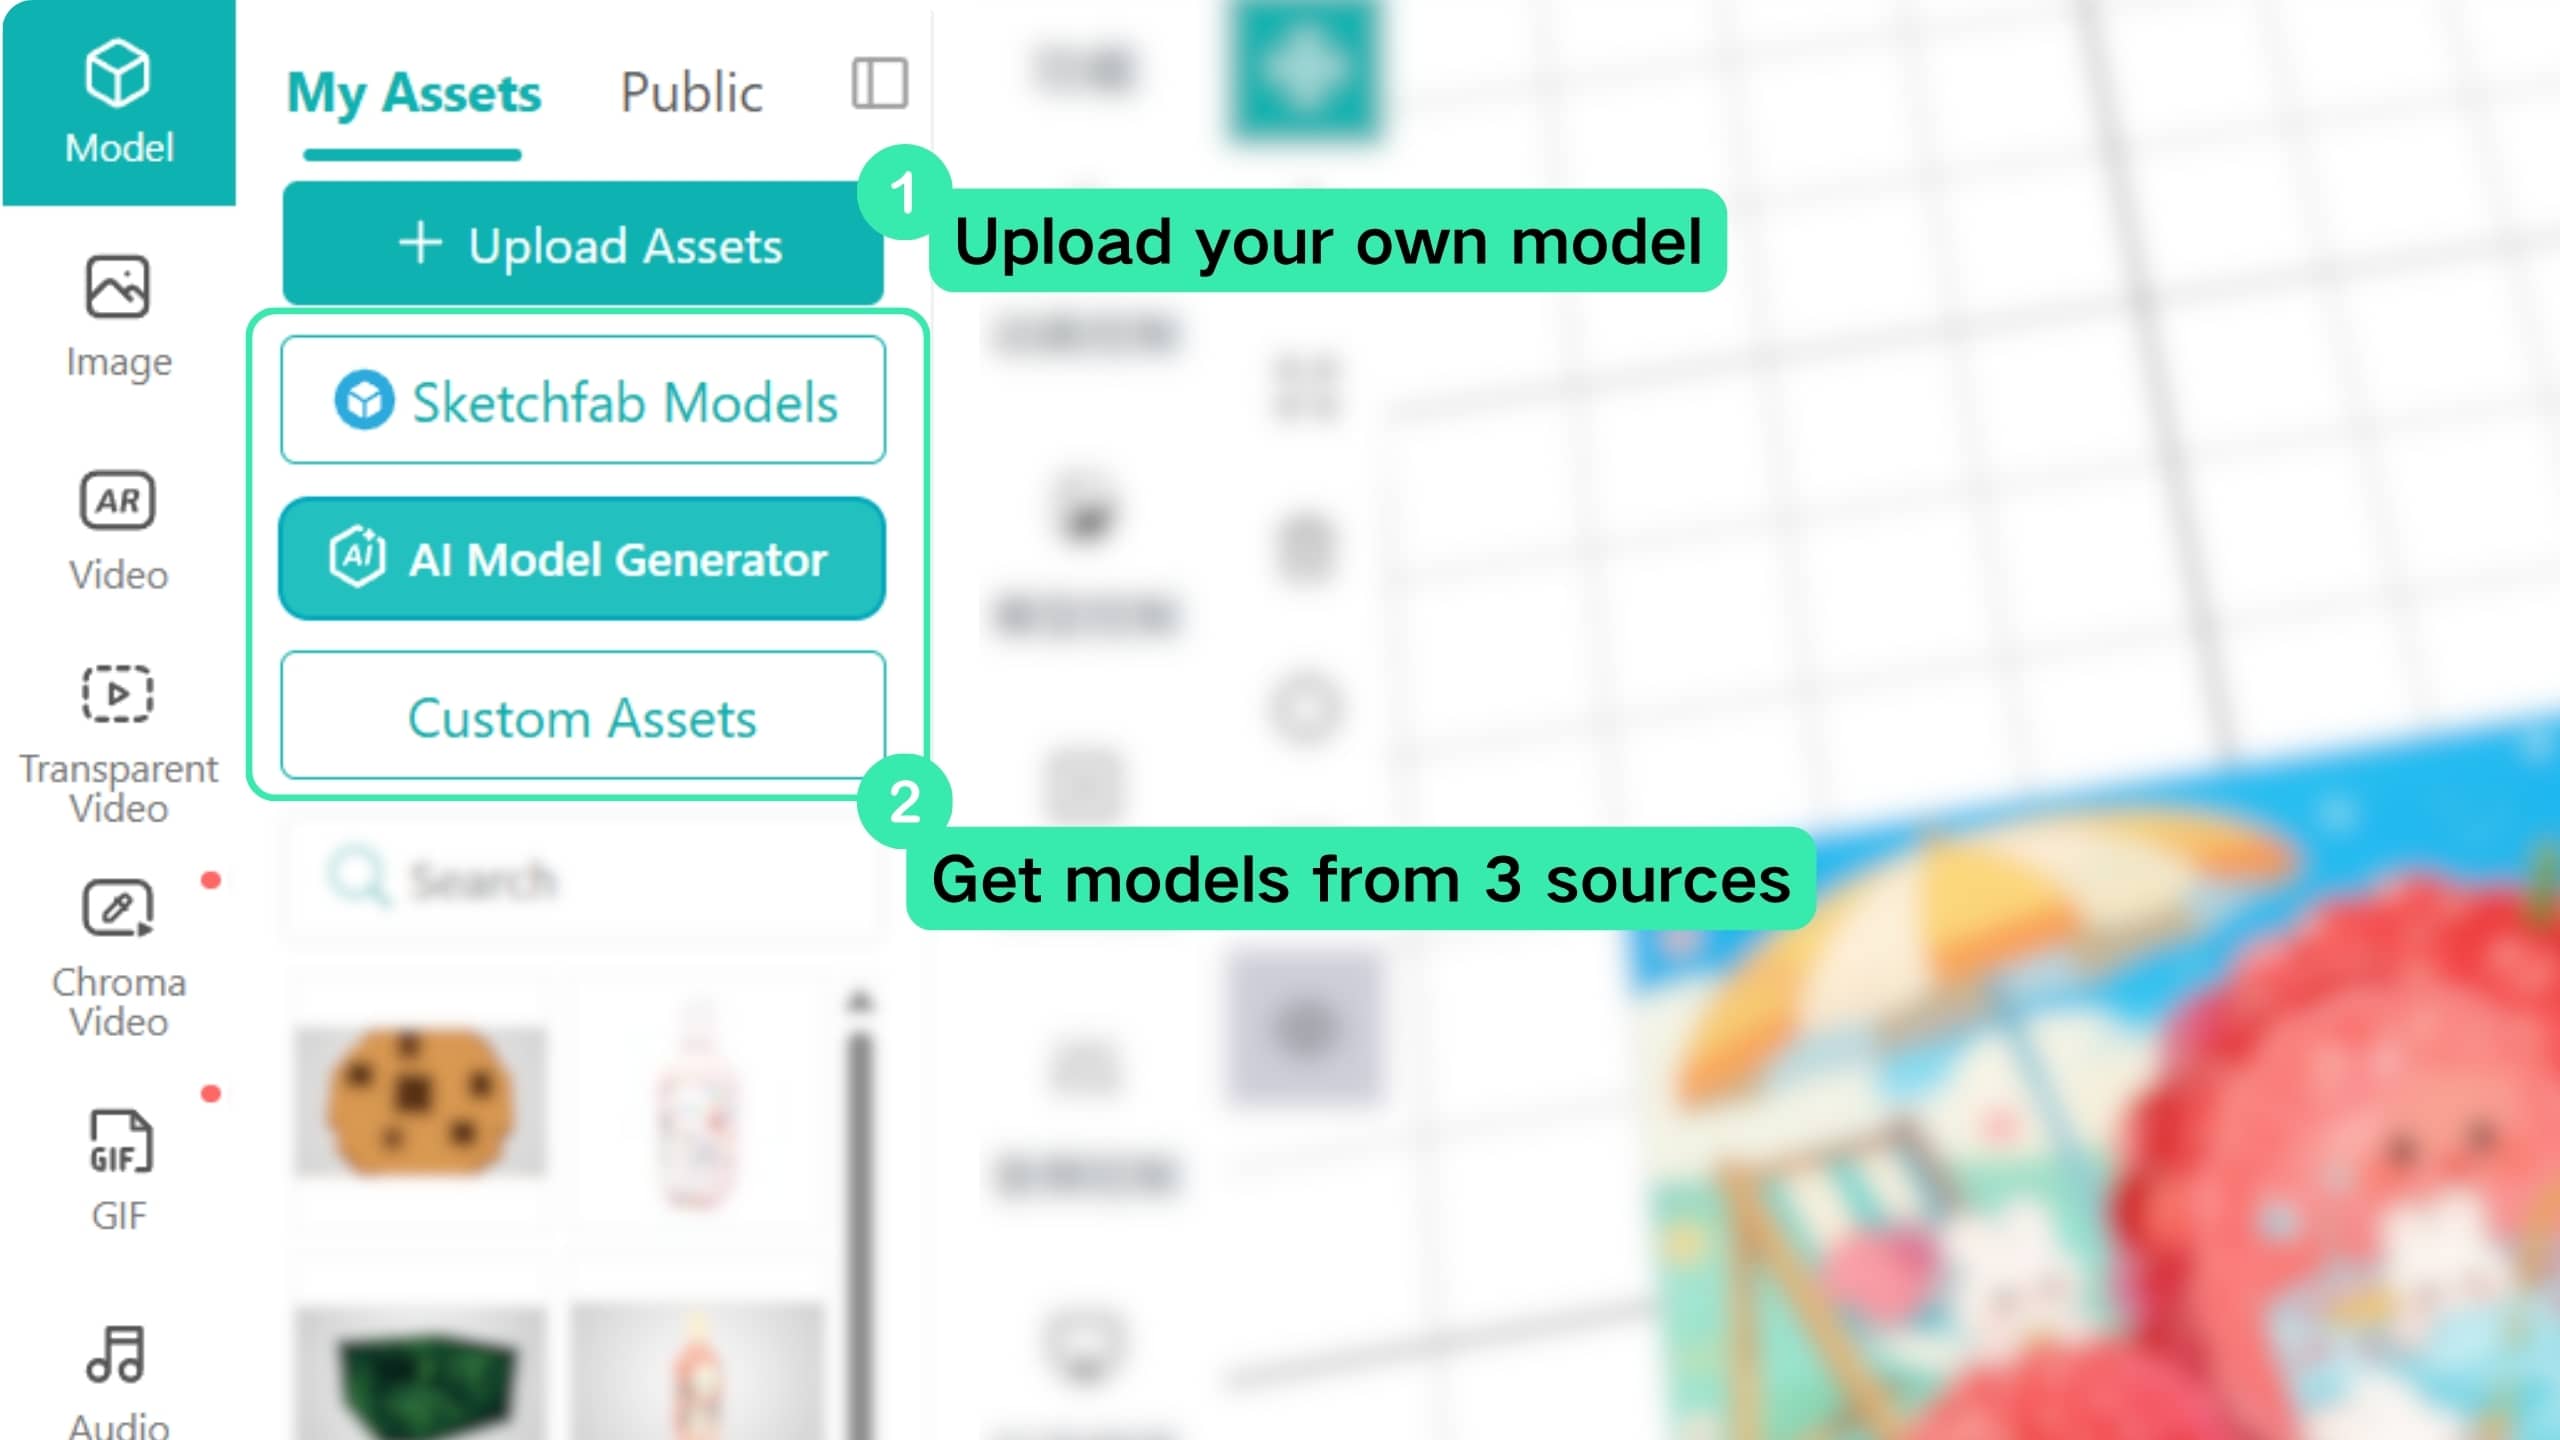
When you upload a 3D model directly to the Content Editor, the system automatically processes and optimizes the model based on its source and format. This helps reduce common issues with textures and materials, making the model easier to use in AR scenes.
Models must follow the Kivicube 3D model requirements.
When importing models into Kivicube, we recommend using the GLB format. Click here to learn how to export GLB models from common 3D modeling software.
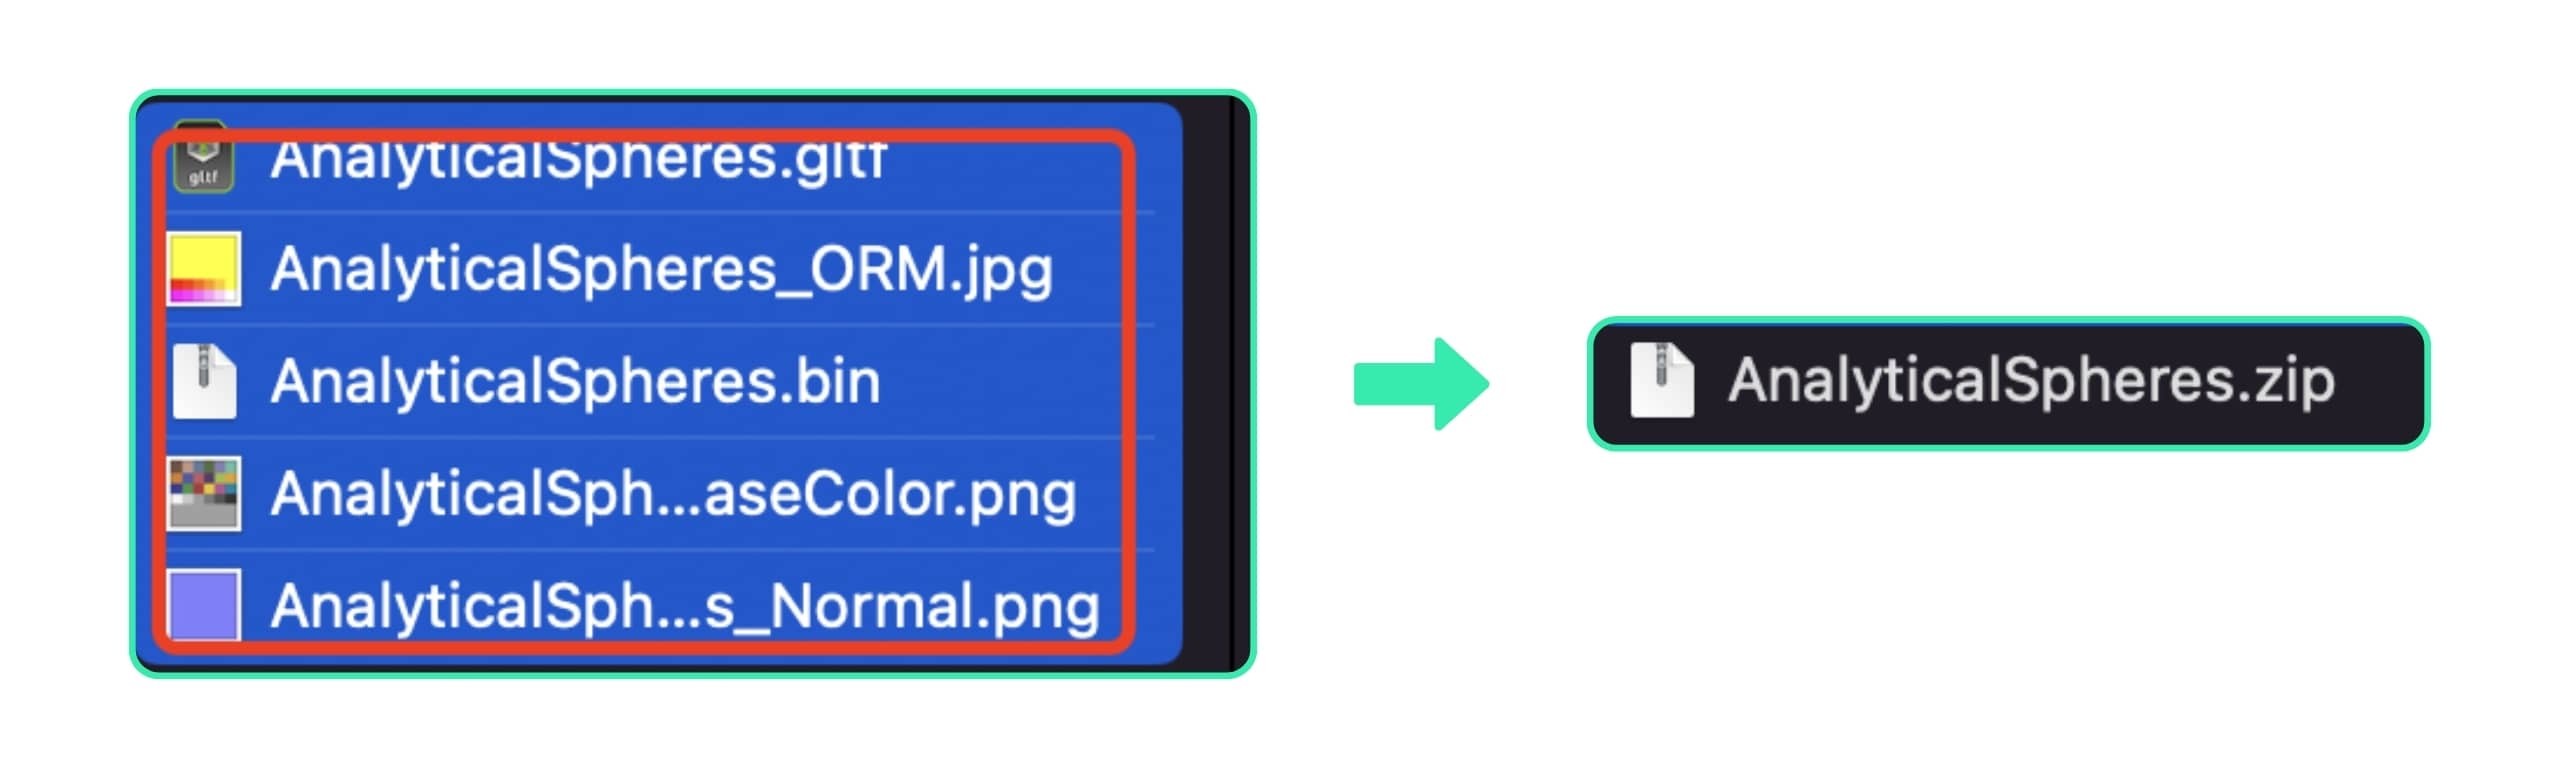
If you cannot get a GLB model, Content Editor also supports importing FBX, OBJ, and GLTF formats. For GLTF files, please compress the .gltf, .bin, and related texture files into a .zip file before uploading.
Since FBX, OBJ, and GLTF formats are more likely to have compatibility issues with textures and materials, we recommend using the GLB format for a more stable import experience.
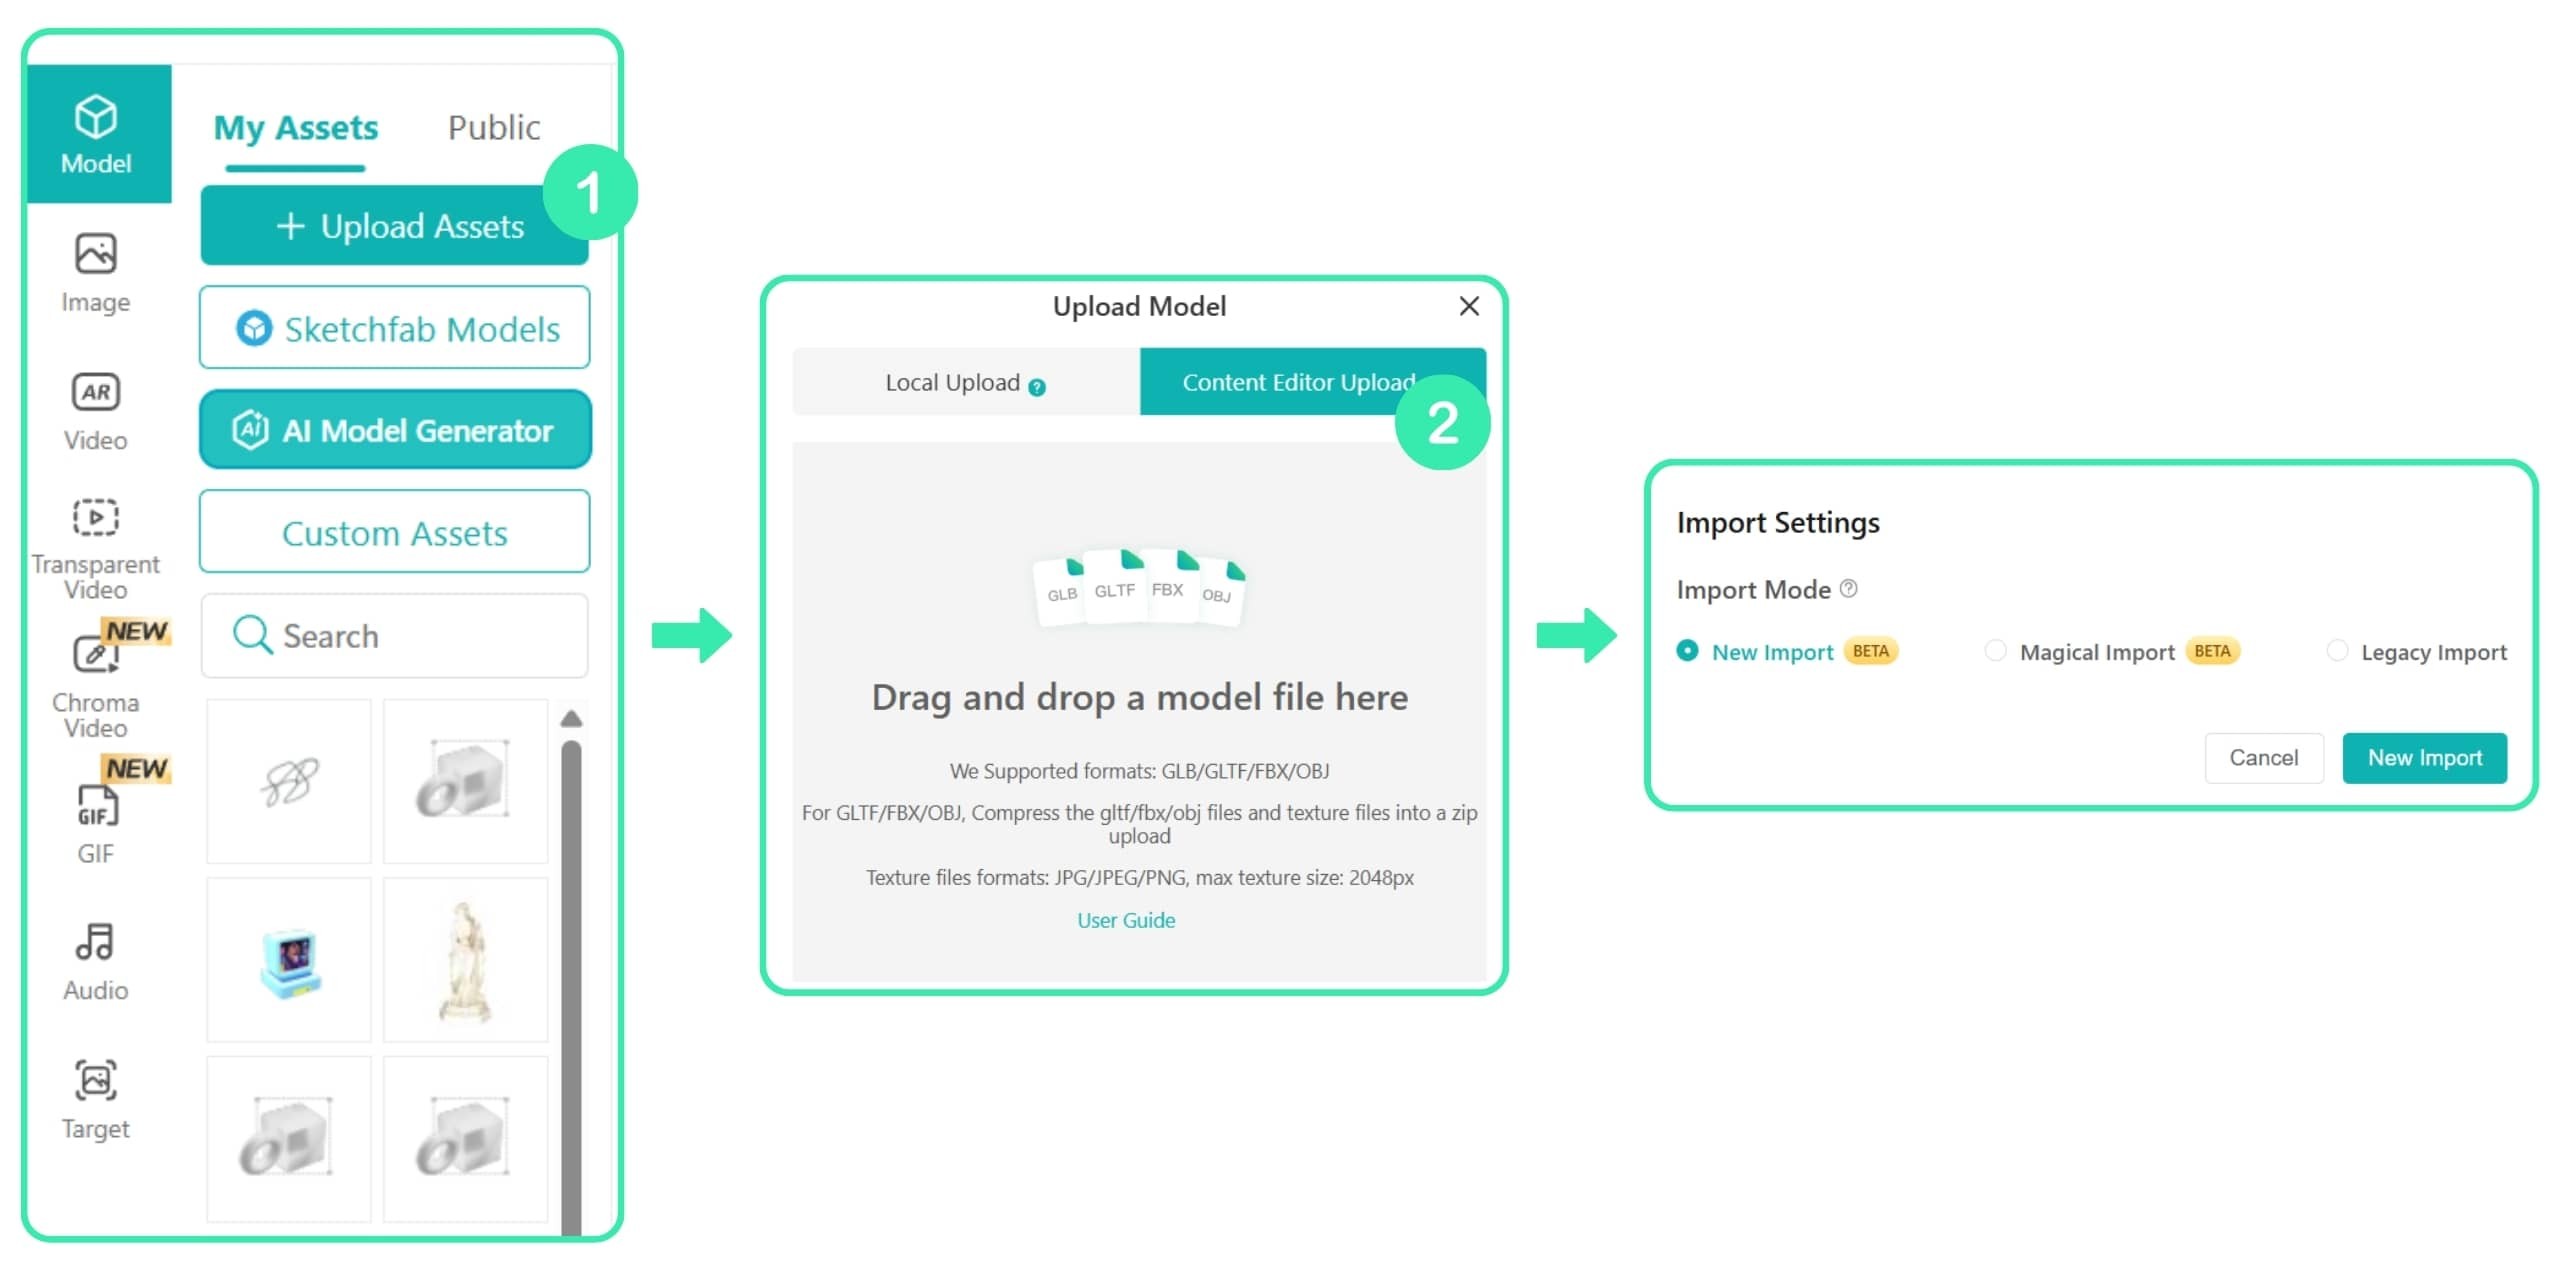
In the Scene Editor, select Model from the Asset Panel on the left, click Upload Asset, and choose Content Editor Upload.
After the model is uploaded, the system provides 3 import modes. For the first attempt, we recommend using the New Import. Once the model is imported successfully, check the model's appearance in the Content Editor.
If the model does not import correctly, repeat the steps above and try another import mode.
If none of the 3 import modes work, please send the model file to our support team at wendell.yang@kivisense.com with a detailed description of the issue. Screenshots or error messages are recommended to help us troubleshoot faster. Our technical team will assist you with the investigation.
This is a common issue. Textures may be lost during the model conversion process. To fix it, click Material on the right panel, select the material with the issue, and add the texture again.
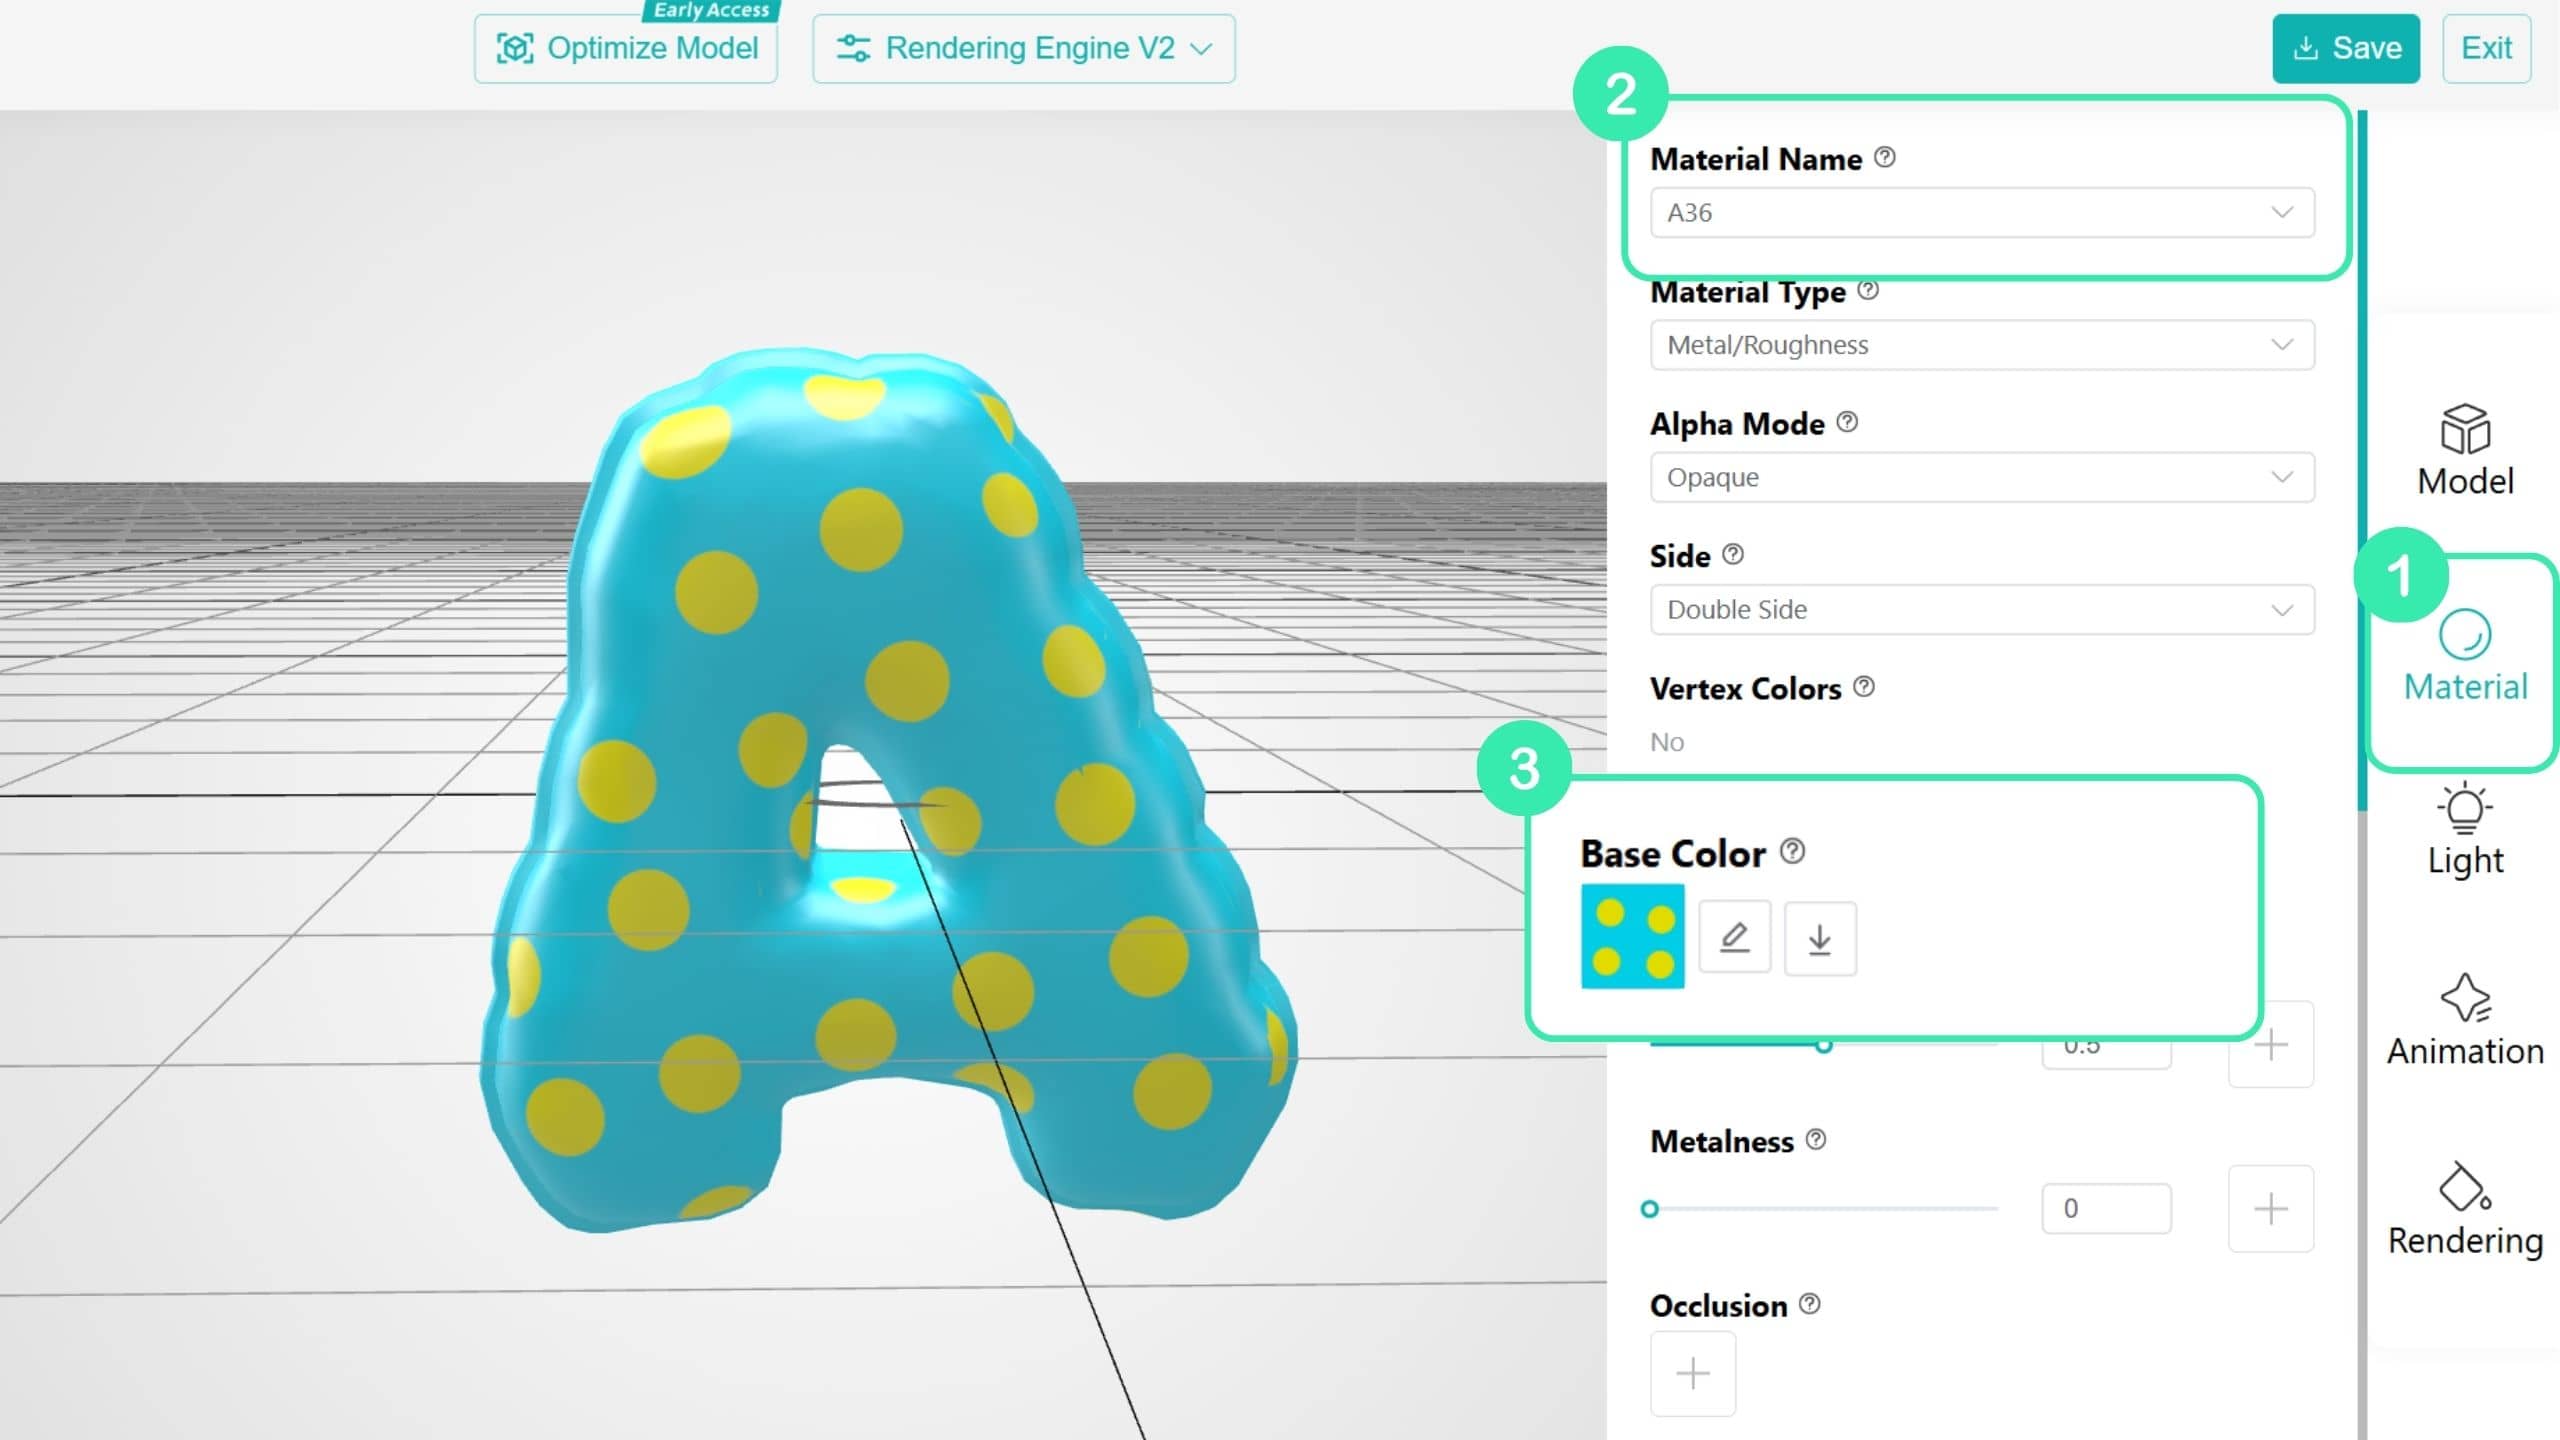
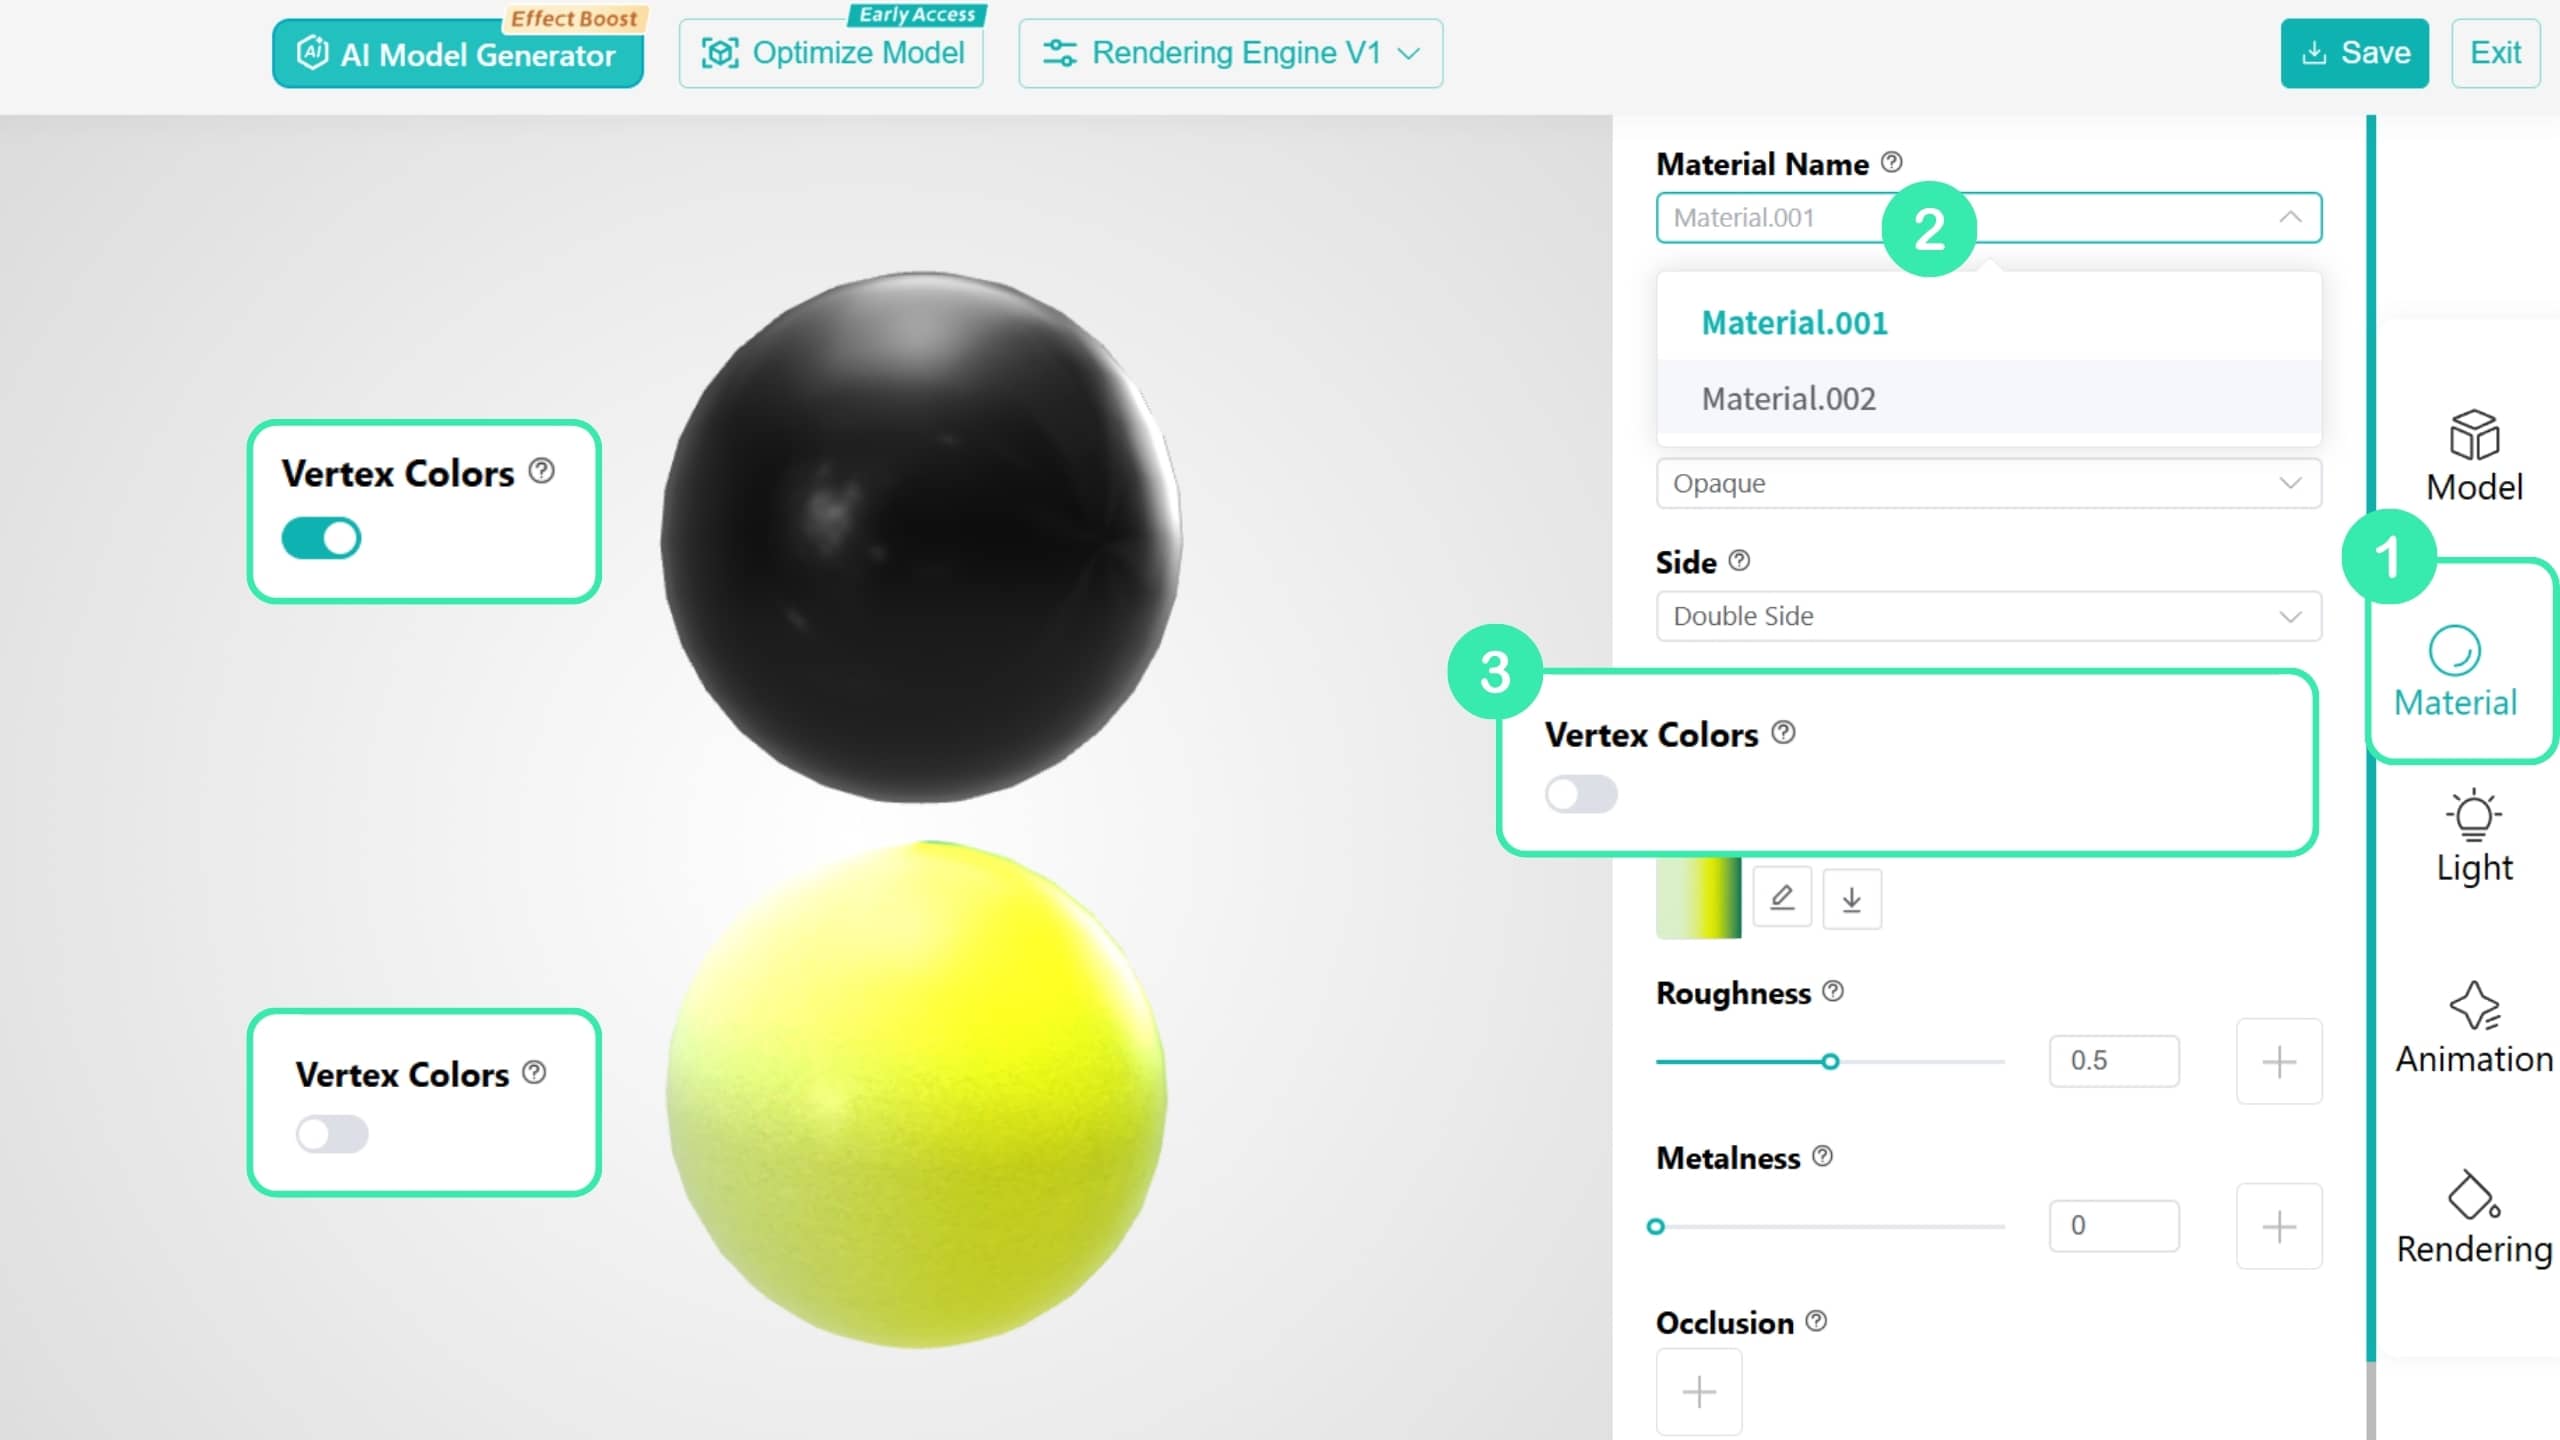
Imported models may contain both vertex colors and textures. Vertex colors can be understood as an additional layer of color information on the model, which works together with textures to affect the final appearance.
If vertex colors contain color information, they may affect the texture display and cause issues such as darker colors, color shifts, or incorrect rendering. To fix this issue, click Material in the right panel of the Content Editor, select the affected material, and disable Vertex Color.
TIP
● If the model uses vertex colors for gradients, shadows, or special effects, do not disable this option.
● For models created with Nomad, we recommend using New Import or Magic Import first, then adjusting the vertex color settings for each material based on the actual result.
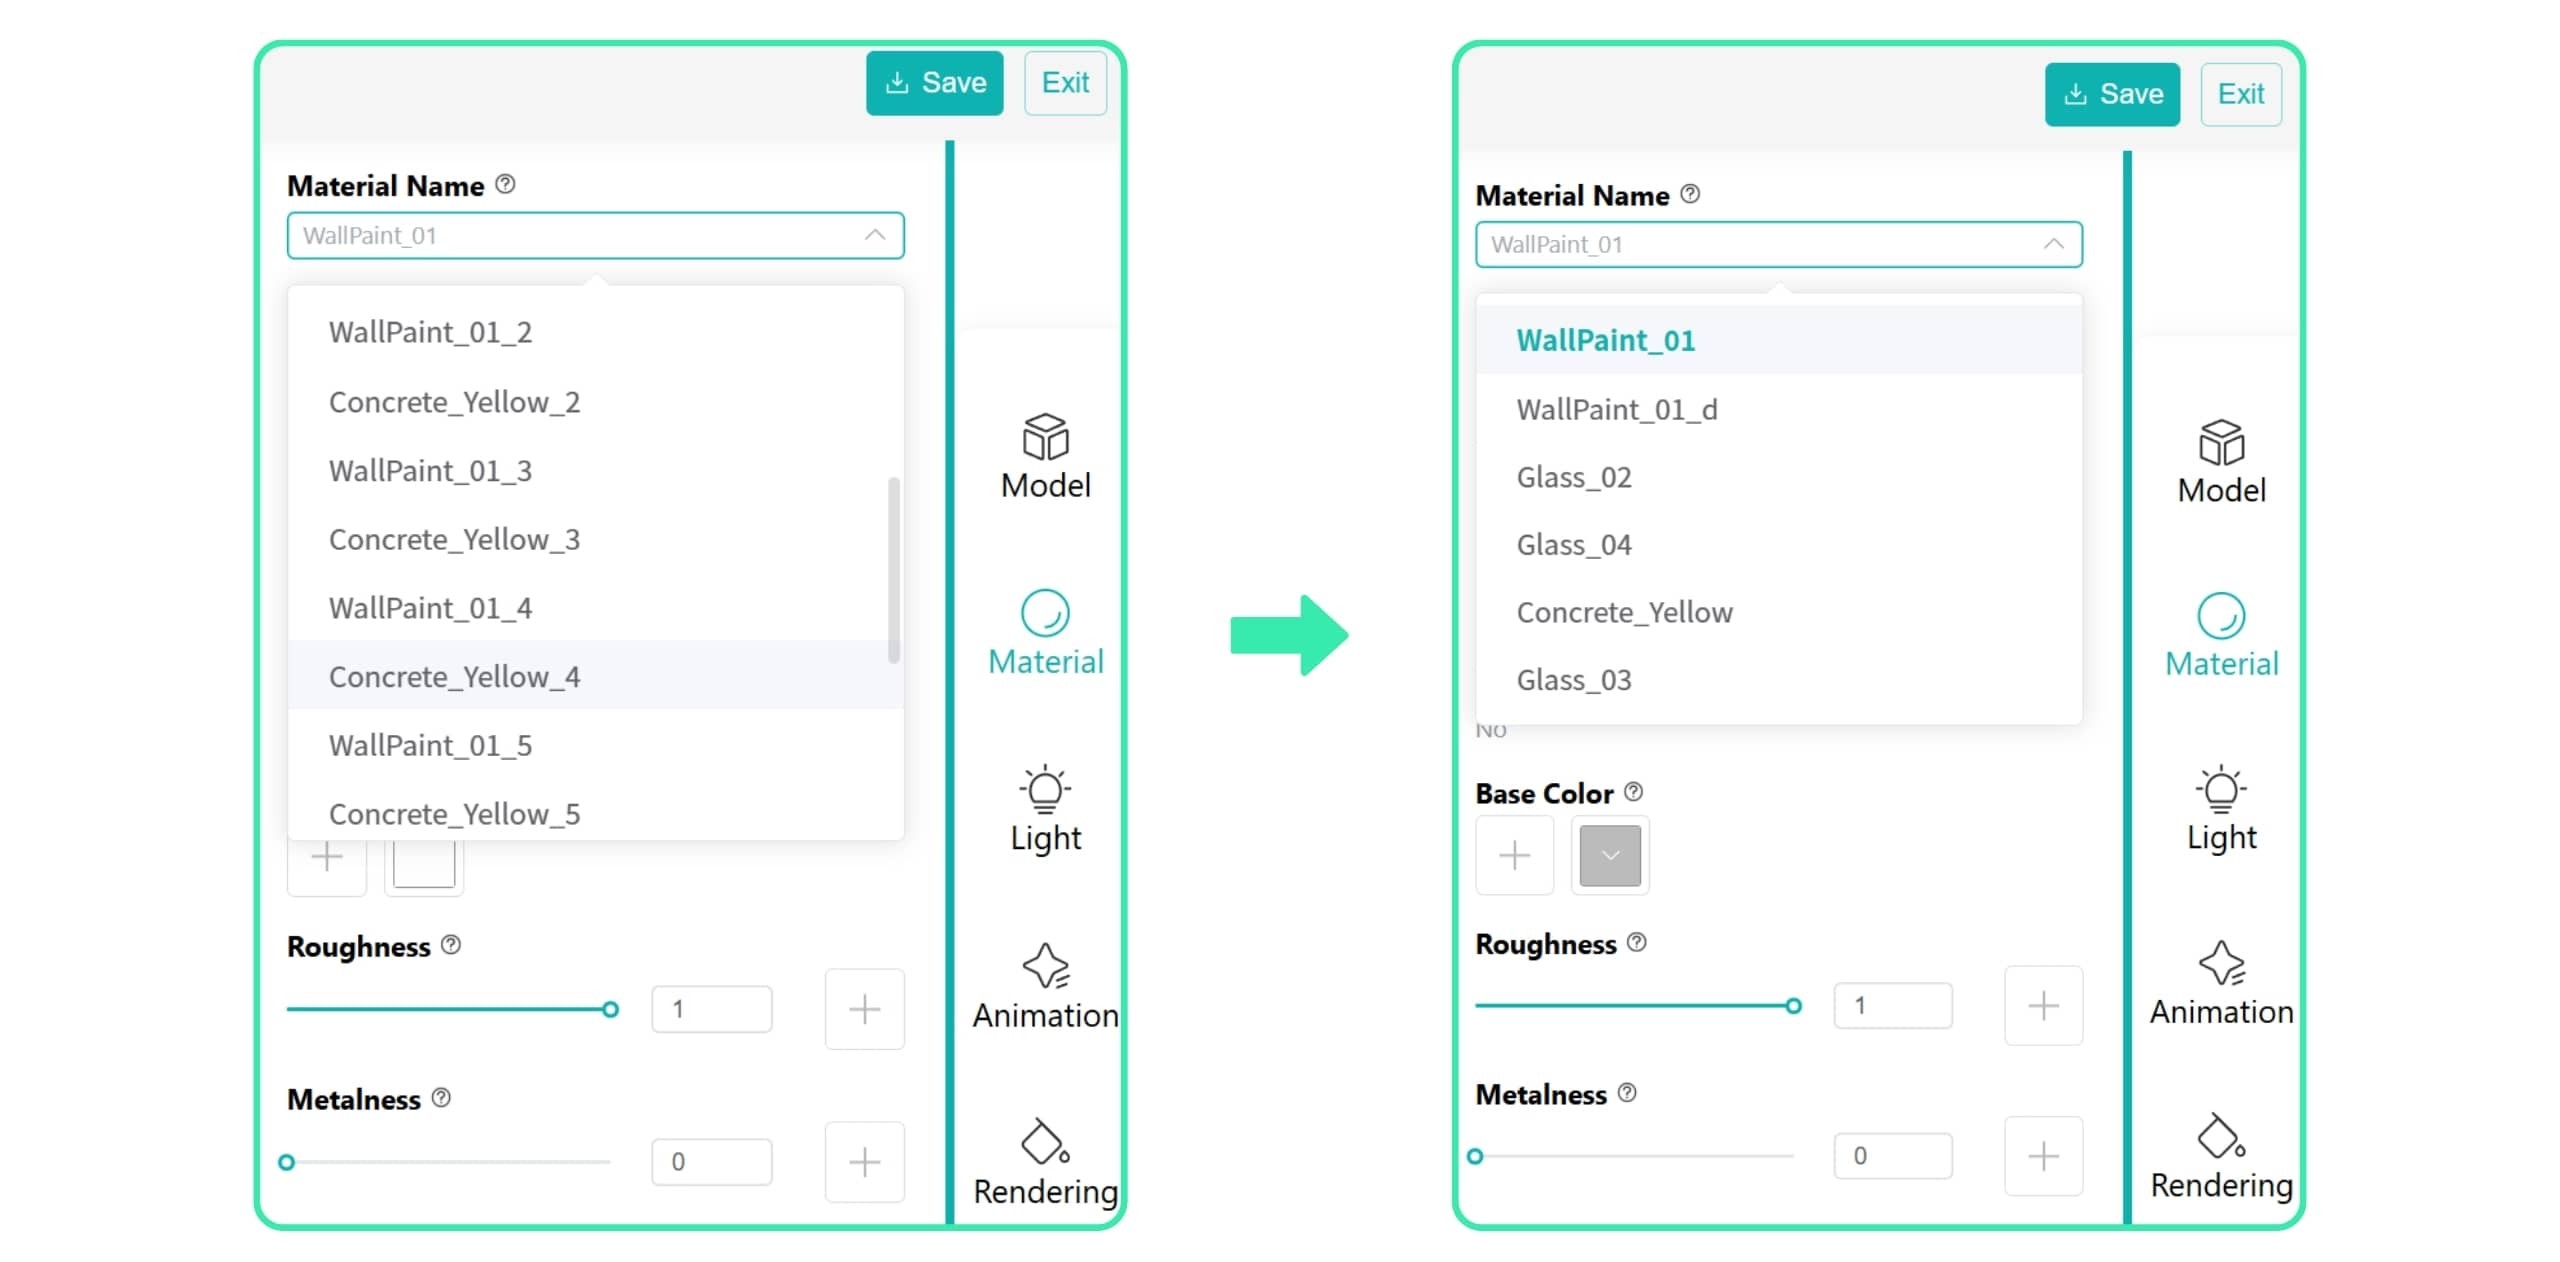
Duplicate textures increase resource usage and may affect model performance. If you cannot merge textures in your 3D software, we recommend using New Import or Magical Import. Both methods can automatically detect and merge duplicate textures in the model to reduce resource usage.
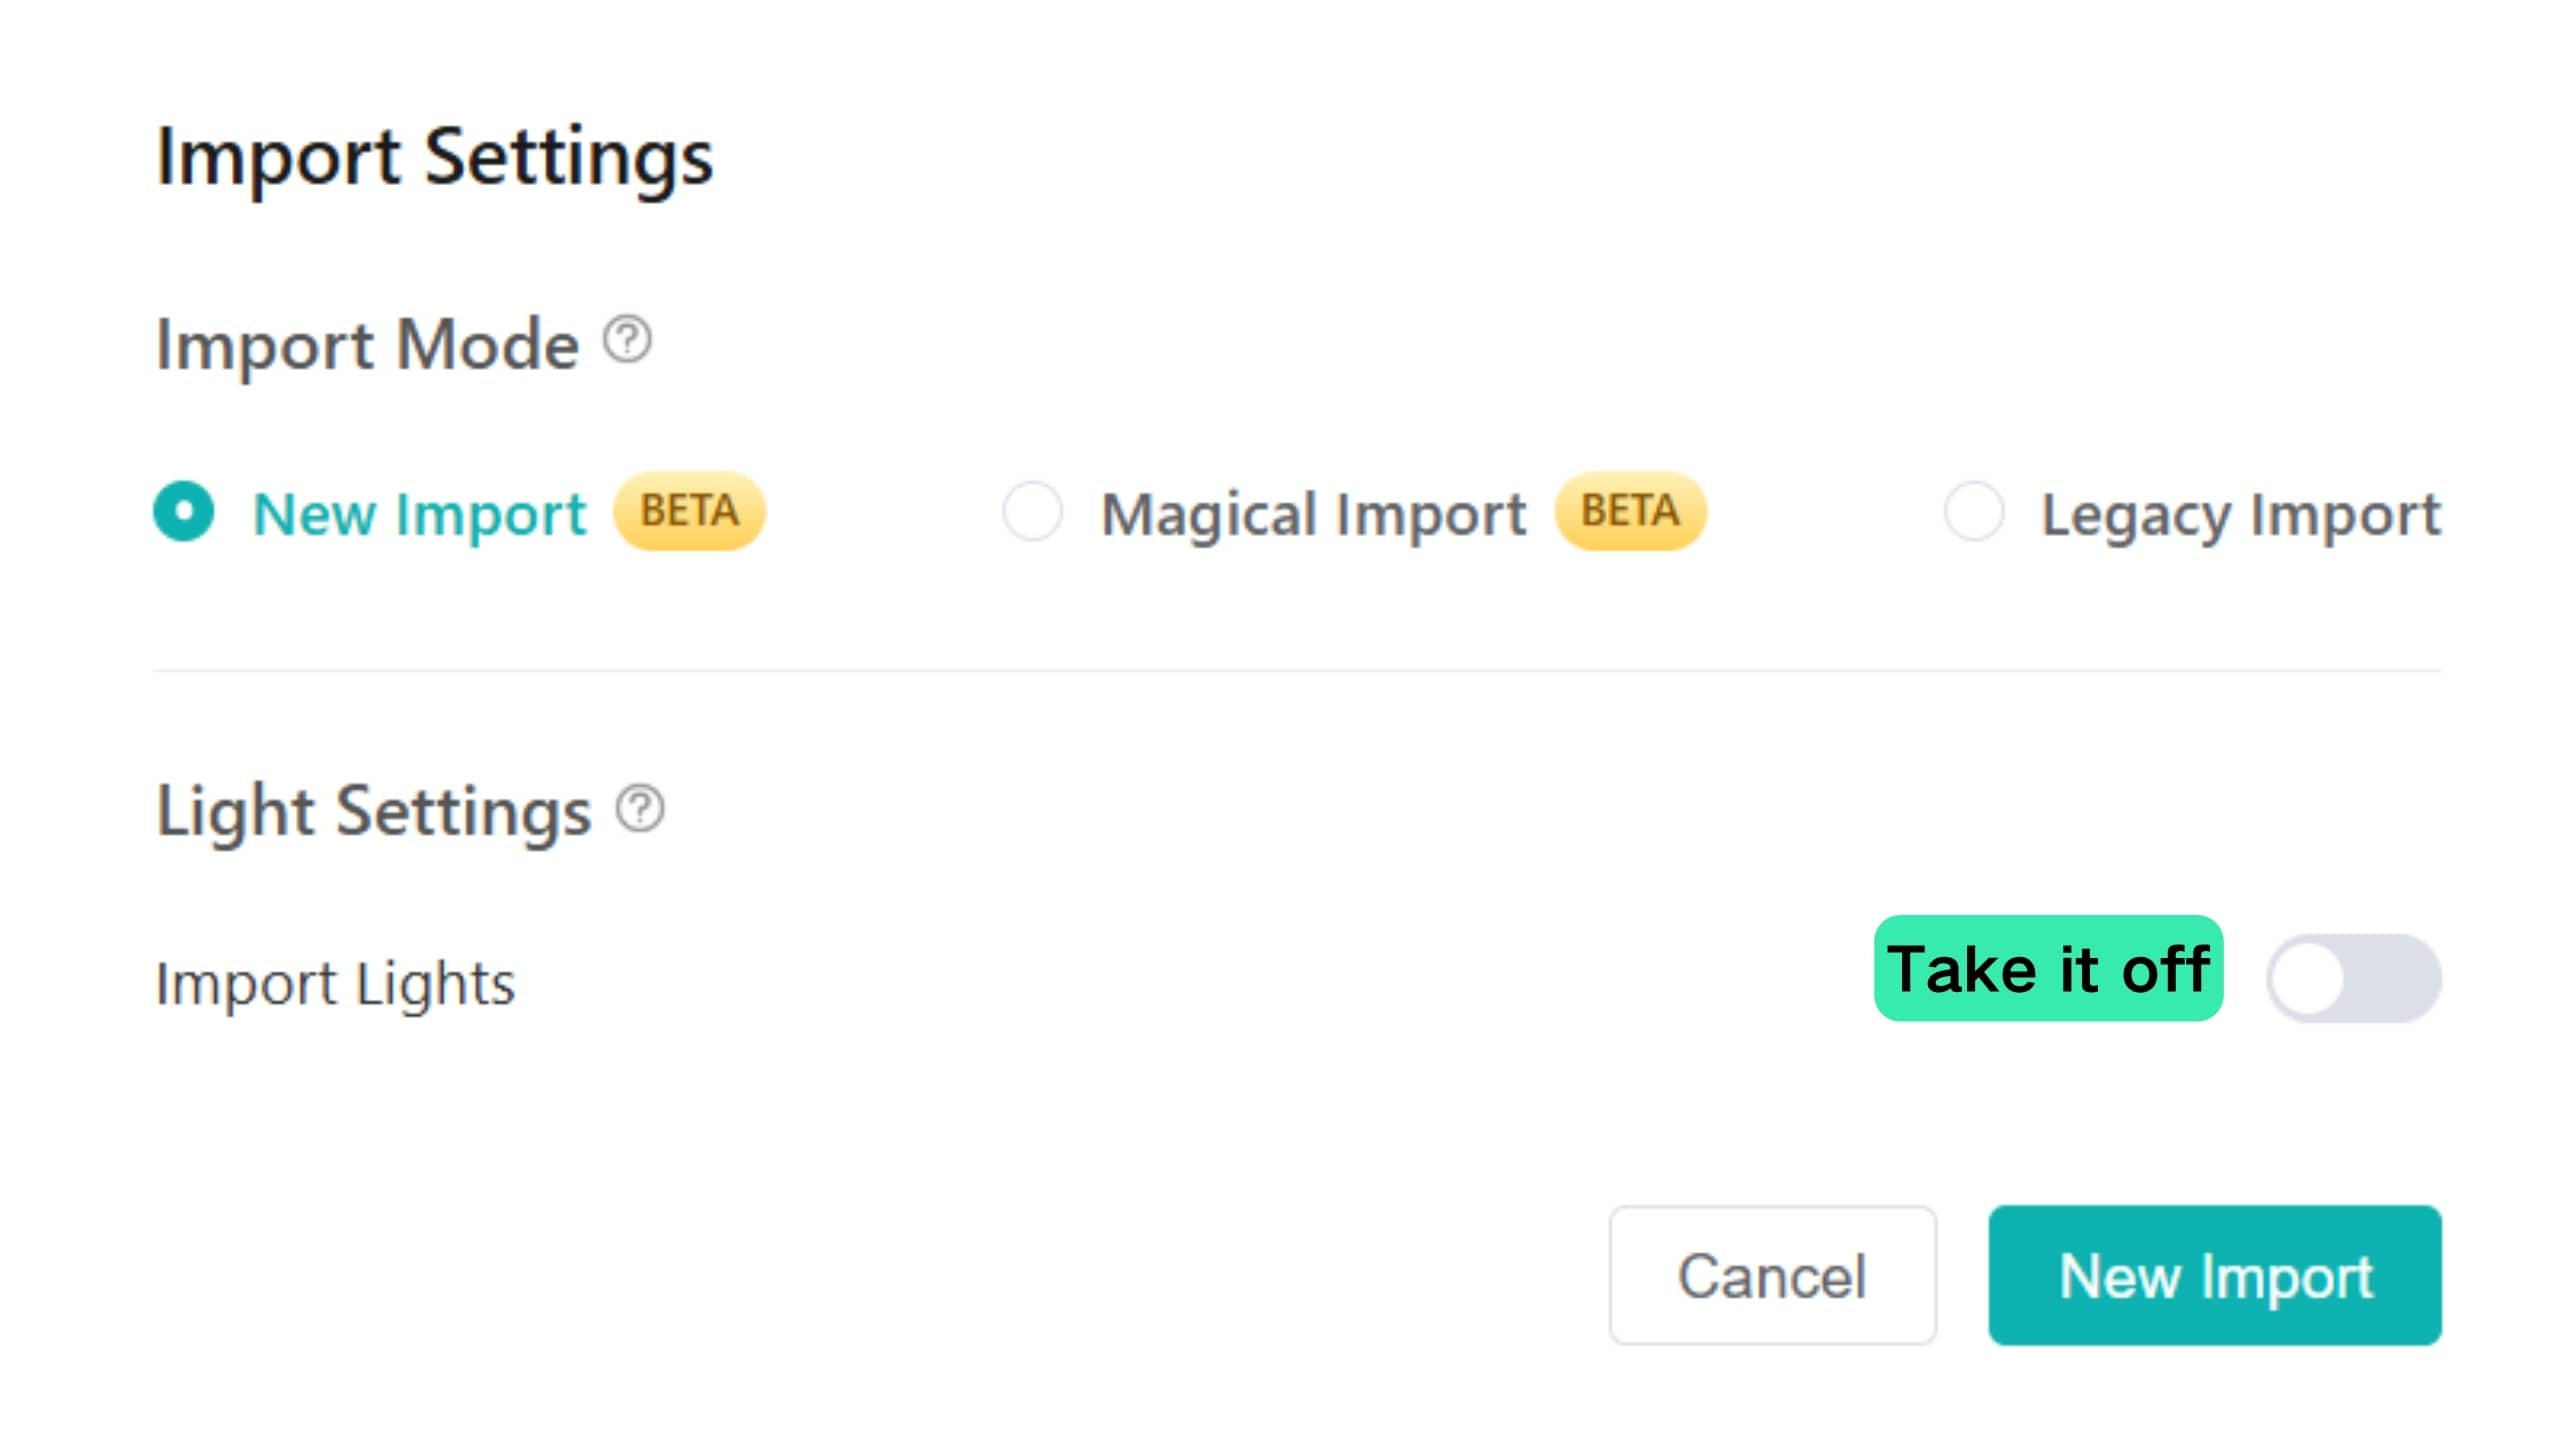
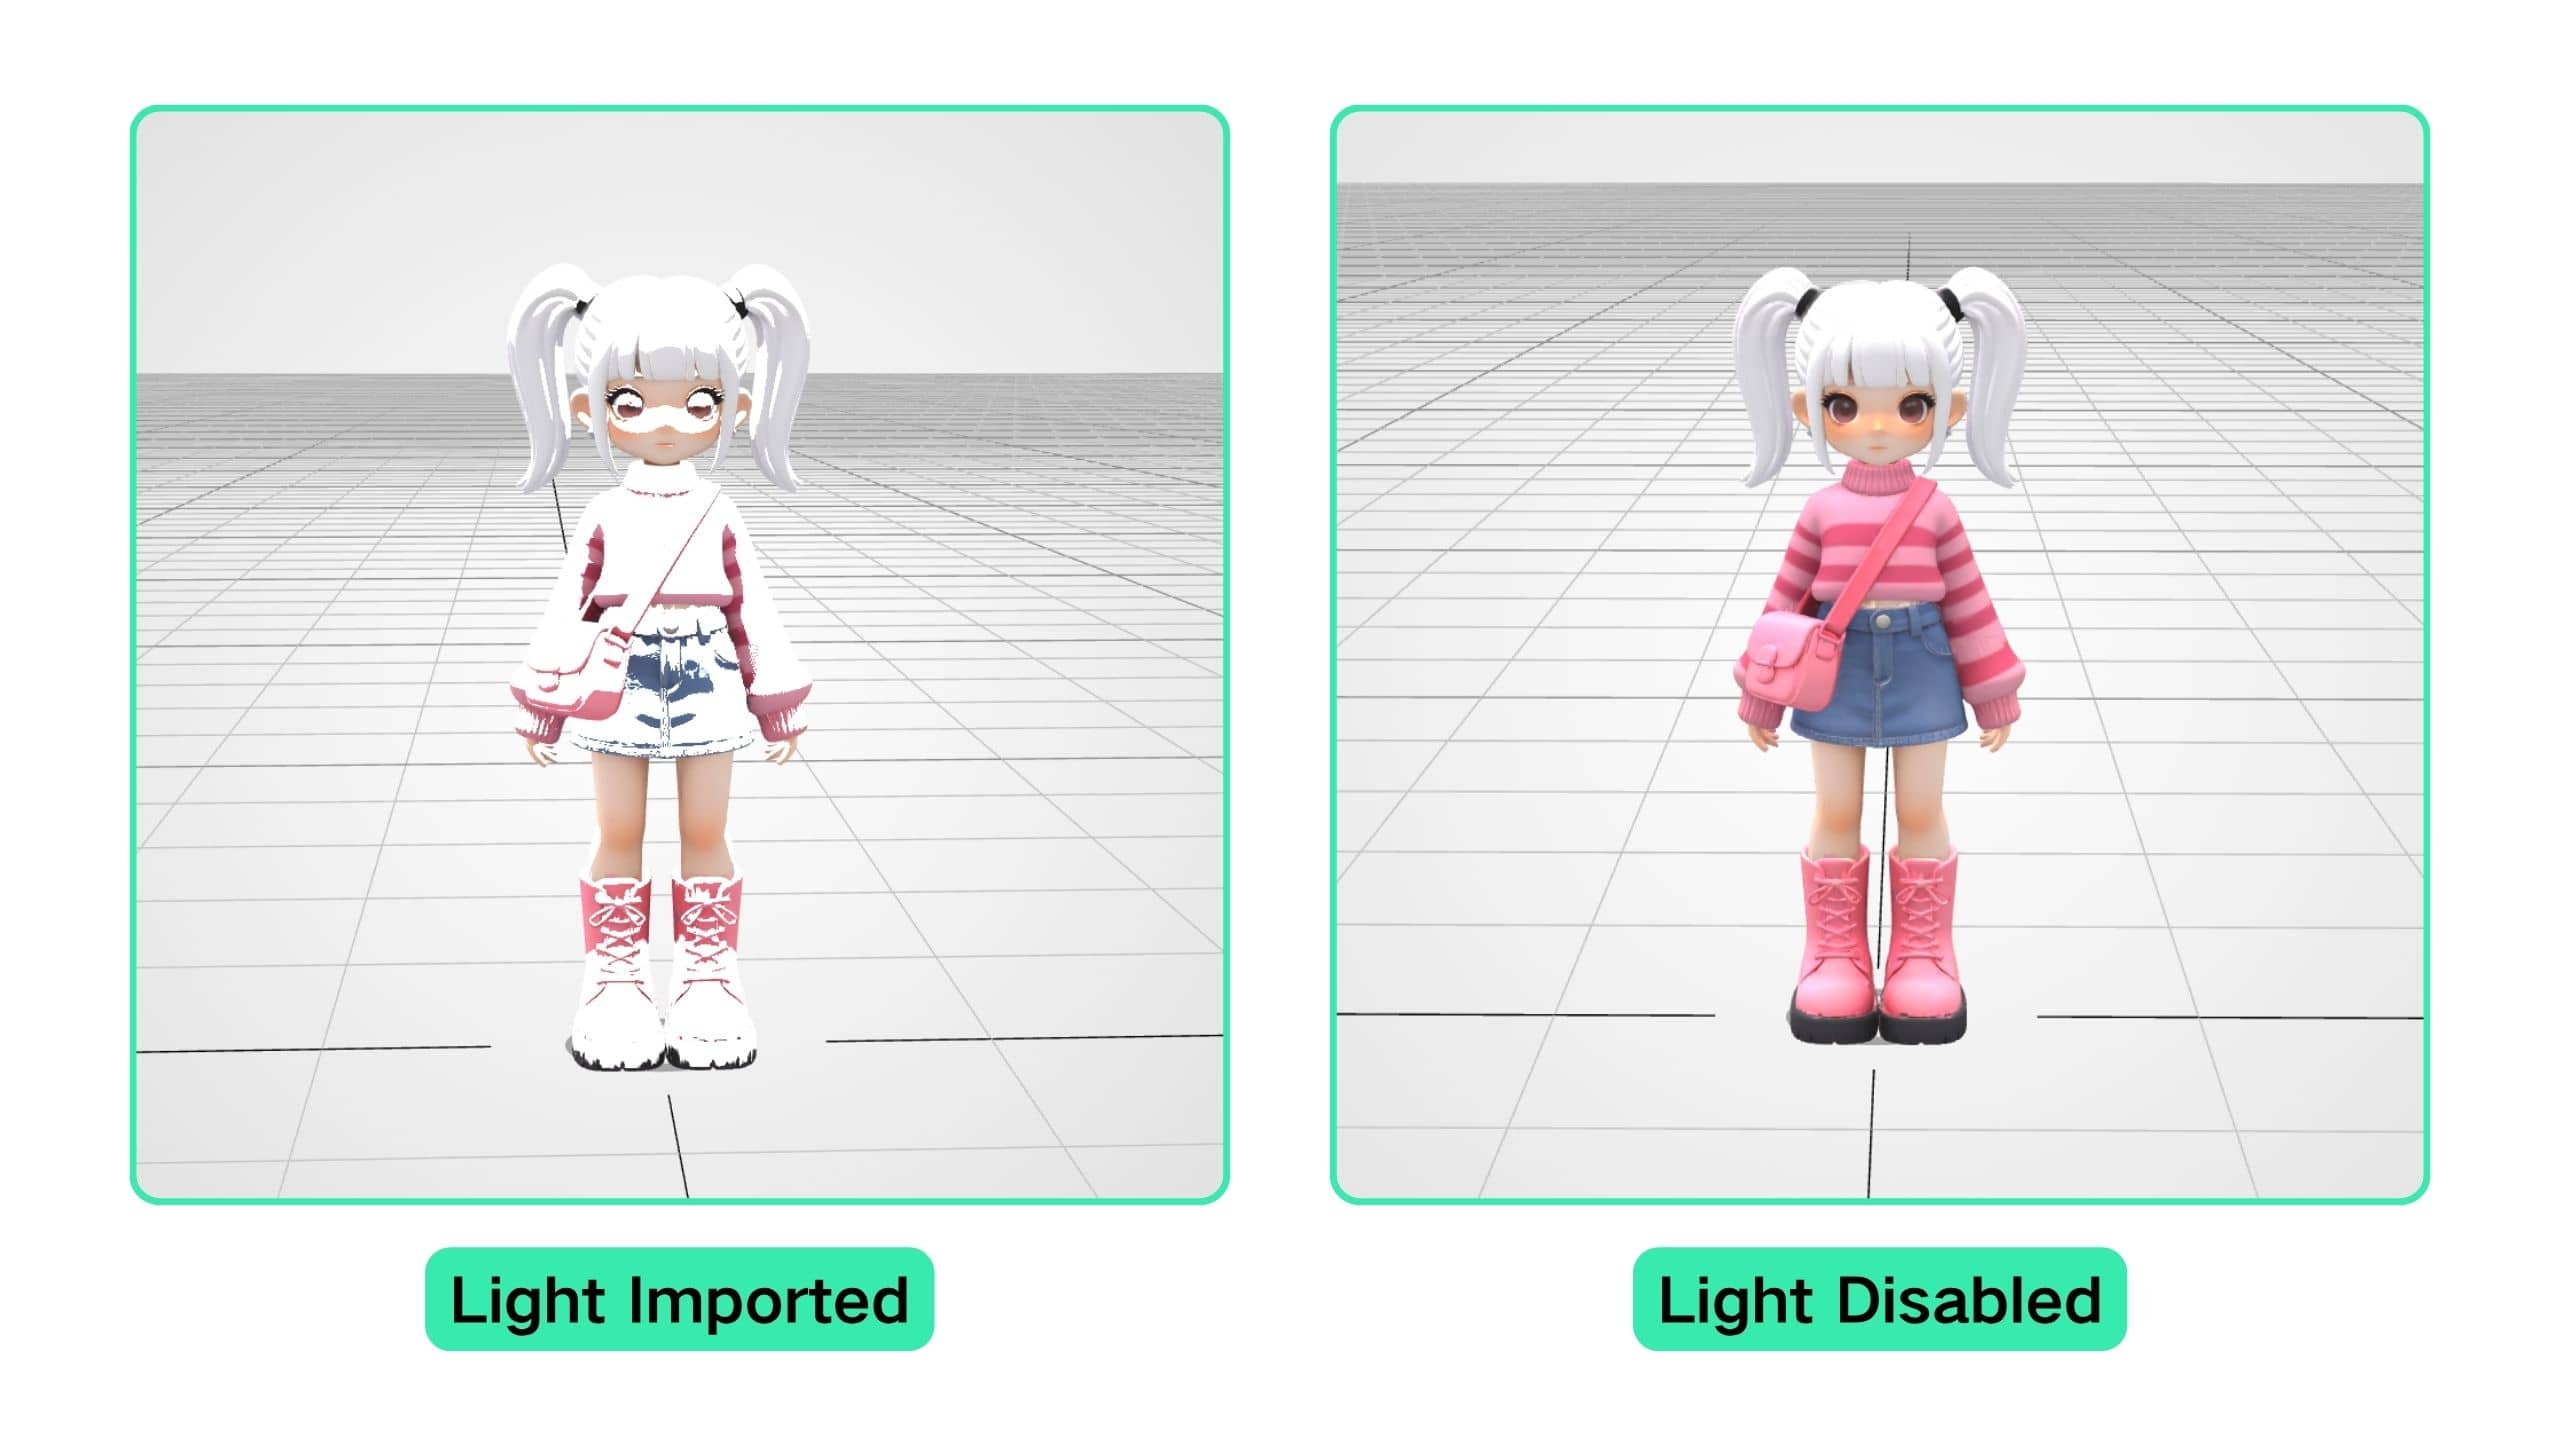
The Scene Editor and Content Editor already include built-in lighting. Importing models with embedded lights may create overlapping light sources, causing overexposure or unexpected brightness issues.
To avoid this, the Content Editor automatically detects whether the model contains light during import. If light is detected, we recommend disabling the light import toggle and adjusting the lighting using the light settings in the Scene Editor.
TIP
For models created with Nomad, we recommend using New Import or Magical Import and choosing not to import model light.
Follow the workflow below to achieve the best lighting results:
If the model contains embedded lights and appears overexposed, disable the lights before uploading to avoid overlapping with scene lighting.
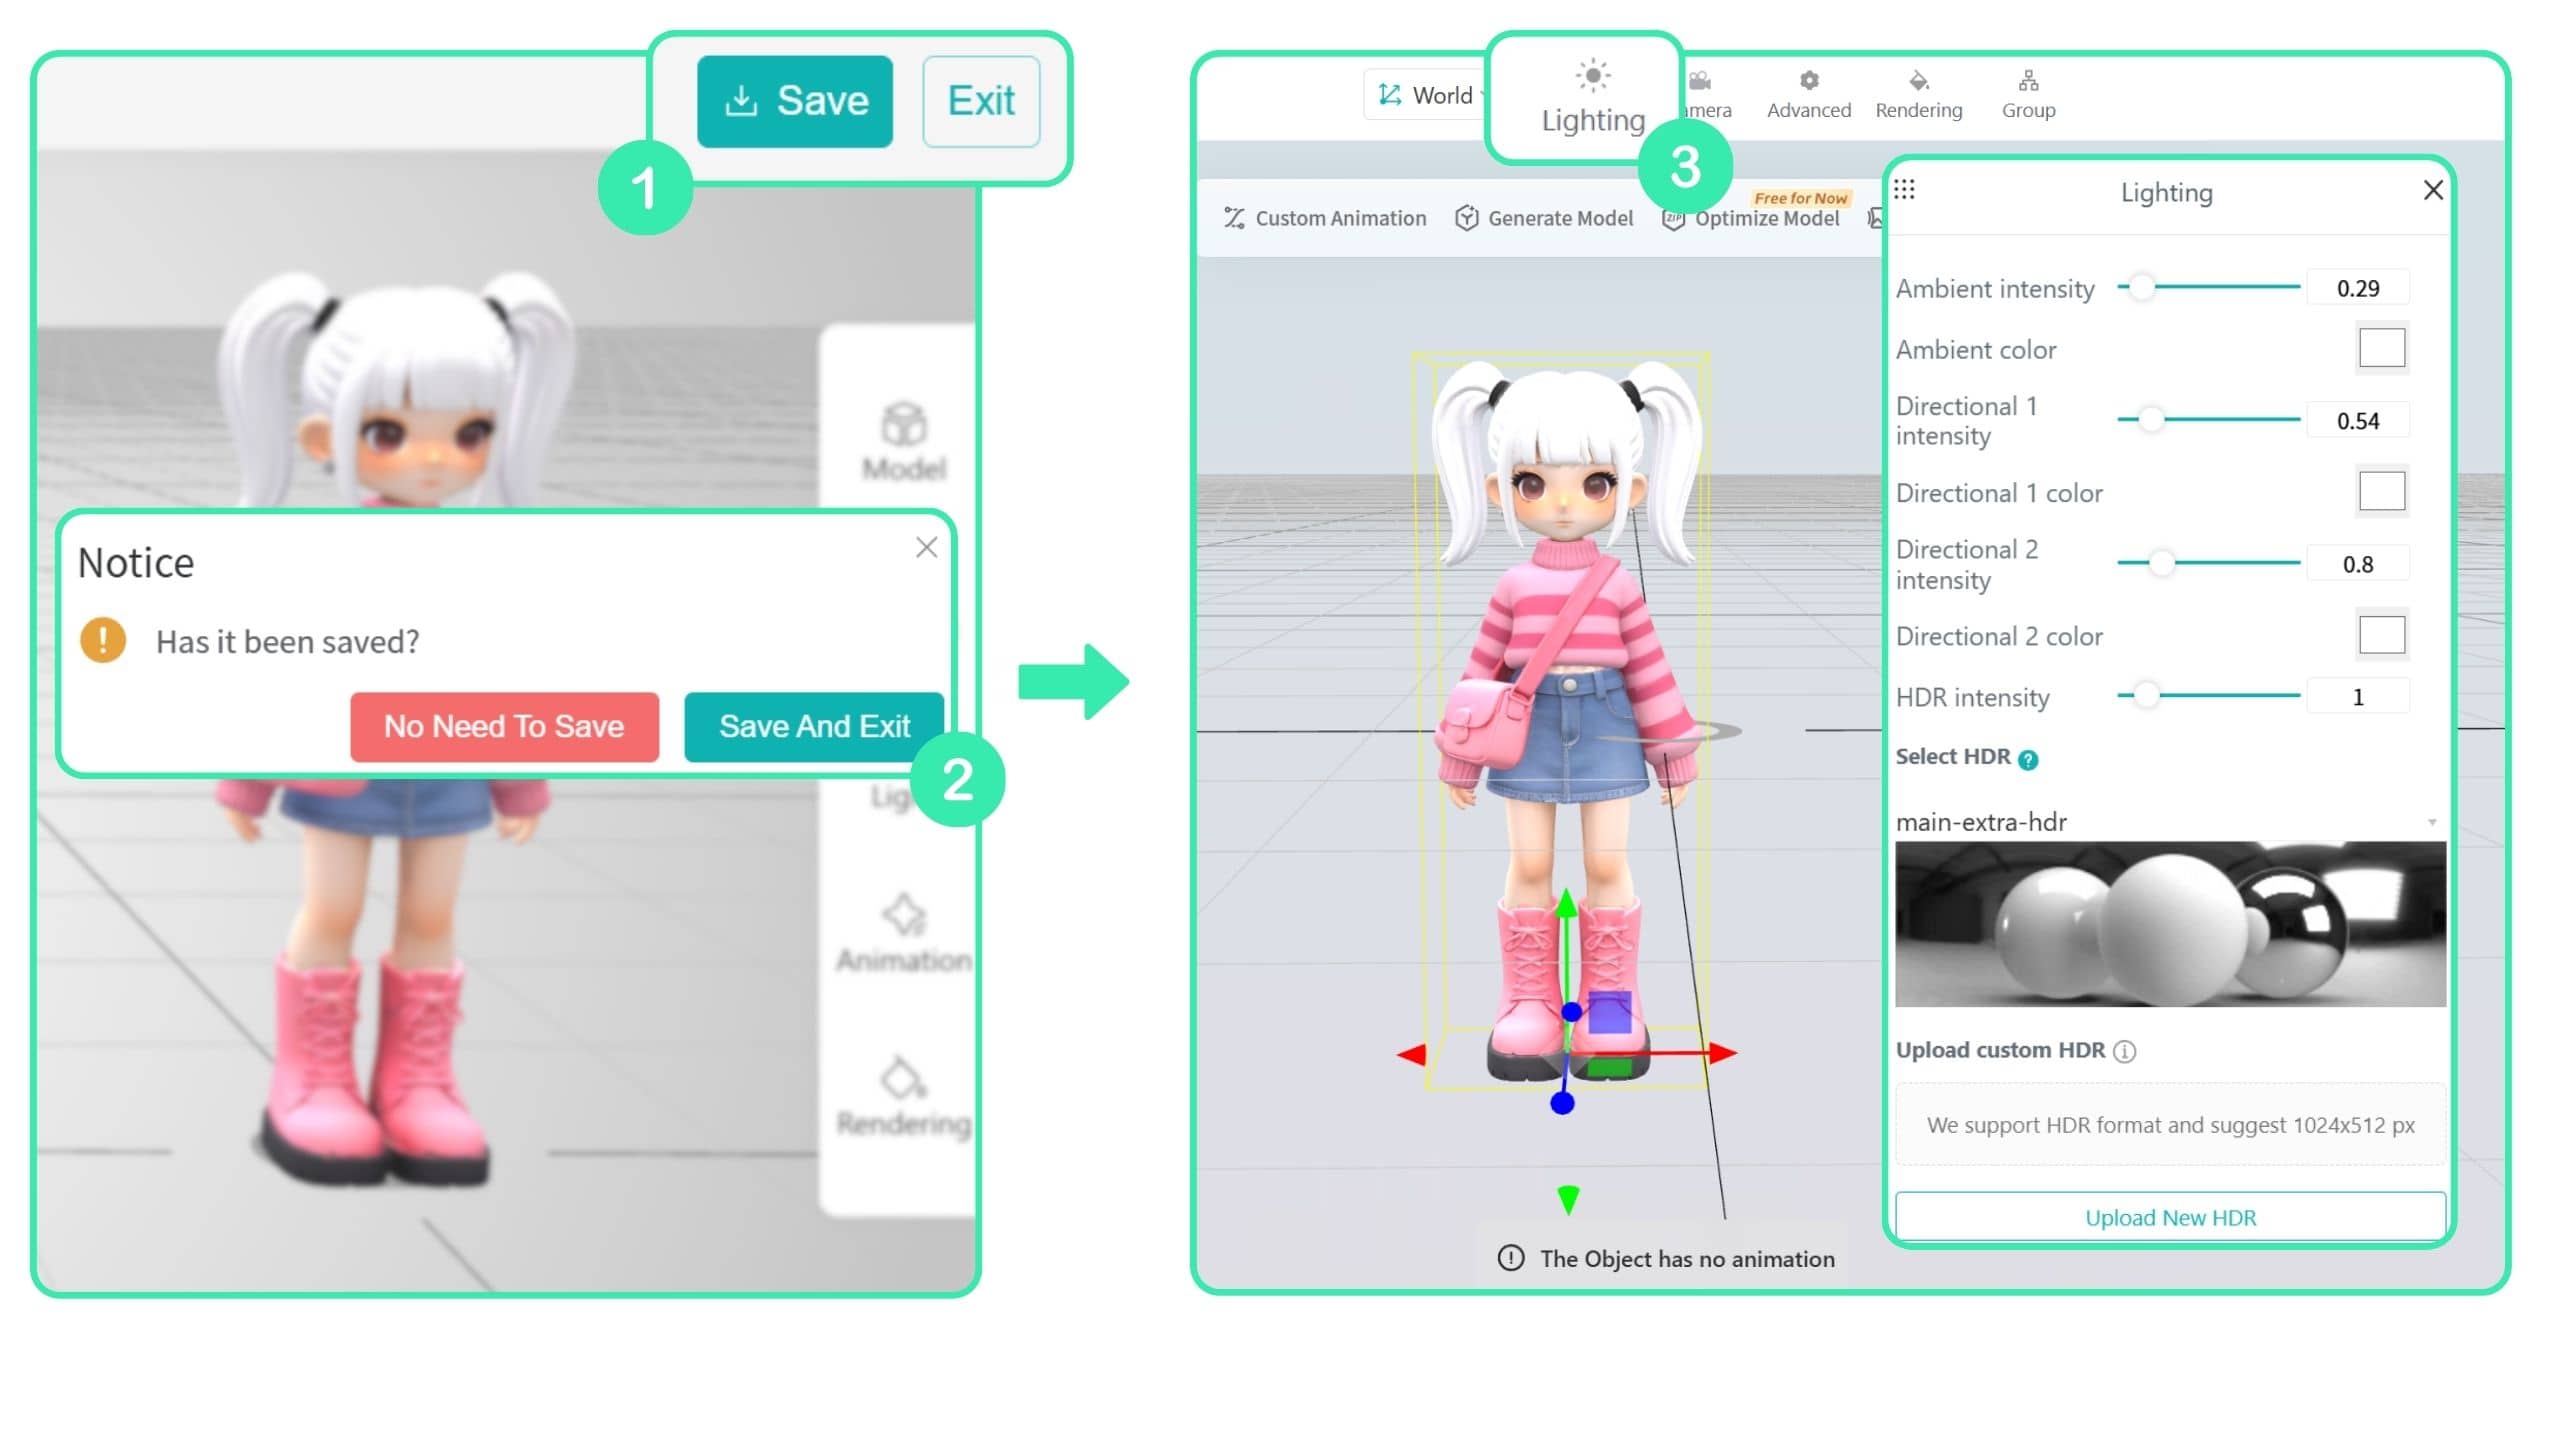
After disabling the model lights, you can save the model to the Scene Editor and continue adjusting the scene lighting for better results.
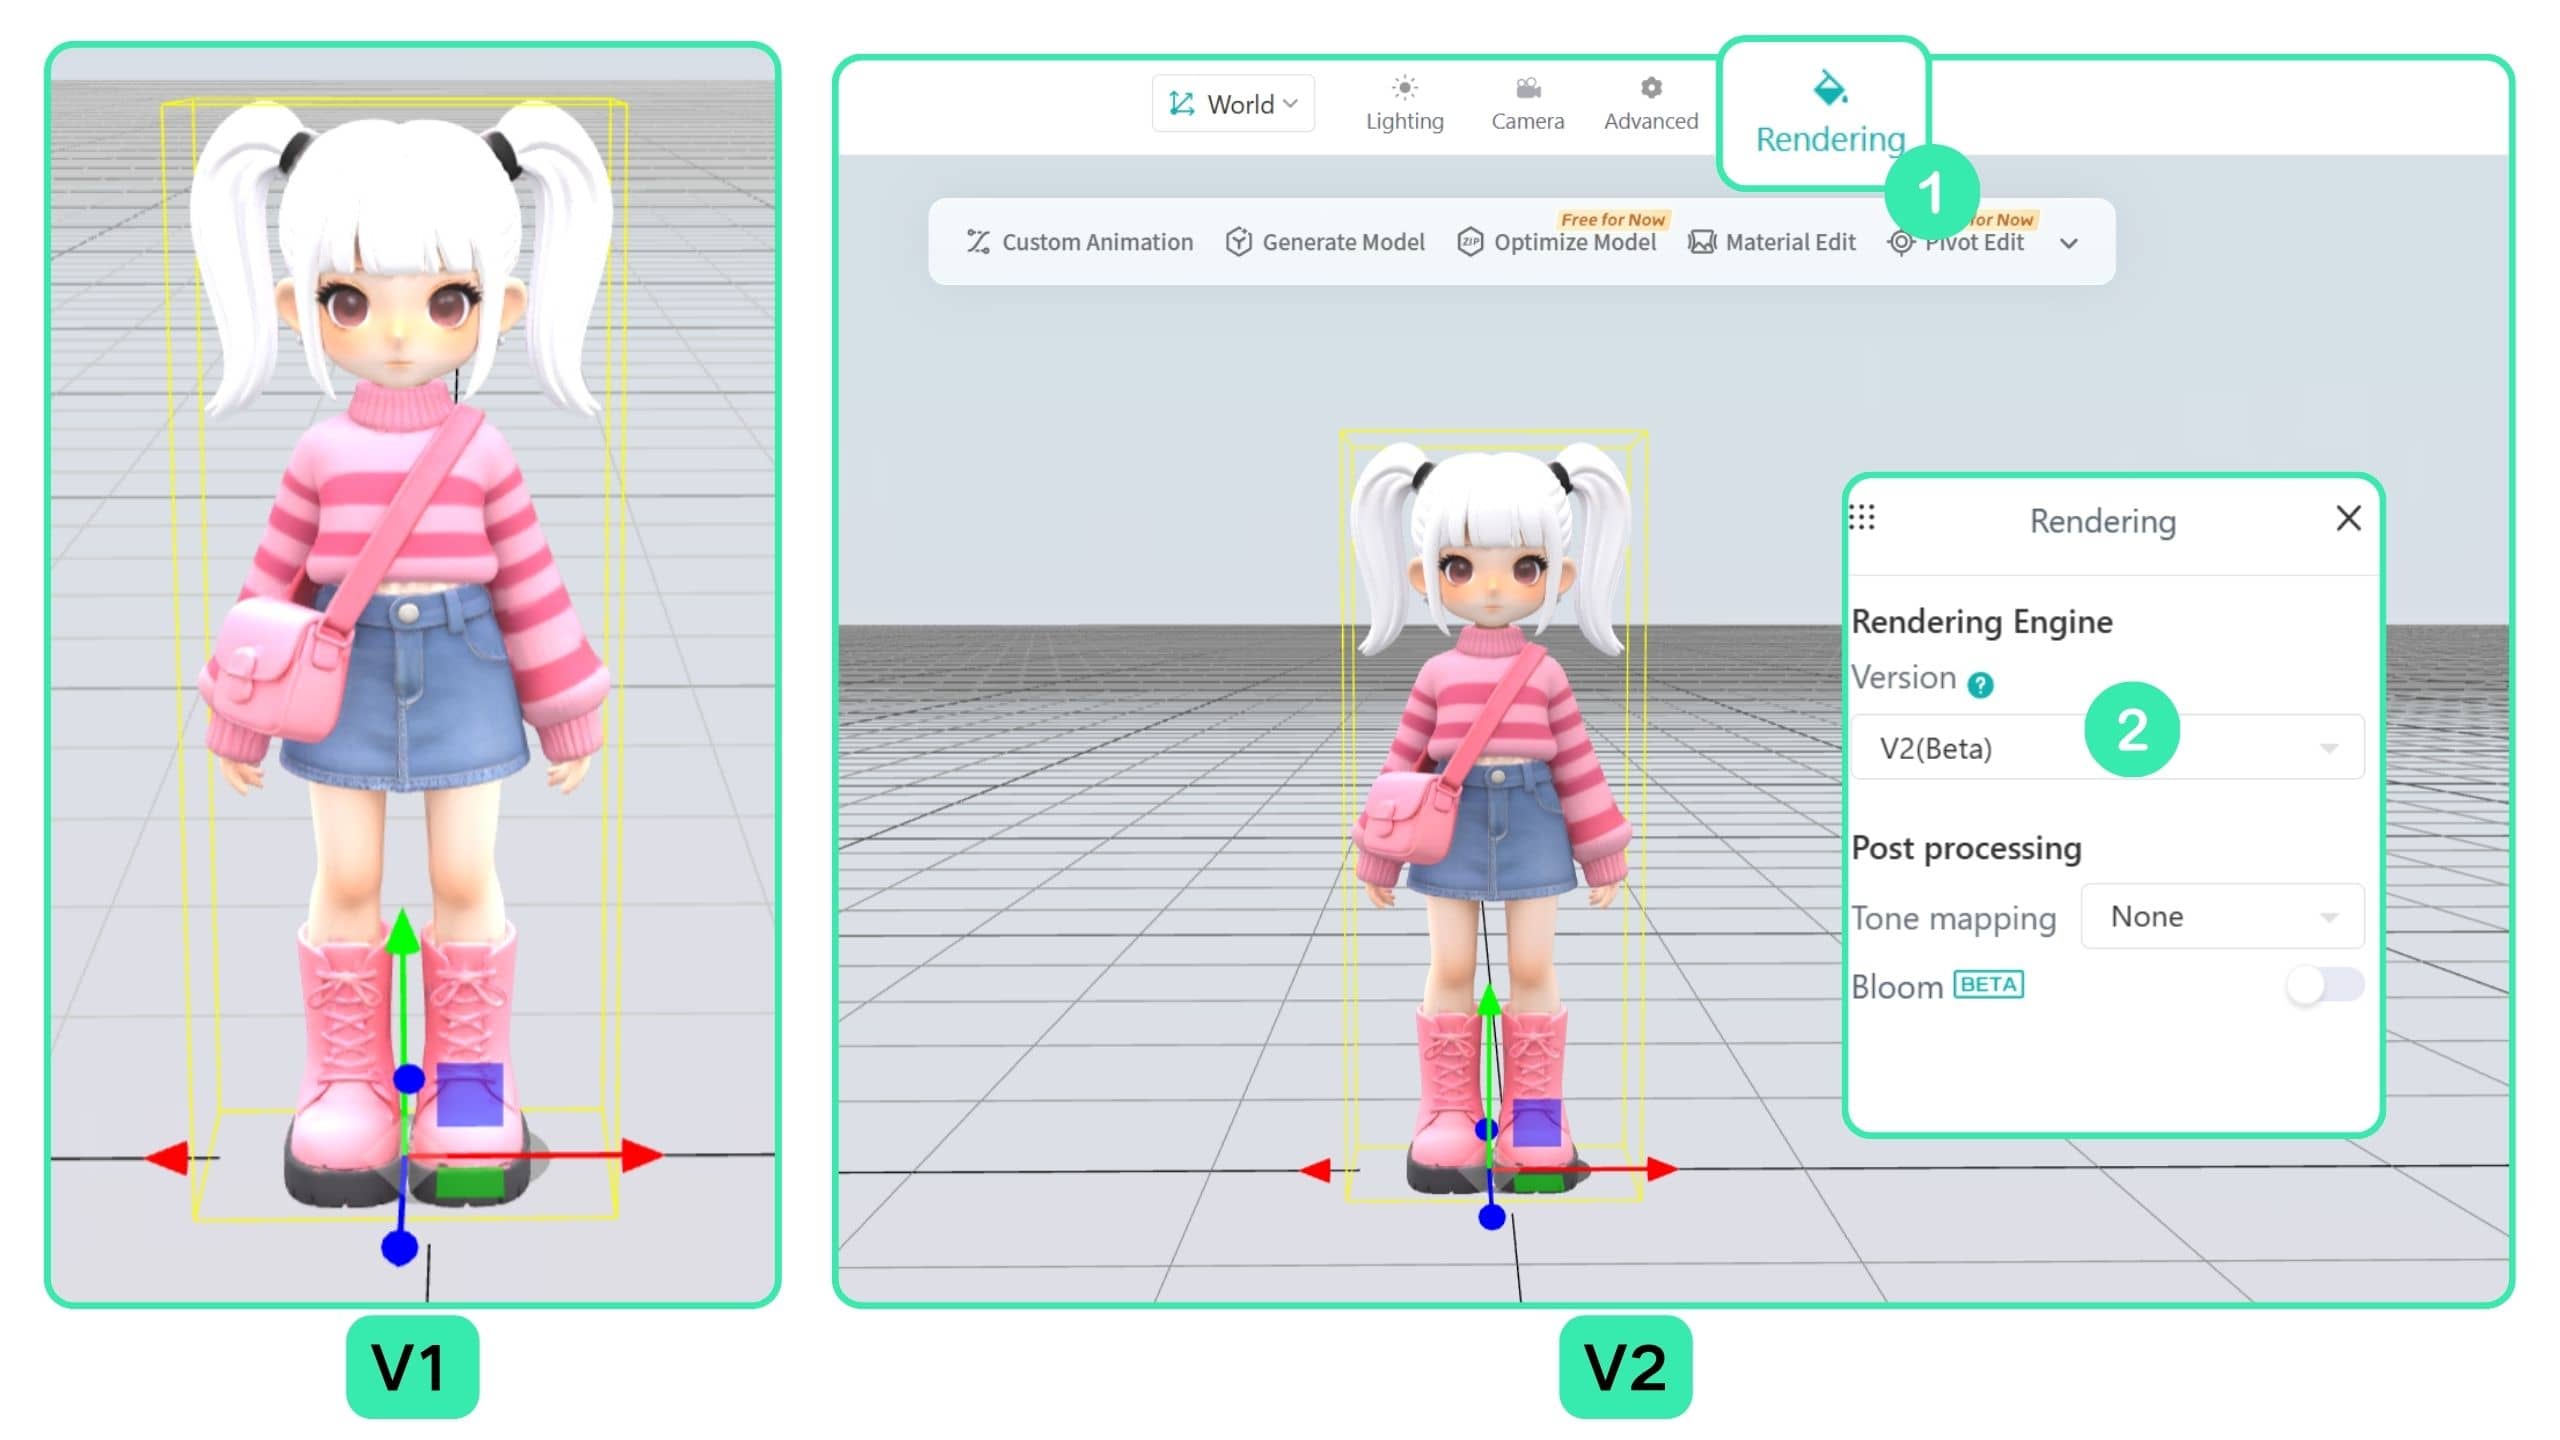
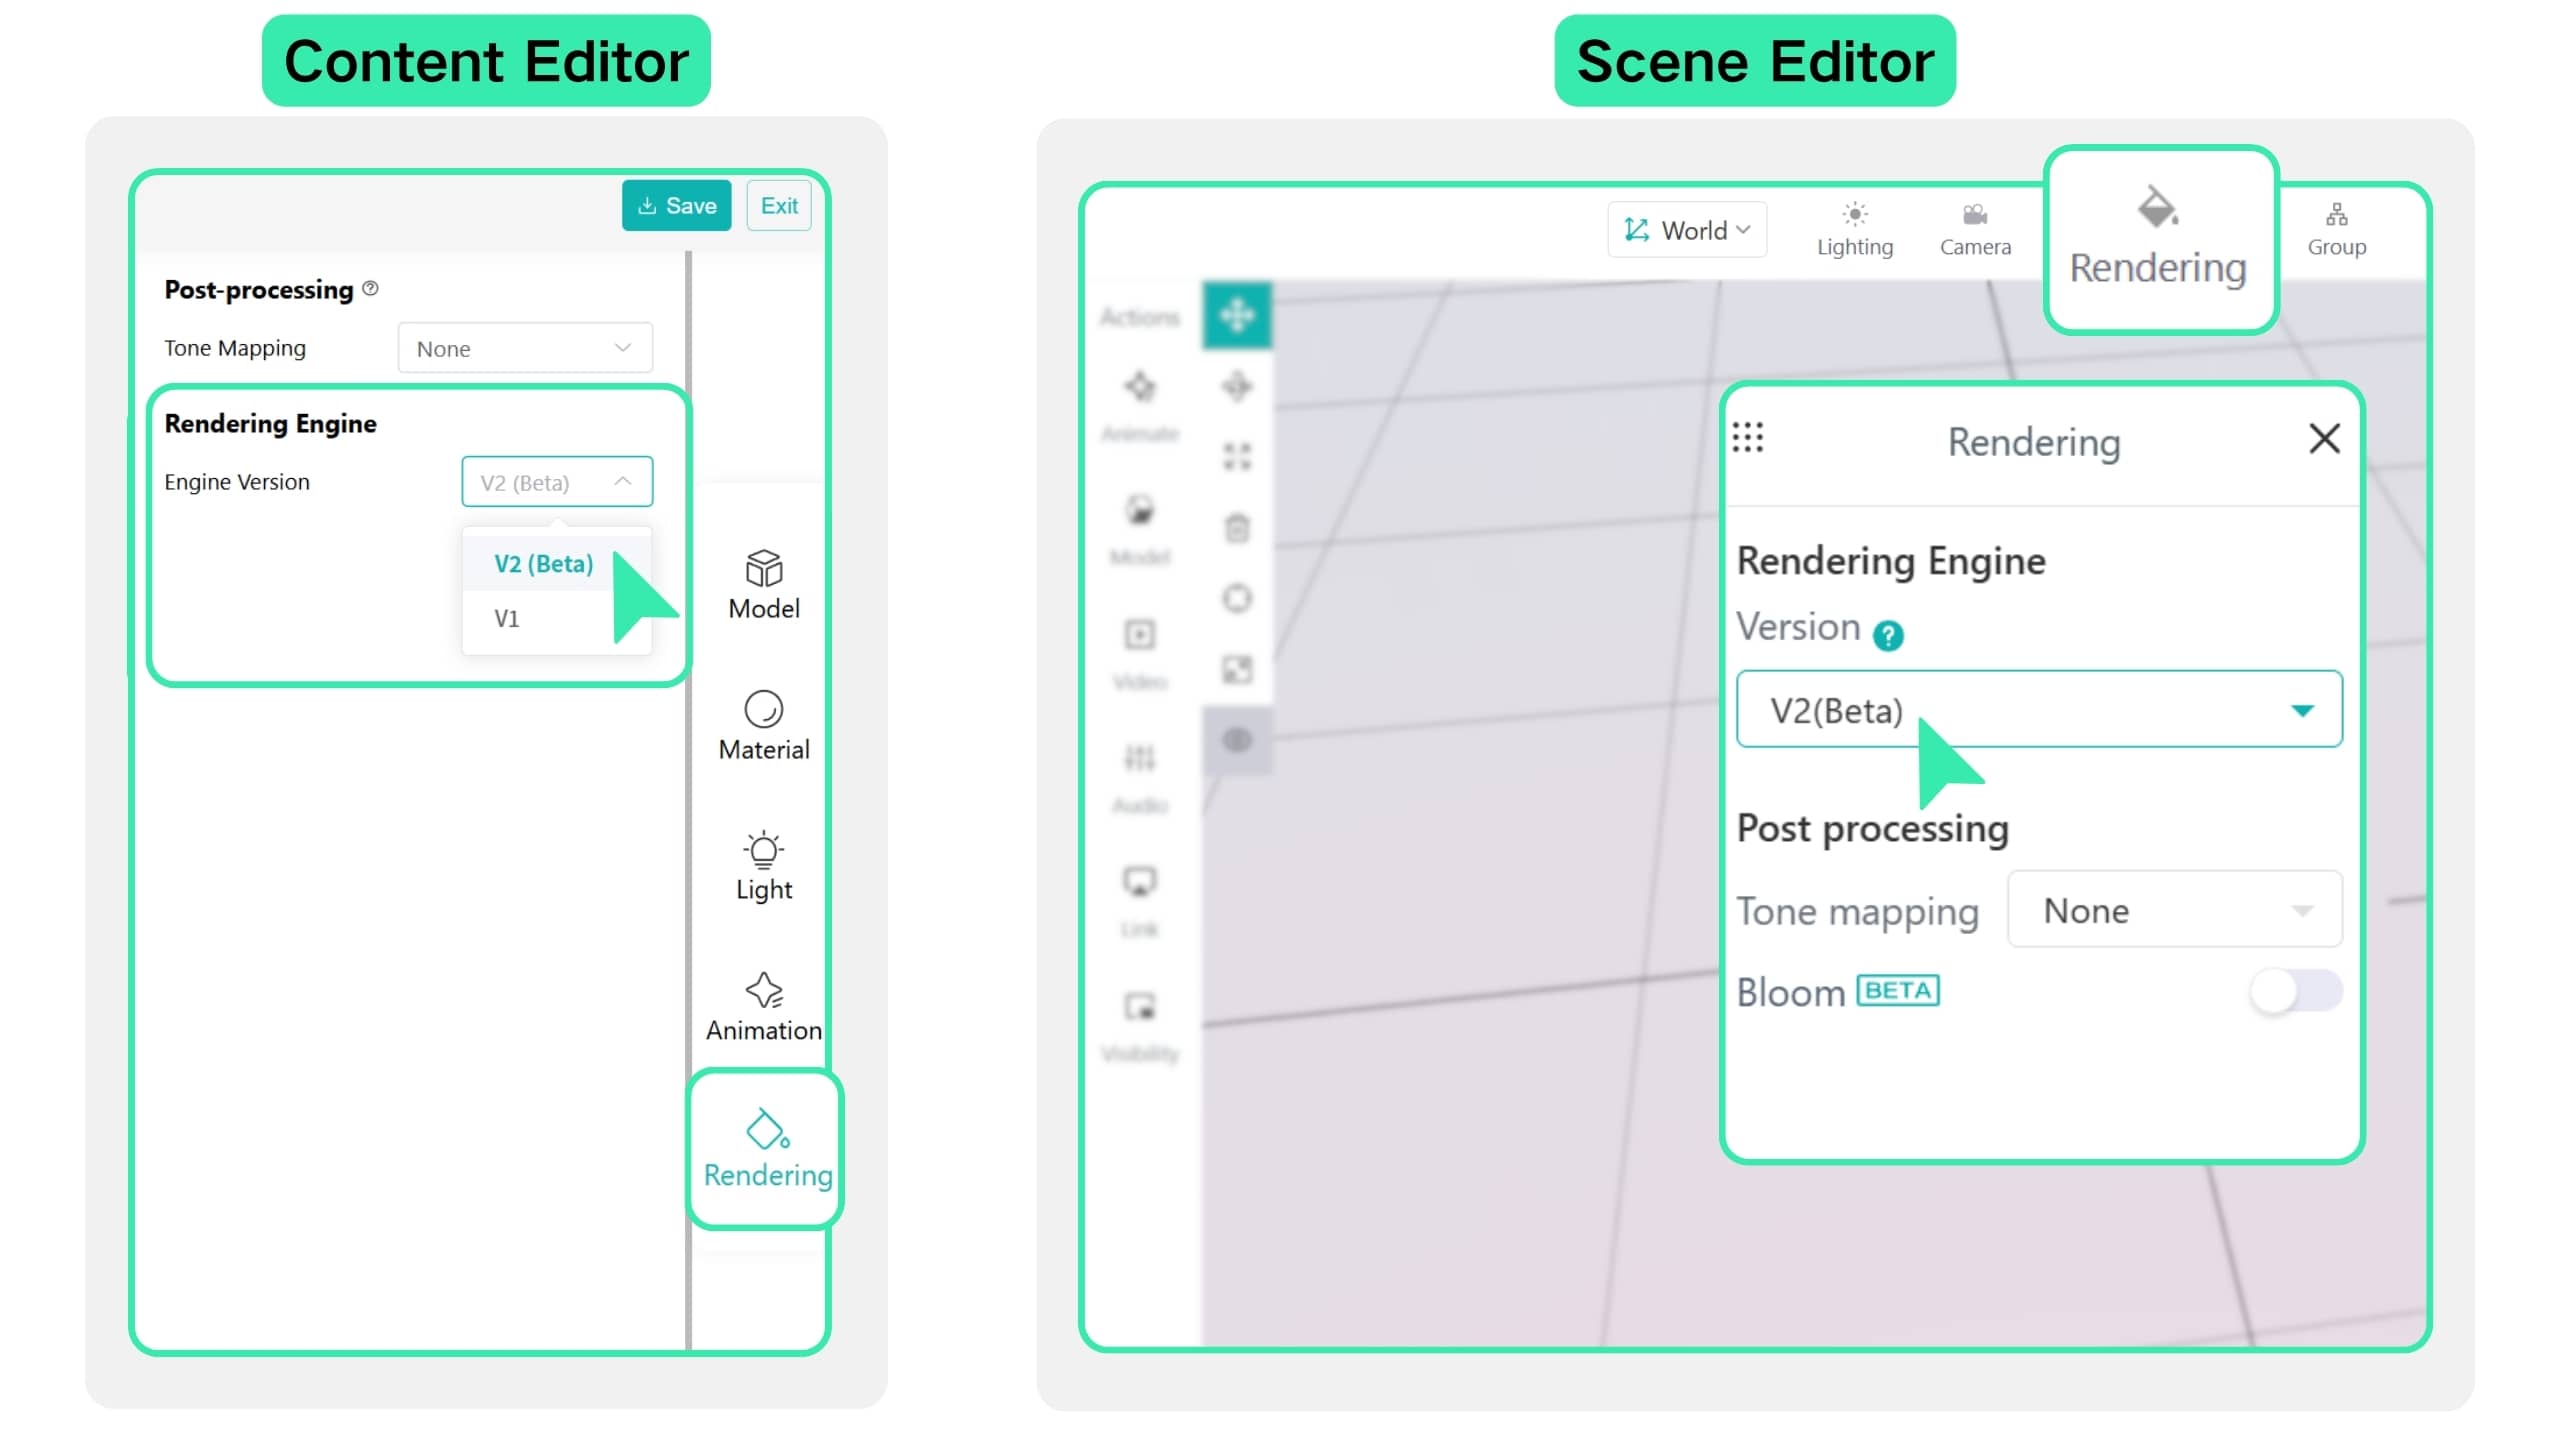
If the model still appears too bright or requires more realistic lighting, switch to the V2 Rendering Engine for further optimization.
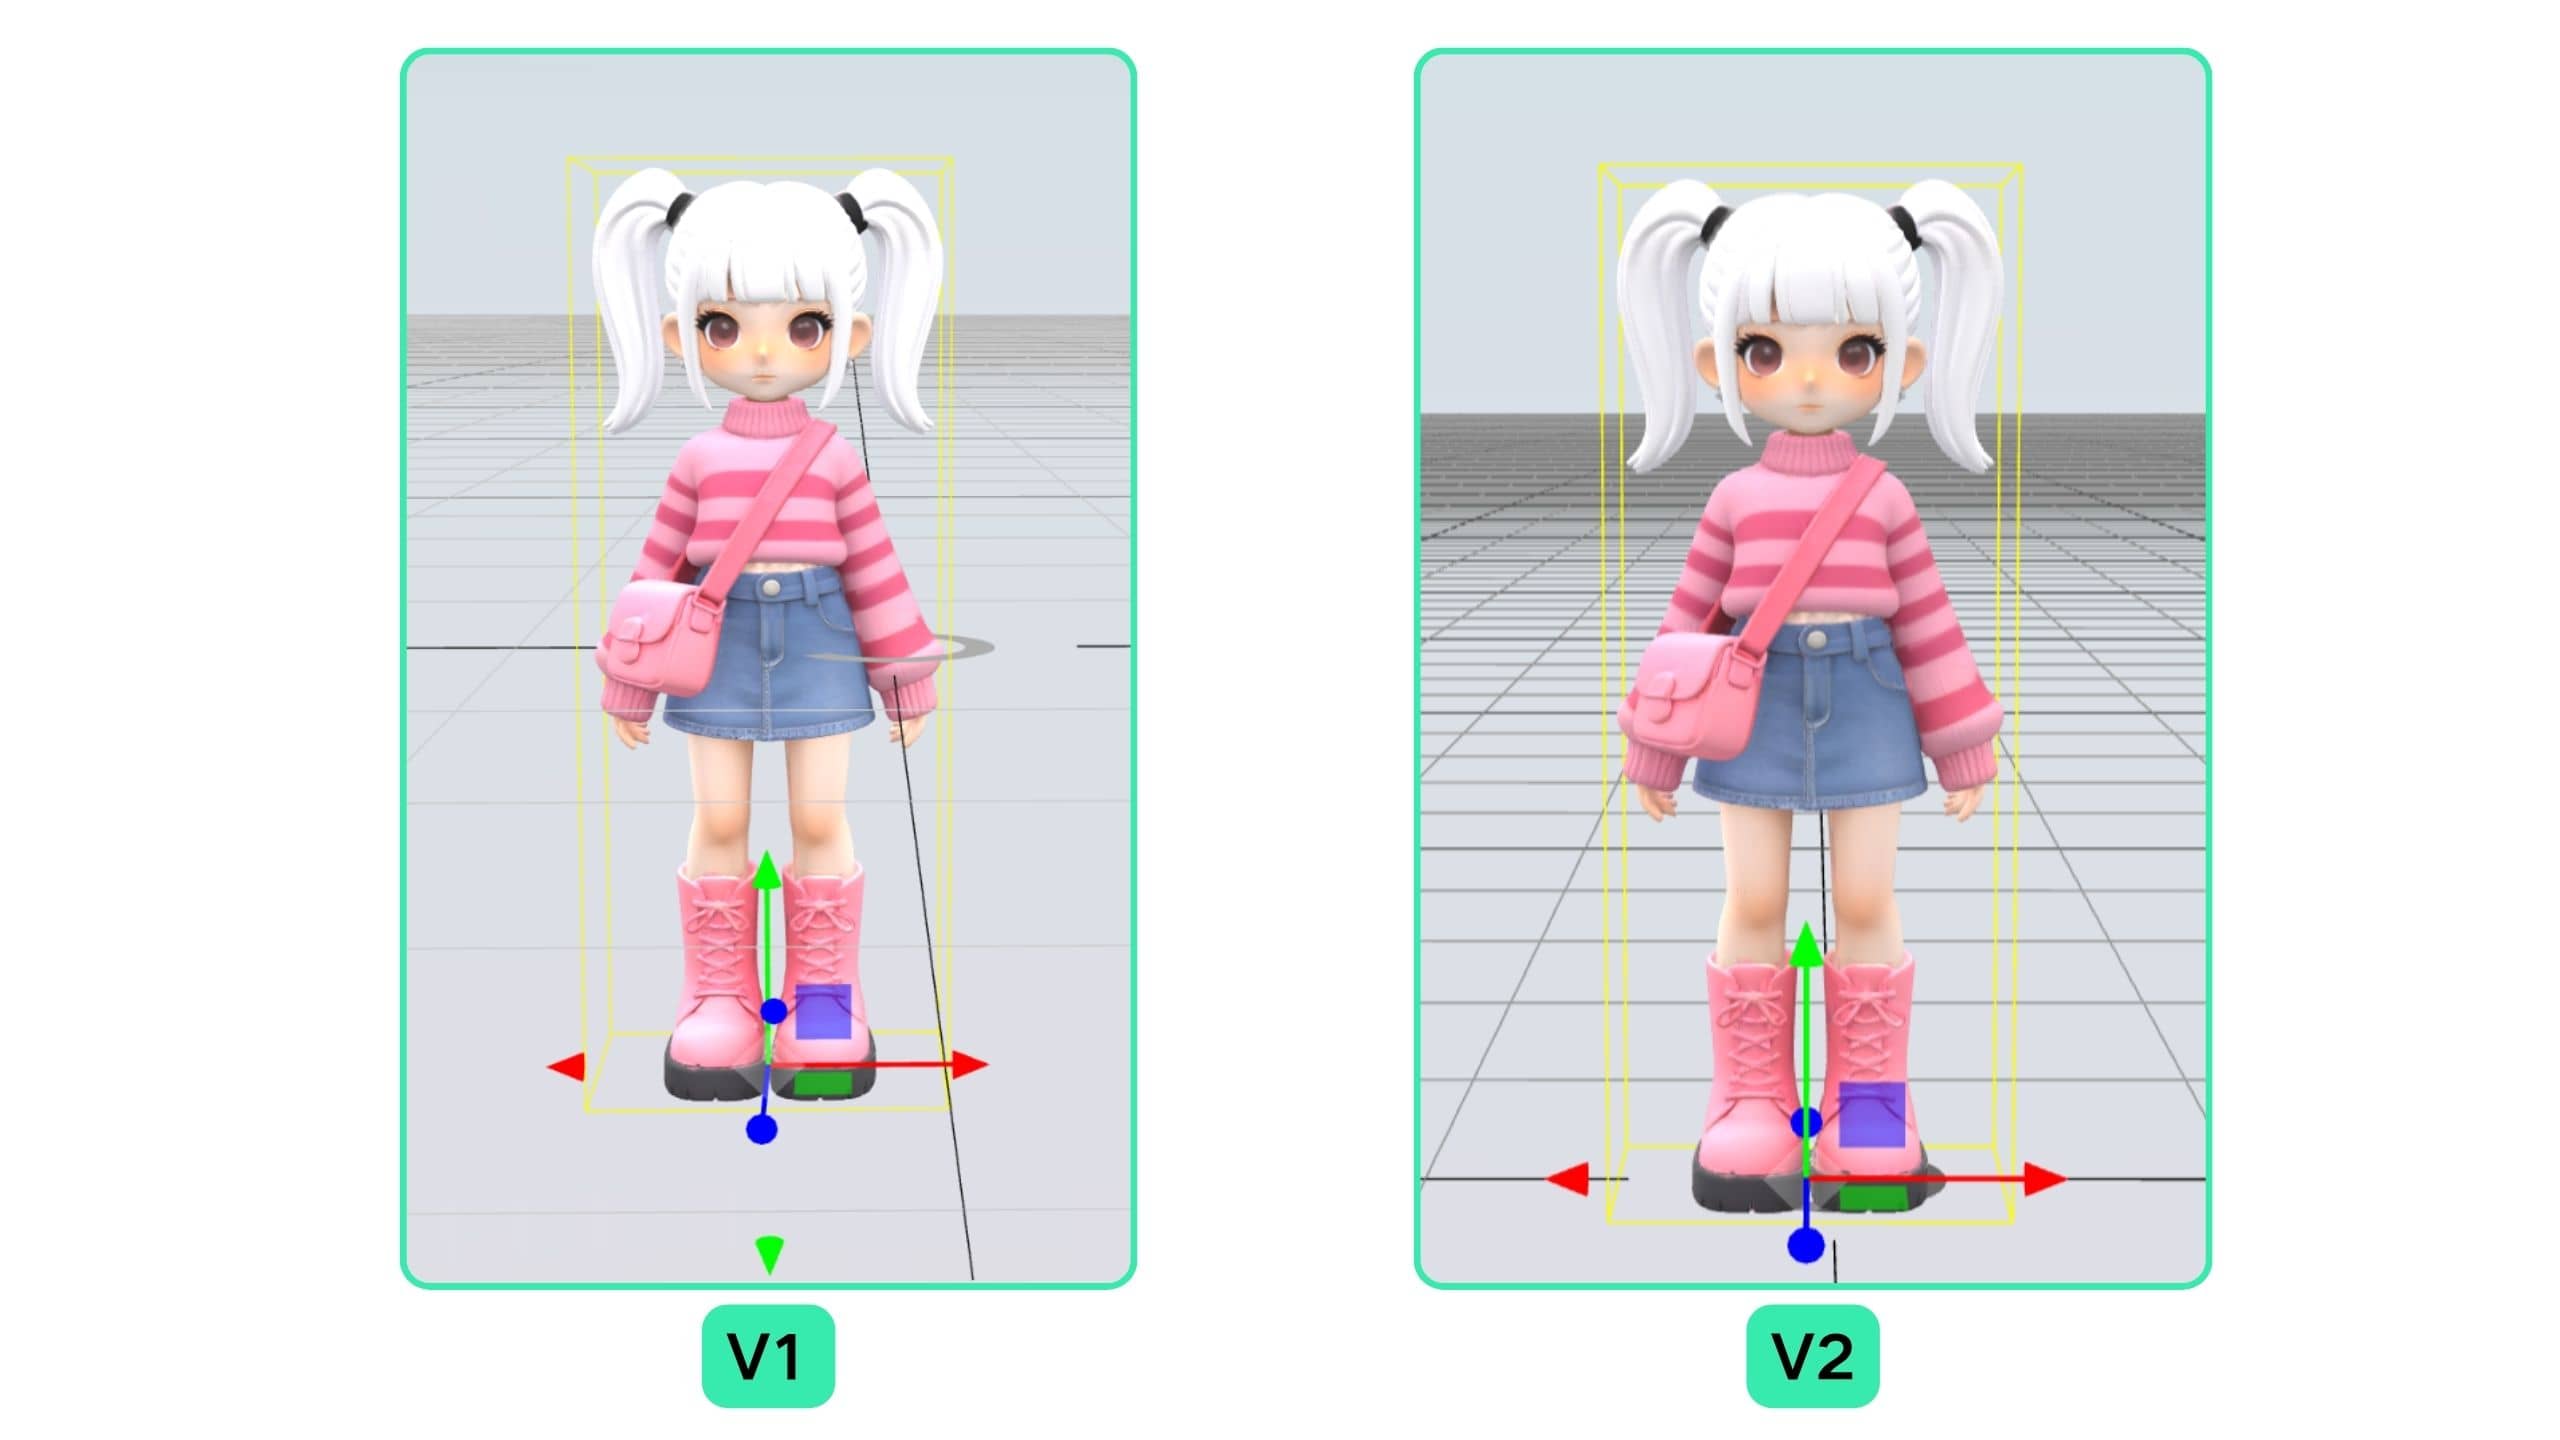
After switching to the V2 Rendering Engine, adjust lighting parameters such as intensity, direction, and environment lighting based on the model materials and scene requirements to achieve more natural rendering results.
When an uploaded 3D model contains exclusive features supported only by the V2 Rendering Engine, a pop-up window will appear during import. We recommend selecting “Switch & Import” to ensure these exclusive features display correctly in the preview.
TIP
V2 Rendering Engine features are currently supported only in Web experiences.
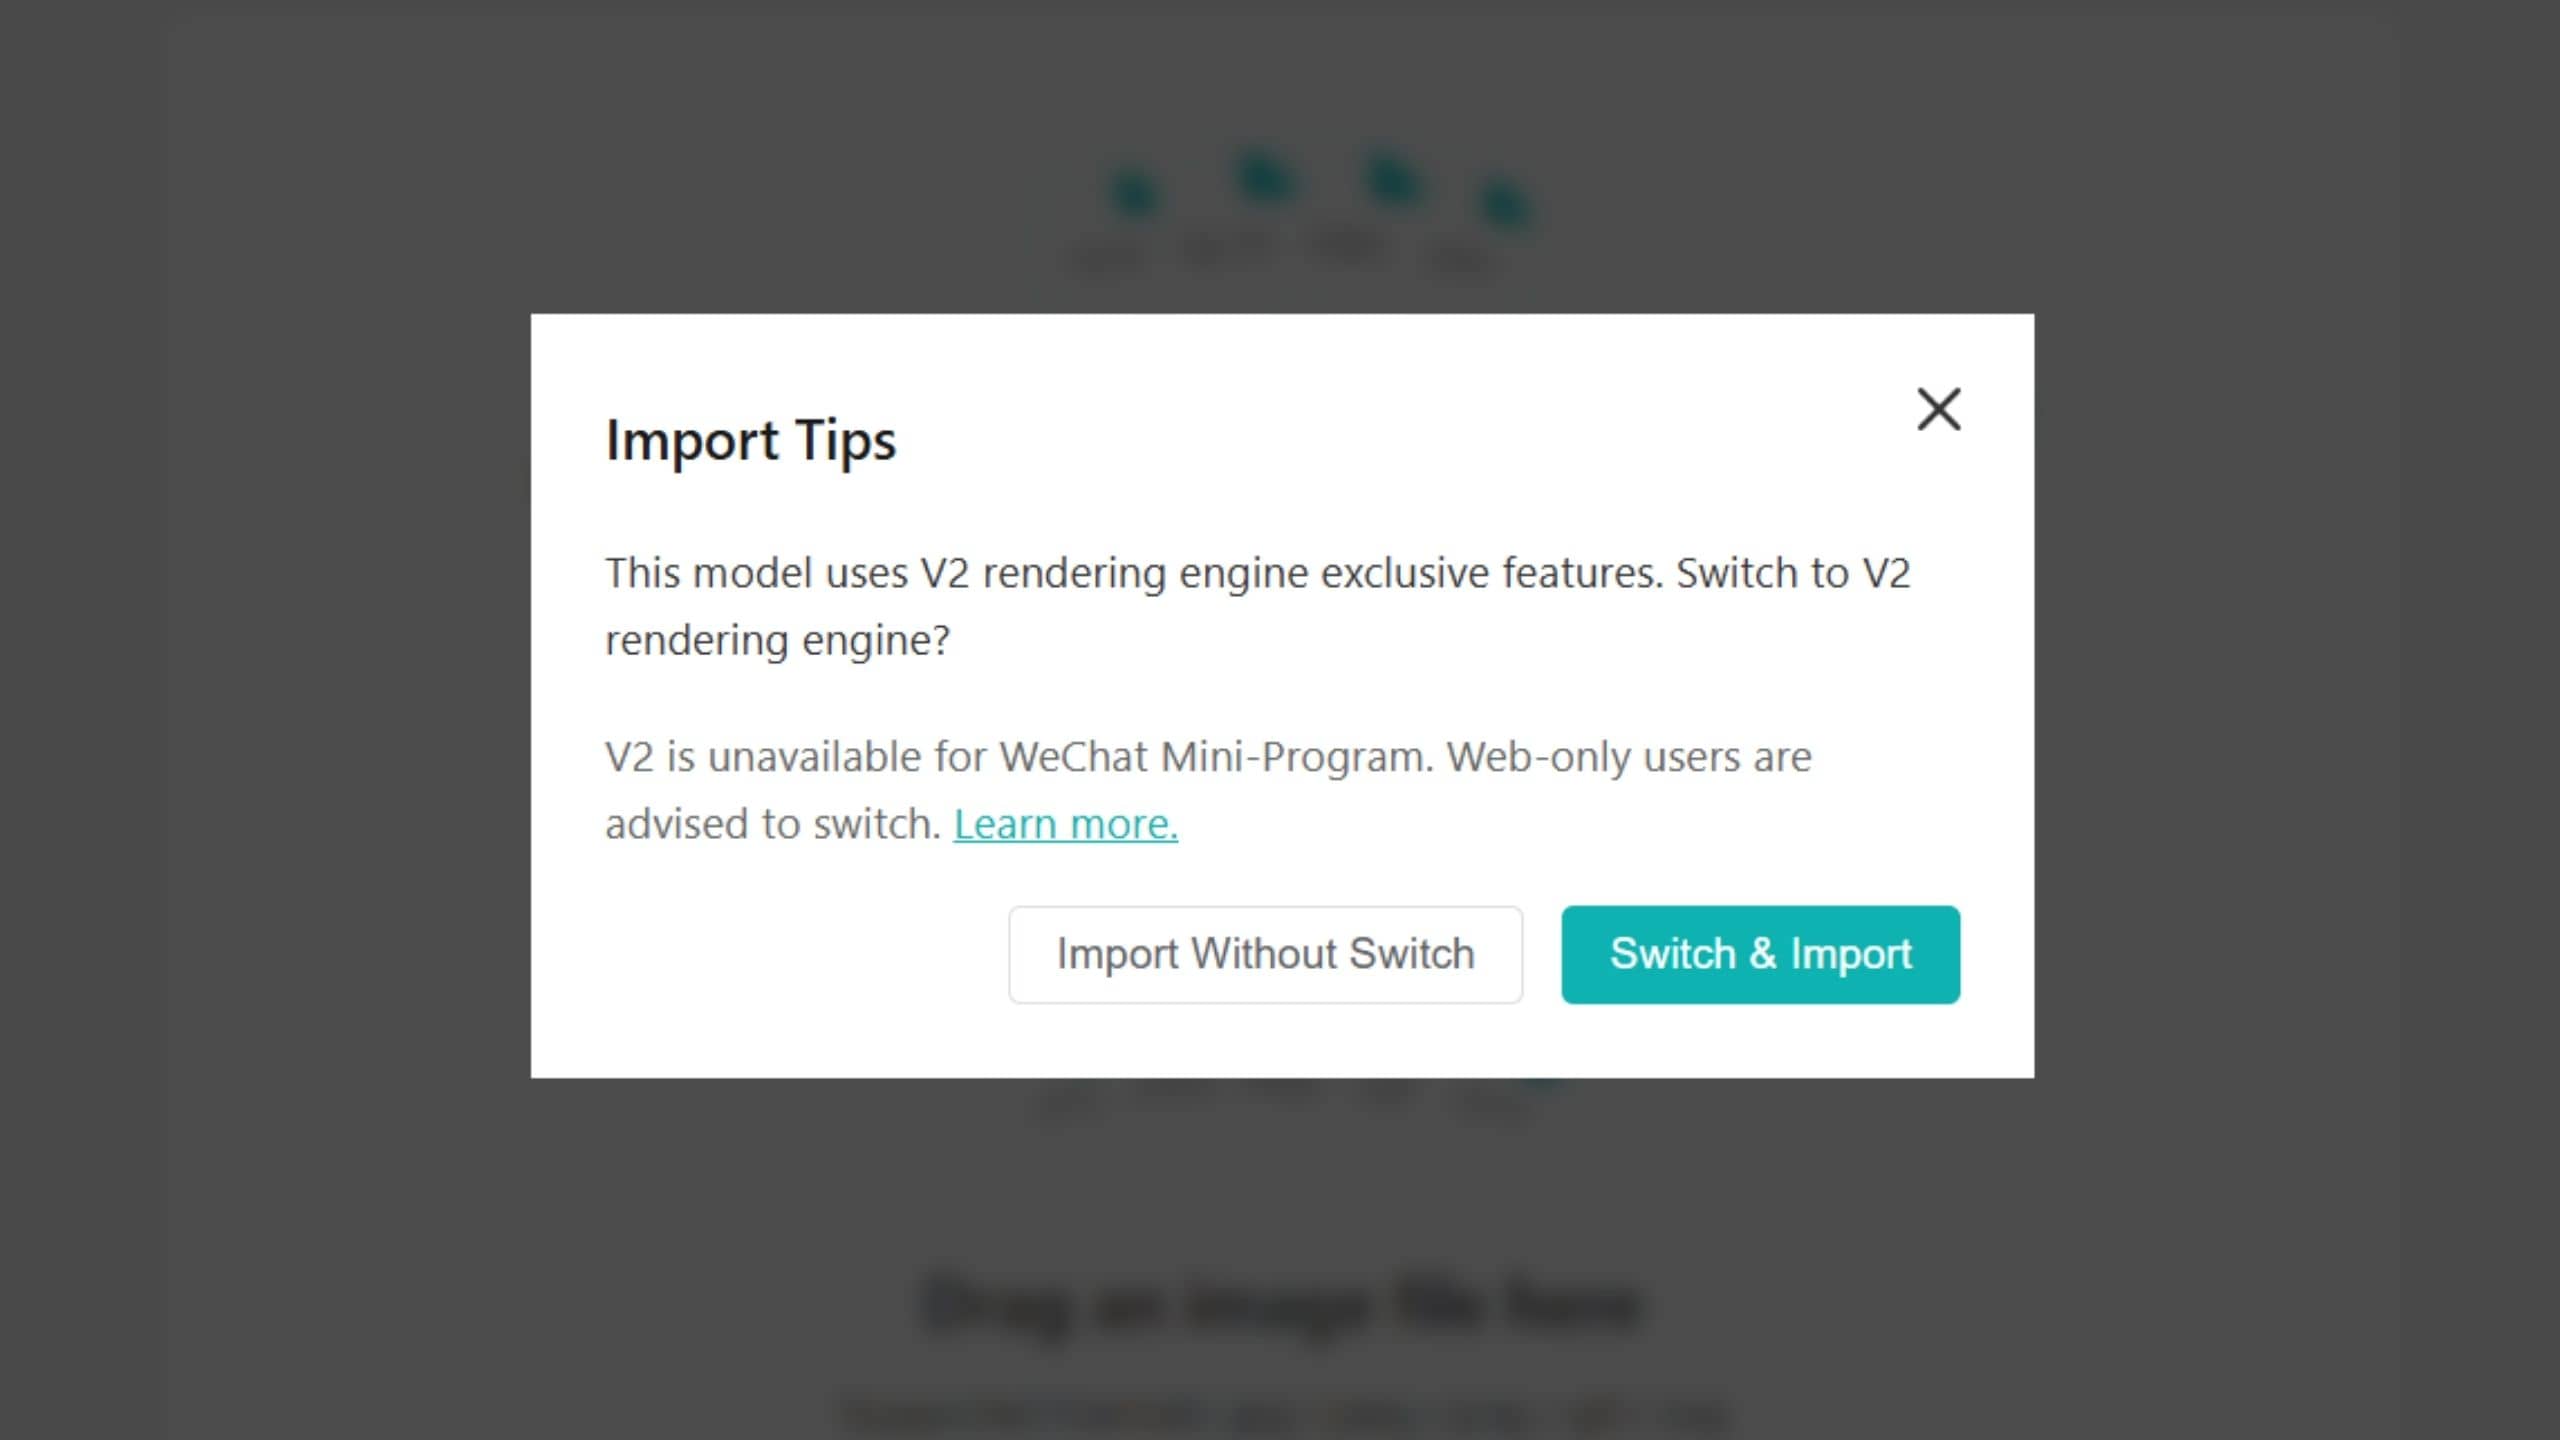
Switch & Import: Automatically enables the V2 Rendering Engine in the Content Editor, allowing you to preview the model’s advanced features.
Import Without Switch: The model will still be imported, but exclusive features will not take effect. You can manually enable the V2 Rendering Engine under Rendering on the right panel.
TIP
After saving the model from the Content Editor to the Scene Editor, manually switch the Scene Editor’s rendering engine version to V2. Save your changes to enable the corresponding effects in the web experience.
This is normal. The Content Editor and 3D software use different rendering engines and lighting environments, so the final model appearance may vary. After confirming that the model structure is correct, you can adjust materials in the Content Editor or configure lighting in the Scene Editor to achieve the desired result.
Textures used in uploaded models must meet the following requirements:
Only JPG, JPEG, and PNG texture formats are supported. Use PNG for transparent textures.
The size of a single texture must not exceed 2048 × 2048.
We recommend using square textures with power-of-two dimensions, such as 16×16, 32×32, 64×64, 128×128, 256×256, 512×512, 1024×1024, and 2048×2048.
When the model UV is set to Repeat, textures used in Mini Programs must be square textures with power-of-two dimensions.
Models that do not meet these requirements can still be uploaded, but they may fail to save to a scene. You can fix this issue in the following ways:
Use tools such as Photoshop or XnView to convert GIF, TGA, DDS, PSD, TIF, BMP, EXR, and HDR files into JPG, JPEG, or PNG formats.
Resize textures to meet the requirements.
Click Optimize Model in the Content Editor to automatically compress textures and optimize model performance.
If the skeletal animation does not play correctly, please check the following settings:
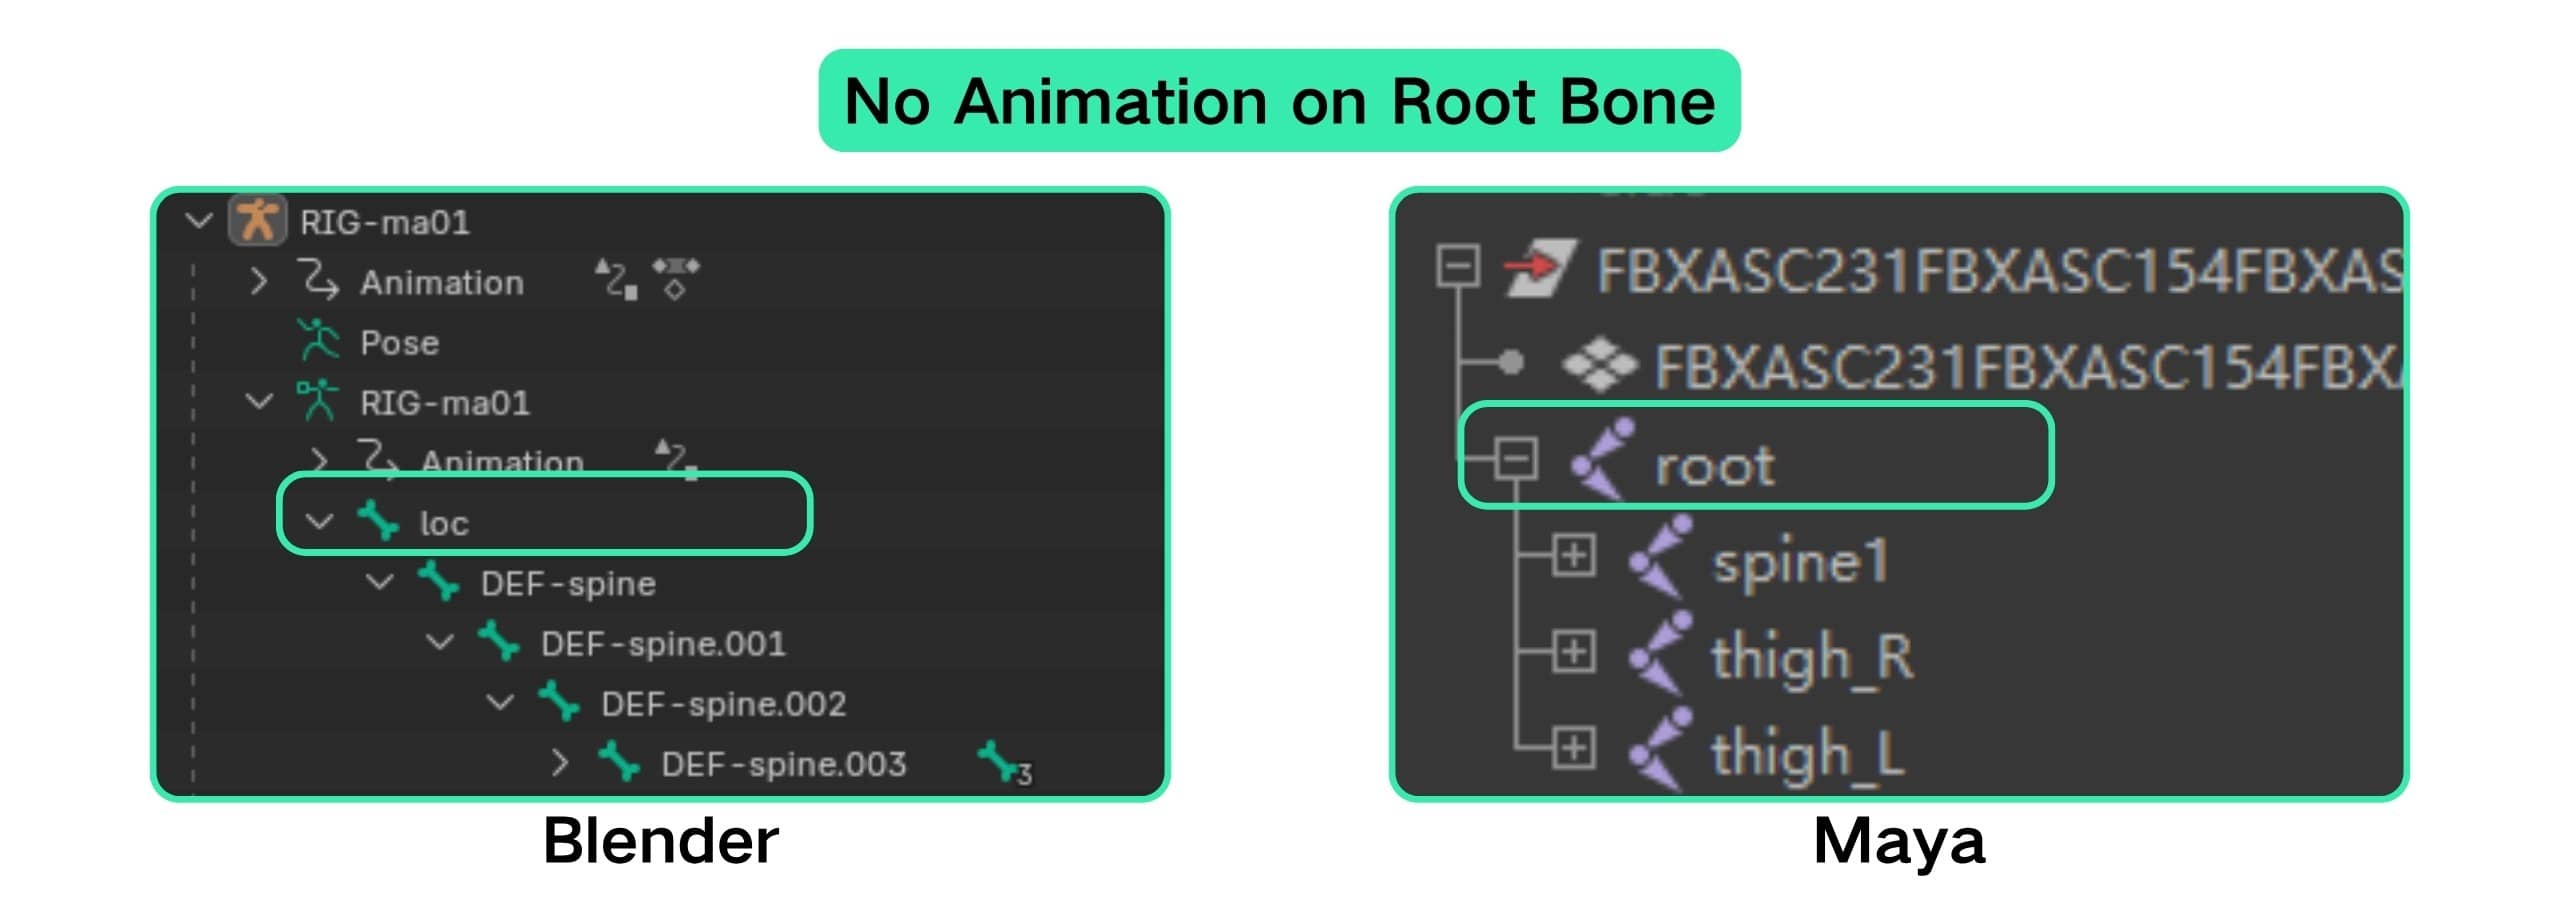
Do not name any bone root.
Make sure Root Bone does not contain animation data. If the animation is bound to the Root Bone, add an empty bone as its parent and bind the animation to the child bone instead. This ensures the model can be imported and animated correctly.
The issue may be caused by unsupported glTF extensions used in the model, which can result in import failures or incorrect material display.
You can try the following solutions:
Export the model as an FBX file and import it into the Content Editor again.
Check your GLB export settings and make sure unsupported glTF extensions are not included.
Common issues include:
The model is empty after import
Import fails or causes browser issues
The model displays correctly in the Content Editor but has material issues after being added to the Scene Editor
Other model-related issues
If you encounter any import issues, we recommend trying New Import or Magical Import first. If the issue persists, import the model into Blender to check whether the model file itself is valid.
If the model file has issues, please refer to the Kivicube 3D Model Requirements or learn how to properly export models from common 3D software.
If the model file is valid, please send the model file to our support email: wendell.yang@kivisense.com. Include a detailed description of the issue, and screenshots or error messages if available. Our technical team will help investigate the problem.
You can browse and select free 3D models from Sketchfab Models in Kivicube, then import them into the Content Editor.
TIP
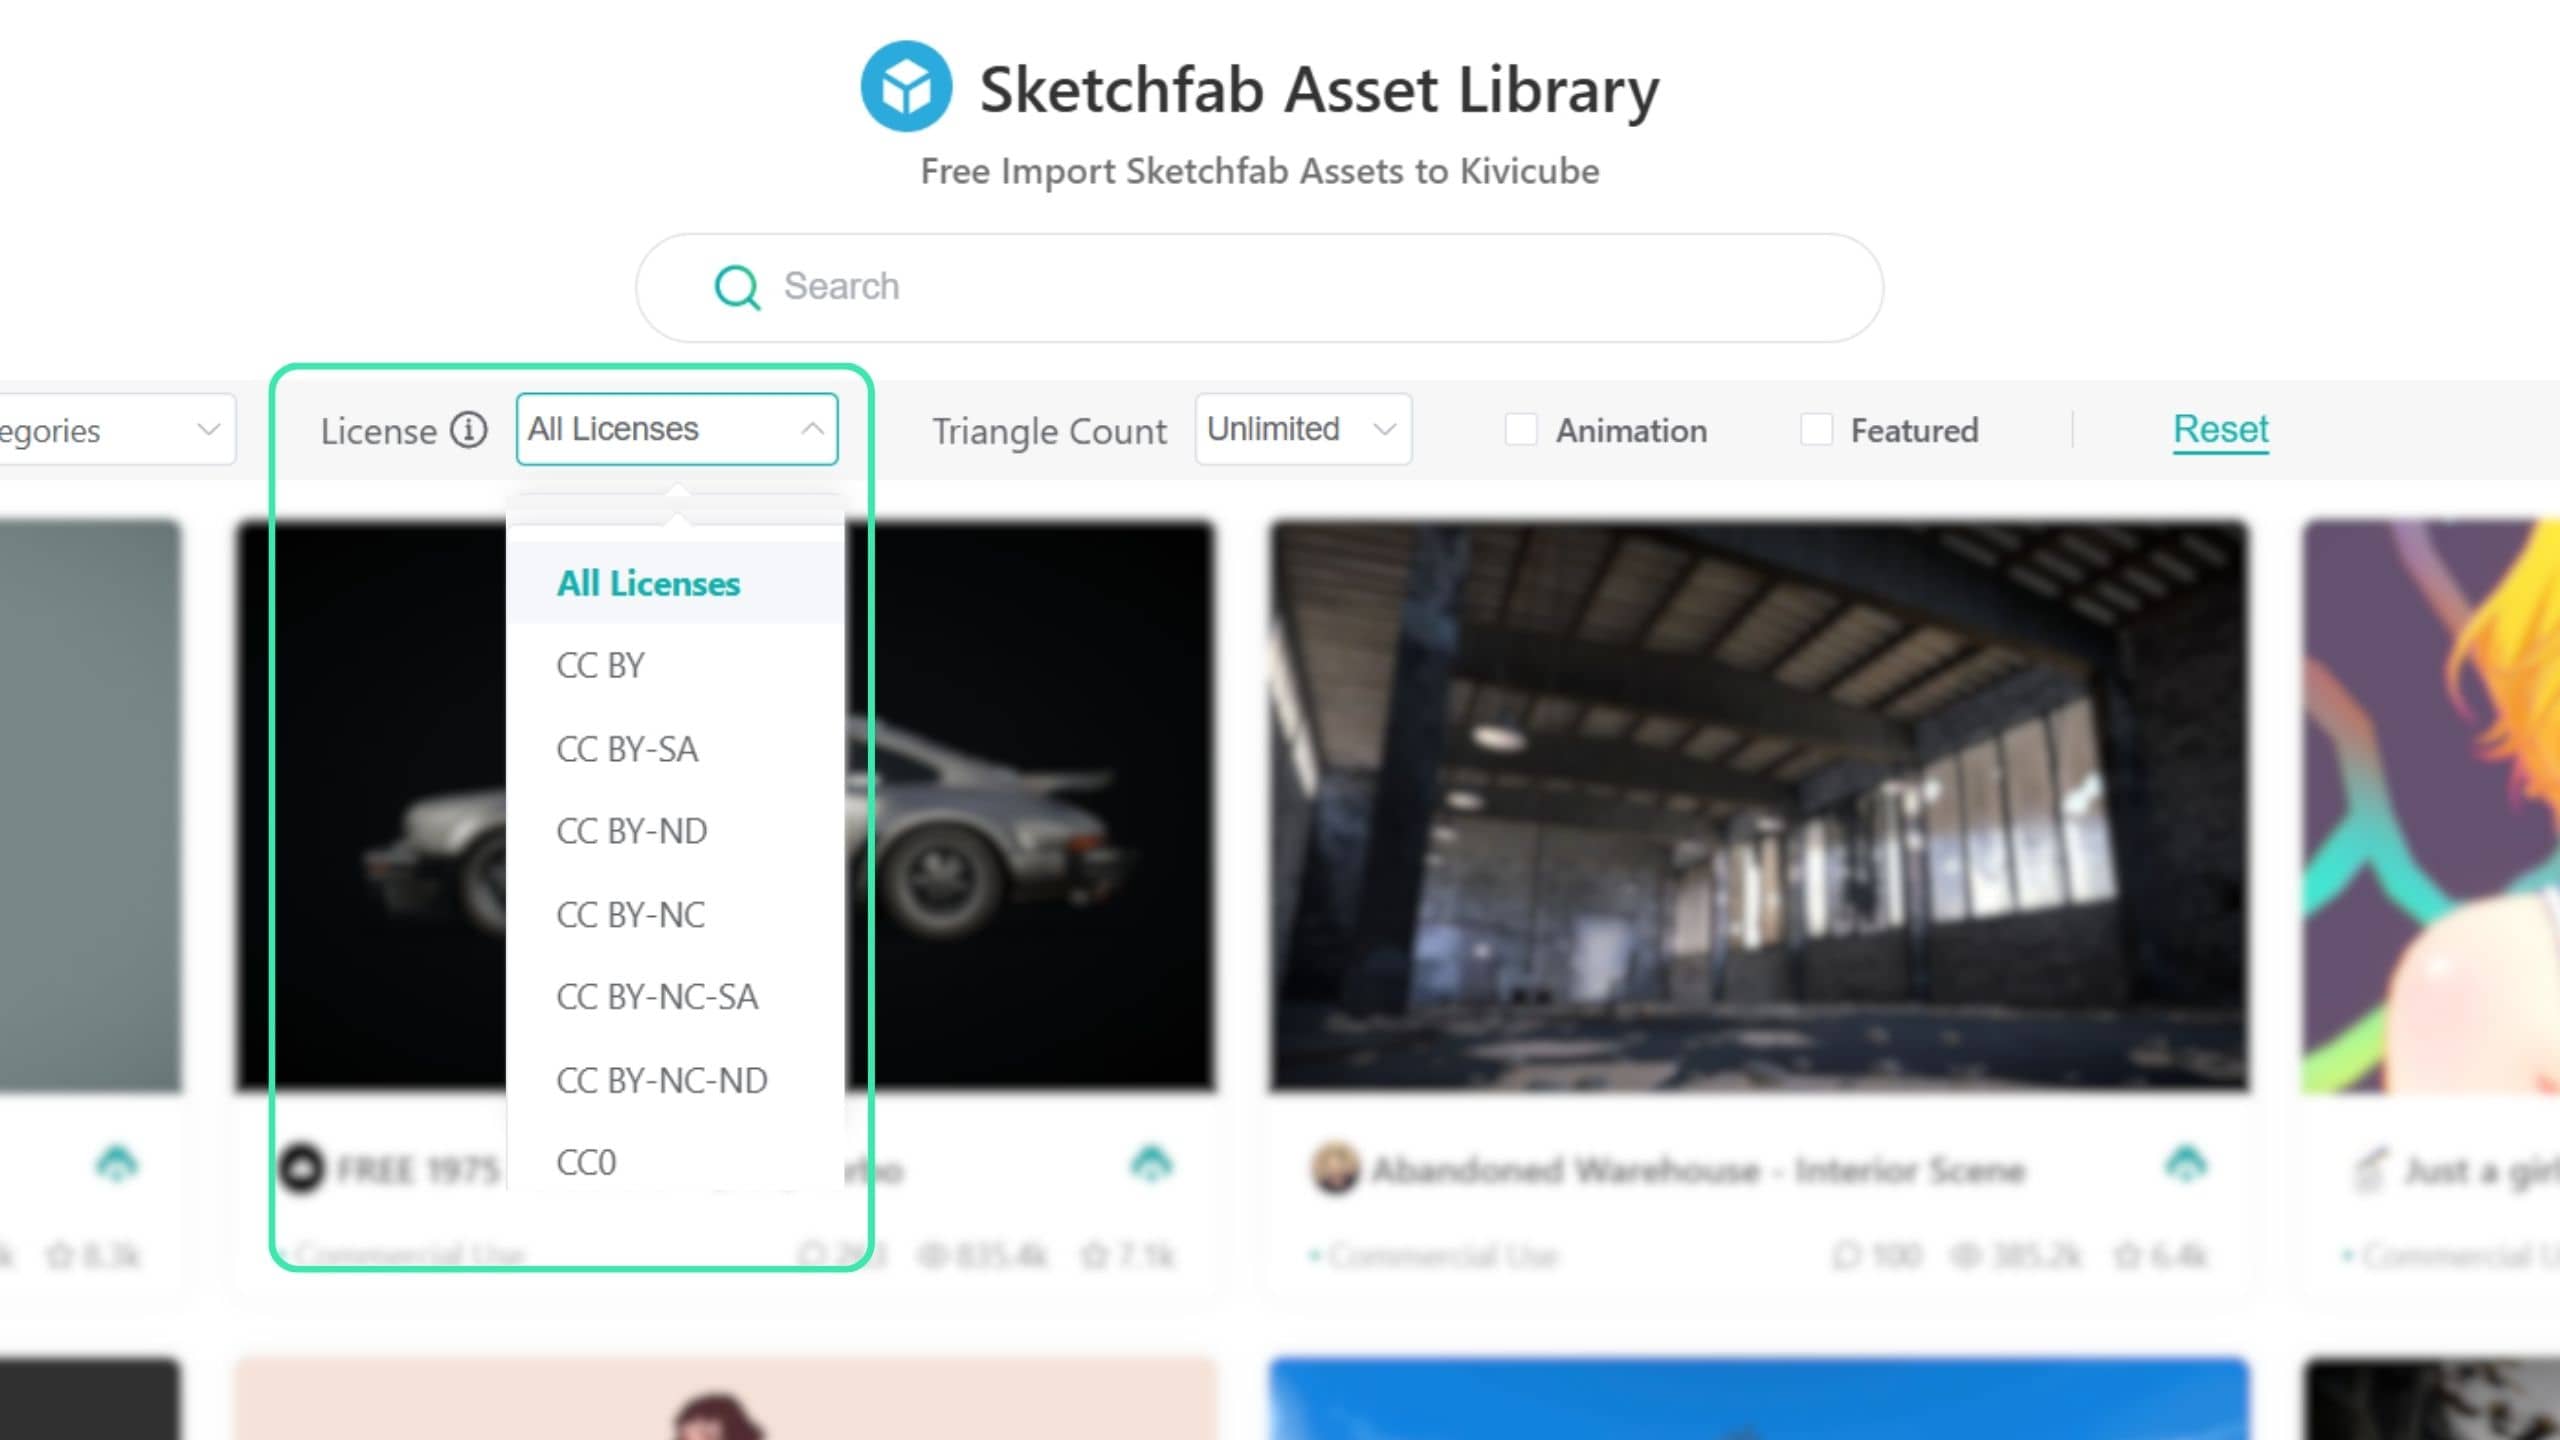
The assets are provided by the third-party platform Sketchfab. Copyright, compliance, and commercial usage rights are determined by the original creators. Please review the license terms before use. You are responsible for any copyright-related issues that may arise.
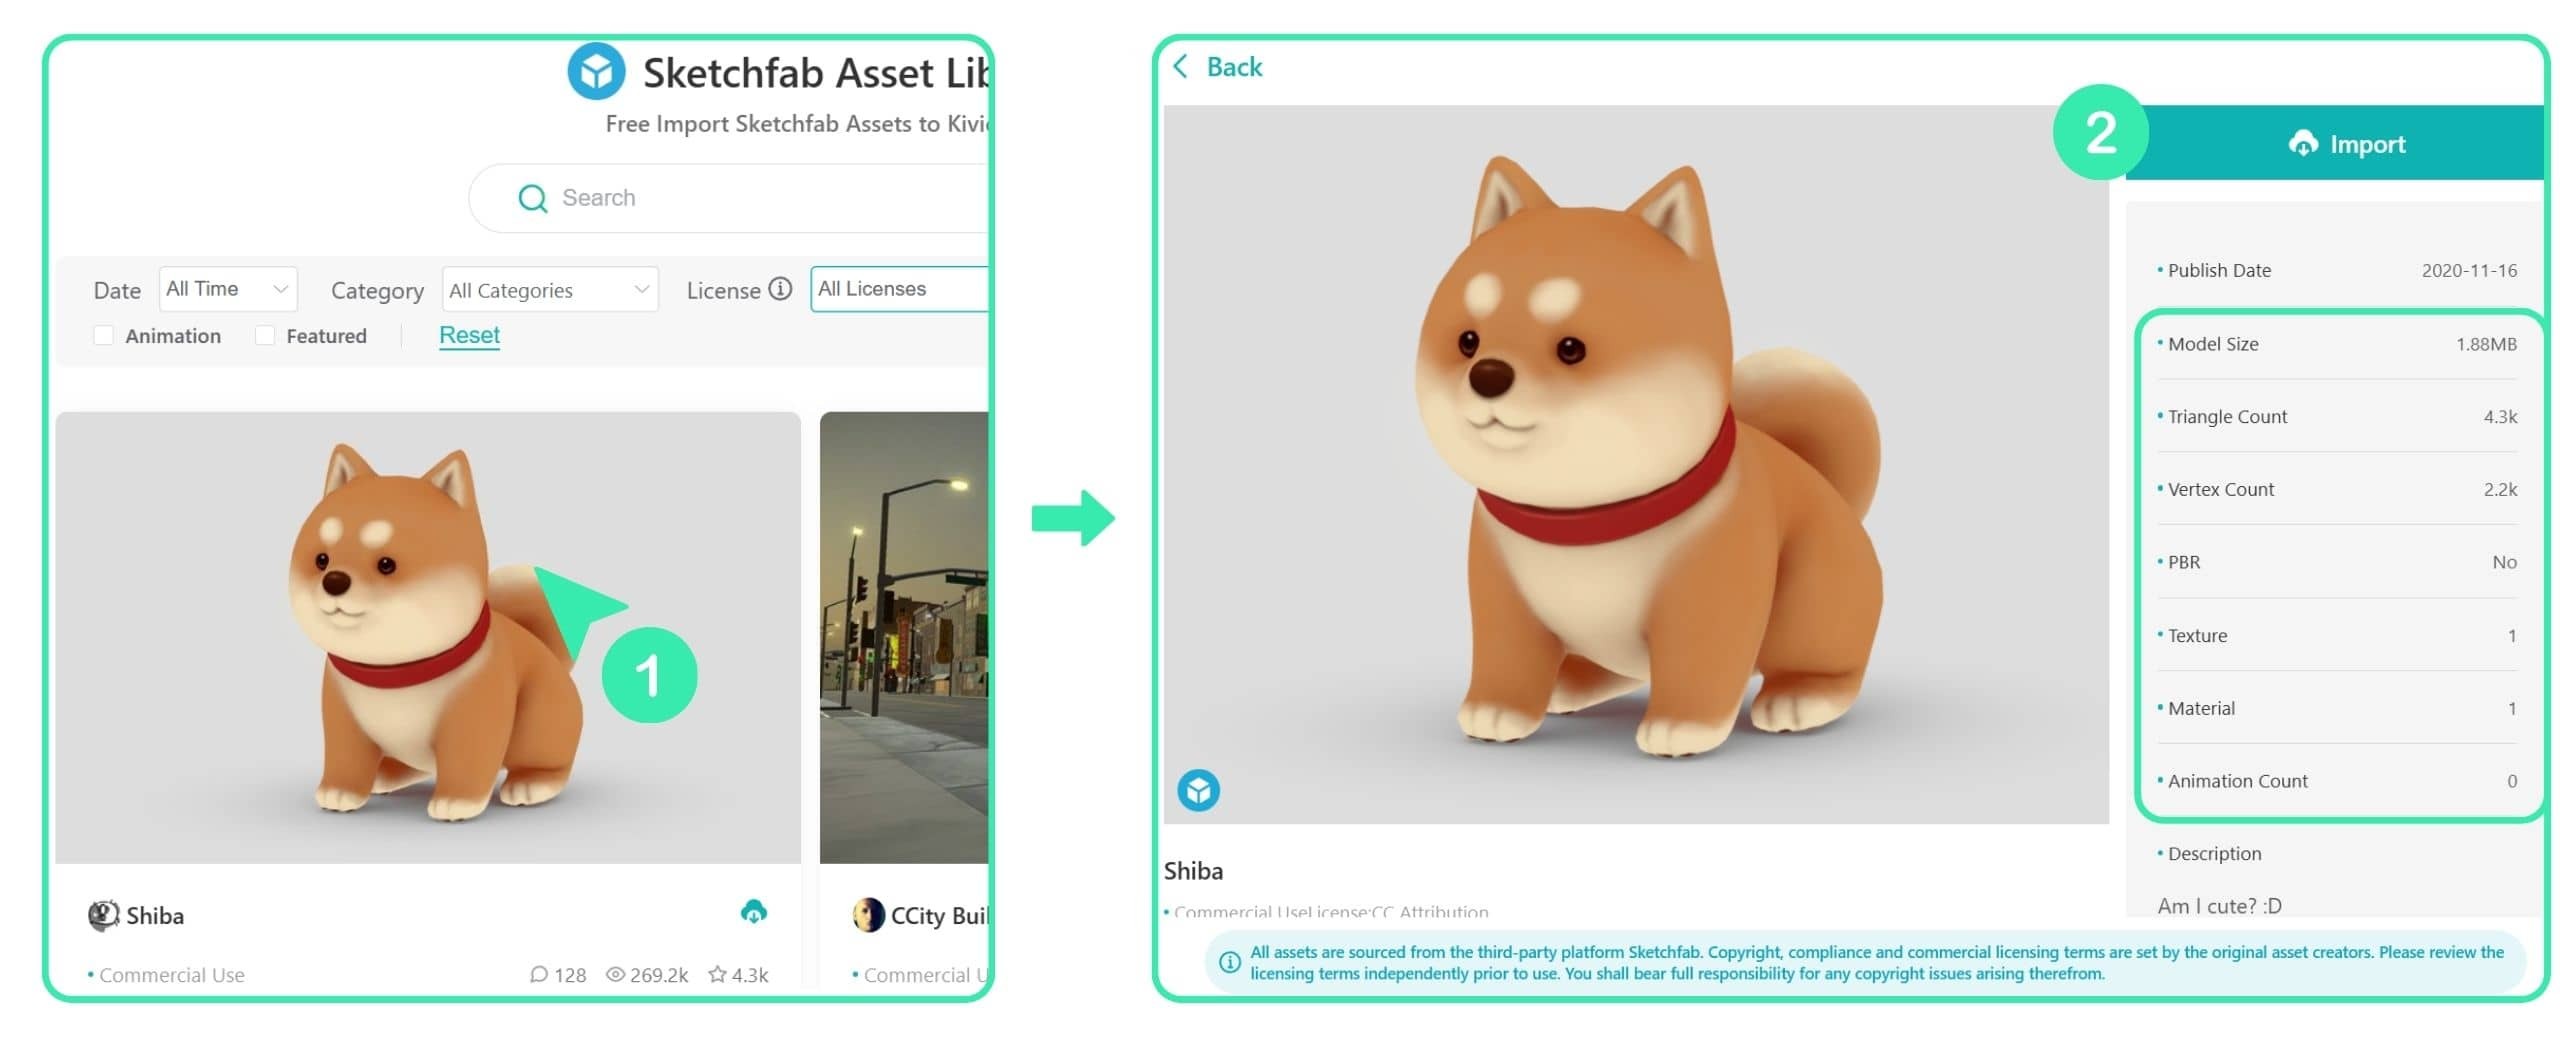
In the model asset panel on the left side of the Scene Editor, select Sketchfab Models. After signing up and logging in, you can browse or search for models you like and import them into the Content Editor.
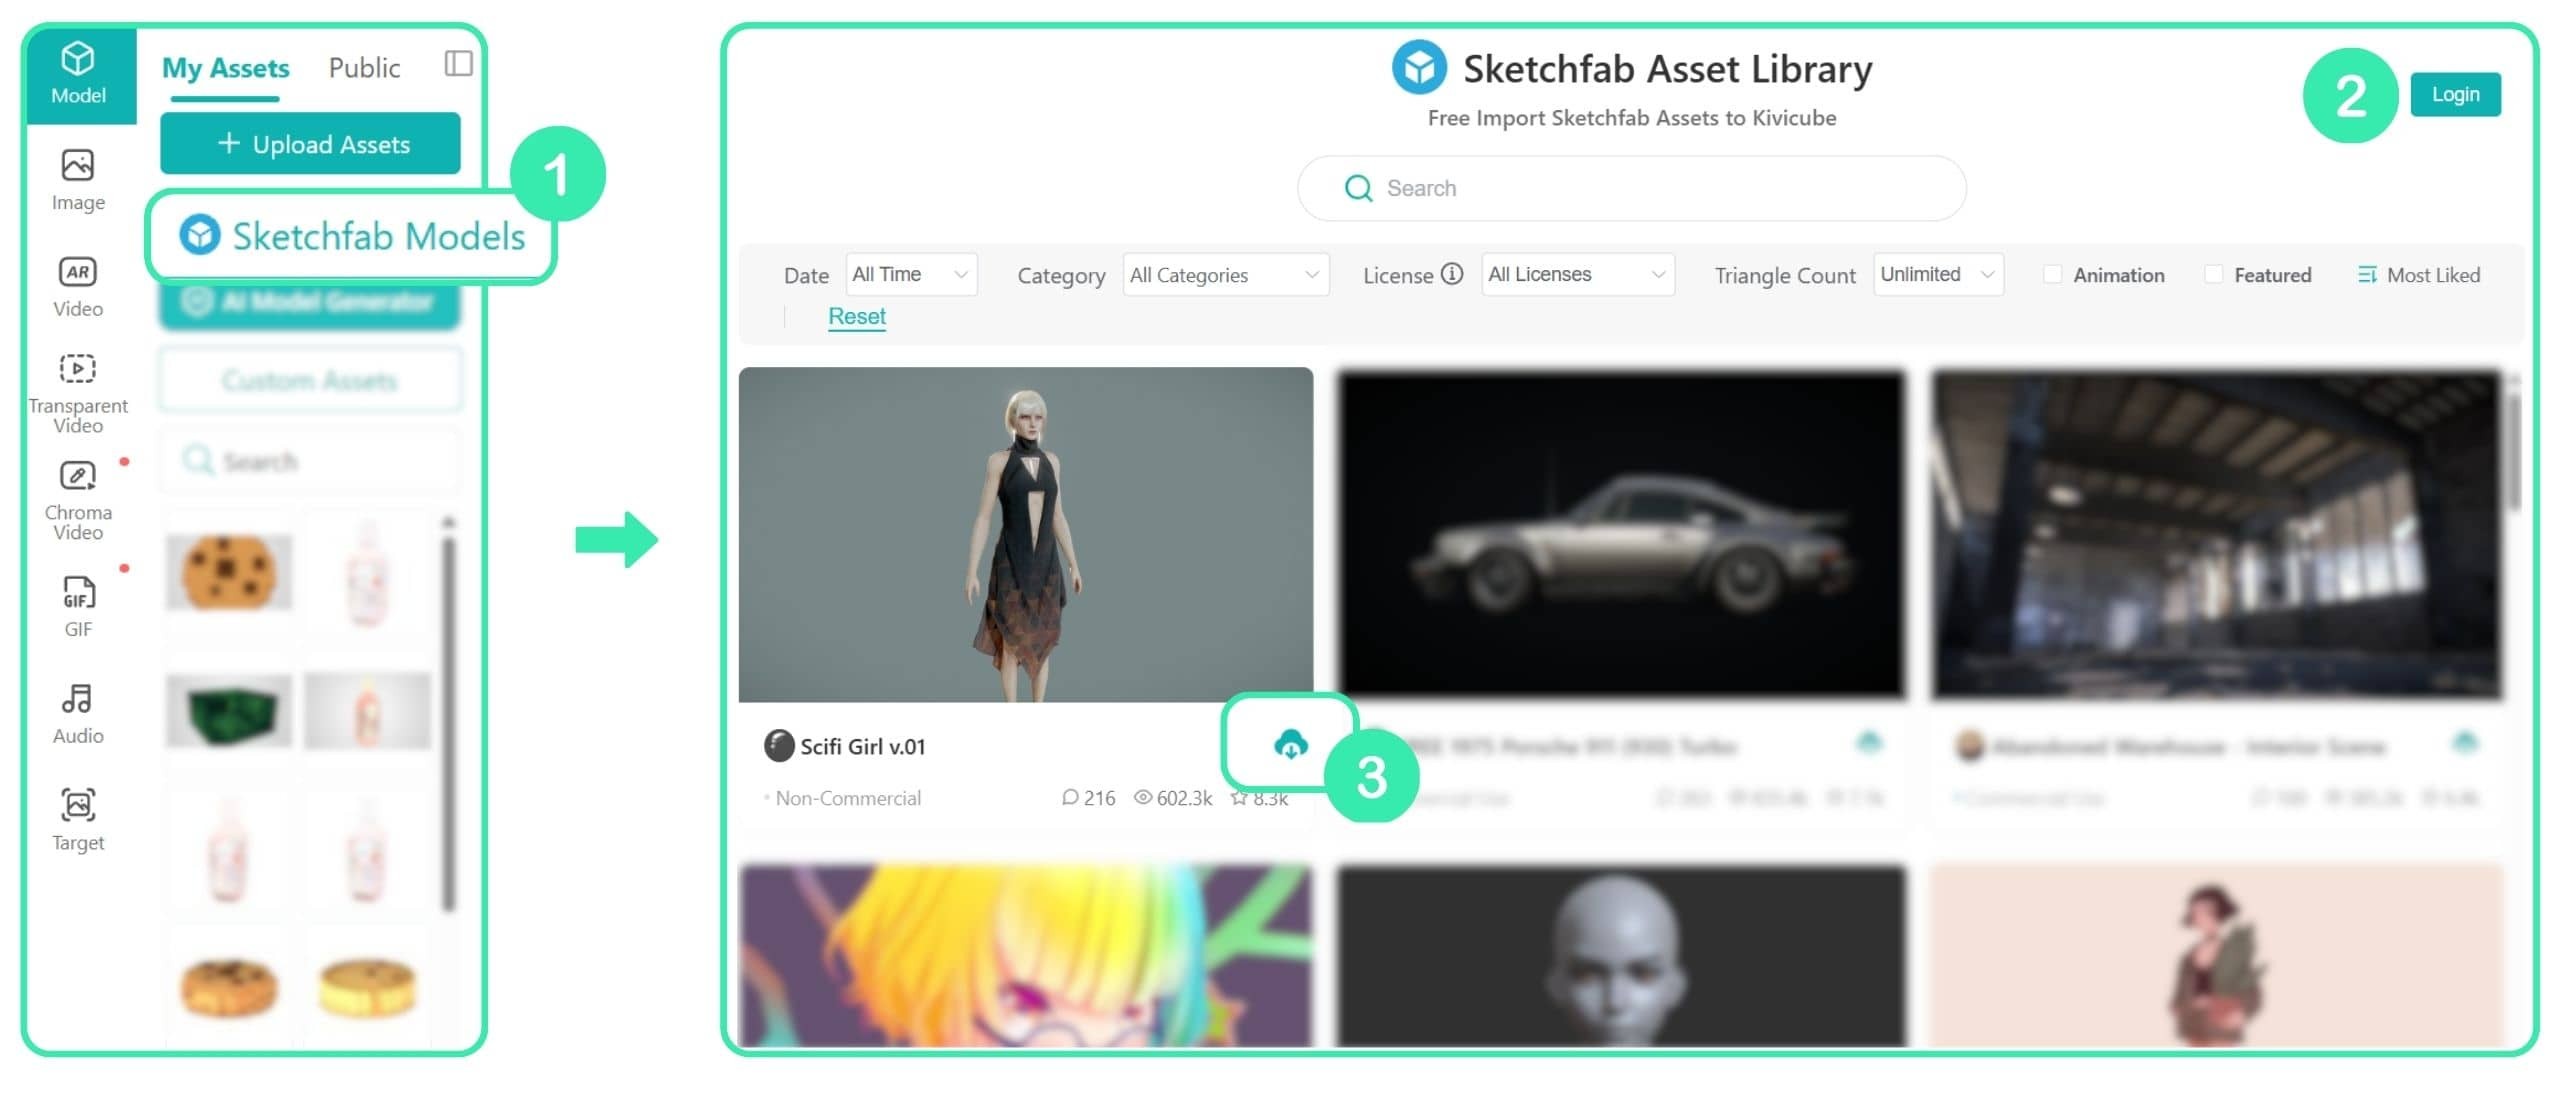
Before importing a model, click the thumbnail to check its properties and make sure the file size and polygon count meet the Kivicube 3D Model Requirements. Avoid using models with large file sizes or high polygon counts, as they may cause slow loading, poor AR performance, or even affect page stability.
The models in the asset library are provided by third-party platforms. Copyright and licensing terms are determined by the original creators. Before using a model, please review its license agreement and make sure it meets your intended use case.You are responsible for any copyright-related issues.
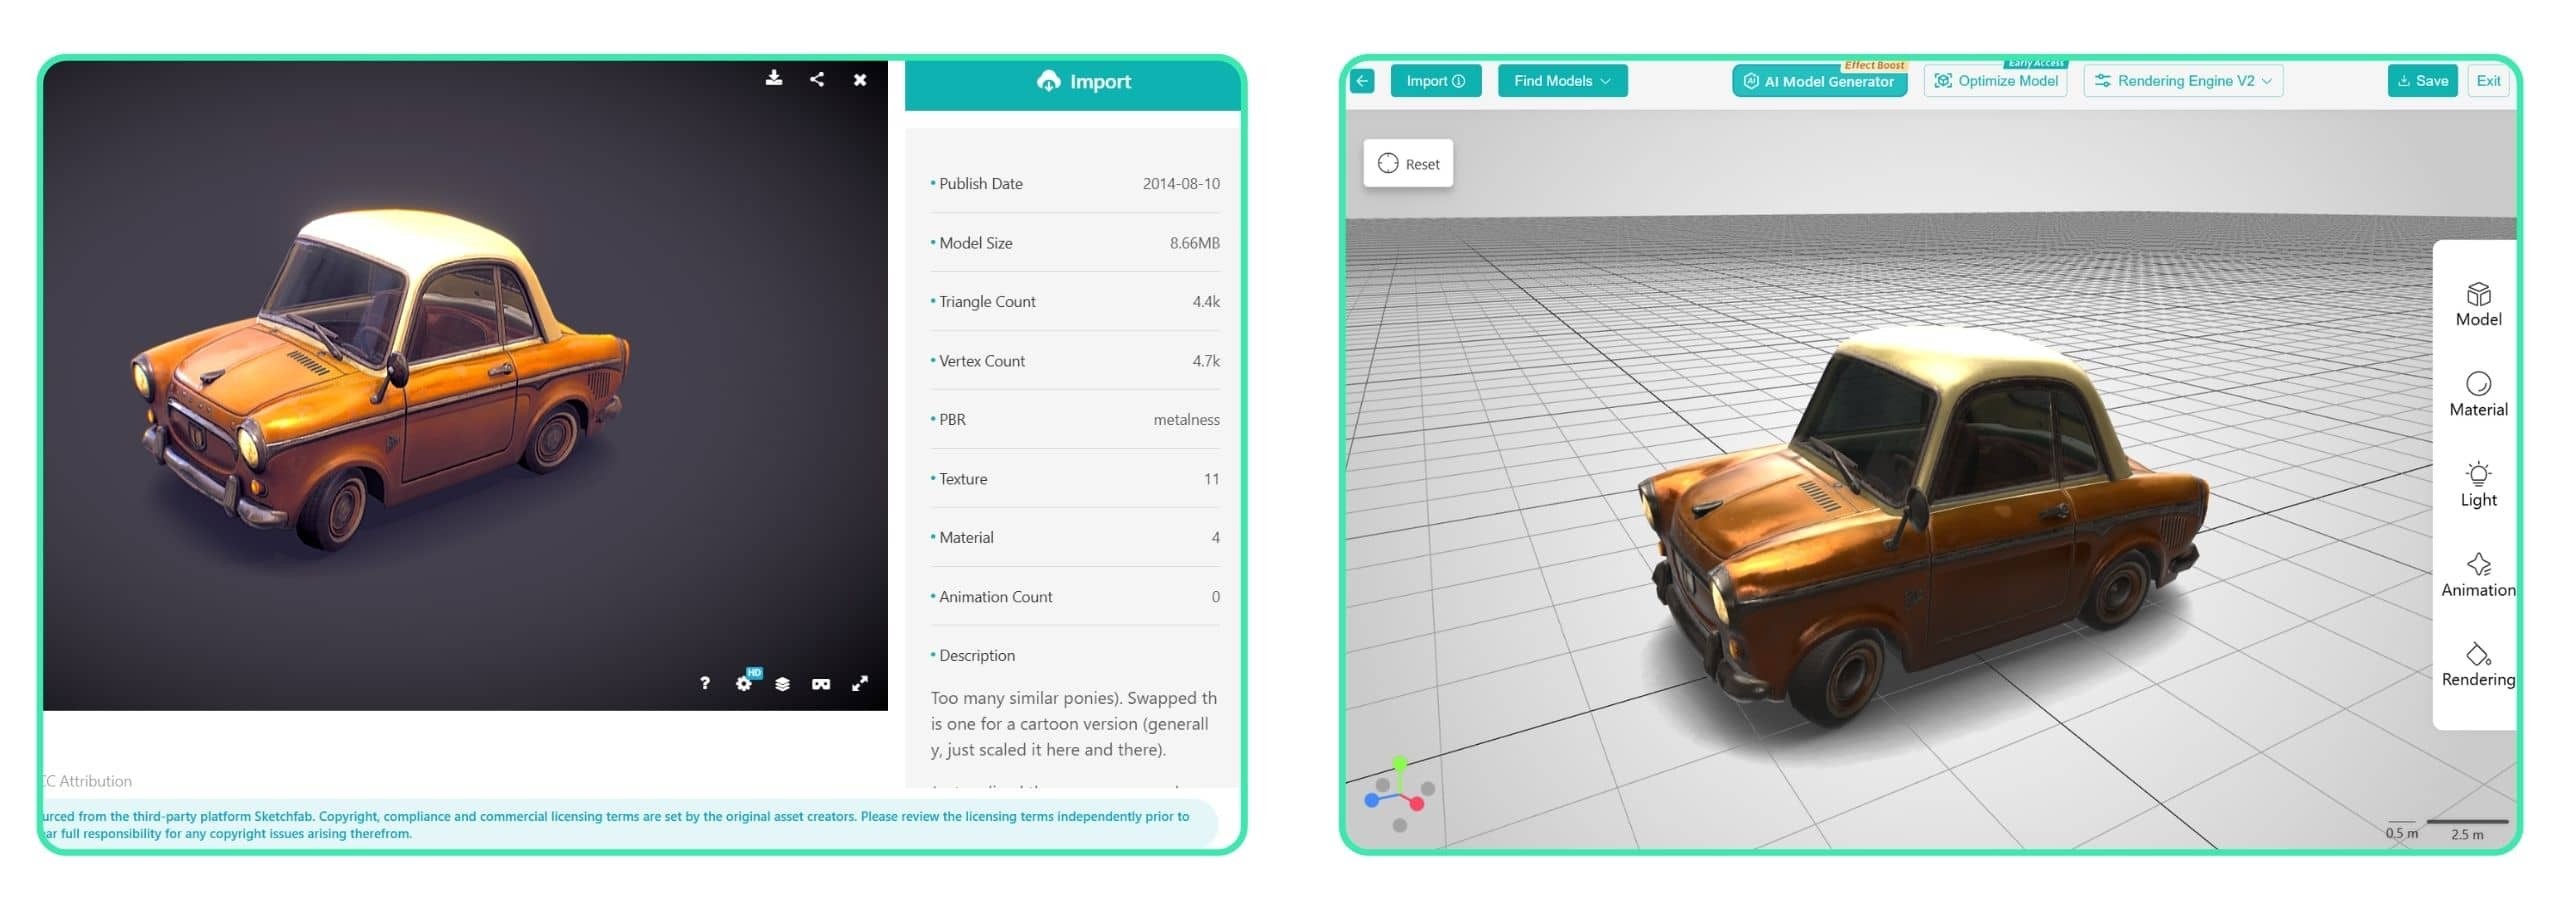
This is normal. Sketchfab and Kivicube use different rendering engines and lighting environments, so the same model may look different on each platform. You can adjust the model materials in the Content Editor and configure lighting and rendering settings in the Scene Editor to further optimize the model appearance.
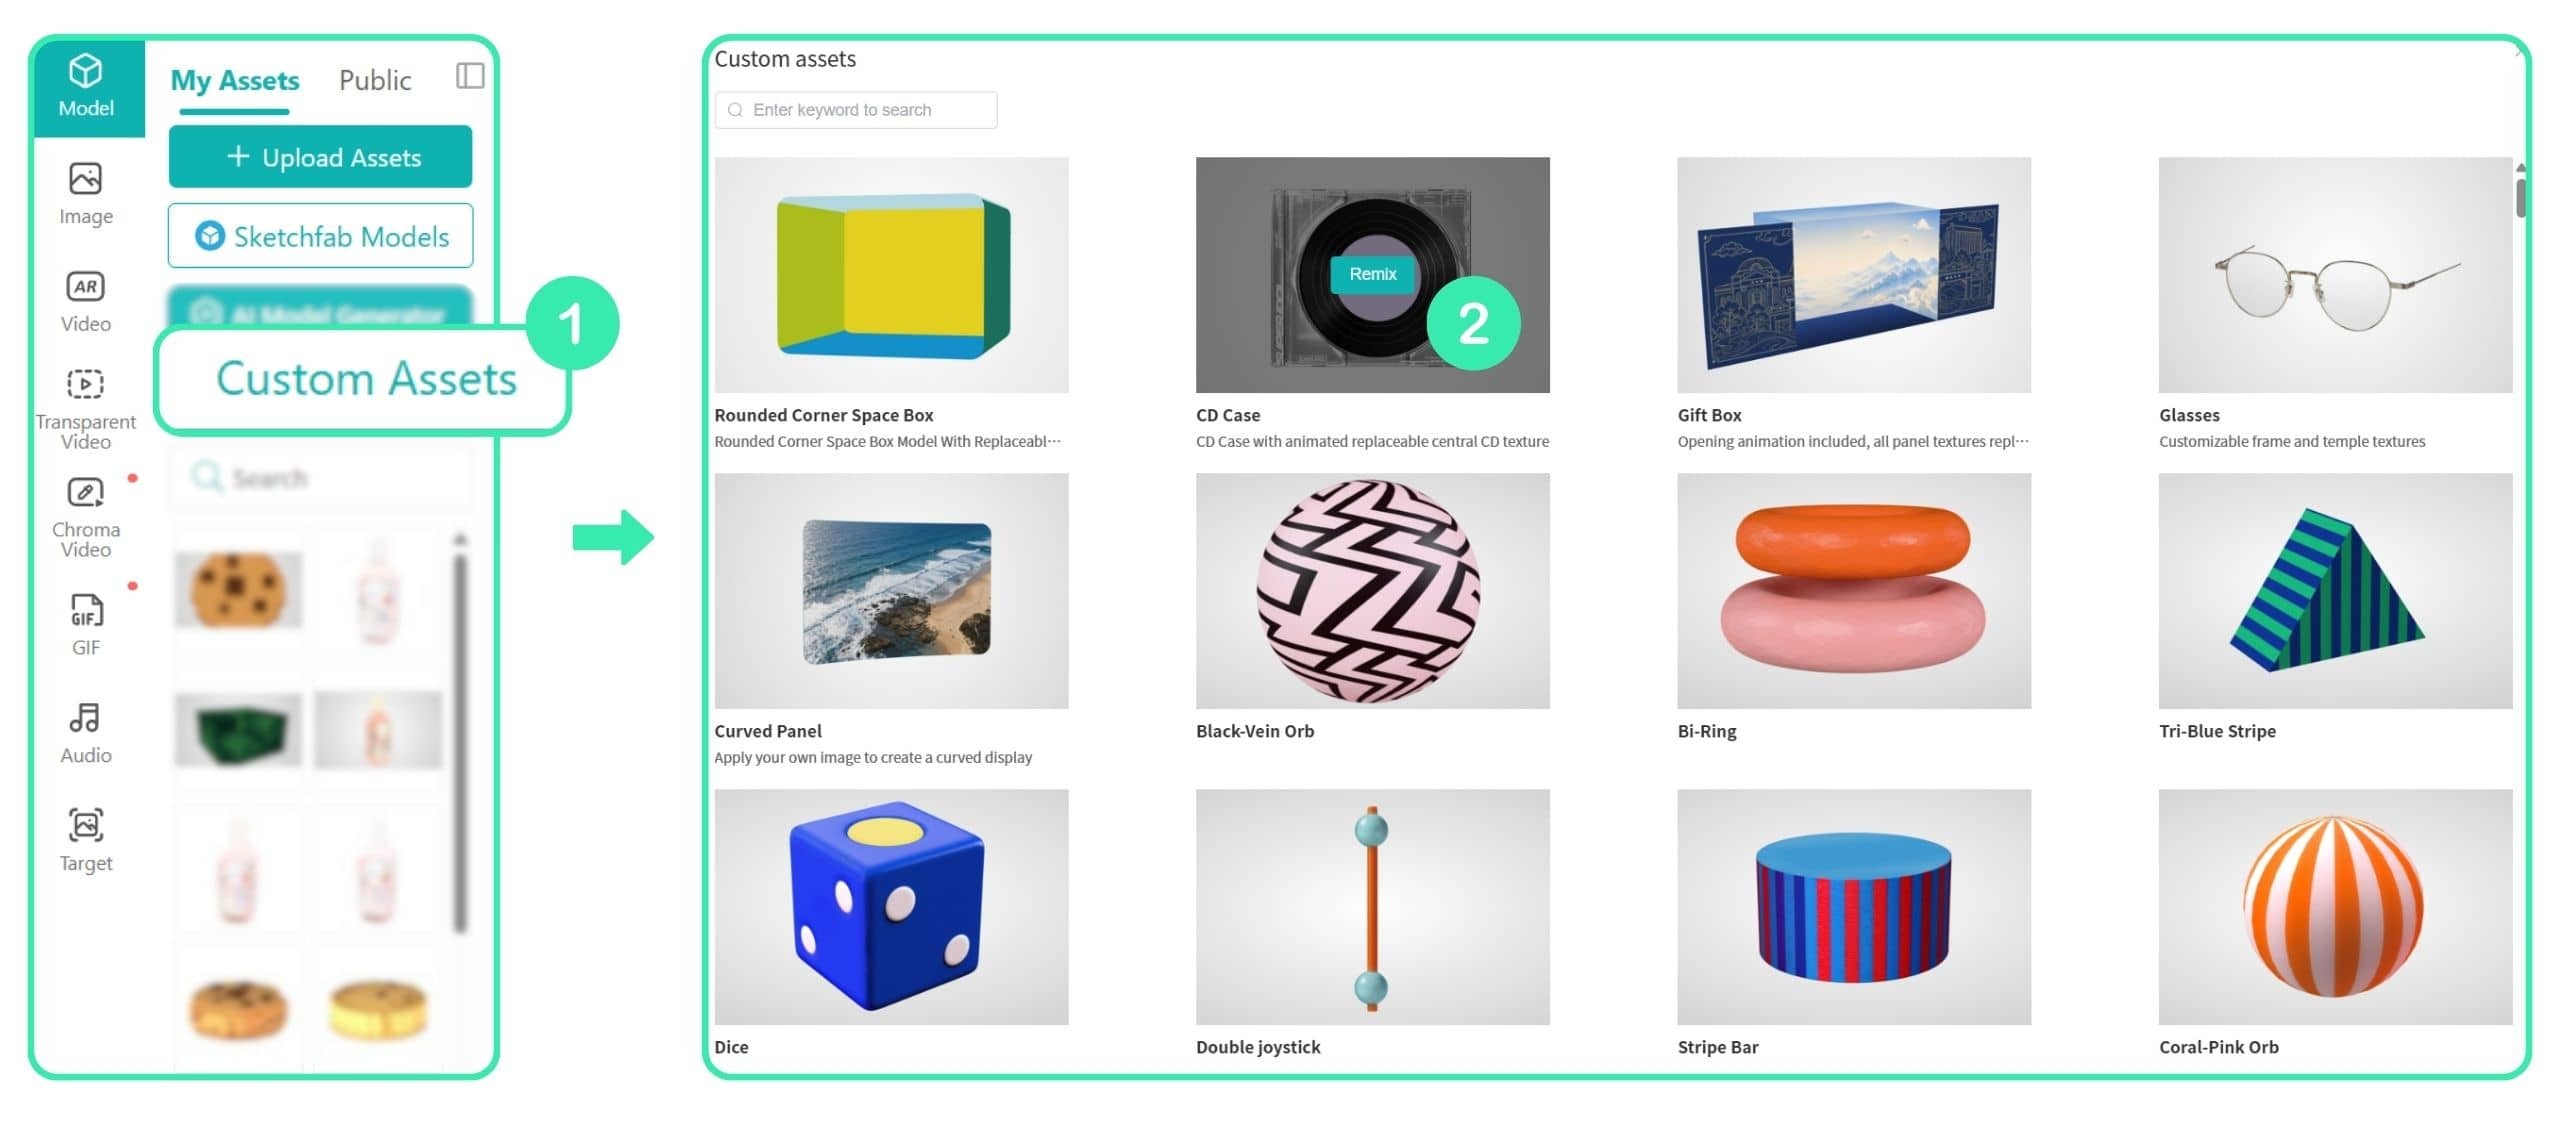
The Custom Asset Library provides optimized 3D model templates. You can select a suitable model, import it into the Content Editor, and replace the textures directly to quickly create personalized 3D assets.
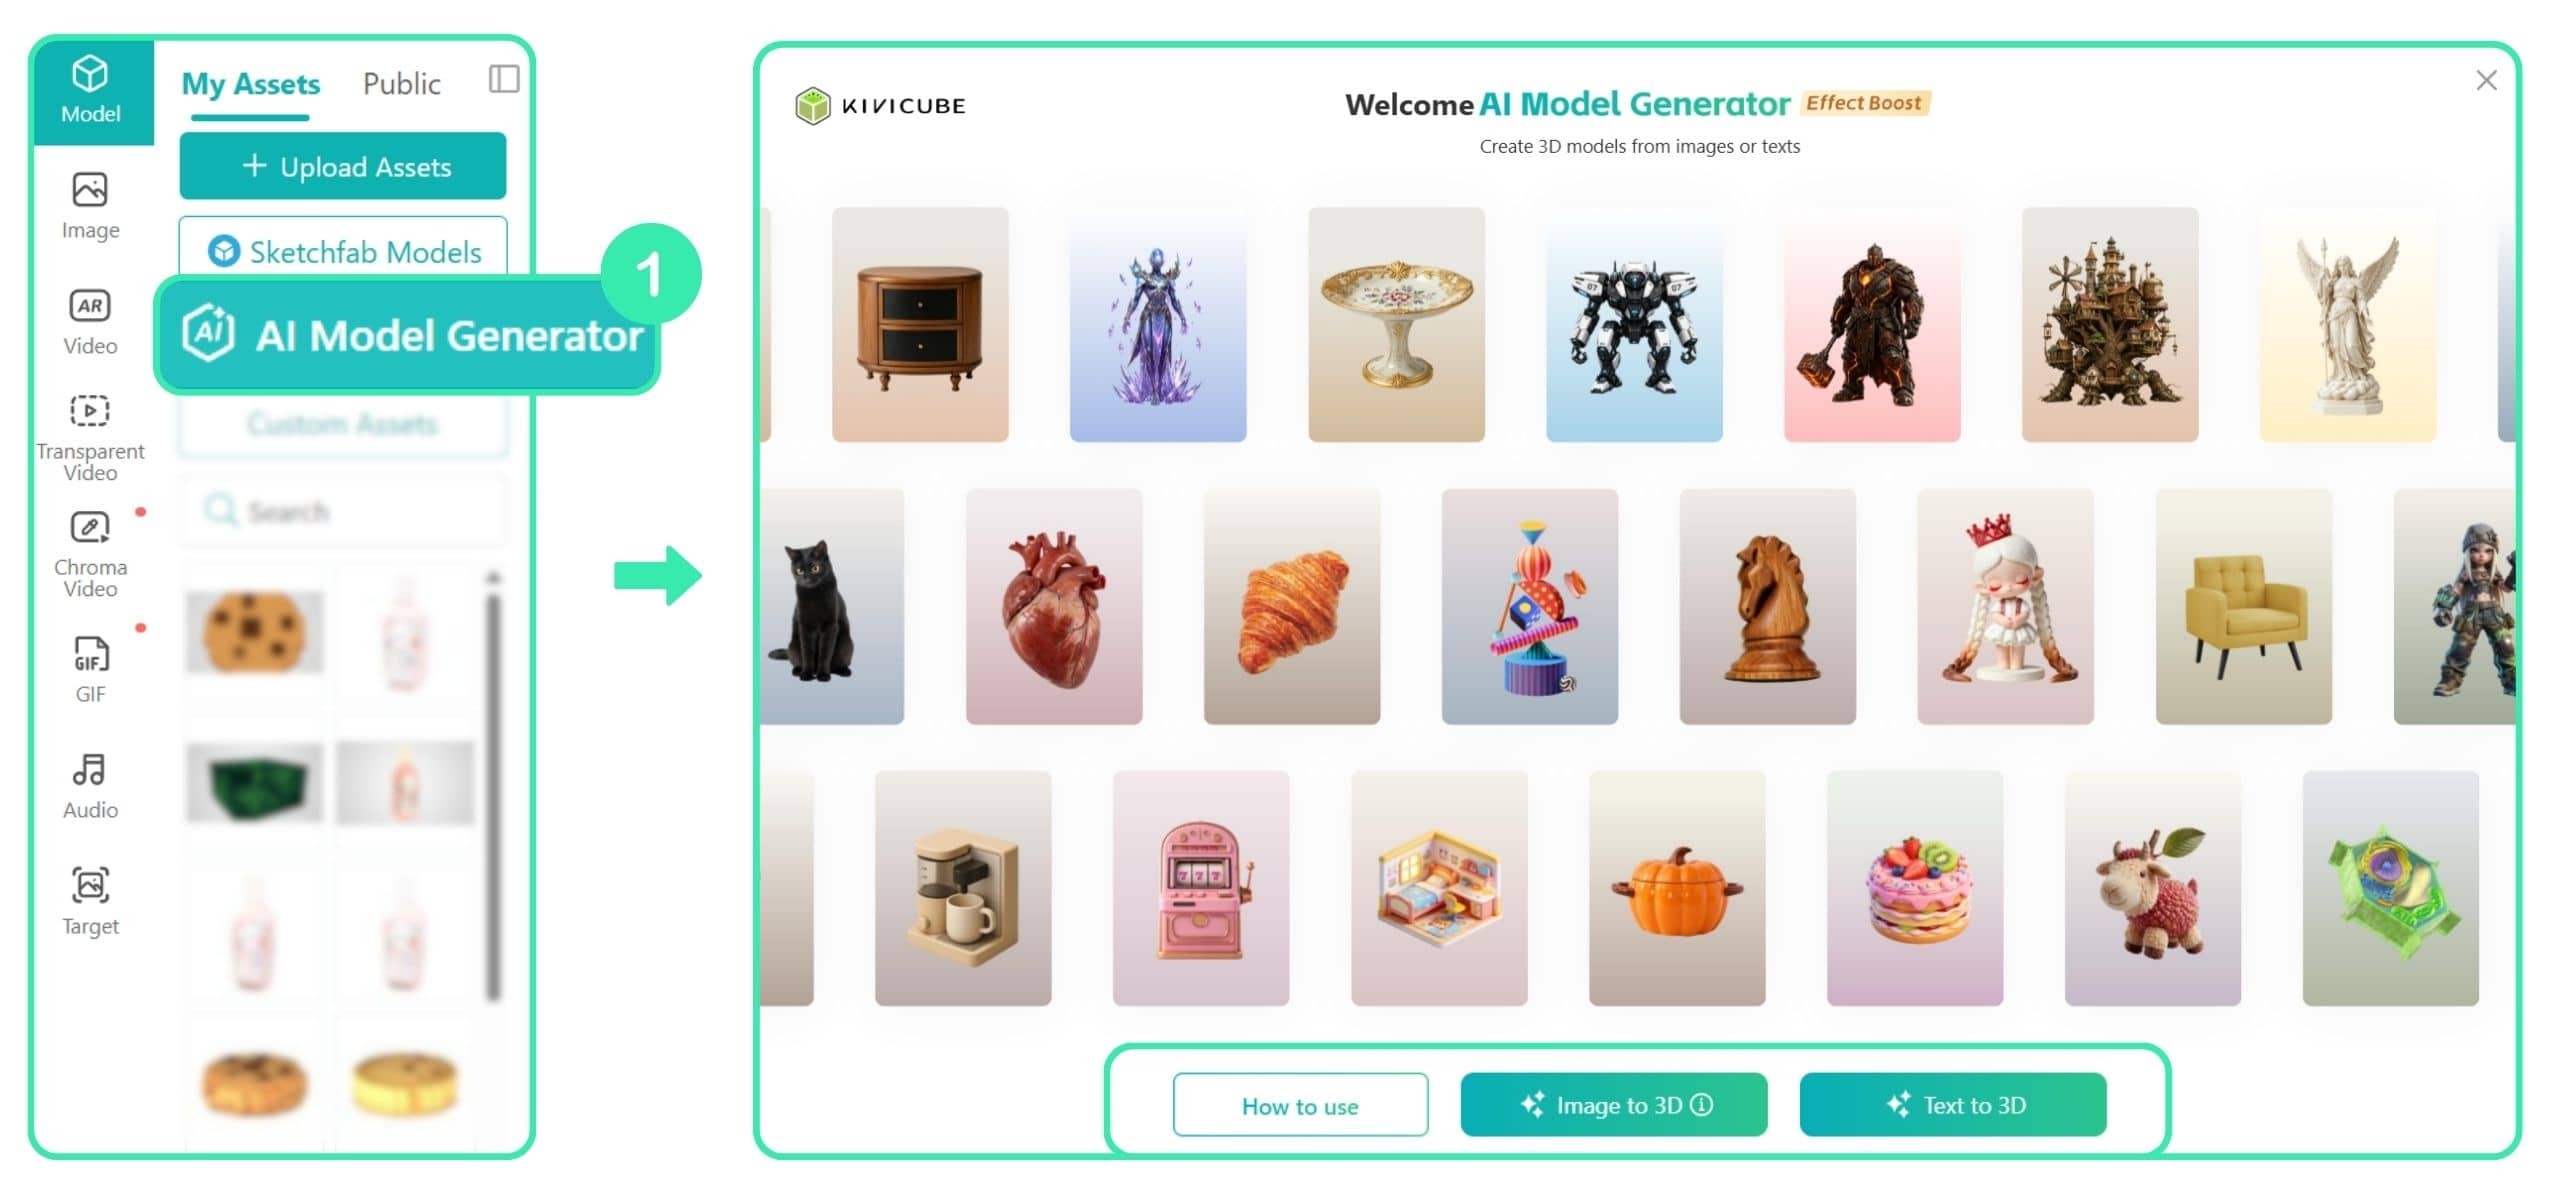
You can generate 3D models with AI by uploading an image or entering a text prompt. Generated models are automatically imported into the Content Editor for further optimization and adjustments. Click here to view the AI Model Generator guide.